Marine Heating Solutions

Author: MarineHeating

  • Expert Water Tank Cleaner for Boats and Caravans

    Expert Water Tank Cleaner for Boats and Caravans

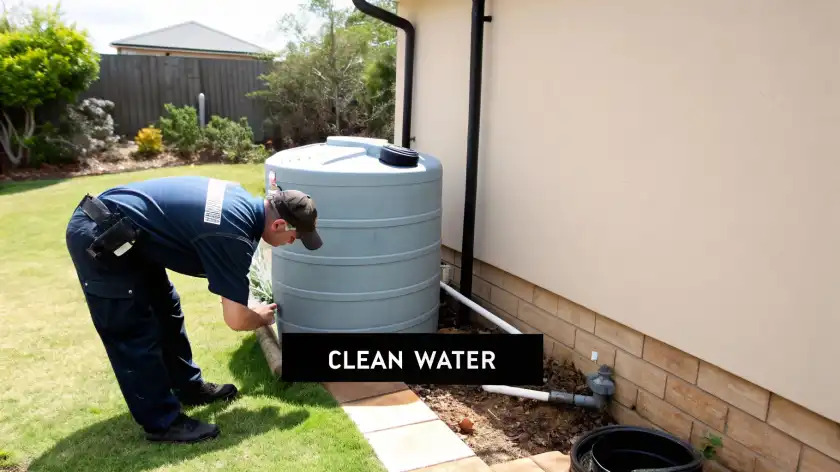
    You might look at your water tank and think it’s clean, but a quick splash of a generic water tank cleaner rarely deals with the real problems. The threats you can’t see are the ones that cause the most trouble: microscopic bacteria, viruses, and the dreaded biofilm. These nasties can ruin your water quality, and worse, your health, turning a fantastic holiday into a complete disaster. At Marine Heating Solutions, our expert service is designed to eliminate these risks professionally.

    The Hidden Dangers Lurking in Your Water Tank

    Choose Marine Heating Solutions For Your Water Tank Maintenance

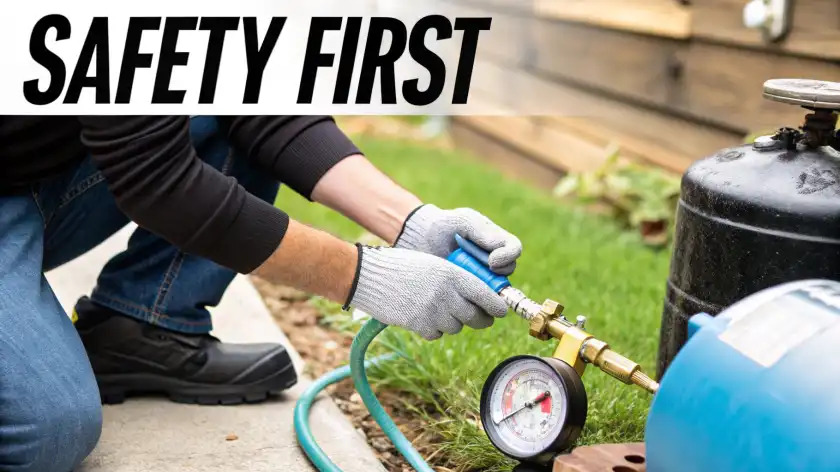
    It’s a story we’ve seen play out far too many times. A family heads off for a much-needed caravan trip, or a couple starts a peaceful journey down the canal, only for illness to bring everything to a grinding halt. Nine times out of ten, the culprit is a water system that hasn’t been professionally maintained.

    Even if your water looks clear and tastes perfectly fine, the tank itself can be an ideal breeding ground for all sorts of harmful microorganisms. This isn’t just about a funny taste or a bad smell; it’s about genuine health risks that can put everyone on board in a bad way.

    Understanding Water Contamination

    The biggest issue we tackle in boat and caravan water tanks is the build-up of biofilm. This is a slimy, almost invisible layer of bacteria that sticks to the tank walls and pipework. Think of it as a protective shield where other, more dangerous, microbes can hide and multiply.

    Once that biofilm gets a foothold, it can harbour some really unpleasant contaminants. It’s not just dirt; it’s a living ecosystem of things you really don’t want to be drinking.

    Before we go further, it’s worth knowing exactly what we’re up against. Here’s a quick look at the common contaminants found in untreated water tanks and the potential health risks they bring.

    Common Contaminants in Leisure Vehicle Water Tanks

    ContaminantWhere It Comes FromPotential Health Risk
    LegionellaStagnant water, especially in complex plumbing systems.Can cause Legionnaires’ disease, a serious type of pneumonia.
    E. coli & CampylobacterOften from contaminated water sources or poor hygiene when filling the tank.Common causes of severe gastrointestinal illness (vomiting, diarrhoea).
    NorovirusHighly contagious virus that spreads easily through contaminated water.Leads to vomiting and diarrhoea, spreading quickly among people in close quarters.
    BiofilmForms naturally on surfaces in contact with non-sterile water.Protects and harbours other pathogens, making them harder to remove.
    Algae & MouldCan grow if the tank is exposed to light or if spores enter the system.Can cause allergic reactions, unpleasant tastes, and odours.

    As you can see, this is more than just a simple cleaning job. These contaminants pose a real threat, which is why a thorough, professional approach from our certified technicians is so important.

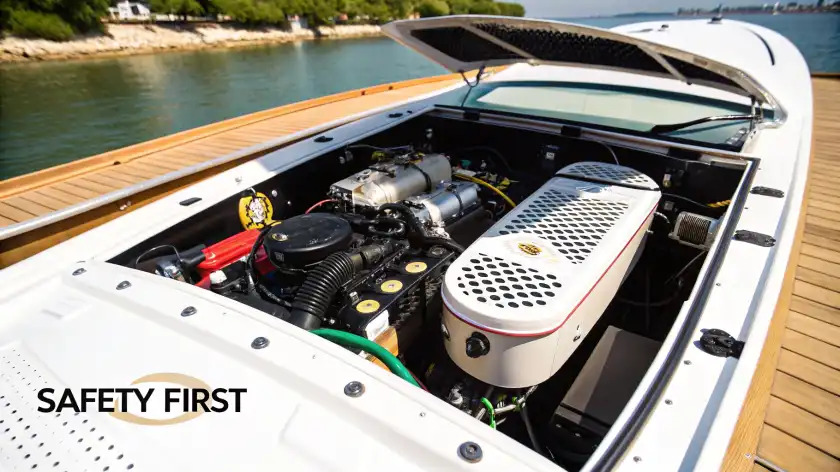
    Neglecting your water system is like ignoring the engine. It’s a critical component that needs proper attention to keep you safe and your travels reliable. A truly clean tank is a safe tank.

    The Need for Professional Care

    While we’re talking about boats and caravans, the need for professional tank cleaning is something taken very seriously in other industries. The industrial tank cleaning market, for instance, has grown massively because of strict safety rules. It was valued at approximately USD 2.5 billion in 2024 and is expected to keep growing. This just goes to show a universal truth: clean tanks are vital for safety, whether in a huge factory or your beloved campervan. You can read the full research on the industrial tank cleaning market to see its global impact.

    This is exactly why getting a professional service isn’t a luxury—it’s essential for your boat or caravan. Our certified technicians have the right tools and, just as importantly, the experience to completely get rid of biofilm and properly sanitise your whole system. We make sure your water is safe, so you can get back to what matters: making memories, not worrying about what’s coming out of your tap.

    Our Professional Water System Sanitation Process

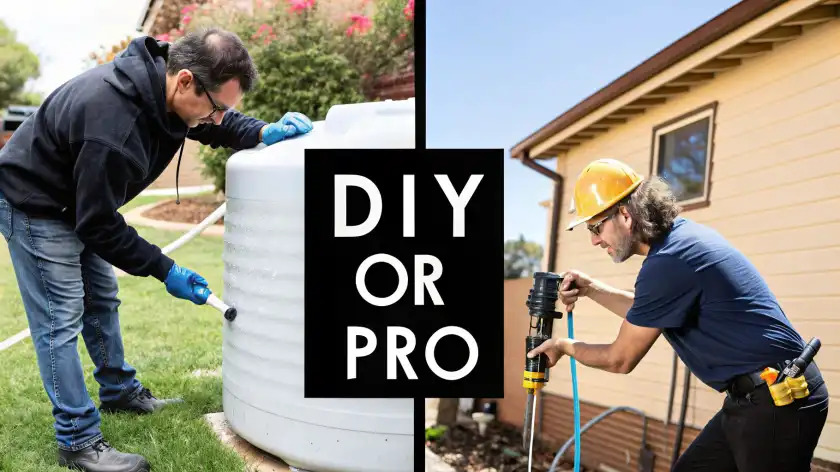
    Choosing a professional to sort out your boat or caravan’s water system is about more than just a quick clean. It’s an investment in a thorough, multi-stage process, handled by certified technicians, designed to completely restore the safety and integrity of your entire system. We get stuck into the tough, hidden problems that off-the-shelf products just can’t touch.

    Our process kicks off with a proper diagnostic inspection. We don’t just start draining things; we look at the whole system to spot any weak points, signs of heavy contamination, or general wear and tear on the components. This lets us tailor our approach, making sure we fix what actually needs fixing on your specific vessel or vehicle.

    Once we know what we’re dealing with, our team gets to the core of the sanitation job. We know from experience that stubborn biofilm layers, limescale build-up, and nasty metallic or chemical tastes need more than a simple rinse. They need specialised techniques and professional-grade kit to be dealt with properly.

    Our Systematic Approach to Cleanliness

    We’ve refined our method over the years to guarantee a complete and lasting clean. It’s a process that flows from diagnosis to deep cleaning, full system sanitation, and a final check to make sure every single part of your system is sorted.

    • Initial System Purge: Our technicians safely drain the entire system. This includes the water heater and all the low points in the pipework, getting rid of all the old water and any loose bits and pieces.
    • Targeted Deep Clean: Using our specialised equipment, we physically tackle the inside of the tank. This breaks down and removes the stubborn biofilm and scale that loves to cling to the surfaces.
    • Full System Flush and Sanitisation: We then circulate a powerful, but completely taste-neutral, water tank cleaner and sanitising solution through every single pipe, tap, and outlet. This is crucial for making sure the sanitiser gets into all the nooks and crannies where contaminants hide.
    • Final Rinse and Quality Check: The whole system is then flushed through with fresh water until every last trace of the cleaning solution is gone. We then do a final check to ensure the water is clean, clear, and doesn’t smell of anything it shouldn’t.

    This methodical process is the only way to get a truly clean tank.

    Systematic Approach For A Cleaner Caravan Water Tank

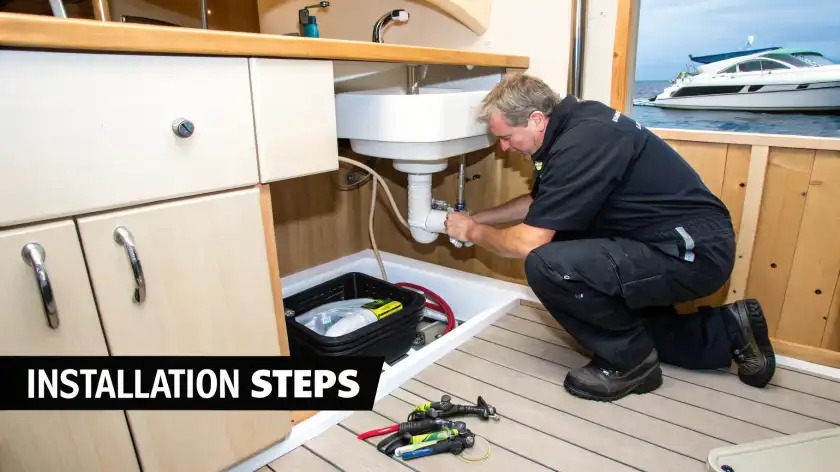
    The image above shows the basic steps, but our professional service goes into much greater detail to ensure a perfect result every time.

    Ensuring Complete Microbial Elimination

    Nasty bugs like Norovirus can be surprisingly resilient and hang around in water systems, which is a serious health risk. Our professional sanitation process is designed specifically to neutralise these kinds of threats. We use methods that are backed by scientific insights into norovirus disinfection efficacy, so you can be confident of a thorough job.

    Trusting a certified technician means you’re not just getting a clean tank; you’re getting peace of mind. Our expertise guarantees that every component of your water system is treated with the highest standard of care, meeting all safety and regulatory requirements.

    By letting us handle your water system, you’re choosing a proven method that delivers safe, clean water every single time. We take the guesswork and the risk out of it, leaving you to focus on enjoying your time on the water or on the road, confident in the quality of your water supply.

    The Specialist Products We Use and Sell

    Cleaner Options For Boat Water Tanks

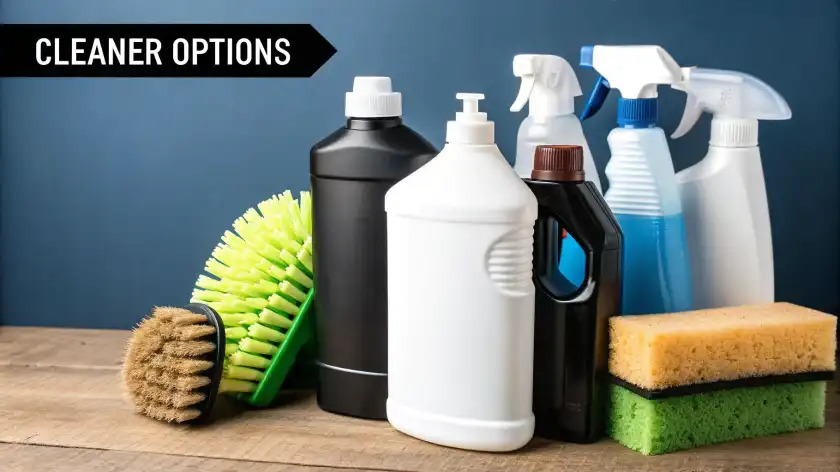
    Getting your water system properly sanitised really comes down to using the right tools for the job. Our professional service provides the ultimate deep clean, using products we trust so much that we sell them directly to our customers.

    Our range features specialised purifiers, powerful descalers, and effective sanitisers. Each one is formulated to tackle a specific problem you might face with your boat or caravan’s water system. This professional, targeted approach is the key to keeping your water fresh, safe, and free from any funny tastes.

    Tailored Formulas For a Perfect Clean

    We know from experience that different parts of your system need different kinds of attention. That’s why we always use specific products for distinct jobs. One formula, for instance, is brilliant at breaking down the tough limescale and mineral build-up that can clog your pipes and even damage your appliances. Another is purely focused on disinfection, knocking out harmful microbes without leaving that chemical aftertaste that can ruin a good cup of tea.

    Using the correct, specialised chemicals is a non-negotiable principle in many UK industries. Think about it: the global tank cleaning market, valued at a massive USD 1.27 billion in 2023, is built on using precise solutions to guarantee hygiene and safety in everything from food production to pharmaceuticals. It just goes to show the value of using the right tool for the job – a philosophy we live by with our marine and leisure products.

    Our Curated Product Selection

    The products we offer stand out because they’ve been developed with the unique needs of boat and caravan owners in mind. They’re powerful enough to get the job done but are completely safe for all the components in your water system, from the pumps to the plastic tanks.

    • Taste-Neutral Sanitiser: Our go-to water tank cleaner is a sanitising solution that kills bacteria and viruses without imparting any chlorine taste or smell to your water.
    • Eco-Friendly Descaler: This product is fantastic for safely dissolving limescale and mineral deposits, which helps improve water flow and protects your water heater and taps from damage.
    • System Purifier and Freshener: Perfect for getting your system ready after it’s been sat over winter, this purifier flushes out stagnant water and musty smells, leaving everything pristine.

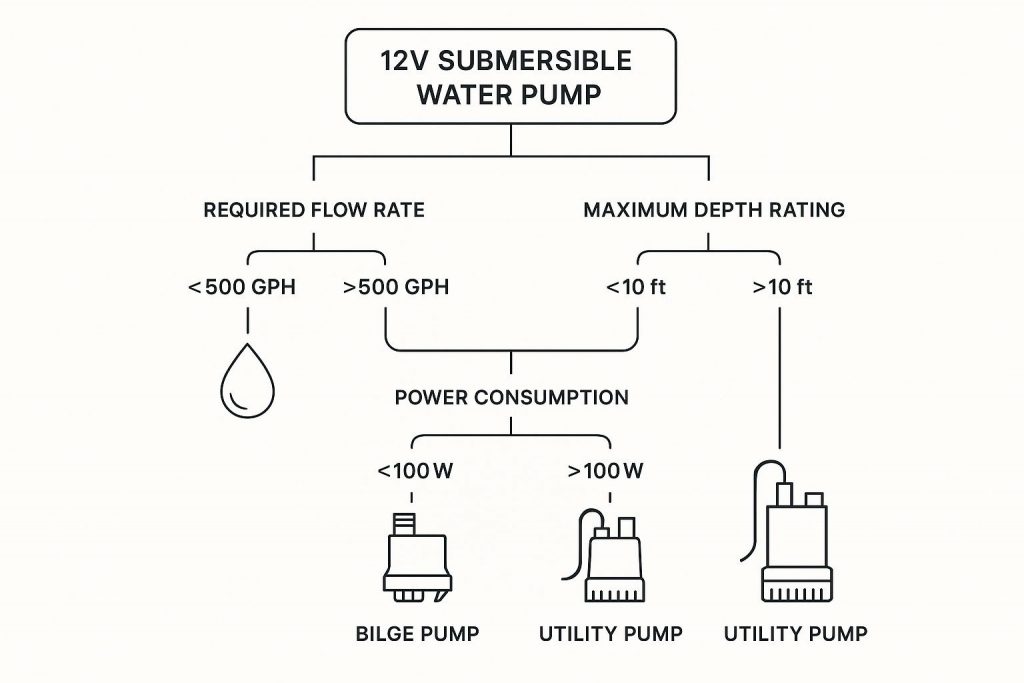
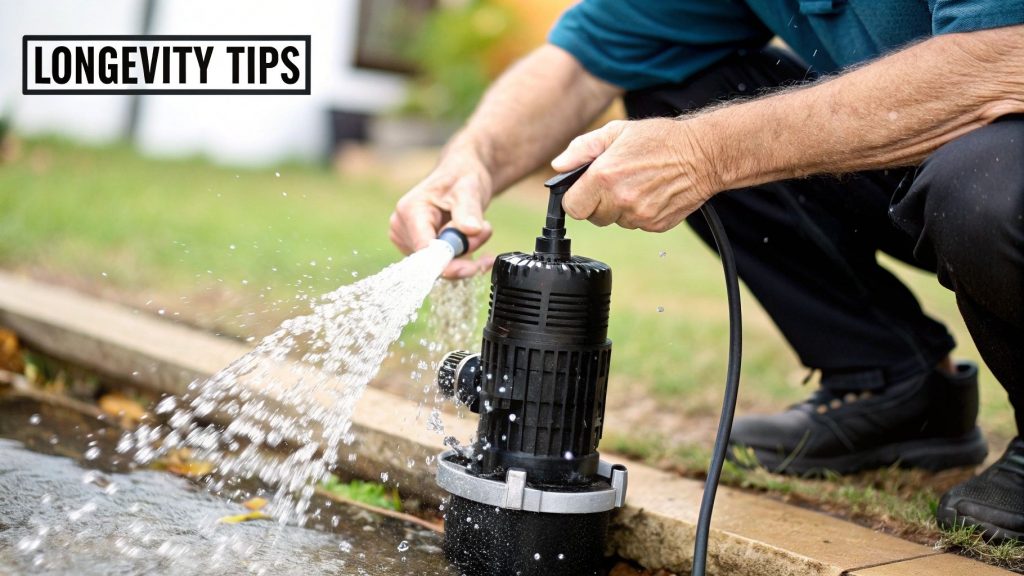
    Of course, to get the most out of these products, your system’s components need to be in good working order. A reliable pump, for example, is absolutely essential for circulating the cleaning solutions properly through the entire system. If you have any worries about your current setup, you can check out some of the kit we use and recommend, like these powerful 12V submersible water pumps.

    By choosing the products we use and sell, you’re trusting the exact same quality formulas our own certified technicians rely on. This maintains a higher standard of cleanliness and protects the health of everyone on board.

    If you’re interested in the science behind getting rid of nasty bacteria, A Guide to Effectively Killing Staphylococcus aureus is an excellent read. It really digs into the methods used to kill resilient bacteria and underlines why using a purpose-built sanitiser is so critical for a truly hygienic water system.

    Upgrade Your System With Our Water Appliances

    A professional clean is a fantastic start, but it’s only half the story when it comes to great water quality. Think about it – the reliability of your entire system, from the pump that draws the water to the tap it flows from, plays a huge part in keeping things safe and convenient on your boat or caravan.

    True peace of mind comes from knowing every single component is working as it should. An older, struggling water pump or a worn-out tap can easily undermine even the most thorough cleaning job. This can lead to poor pressure, an annoying intermittent flow, or even allow the system to get contaminated all over again. It’s exactly why we don’t just clean systems; we also supply and fit the high-performance appliances needed to get them working perfectly.

    Enhance Your Onboard Water Experience

    Upgrading key components isn’t just about replacing old for new; it’s about genuinely improving your day-to-day life on board. A modern water system can completely transform your experience, giving you the kind of reliable pressure you’d expect at home, whether you’re having a shower or just washing up.

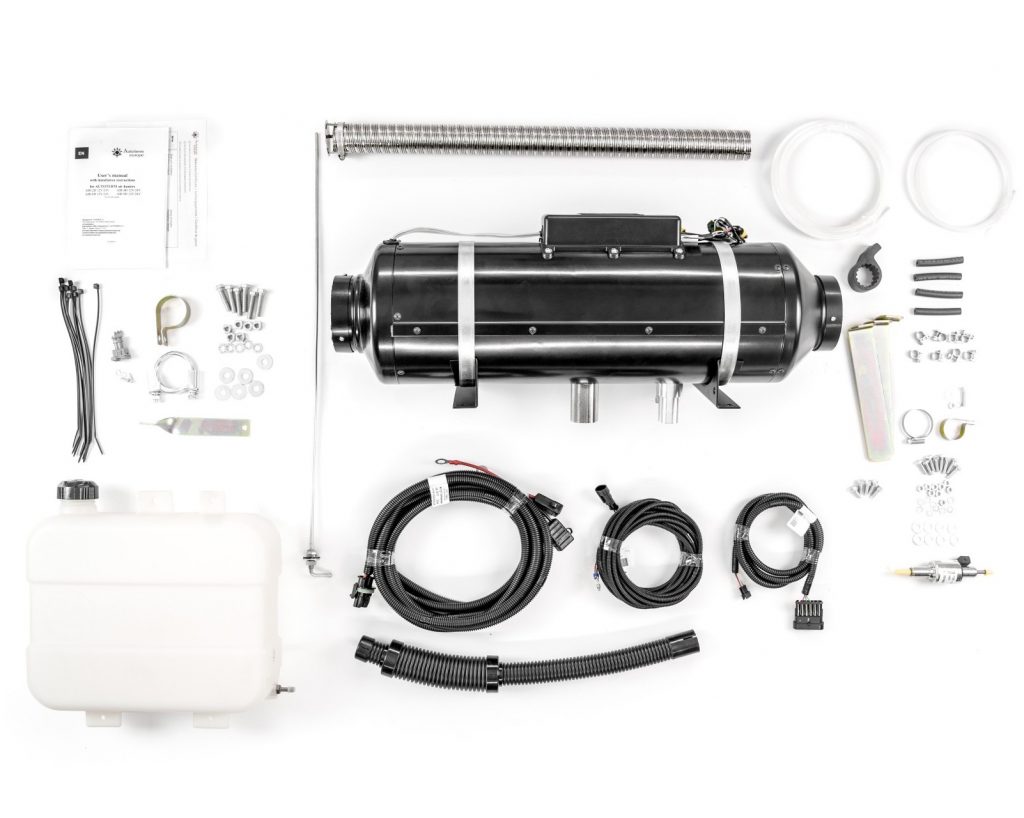
    We offer a carefully chosen range of top-quality water system appliances, all designed specifically for the tough demands of marine and leisure vehicle life. These are products we trust and fit for our own clients every single day.

    • High-Performance Water Pumps: A powerful, reliable pump is the absolute heart of your water system. The models we supply ensure you get strong, consistent water pressure at every tap.
    • Essential Accumulator Tanks: These small but vital tanks work with your pump to smooth out the water flow. They stop that annoying pulsing and also reduce wear and tear on the pump motor itself.
    • Advanced Filter Systems: For an extra layer of defence, fitting an inline filter system is a brilliant move. It catches sediment and other impurities before they even reach your glass, giving you crystal-clear drinking water.
    • Modern and Durable Taps: A leaky or corroded tap is more than just an irritation; it’s a potential weak point for contamination. We stock stylish, robust taps built to handle the unique environment of a boat or caravan.

    Your Complete Partner for Water System Excellence

    We really aim to be your complete partner for anything to do with your boat or caravan’s water. Our expertise covers everything from routine sanitation with a professional-grade water tank cleaner right through to full-scale system upgrades using the best gear on the market.

    Investing in quality appliances is an investment in reliability and safety. It makes sure the benefits of a professional clean last much longer and gives you a dependable water supply for all your adventures.

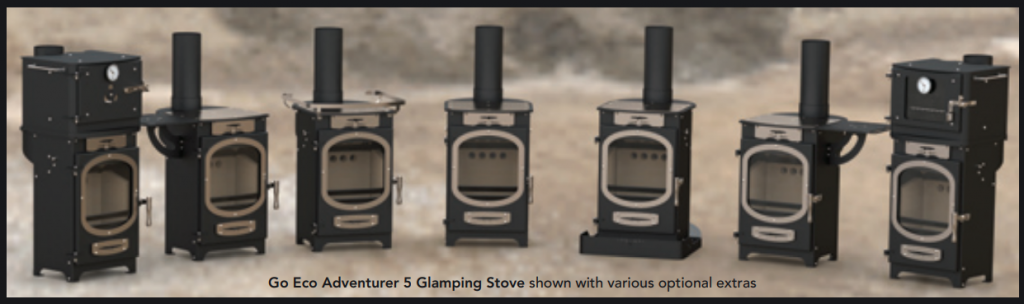
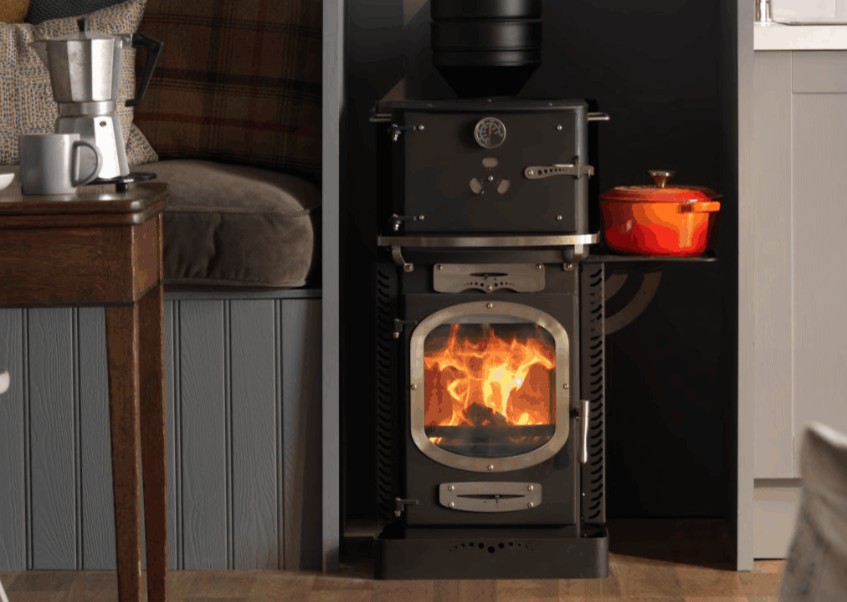
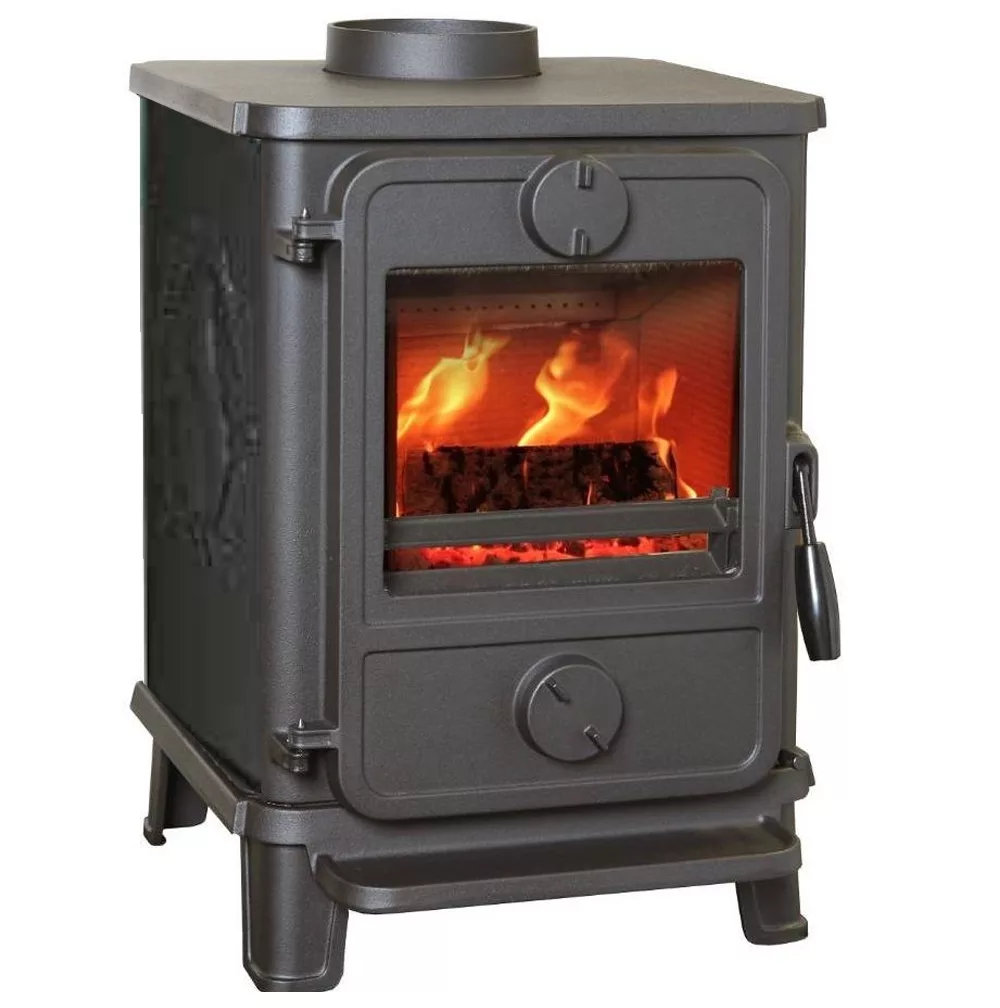
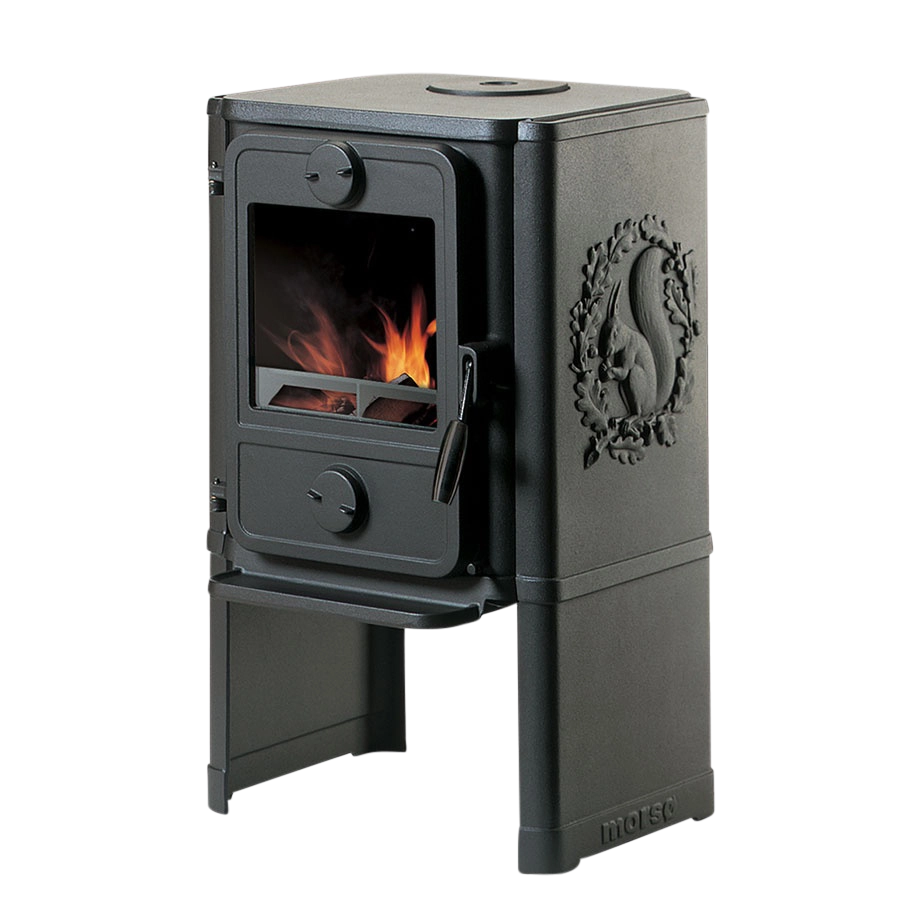
    Every product we sell has been chosen to provide a real, tangible benefit, connecting directly to a better, safer, and more comfortable experience for you and your family. Of course, a well-functioning water system is just one piece of the puzzle in making your vessel a comfortable, safe haven. For those looking to create the perfect onboard atmosphere, you might also be interested in our guide to the Go Eco Adventurer boat stove, which is an ideal heating solution.

    Why Trust Our Experts With Your Water System?

    DIY or Pro - Water Tank Cleaner for Boats and Caravans

    When it comes to the water system on your boat or caravan, the health of your family and the reliability of your vessel are on the line. Choosing the right people for the job is everything.

    A generic water tank cleaner simply isn’t enough. True peace of mind comes from deep, specialist knowledge of marine and leisure vehicle plumbing. Our expertise goes far beyond just flushing a tank; it’s about safeguarding your investment and making sure every trip you take is free from worry.

    We’ve seen countless situations where a simple-looking issue was actually hiding a much bigger problem. Our certified technicians bring years of hands-on experience to every job, allowing them to spot potential failures before they happen and diagnose issues that others would miss. This isn’t just a service; it’s a guarantee of quality from professionals who live and breathe these systems.

    A Higher Standard of Care and Competence

    Our commitment to excellence shows in everything we do, from the first look to the final sign-off. We get the unique challenges these water systems face—from the risk of contamination in complex pipework to the wear and tear caused by constant movement and vibration.

    • Certified and Experienced Technicians: Our team is fully qualified, with the expertise to handle everything from routine sanitation to complex system installations and repairs.
    • Comprehensive System Knowledge: We don’t just clean tanks. We understand how your pumps, heaters, and pipework all have to work together as a single, reliable system.
    • Guaranteed Peace of Mind: When you entrust your vehicle to us, you can relax. You’ll know the job is done right, protecting both your family and your asset.

    This professional approach is crucial. The tank cleaning industry is seeing steady growth, with the global market worth around USD 0.54 billion in 2024. This growth is driven by rising safety standards and environmental regulations, which just goes to show that proper cleaning requires expert knowledge.

    Your Trusted Partner in Onboard Safety

    Our qualifications are a key reason our customers place their trust in us. As registered Boat Safety Scheme examiners, we’re intimately familiar with the standards required for safe operation on the water.

    This means our work isn’t just about getting things clean; it’s about compliance and ensuring your entire vessel meets rigorous safety benchmarks. If you have questions about certifications, our guide on Boat Safety Certificates and Surveys has some valuable information.

    Choosing our expert service is a decisive step towards protecting your vehicle and ensuring your family’s well-being. We manage the complexities of your water system, so you can focus entirely on enjoying your travels.

    Let our team provide the meticulous care your system deserves. With our professional services and access to the best appliances on the market, we are your one-stop solution for a safe, reliable, and hygienic water system.

    Common Questions About Water Tank Cleaning

    Making the right decision about your boat or caravan’s water system is a big deal. Over the years, we’ve found that most owners run into the same questions and concerns. Here, we’ll answer some of the most common queries we get, explaining why professional care and the right products are the only way to go for your safety and peace of mind.

    How Often Does My Tank Really Need a Professional Clean?

    For most leisure vehicles, we recommend a full, professional clean at least once a year. The best time to get this done is right at the start of the season, especially when you’re de-winterising your caravan or boat after it’s been sitting for a few months.

    That said, if your vehicle gets a lot of use or you notice any signs of poor water quality—like funny smells or tastes—you’ll want to get it serviced sooner. The more you use it, the more chances there are for contamination to build up.

    What Are the Telltale Signs My Water System Needs Attention?

    Your own senses are usually the best early warning system you have. Keep an eye (and nose) out for any of these signs, as they’re a clear signal it’s time to call in an expert.

    • Unpleasant Odours: A musty, stale, or chemical smell coming from the taps is a dead giveaway that something isn’t right inside your tank or pipes.
    • Foul Tastes: If your water has a metallic, plastic, or just an “off” taste, that’s a strong indicator of contamination or even the system itself degrading.
    • Discoloured Water: Any cloudiness, specks, or weird colours in your water is a major red flag. The system needs immediate sanitation.
    • Poor Water Flow: Reduced pressure can be a symptom of limescale or other gunk building up in the pipework, which is a perfect breeding ground for bacteria.

    Don’t just ignore these signs hoping they’ll go away—they won’t. Being proactive not only means you get better, safer water, but it also helps protect the lifespan of your pumps, heater, and taps from damage.

    Are Your Cleaning Products Safe for My System?

    Absolutely. This is a critical point and a key reason to trust a professional service. All the water tank cleaner solutions and sanitisers we use and sell are specifically formulated for drinking water systems in boats and caravans.

    Our products are powerful enough to break down and eliminate stubborn biofilm and harmful microbes, yet they are also completely non-toxic and taste-neutral. Once we’ve finished our flushing process, there’s no harmful residue or chemical aftertaste left behind. This ensures your water is not only safe to drink but also tastes fresh and clean, exactly as it should. We firmly believe you should never have to choose between safety and quality.


    For a guaranteed safe, clean, and reliable water system, you can trust the certified experts. At Marine Heating Solutions, we provide comprehensive services, from professional sanitation to supplying high-quality appliances.


    For quotes and bookings, call or email us here.

  • Choosing the Right Toilet on a Boat for Your Vessel

    Choosing the Right Toilet on a Boat for Your Vessel

    Choosing the toilet on a boat is a big decision, one that really affects your comfort and how much you enjoy your time on the water. We specialise in supplying and installing high-quality, reliable marine toilet systems. These are built to handle the UK’s unique boating environment. Our expert team will walk you through the real differences between the main types, from the big-capacity pump-out models to the more flexible macerator and cassette units, ensuring you get the perfect appliance for your needs.

    Your Guide to Choosing the Best Toilet on a Boat

    Picking the perfect loo for your vessel isn’t just about plumbing; it’s about matching the tech to how you actually live on the water. A family living full-time on a wide-beam canal boat has completely different needs to a couple who pop out for weekend trips on their GRP cruiser. We’re here to help you navigate this choice, making sure you end up with a system that’s tough, compliant, and just right for your boat.

    As certified marine engineers, we don’t just sell appliances. We provide complete, professionally managed solutions from start to finish. We’ve built our expertise on recommending and fitting only the most durable and efficient systems out there. We stock models from trusted manufacturers that have proven they can perform in real-world marine conditions.

    Matching the System to Your Boating Style

    Choosing a boat toilet is a significant decision. You have to consider its capacity, how efficient it is, and what you’ll be asking it to do. The best toilet for your boat will come down to a few key things:

    • Your Vessel: Is it a narrowboat, a sailing yacht, or a roomy barge? The space you have and any existing pipework will narrow down your options straight away.

    • Your Crew: How many people will be using the heads regularly? This is the single biggest factor in determining the holding capacity you’ll need.

    • Your Cruising Habits: Are you out for weeks at a time, or do you stick to short day trips? This will tell you whether a large holding tank is essential or if a simple, portable cassette makes more sense.

    By discussing these points with you, we can move away from a ‘one-size-fits-all’ solution. Our aim is to fit your boat with a sanitation system that feels like a natural part of your life on the water, not something you’re constantly having to worry about.

    To make things a bit simpler, this decision tree shows how factors like boat size and usage patterns can point you towards the right system. Our team can talk you through these options in more detail.

    Matching the System to Your Boating Style

    As you can see, your own preferences lead you directly to the most logical type of marine head for your specific situation.

    A Quick Look at the Main Toilet Systems

    To give you a clearer picture of the options, we’ve put together a simple table comparing the core systems we install. This should help you see, at a glance, which type might be the best fit for you.

    Quick Comparison of Marine Toilet Systems We Offer

    System Type

    Primary Benefit

    Ideal For

    Waste Handling

    Pump-Out

    High capacity & convenience

    Liveaboards, long-distance cruisers, larger boats

    Large, fixed holding tank emptied at marina stations

    Macerator

    Flexible installation

    Boats with tricky plumbing runs or limited space

    Grinds waste, pumps to a holding tank via small pipes

    Cassette

    Simplicity & portability

    Weekend boaters, smaller boats, no pump-out access

    Small, removable tank emptied manually at disposal points

    Each of these has its place, and our experts can advise on which is best for your boat and how you use it. Now, let’s take a brief look at each one.

    Our Core Offerings

    We specialise in three main types of marine toilet systems, and each has distinct advantages. Our team has fitted and serviced countless units of each type. We can guarantee a perfect installation and long-term reliability. We’ll go into more detail on each one in later sections, but here’s a quick introduction to what we offer.

    1. Pump-Out Toilets: These are the gold standard for anyone living aboard or spending a lot of time on their boat. They use a large holding tank that you empty at dedicated pump-out stations.

    2. Macerator Toilets: These are fantastic problem-solvers. The unit has blades that turn waste into a fine slurry, which can then be pumped through much smaller pipework to a holding tank.

    3. Cassette Toilets: The ultimate in simplicity. These are self-contained units with a small, removable waste tank that you can easily carry and empty at a designated disposal point.

    Our promise is to guide you to the best possible solution for your needs and then provide the expert installation that ensures it works perfectly for years to come.

    The Evolution of Marine Sanitation at Sea

    Marine Head Types

    To really appreciate the comfort and quality of the marine toilets we supply and install today, it helps to glance back at how far things have come. The journey from the most basic facilities to the advanced systems we now take for granted is a fascinating story of ingenuity, all driven by our changing ideas about hygiene, comfort, and environmental care.

    Way before reliable pump-out or cassette systems were even a thought, sailors had a much more… direct approach to waste. Even the term ‘heads’, which we all still use for the loo on a boat, comes from this time. It literally refers to the head, or bow, of the ship.

    The history of the toilet on a boat in the UK goes back centuries, evolving from some pretty rudimentary setups during the Age of Sail. On British naval ships from the 17th to 19th centuries, the ‘heads’ were often just simple wooden seats with holes, sometimes called ‘spice boxes’. They were positioned so that all waste dropped straight into the sea, letting the waves do the cleaning. If you’re interested in the nitty-gritty of this nautical history, Hekint.org has some great insights.

    A Shift Towards Modern Comfort

    For centuries, that was just how it was done. But as leisure boating started to take off and people began spending more time on canals and coastal waters, expectations naturally changed. The thought of simply chucking waste overboard became pretty unacceptable, both for the environment and for the comfort of everyone on board.

    This change in attitude created a demand for better solutions. The first enclosed heads offered a bit more privacy but still often discharged straight into the water. The real game-changer was the development of holding tanks. This created a properly contained system that protected the environment and got rid of the unpleasantness of the old methods for good.

    This transition from open-air heads to contained systems is really the foundation of modern marine sanitation. It reflects a core principle we still follow today: that a boat should be a comfortable, self-sufficient home on the water, with reliable systems you can trust.

    Our expertise is built on this very progress. We know that a modern toilet on a boat isn’t just a convenience; it’s an essential system that has to be tough, compliant with the rules, and installed by an expert to work as it should.

    From Basic Plumbing to Engineered Systems

    The evolution didn’t stop with holding tanks, though. The systems we fit now are genuine marvels of marine engineering, designed for top efficiency with minimal fuss.

    • Materials: We’ve gone from simple wood and metal to specialised, non-porous plastics and ceramics that resist odours and are a doddle to clean.

    • Mechanisms: The simple pull of gravity has been replaced by powerful manual pumps, electric macerators, and clever vacuum systems.

    • Compliance: Growing environmental awareness brought in strict regulations. This drove the need for professionally installed, certified systems that tick every legal box.

    This journey—from a simple board hanging over the waves to the advanced, hygienic toilets we offer—shows exactly why professional knowledge is so crucial. When we install a new toilet system, we’re not just fitting an appliance. We’re putting decades of engineering progress to work to make sure you’re safe, comfortable, and worry-free on the water.

    Understanding Pump-Out Toilet Systems

    Understanding Pump-Out Toilet Systems

    If you spend a lot of time on your boat, especially if you’re a liveaboard or love long-distance cruising, the pump-out toilet is the gold standard. It’s the closest you’ll get to having a proper household loo while you’re out on the water. It’s designed for genuinely hassle-free, long-term use.

    At its heart, a pump-out system is pretty simple. It has two main parts: a toilet bowl (which can be manual or electric) and a large, permanently installed holding tank. Every time you flush, the waste goes directly into this sealed tank where it’s safely stored. This setup keeps everything contained onboard until you’re ready to empty it at a proper facility.

    The big win here is capacity. These tanks can often hold over 100 litres, which means you might go for weeks without even thinking about waste disposal. It’s a solid, reliable solution that our certified marine engineers specialise in fitting, making sure it ticks every box for safety and environmental rules.

    How a Pump-Out System Works

    Think of a pump-out system like the central heating in your house. It’s a permanent, fully integrated setup built for performance. The toilet itself is plumbed straight into the holding tank, which our team fits strategically within your boat’s structure. This is often tucked away in the engine bay or another unused space.

    When the tank eventually gets full, emptying it is a clean and simple job. You just moor up at a designated pump-out station, connect their suction hose to a special fitting on your deck, and let the station’s powerful pump do all the work. It’s a fast, hygienic process that requires no manual handling of waste.

    A professionally installed pump-out system is a true ‘fit-and-forget’ solution for your toilet on a boat. Our expertise lies in ensuring every component, from the toilet to the tank and the deck fitting, is flawlessly integrated for a leak-proof and odour-free experience.

    We only supply and install pump-out toilets from manufacturers we know can stand up to the tough UK marine environment. The models we put our name to are chosen for their top-quality construction. All are featuring robust seals, powerful flushing mechanisms, and easy-to-clean ceramic bowls that don’t hold onto odours or stains.

    Here are the key features we look for in the systems we trust:

    • Durable Materials: We insist on models built with marine-grade components that can handle constant use and the damp conditions you find on a boat.

    • Electric or Manual Options: We offer both electric flush toilets for that extra bit of convenience and dependable manual pump models for simplicity and lower power draw.

    • Odour-Proof Design: The systems we recommend are engineered with high-quality, non-permeable sanitation hoses and secure tank seals to stop any smells from escaping.

    Our job isn’t just to sell you a toilet. It’s to provide a complete, reliable sanitation solution. We’ll work with you to pick the perfect model and tank size for your boat. We can then carry out an installation that guarantees performance for years to come.

    Professional Installation and the UK Pump-Out Network

    A huge plus for this system is how well it works with the UK’s brilliant network of pump-out facilities. Modern boating on UK canals and inland waterways has seen massive improvements in sanitation infrastructure. You’ll now find pump-out stations at most marinas, boatyards, and at points all along the canal network.

    Typically, you can expect to pay between £15 and £20 for a full pump-out service. This makes it a really affordable and convenient option. For a bit more insight, you can explore this helpful guide on the narrowboat toilet debate.

    By choosing one of our professionally installed pump-out systems, you’re investing in a completely seamless experience. Our certified technicians will make sure your toilet on a boat is not only comfortable and reliable but also fully compliant, letting you cruise with total peace of mind.

    Exploring Macerator And Cassette Toilets

    Exploring Macerator And Cassette Toilets for Boats

    While a big, high-capacity pump-out system is a brilliant bit of kit for many boaters, it isn’t always the right solution for every single vessel. Sometimes, you’re dealing with tight spaces, tricky plumbing routes, or you just want something simpler. This is where macerators and cassette toilets really shine. They offer fantastic, flexible alternatives. Our team are experts at not only supplying these clever systems. We also fit them professionally, so you get top performance without any compromises.

    Think of a toilet on a boat with a macerator as having a powerful blender built right in. It uses tough blades to liquefy waste before pushing it through narrow pipes to a holding tank. On the other hand, the cassette toilets we supply offer a kind of self-contained simplicity that’s hard to beat. This makes them a superb choice for weekend cruisers. Our goal is always to help you find the perfect appliance and then ensure it works flawlessly for years to come with our expert installation.

    The Power And Flexibility Of Macerator Toilets

    Macerator toilets are genuine problem-solvers on a boat. They become the go-to choice when a standard gravity-fed system just won’t work. The real magic is in the macerating pump itself, which can efficiently move waste through pipework as small as 25mm in diameter.

    This makes them absolutely perfect for retrofitting older boats or any vessel where you can’t place the toilet right next to the holding tank. Our qualified technicians can cleverly route the small, flexible pipework around existing bulkheads and furniture with very little fuss. A task that requires professional expertise.

    Choosing a macerator toilet opens up a world of possibilities for where you can position your head. You’re no longer restricted by the location of the holding tank. Our installation service guarantees this powerful system is fitted correctly, with secure electrical connections and flawless plumbing for complete peace of mind.

    We only stock macerator units that are known for their reliability and power. The models we recommend feature robust motors and tough, corrosion-resistant blades. They are built to handle the demands of marine life, giving you a dependable and discreet system you can count on.

    The Unmatched Simplicity Of Cassette Toilets

    For boaters who value straightforward, no-fuss operation and don’t need to find pump-out stations, the cassette toilet is a brilliant option. We supply a range of high-quality, modern cassette toilets that are a world away from the basic portable loos of the past. These are fully-integrated, sturdy appliances that offer real comfort and convenience.

    A cassette toilet is essentially a self-contained unit with a small, removable waste tank – the ‘cassette’. When the tank is full, an indicator light will let you know. You then just pop open an external service door, slide the cassette out, and empty it at a designated disposal point, often called an Elsan point.

    This system offers several key advantages we really champion:

    • No Fixed Holding Tank: This frees up a surprising amount of valuable storage space below deck.

    • Simple Operation: There are no complex sea cocks or pumps to worry about.

    • Ultimate Convenience: You can empty the tank whenever and wherever a disposal point is available.

    Even though these systems seem simple, a professional installation is still key to making sure they are secure, level, and properly ventilated. Our team will fit your new cassette toilet perfectly into your boat’s head compartment for a neat, professional finish.

    For those interested in the very latest sanitation technologies, it’s also worth looking into waterless options. You can find out more about how our team can help with these cutting-edge solutions by reading about the Cinderella Incinerator Toilet.

    Ultimately, whether you need the problem-solving power of a macerator or the simple convenience of a cassette, our team has the expertise to guide you. We don’t just sell you a toilet on a boat. We provide a complete, expertly installed solution that perfectly matches your vessel and your cruising style.

    Why Professional Installation is Essential

    Choosing a good quality marine toilet is a great start, but its day-to-day performance and how long it lasts will come down to one thing: the quality of the installation. Fitting a boat toilet properly is much more than just hooking up a few pipes. It’s a complex job that requires a real understanding of marine-grade systems. Investing in our professional service is the best way to protect your boat. This way you’ll stay compliant, and get the most out of your new toilet on a boat.

    Attempting a DIY installation can often lead to serious, expensive problems down the road. Leaks, persistent smells, electrical faults, and even structural damage to your vessel are all common risks when the job isn’t done to proper maritime standards. For any plumbing job on a boat, especially for something as crucial as a toilet, it pays to call in an expert. For anyone considering their options, there are resources for weighing DIY vs. professional plumbing services.

    Our team of certified marine engineers takes all the guesswork and risk out of the equation. We make sure every installation is safe, secure, and built to last.

    The Hidden Complexities of Marine Plumbing

    Unlike the plumbing in your house, fitting a toilet on a boat brings a unique set of challenges. This is where specialist knowledge really counts. Our technicians are trained to handle these complexities, ensuring you get a flawless, reliable system from day one.

    A huge part of our work is making sure every connection is perfectly sealed and all pipework is routed correctly. We meticulously install everything from the sea cocks to the holding tank vents. An improperly vented tank, for instance, can create a vacuum that makes pumping out impossible. Even worse, it can lead to foul odours spreading through your living space.

    Your boat’s sanitation system is a critical piece of onboard equipment. Our meticulous installation process treats it as such, guaranteeing every component works together seamlessly for an odour-free, leak-proof, and safe environment on the water.

    Our Meticulous Installation Process

    When you choose our installation service, you’re investing in peace of mind. Our qualified technicians stick to a strict, detailed process that guarantees the highest quality finish for your new toilet on a boat. We don’t just fit an appliance; we integrate a complete sanitation solution into your vessel.

    Our service includes:

    • Expert System Integration: We make sure the toilet, plumbing, holding tank, and any electrical systems are all correctly matched and installed to work together perfectly.

    • Marine-Grade Materials: We only use the highest quality, corrosion-resistant fittings and proper sanitation hoses designed specifically to prevent leaks and odours.

    • Certified Electrical Work: For electric flush or macerator toilets, our technicians ensure all wiring is properly sealed, safe, and protected from the damp marine environment.

    • Regulatory Compliance: We guarantee that your installation will meet all current Boat Safety Scheme (BSS) and environmental regulations.

    This professional approach isn’t just for toilets. We apply the same rigorous standards to all our services, including fitting heating systems. For example, our expertise with Bubble boat stoves shows our commitment to keeping you safe and comfortable on board.

    Ensuring Safety and Longevity

    At the end of the day, professional installation is about safety. A badly fitted system can lead to serious hazards, from electrical fires to flooding. Overall safety on UK vessels is always a top priority. According to the UK Marine Accident Investigation Branch (MAIB), in 2022, UK fishing vessels had 7 very serious accidents and 11 serious ones. While these incidents aren’t about toilets, events like capsizing show just how crucial it is to have robust, professionally maintained systems for the integrity of the whole vessel. You can see the full data in the MAIB Annual Report 2022.

    By trusting us with your installation, you’re protecting your investment. A correctly fitted toilet will work more efficiently, last longer, and need fewer repairs over its lifetime, saving you money and hassle in the long run. Let our experts provide the quality workmanship your vessel deserves.

    Protecting Your Investment with Expert Maintenance

    Once our team has your new marine toilet installed and working perfectly, the real trick is keeping it that way. Regular, professional maintenance is what stops tiny issues from spiralling into major, expensive headaches. This is where we come in, helping you protect your investment and making sure your essential systems are ready to go when you are.

    The Dangers of Neglect

    Putting off routine maintenance on a toilet on a boat is asking for trouble. Our experienced technicians see the consequences of neglect almost every day, and most of it is completely preventable.

    Here are a few of the common problems we’re called out to fix:

    • Persistent Odours: This is usually down to failing seals or sanitation hoses that have become permeated over time. Our professional inspection would have caught it early.

    • Unexpected Blockages: A build-up of minerals or using the wrong kind of toilet paper can cause a blockage at the worst possible moment.

    • Pump or Motor Failure: The moving parts in electric and macerator toilets need looking after. Our regular checks ensure they’re running freely.

    • Costly Winter Damage: This is a big one. If water is left in the system over winter, it can freeze, expand, and crack pumps, bowls, and pipework. The repair bill in the spring can be significant.

    Our scheduled maintenance services are designed to get ahead of these problems. It’s all about giving you complete peace of mind, knowing a qualified marine engineer has inspected, tested, and serviced every part of your sanitation system, keeping it in perfect working order.

    Frequently Asked Questions

    When it comes to the world of marine sanitation, it’s natural for plenty of questions to pop up. Here, we tackle some of the most common queries we get from clients about choosing and looking after a toilet on a boat. Hopefully, it shows the value of getting expert advice and the quality of the appliances we supply and fit.

    Which Boat Toilet Is Best For Avoiding Smells?

    Unpleasant odours are right at the top of the worry list for any boat owner. The truth is, stopping smells has less to do with the specific type of toilet and much more to do with the quality of the installation and professional maintenance.

    Your best line of defence is a professionally installed system with high-quality, non-permeable pipework and ventilation hoses routed correctly. Our expert engineers make sure every single seal, hose, and vent is fitted perfectly to create a genuinely odour-free experience, no matter which system you go for.

    The most common cause of bad smells isn’t the toilet itself. It’s usually small installation mistakes or lack of maintenance. Our professional service gets rid of these risks from day one, guaranteeing a fresh and pleasant environment on your vessel.

    How Often Does A Pump-Out Tank Need To Be Emptied?

    This is a very common question, but we can give you a pretty good idea. How often you’ll need to empty the tank really boils down to three things: the size of your holding tank, how many people are on board, and how much you use the boat.

    As a rule of thumb, a couple living aboard with a standard-sized tank usually finds they need a pump-out every two to three weeks. For weekend cruisers, it could be much less frequent. A key part of our service is helping you pick a tank size that perfectly fits your cruising style, keeping those pump-out trips to a minimum.

    Can I Replace My Old Cassette Toilet With A Pump-Out System?

    Absolutely, and it’s an upgrade we carry out all the time for boat owners who want more convenience and a larger capacity. Moving from a basic cassette to a fully integrated pump-out system is a popular choice for anyone spending more time on the water.

    This is definitely a job that calls for professional expertise. Our certified technicians are experts at retrofitting these systems, a process that involves:

    • Installing a new holding tank of an appropriate size.

    • Running new, marine-grade plumbing and sanitation hoses.

    • Making sure all electrical parts for the system are wired up safely and correctly.

    We handle the whole conversion for you, giving you a clean, efficient, and seamless switch to a more capable and convenient toilet on a boat.


    For quotes and bookings, call or email us here.


  • Choosing a Submersible Water Pump 12V for Your Boat

    Choosing a Submersible Water Pump 12V for Your Boat

    A submersible water pump 12v is a workhorse on any boat. It’s a low-voltage device designed to shift water where you need it, whether that’s draining the bilge or clearing a shower sump. Since it runs off your boat’s battery, it’s an essential bit of kit for marine plumbing and, more importantly, your safety.


    For quotes and bookings, call or email us here.


    How to Select the Right 12V Submersible Pump

    Picking the right 12V submersible water pump isn’t just about grabbing one off the shelf. It’s a crucial decision for your boat’s day-to-day running and safety. Forget just looking at the price tag for a moment; what really counts is matching the pump’s performance to the job you need it to do.

    Our team has seen it all, and we can help you figure out exactly what your vessel requires. Whether it’s a small pump for a galley sink or a high-capacity beast for emergency bilge draining, getting the right match is everything.

    Matching Flow Rate and Head Height to Your Needs

    When you’re comparing pumps, the two specs that matter most are flow rate and head height.

    Flow rate, measured in Litres Per Hour (LPH), tells you how much water the pump can shift. A small pump for a shower sump has very different needs to an emergency bilge pump, where speed and volume are critical.

    Just as important is the head height. This is the maximum vertical distance the pump can push water. Our engineers will measure from where the pump sits in the bilge or tank right up to the outlet point above the waterline. An incorrect assessment can lead to a pump that struggles to push water out, or doesn’t work at all.

    This diagram breaks down how flow rate, depth, and power draw should guide you to the right pump from our range.

    Table - Bilge Pump Comparrison

    It’s a simple visual guide to help you narrow things down based on what your boat actually needs.

    To make things easier, we’ve highlighted our leading 12V submersible pump models below. This should help you find the perfect match for your boat’s specific needs, whether you’re outfitting a small day-sailer or a larger liveaboard.

    Pump Model

    Ideal Application

    Flow Rate (LPH)

    Max Head (m)

    Standout Feature

    Whale Supersub

    Bilge, Shower Sump

    650 – 1100

    2.0

    Ultra-low profile for tight bilge spaces

    Rule-Mate 500

    Automatic Bilge Pumping

    1890

    3.0

    Built-in float switch for automated operation

    Seaflo 750

    General Purpose & Emergency

    2838

    3.5

    Excellent balance of power and affordability

    SPX Johnson L450

    Compact Bilge & Livewell

    1700

    3.2

    Removable cartridge motor for easy cleaning/service

    Every pump in our lineup is chosen for its reliability and performance in real-world marine conditions. We stand by these models because we know they deliver when it counts.

    Engineered for the Harshest Marine Environments

    Any pump on a boat has to be tough. In the UK, a submersible water pump 12V is an essential tool that needs to withstand a harsh life at sea, running reliably from a standard 12V DC battery.

    The models we supply are built for this. Some have motor lifespans of up to 400 hours, which can be double what you’d get from other pumps on the market. They are designed for serious use.

    A pump’s reliability is tied directly to how it’s built. That’s why we only stock pumps with corrosion-resistant housings and fully waterproof seals. They’re made to stand up to saltwater, engine vibration, and the constant motion of a vessel.

    This focus on build quality means you get a dependable, high-performance pump that’s built to last. A quality water system is just as fundamental to your comfort and safety as a reliable heater. If you’re looking to upgrade your boat’s overall comfort, you might also want to look at our guide on Autoterm diesel heaters.

    By choosing from our hand-picked range, you’re not just buying a pump; you’re making a sound investment in your boat’s operational integrity.

    Why Professional Pump Installation Matters

    A high-quality submersible water pump 12V is a great starting point, but its real-world performance and lifespan hinge entirely on the quality of the installation. The marine environment is brutal. Constant movement, dampness, and corrosive saltwater throw unique challenges at any piece of kit, and a pump is no exception. An improper installation can lead to poor performance and create serious safety hazards.

    12v Bilge Pump Efficient Performance

    This is precisely why we have our certified marine engineers handle every installation. We’ve seen what can go wrong, and our process is built around guaranteeing safety and reliability. It’s about protecting your investment and ensuring your boat stays safe.

    The Foundation of a Reliable System

    It all starts with getting the placement right. Our technicians will find the sweet spot – the absolute lowest part of the bilge. Positioning the pump here ensures it can suck out the maximum amount of water and, crucially, prevents it from getting an airlock. An airlock is when a pump runs dry, which will quickly cause it to overheat and fail.

    Next, we turn our attention to the wiring, which is where many installations fall short. We only use marine-grade, tinned copper wiring and proper waterproof, heat-shrunk connectors. There are no shortcuts here. This approach is vital to prevent two huge risks:

    • Voltage Drop: Using wire that’s too thin or not up to the job means the pump won’t get the power it needs. This results in sluggish performance and will eventually burn out the motor.

    • Fire Hazard: Any dodgy connection exposed to bilge water is a recipe for a short circuit. On a boat, that’s a massive fire risk you simply can’t afford to take.

    A professional installation isn’t just about hooking up a pump so it switches on. It’s about building a complete, safe, and dependable system you can count on when the weather turns. Our engineers make sure every single part, from the wiring right down to the fuse, is correctly specified and fitted to the highest marine safety standards.

    Ensuring Seamless and Safe Operation

    Beyond the core connections, a proper job includes the critical safety features. For every pump we fit, we install a correctly rated fuse or circuit breaker. This small but essential component protects the pump motor and your boat’s entire electrical system from dangerous power surges.

    When it comes to bilge pumps, we always recommend fitting an automatic float switch. Our engineers take the time to position these switches perfectly, so they trigger the pump at just the right water level. This gives you automated protection against flooding, providing real peace of mind, especially when you’re not on board.

    By leaving the installation to our qualified team, you sidestep common mistakes and ensure your submersible water pump 12V works exactly as the manufacturer intended. We don’t just shift boxes; we provide complete solutions that deliver safety and performance you can rely on out on the water.

    The Value of a High-Quality Marine Pump

    When you’re out on the water, a pump isn’t just another bit of kit; it’s a vital piece of equipment for both safety and simply keeping things running smoothly. Skimping on a pump is a recipe for disaster. Investing in a top-notch, reliable submersible water pump 12V is genuinely one of the smartest moves any boat owner in the UK can make. A cheap, flimsy pump is just a breakdown waiting for the worst possible moment to happen.

    12 Volt Submersible Pump - Easy Boat Installation

    The marine environment is brutal. You’ve got constant engine vibration, the ever-present threat of saltwater spray, and the damp, humid conditions of a bilge. It’s a seriously hostile place for any mechanical device. This is precisely why your standard, off-the-shelf pump just won’t cut it for long.

    Choosing a quality pump isn’t an expense; it’s an investment in your vessel’s safety and your own peace of mind. The pumps we supply are not just products; they are engineered solutions designed specifically for the challenges of life on the water.

    Our dedication to quality means we’ve hand-picked every pump in our collection to stand up to these harsh realities. We specifically look for models with tough construction, corrosion-resistant materials, and fully sealed, waterproof motors. This focus on durability is what stops a pump from failing prematurely and keeps it performing when you need it most.

    Engineered for Longevity and Performance

    The pumps we stock have been chosen for their advanced engineering, which translates directly into a longer life and better performance. You’re not just buying another component; you’re investing in technology that’s been designed to give you reliable service, year in and year out.

    This reflects a wider trend we’re seeing across the UK. The national water pump market, valued at roughly USD 2,293.54 million in 2023, is set to grow quite a bit. This growth is being pushed by people demanding more durable, sustainable, and modern ways to manage water. If you’re interested in the nuts and bolts of it, you can dive into the market trends in this detailed report on Credence Research.

    Our selection of pumps is a direct response to this demand for higher standards. We provide appliances that offer:

    • Superior Materials: Housings and impellers are made from materials that laugh in the face of saltwater corrosion and impacts.

    • Sealed Motors: These aren’t just any motors. They are high-efficiency units, completely protected from water getting in, which prevents short circuits and burnout.

    • Vibration Resistance: Built to handle the constant shudder and movement of a working boat without falling to bits.

    By choosing a high-quality submersible water pump 12V from our carefully selected range, you’re equipping your boat to handle whatever the elements can throw at it. It’s the smart choice for any boat owner who puts a premium on reliability, safety, and long-term value.

    Extending the Life of Your 12V Water Pump

    Any seasoned boater knows that regular maintenance is the secret to getting a long and reliable life out of your gear. Your submersible water pump 12V is no different. Professional care really does go a long way, especially when it comes to preventing failures when you’re miles from shore. We get it – you need every single component on your vessel to be dependable, and that absolutely includes your water pump.

    Submersible Pump Longevity Tips

    That’s why we always push the importance of routine professional servicing. These checks are crucial for keeping your pump in top condition and making sure it’s ready to go when you need it most.

    Key Areas for Routine Inspection

    Even the best pump needs attention from a qualified professional. The damp, often cramped, bilge area is a harsh environment for any piece of kit, and small issues can escalate if not caught early.

    A professional inspection can spot trouble before it turns into a real headache. Our engineers pay close attention to these key areas:

    • Intake Strainer: Think of the strainer or filter at the base of the pump as its first line of defence. It’s there to stop hair, grit, and other gunk from destroying the impeller. We check and clear this strainer to keep water flowing freely. A clogged strainer is one of the most common and easily preventable pump problems.

    • Wiring and Connectors: In the damp marine environment, corrosion is a constant battle. Our team will inspect all wiring for any signs of degradation, especially around connectors and terminals. A corroded connection builds up electrical resistance, which makes the pump work harder and can eventually lead to burnout.

    • Pump Operation: We don’t just assume a pump is working. During servicing, we activate the pump and listen for any unusual grinding or rattling sounds. These noises are often a dead giveaway for a worn impeller or some debris rattling around inside the housing, which we can then address.

    Preventing a failure is always better than reacting to one. Our professional maintenance services are your best strategy for ensuring your water management system is always ready for action, just like a well-maintained engine or heating system.

    When to Call in the Professionals

    While regular visual checks by the owner are useful, some issues absolutely need an expert eye. If you’re dealing with persistent problems like the pump cycling on and off for no reason, or you’ve spotted serious corrosion on the wiring, it’s time to call our service team. Trying to sort out complex electrical faults without the right gear and knowledge isn’t just difficult – it can be downright dangerous.

    Our certified marine engineers are kitted out to handle these more advanced diagnostics. We can accurately test for voltage drops, inspect internal components for wear, and make sure your entire system, including automatic switches and alarms, is working perfectly. This level of service is vital for more complex setups, especially those integrated with other systems like our reliable Morco boilers and water heaters.

    We don’t just sell and install; we’re here to provide the ongoing support that keeps your vessel safe and fully operational. For some extra general advice, you might find this residential sump pump maintenance guide offers some useful, similar principles. Trusting your maintenance to our team means you can get back to enjoying your time on the water, knowing your boat’s vital systems are in expert hands.

    Troubleshooting Common Pump Problems

    Even the most dependable submersible water pump 12v can start acting up. After all, the marine environment is a tough place to live and work. Figuring out what the symptoms mean is the first step, but knowing when to call in a professional is what really matters for your boat’s safety and the pump’s lifespan. Tackling a complex repair without the right know-how often creates a much bigger, and more expensive, problem.

    A classic issue we hear about all the time is a pump that’s clearly running, but not a drop of water is moving. This usually points to an airlock or a blockage in the intake or outlet hose. While a quick visual check for obvious debris is a good first step, a persistent problem requires a technician’s trained eye and diagnostic tools.

    Common Symptoms and What They Mean

    When your pump starts misbehaving, it’s usually trying to tell you something. If you can recognise the signs, you can explain the problem accurately to our engineers, which means we can get to the root of it much faster.

    Here are a few scenarios we see on a regular basis:

    • Pump Won’t Switch On: While a tripped breaker or blown fuse can be the cause, if they appear fine, the fault could be deeper in the wiring, the switch, or the motor itself. That’s when you need professional tools to diagnose it safely.

    • Intermittent Cycling: A pump turning on and off for no apparent reason could indicate a faulty float switch or a leaky non-return valve allowing water back into the bilge.

    • Loud or Grinding Noises: Any unusual racket often means debris has managed to get past the strainer and is now caught in the impeller. Letting the pump run like this can quickly cause serious damage, so it’s best to have it professionally inspected.

    Don’t let a small pump issue spiral into a major headache. Our professional diagnostic services are designed to accurately pinpoint the root cause of any fault, saving you the guesswork and ensuring a safe, reliable repair every time.

    The Value of Expert Diagnostics

    The technology inside a modern submersible water pump 12v is surprisingly robust, which makes sense given how critical these devices are. In fact, the wider European market for electric submersible pumps, which includes our marine 12V models, was valued at over USD 3.3 billion in 2023. This market is driven by some very demanding applications, which just goes to show how important dependable equipment is. You can read a full analysis of the European ESP market growth on GMI Insights.

    Our certified marine engineers are fully equipped to service this advanced technology. We don’t just put a plaster on the symptom; we find and fix the underlying cause. It could be anything from a dodgy electrical connection or a worn-out internal part to an issue with the pipework connected to it.

    Proper diagnostics are just as vital for other systems, like your gas lines, which is why we also offer expert advice on essential components like our high-quality LPG gas hose. When you entrust your pump problems to our team, you’re making sure your entire water system is safe, efficient, and ready to go when you need it most.

    Got Questions About Our 12V Pumps?

    When you’re dealing with marine equipment, it’s natural for questions to pop up. Here at Marine Heating Solutions, our experts have pretty much heard them all. We’ve put together some straightforward answers to the most common queries we get about choosing and using a submersible water pump 12V on a boat.

    Our aim is to give you the clarity and confidence to pick the right pump, understand how it works, and make sure your vessel is safe and reliable.

    How Long Will My 12V Pump Last?

    This is one of the first things people ask, and for good reason. With a professional installation and the expert maintenance we provide, you can expect many years of dependable service from our high-quality marine pumps. The models we stock are specifically chosen because they’re built for the tough realities of life at sea.

    The motor life in many of the pumps we feature is rated for over 400 hours of continuous operation. That’s not just an abstract number; it’s a testament to their durability and long-term performance, giving you a pump you can count on, season after season.

    Can Any Pump Be Made Automatic?

    Yes, most of the submersible pumps in our range are fully compatible with automatic float switches. For any bilge application, we believe this is an essential safety feature you shouldn’t be without. Automating your pump provides a crucial, hands-free defence against taking on water.

    This is where a professional installation really shows its worth. We don’t just connect the switch; our certified marine engineers make sure it’s positioned perfectly within the bilge. This guarantees it kicks in at exactly the right water level for responsive, reliable protection, giving you complete peace of mind.

    What Is the Typical Power Draw?

    Knowing how much power a pump uses is crucial for managing your boat’s electrical system. The power draw of a submersible water pump 12V, measured in amps, is directly linked to its size and pumping capacity.

    • Smaller Pumps: A compact model, maybe for clearing a shower sump, will typically draw a modest 2 to 4 amps.

    • High-Capacity Pumps: The bigger, more powerful pumps designed for shifting a lot of water from the bilge can pull between 10 to 15 amps when they’re running.

    We provide detailed technical specs for every single pump we sell. This helps you properly assess its impact on your 12V system and ensure you’re not at risk of overloading any circuits.


    For quotes and bookings, call or email us here.


  • Webasto Heater Repair for Your Boat

    A properly functioning heater on your boat is not just about comfort—it’s essential for your safety and the preservation of your vessel. Ensuring your Webasto diesel heater is reliable during cold journeys provides peace of mind. It also plays a crucial role in protecting your investment. By entrusting us with your Webasto heater repair and maintenance, you can ensure your boat remains in top condition without the hassle of DIY repairs.

    The Importance of Professional Webasto Heater Repair

    Webasto Heater Repair - Common Issues

    Understanding the significance of a well-maintained heater can change your outlook on its care. Instead of viewing repairs as a burden, consider them a necessary step in safeguarding your boat. Our professional services offer the assurance that your heater will function optimally, allowing you to enjoy boating with confidence.

    We’ve heard the stories—or perhaps you’ve experienced them: a heater failure can quickly turn a pleasant autumn sail into an uncomfortable, potentially damaging situation for your boat. Avoid such scenarios by relying on our expertise to keep your heater in prime condition.

    More Than Just Comfort

    A consistently warm and dry environment is your best defence against moisture-related damage. Without a reliable heater, condensation can lead to mould and mildew, which not only produce unpleasant odours but can also damage upholstery and woodwork. These issues pose health risks and diminish your boat’s value.

    Additionally, a dependable heater extends your boating season. Instead of halting your adventures in late autumn, continue enjoying the beauty of the water well into the colder months. This ensures you get the most out of your investment.

    Protecting Your Boat’s Value

    A heater in good working order is a direct investment in your boat’s value. Potential buyers are more likely to be interested in a vessel that is free of moisture-related damage and equipped with a functioning heating system.

    A faulty heater is more than an inconvenience; it can lead to expensive repairs. We once encountered a narrowboat owner who ignored heater issues, resulting in a costly repair for mildew damage. Let us help you avoid such expenses with our timely and cost-effective repair services.

    In the UK, Webasto heater repair costs can range from £200 to £500. By choosing our service, you can save significantly while ensuring your heater’s reliability. We find that over 60% of heater problems arise from common fuel and electrical faults, which our skilled technicians can efficiently resolve.

    Understanding Webasto Heater Faults and Error Codes

    Your Webasto heater communicates issues through error codes. Recognising these signals helps in diagnosing problems efficiently. Our team is adept at interpreting these codes, turning potential wild goose chases into straightforward solutions.

    When a fault occurs, the heater’s electronic control unit (ECU) logs an error and displays signals. These codes point directly to issues like fuel supply problems or electrical faults. Our expertise in decoding these messages is a valuable asset in maintaining your heater’s performance.

    Deciphering Flashing Lights

    If your heater uses a rotary controller, error signals appear as flashing lights. Knowing how to interpret these can help quickly identify the problem. For example, five flashes followed by a pause indicate Fault Code F05, while ten flashes signal Fault Code F10. Each code corresponds to a specific issue.

    Pro Tip: Never rush to clear a fault code. It’s a record of what the heater experienced. Make a note of the code first—it’s crucial for accurate diagnosis.

    To assist you, we’ve created a quick reference guide for common error codes.

    For those with digital controllers, errors are displayed directly on the screen, like “T12” or “H94”. Our team is skilled in resolving such issues, ensuring your system functions smoothly.

    Our systematic approach to error codes helps pinpoint underlying causes efficiently, saving you time and effort. Trust our expertise to handle the complexities of your Webasto heater.

    Why Choose Us for Your Webasto Heater Service

    Webasto Heater Maintenance Tips

    Attempting to repair a heater without the proper tools and expertise can lead to complications. Our professional service ensures your heater is maintained correctly, avoiding damage to delicate parts and ensuring safety.

    Our technicians are equipped with the right tools and follow strict safety protocols, ensuring a successful repair every time. We prioritise your safety and the longevity of your heater, so you can focus on enjoying your time on the water.

    If you’re considering a replacement or an additional unit, consider exploring Autoterm diesel heaters, which are also popular in the marine community.

    Maintaining Your Webasto Heater for Reliability

    Regular maintenance is key to keeping your Webasto heater in optimal condition. Our services include thorough checks and cleaning to prevent common faults and ensure reliable performance.

    By scheduling regular maintenance with us, you can enjoy peace of mind knowing your heater is in expert hands. Avoid unexpected breakdowns and costly repairs by relying on our professional services.

    If you have questions about your Webasto heater or need assistance, our team is here to help. We offer comprehensive support and guidance to ensure your heater remains a reliable part of your boating experience. For insights on other popular heating options, check out our guide on Eberspacher diesel heaters.


    For quotes and bookings, call or email us here.

  • Your Essential Guide to Marine Gas Bottle Gauges

    Your Essential Guide to Marine Gas Bottle Gauges

    A gas bottle gauge is a must-have piece of safety kit for your boat. It gives you a clear, at-a-glance idea of how much LPG you have left in the cylinder. But it’s more than just a convenience. A good gauge helps you dodge the headache of running out of fuel mid-trip and, crucially, lets you keep an eye on your gas system for any dangerous changes in pressure.


    For quotes and bookings, call or email us here.


    Why a Reliable Gas Gauge Is Your Best Friend at Sea

    Picture this: you’ve just dropped anchor in a perfect, secluded cove after a long day’s sailing. You’re ready for a well-deserved hot meal, you turn on the hob… and nothing. The gas bottle is bone dry. It’s a classic story, and it’s more than just frustrating; a dodgy gas system is a major safety risk on any vessel.

    Think of your gas bottle gauge not as a nice-to-have accessory, but as a core piece of your safety equipment. Knowing exactly how much fuel you’ve got is fundamental to safe and happy boating. It puts you in control of your supplies, stopping those unexpected shortages from ruining a perfectly good trip.

    Preventing Hazards Beyond Inconvenience

    Beyond the galley, a properly working gauge is your first line of defence against slow leaks or a failing regulator. If you notice a sudden or unexplained drop in pressure, that’s often the first red flag that something needs immediate attention. This kind of proactive monitoring is the bedrock of onboard gas safety.

    You simply can’t overstate the importance of having the right equipment. A problem with your gas system isn’t a small niggle; it’s a direct threat to the safety of everyone aboard. A reliable gauge is your early warning system, both for running empty and for catching faults before they become disasters.

    UK regulations take this very seriously. The Gas Safety (Installation and Use) Regulations 1998 lay down strict rules for all LPG equipment, demanding that fittings like gauges are completely secure and gas-tight. It’s not just red tape. Data from 2015 revealed that 25% of gas-related incidents in properties not connected to the mains involved portable LPG cylinders. Worryingly, 5% of those were directly linked to faulty gauges, which really drives home just how critical they are.

    How Different Types of Gas Gauges Actually Work

    LPG Gauge Accuracy

    Ever wondered what’s actually going on inside that little gauge on your gas bottle? The tech can feel a bit like a black box, but each type works on a simple, clever principle. Getting your head around how they work helps you make sense of their readings and pick the right one for your boat.

    Let’s start with the most common type you’ll come across. A standard pressure gauge works a lot like the pressure meter you use for your tyres. It measures the pressure of the LPG vapour sitting at the top of the cylinder, not the liquid fuel itself.

    This is exactly why a pressure gauge can be a bit deceptive. As long as there’s any liquid LPG left to turn into vapour, the pressure stays constant. This means the gauge will confidently read ‘full’ right up until the tank is almost bone dry, then it will plummet without warning.

    A pressure gauge is a brilliant tool for spotting a leak. If you see the pressure dropping when you’re not using any gas, you’ve got a problem. For actually tracking how much fuel you’re using day-to-day, though, it’s not the most reliable tool.

    Because they’re so mechanically simple, these gauges are everywhere. To get a better feel for the basic technology behind many gauges, you could look into how Analog Panel Meters operate.

    Gauges That Use Temperature

    Next up are the magnetic and thermal stick-on gauges, which are brilliantly simple. Think of them as mood rings for your gas bottle. They work by picking up on the tiny temperature difference on the cylinder’s surface.

    The liquid LPG inside the bottle makes the metal wall colder where the fuel is. When you start using gas, this cooling effect becomes even more noticeable. These gauges have temperature-sensitive crystals that change colour, showing you the line between the cold liquid fuel and the warmer vapour space above it. It’s a rough visual clue, but often better than nothing.

    Advanced Electronic Solutions

    For those of us who like a bit more precision, ultrasonic gauges offer a proper high-tech solution. These gadgets usually attach to the bottom of your cylinder and act like a ship’s sonar. They send a little sound wave up through the cylinder, which bounces right off the surface of the liquid LPG.

    By timing how long it takes for that echo to come back, the device calculates the exact height of the liquid fuel. This gives you a much, much more accurate idea of how much gas you really have left.

    Finally, smart gauges are the latest word in fuel monitoring. They often use the same ultrasonic tech but add a digital brain and a way to talk to your phone. They work just like a modern car’s fuel display and bring a few key benefits to the table:

    • Precise Readings: They give you an exact percentage or volume, so there’s no guesswork.
    • Remote Monitoring: The gauge sends its data over Bluetooth or Wi-Fi straight to an app on your smartphone.
    • Automated Alerts: You can get a notification pinged to your phone when you’re running low.

    These advanced gauges take all the uncertainty out of the equation. They offer complete peace of mind, which is especially critical on longer trips where running out of gas just isn’t an option.

    Choosing the Right Gas Gauge for Your Boat

    Picking the best gas bottle gauge for your boat isn’t a one-size-fits-all job. The “best” product is the one that fits your specific needs and how you use your vessel. It all comes down to balancing things like how long your trips are, what your budget looks like, and how comfortable you are with different bits of tech.

    If you’re a weekend sailor just pottering along the coast, a simple magnetic or stick-on gauge will probably do the trick. It gives you a basic visual clue of the fuel level, which is often more than enough for short hops where a top-up is never too far away. They’re cheap, require zero installation, and are a definite step up from the old shake-and-guess method.

    For a long-distance cruiser living aboard for weeks or months at a time, however, the stakes are much higher. Running out of gas mid-voyage is a serious problem. In this scenario, the precision and remote monitoring you get from a smart ultrasonic system offers genuine peace of mind and is well worth the investment.

    Matching the Gauge to Your Journey

    To get beyond a generic list of pros and cons, you need to ask yourself a few honest questions about your own setup:

    • How long are your typical trips? For day trips or the odd overnighter, a basic gauge is usually fine. But for multi-day voyages or blue-water cruising, the accuracy of an ultrasonic or smart gauge becomes critical for proper planning.
    • What’s your budget? Simple thermal gauges are very cheap, while advanced smart systems are a more significant purchase. Your budget will naturally narrow down your options.
    • How critical is precision? If you rely on LPG for your cooking, heating, and hot water, knowing your exact fuel percentage is vital. If it’s just for an occasional brew, a rough estimate will do.

    This handy image shows you the core differences between the main types of gas bottle gauges at a glance.

    Analog vs Digital

    As you can see, there’s a clear trade-off. You get more features and accuracy as the price goes up, with smart gauges sitting at the top for performance and convenience.

    To help you weigh your options, this table breaks down the different types of gauges available for your boat.

    Comparing Marine Gas Bottle Gauge Types

    Use this table to compare the key features of different gas gauge types and select the best option for your boat.

    Gauge TypeHow It WorksAccuracyBest ForProsCons
    Magnetic/Stick-OnChanges colour based on the temperature difference between the liquid gas and the gas vapour.LowShort trips, occasional use, tight budgets.Extremely cheap, no installation needed, simple visual check.Very inaccurate, affected by weather, only shows a rough level.
    Pressure (Dial)Measures the vapour pressure inside the bottle.Low to MediumStatic caravans, BBQ use (not ideal for boats).Easy to read at a glance.Pressure varies with temperature, not fuel level, so it’s unreliable for knowing how much gas is left.
    UltrasonicSends sound waves through the bottle to measure the distance to the liquid gas surface.HighLiveaboards, long-distance cruisers, anyone needing accuracy.Very accurate, can be used on various bottle types, often has remote displays.More expensive, requires installation and power.
    Smart (Bluetooth/Wi-Fi)An ultrasonic sensor that connects to a smartphone app for remote monitoring and alerts.HighTech-savvy boaters, anyone wanting ultimate convenience and peace of mind.All the benefits of ultrasonic plus remote monitoring, usage history, and low-level alerts.Highest cost, relies on app/Bluetooth functionality.

    Each gauge type serves a purpose, from the cheap and cheerful stick-on for the day-tripper to the high-tech smart gauge for the serious cruiser. The right choice is the one that gives you the confidence you need for the type of boating you do.

    Embracing Modern Technology

    There’s a clear trend towards more advanced monitoring. Back in 2010, the UK first saw ‘smart’ gauges with remote features hit the market. Fast forward to 2022, and industry estimates suggest they accounted for roughly 35% of new domestic LPG cylinder installations. Yet, plenty of people still rely on older tech; a 2023 survey found that 40% of UK LPG users still use traditional dial gauges, which can be prone to user error.

    The right gas bottle gauge is one that removes uncertainty from your journey. Whether it’s a simple stick-on indicator or a full smart system, the goal is to have confidence in your fuel supply, so you can focus on enjoying your time on the water.

    Your choice of fuel also plays a part. The way the gas behaves can affect gauge readings, so it helps to understand the difference. You can find out more in our guide on propane vs butane for marine installations.

    Ultimately, investing in the right gauge is just one piece of the puzzle. It’s part of a wider strategy for managing your resources efficiently on board. Looking at the bigger picture, like selecting fuel transfer solutions, can also boost your system’s overall efficiency and safety.

    A Practical Guide to Safe Installation

    Gas Gauge Easy Installation

    Getting your new gas bottle gauge installed correctly isn’t just a box-ticking exercise; it’s absolutely vital for the safety of your vessel and everyone on board. A secure, leak-free installation is the only way to ensure your gauge gives you reliable readings and prevents a potentially dangerous situation from developing

    Of course, how you go about it depends entirely on the type of gauge you’ve chosen. For the simple stick-on and magnetic types, the job is straightforward and takes just a few seconds. But when it comes to in-line pressure gauges, which become a physical part of your gas plumbing, the process demands far more attention to detail.

    Installing Basic Thermal and Magnetic Gauges

    This is probably the simplest installation job you’ll ever do on your boat. Since these gauges don’t actually break into the gas line, there’s no risk of creating a leak.

    1. Clean the Cylinder: First, give the side of your gas bottle a good wipe down so it’s clean and dry. Any dirt, grease, or moisture will stop the gauge from making good contact.
    2. Position the Gauge: Place the gauge on the lower half of the cylinder. You want to make sure the bottom of the gauge sits below where the liquid gas level is likely to be.
    3. Check the Reading: To get a reading, you’ll actually need to use a bit of gas. Just run your hob for a few minutes. This causes the cylinder wall to cool down where the liquid is, and the gauge will change colour to show you the level.

    Fitting an In-Line Pressure Gauge

    This installation is a bit more involved because you are physically breaking into the gas line. Safety is paramount here. In the UK, this work must be carried out by a GasSafe-registered engineer by law.


    For quotes and bookings, call or email us here.


    Keeping Your Gauge in Shipshape for Long-Term Safety

    LPG Gauge Maintenance

    A gas bottle gauge is only as reliable as the condition you keep it in. Just like any other bit of safety kit on your boat, it needs regular TLC to stay trustworthy. Looking after it isn’t just about getting accurate readings; it’s about stopping dangerous situations from ever getting a foothold.

    Try to build it into your pre-voyage checks. A quick once-over of your gauge and its connections can catch small problems before they turn into major headaches. This simple habit means you can manage your LPG system with confidence, knowing it’s ready to perform safely whenever you need it.

    We can’t overstate how vital this is. Between 1980 and 2000, the UK saw 30–50 gas-related incidents involving LPG every year, with many stemming from user error or faulty gear. While modern gauges have thankfully helped reduce these numbers, an estimated 10% of incidents are still linked to measurement errors. This really drives home why good maintenance is absolutely non-negotiable.

    To ensure the ongoing safety and efficiency of your boat’s gas system and its gauge, it’s critical to schedule an annual check-up with a GasSafe registered engineer. These professionals have the expertise to identify potential issues that might go unnoticed during regular inspections by the boat owner. By investing in a comprehensive review of your LPG system, you help prevent gas leaks, ensure compliance with safety regulations, and maintain peace of mind while enjoying your time on the water. Regular maintenance is not just a safety measure; it’s a key part of responsible boating.

    Your Routine Maintenance Checklist

    Simple, regular checks are the bedrock of a safe gas system. By weaving these tasks into your normal boat maintenance routine, you ensure your gas bottle gauge remains an instrument you can depend on. A few minutes of prevention can save you a world of trouble down the line.

    • Inspect for Corrosion: The marine environment is relentlessly harsh. Check all connections—the gauge itself and where it meets the bottle or regulator—for any tell-tale signs of rust or that dreaded green/white powdery build-up.
    • Clean the Gauge Face: Salt spray and grime can easily obscure the dial. A quick wipe with a damp cloth is all it takes to make sure you can always get a clear, accurate reading at a glance.
    • Perform Leak Test: At least once a month, do a Leak Detection Fluid test on all your connections, even if you haven’t changed the bottle. It’s a simple, classic test and still your best defence against slow, hazardous leaks.

    A frequent point of failure in any LPG system isn’t the tough steel cylinder itself, but the softer components attached to it. Hoses and regulators have a definite lifespan and will degrade over time. Part of good maintenance is simply knowing when these critical parts are due for a change. Find out more by reading our guide on when your LPG regulator and hose were last changed.

    Quick Troubleshooting Guide

    Even with the best maintenance, things can sometimes go awry. This quick guide will help you figure out and fix common gauge issues. But remember, know your limits—if you’re ever in doubt, it’s time to call in a professional.

    ProblemLikely CauseSolution
    Gauge Stuck on FullThis is perfectly normal for pressure gauges.The gauge reads vapour pressure, which stays constant until the liquid LPG is nearly gone. If you want true level readings, you’ll need to look at an ultrasonic gauge.
    Fluctuating ReadingThe surrounding temperature is changing, which affects the internal pressure of the cylinder.This is normal behaviour for this type of gauge and not usually a sign of a fault. The reading will settle down as the temperature stabilises.
    Gauge Reads Empty on a New BottleThe gauge might be faulty, or there could be a blockage in the valve.Double-check the connection is screwed on tight. If it’s still reading empty, try the gauge on another bottle to see if the gauge itself is the problem.
    You Smell GasYou have a leak.IMMEDIATELY turn off the gas at the cylinder valve. Don’t use any electronics or do anything that could create a spark. Ventilate the area thoroughly and call a Gas Safe engineer. Do not try to fix it yourself.

    Frequently Asked Questions About Gas Gauges

    Even with the best gear, you’re bound to have questions. Getting to grips with the quirks of your gas bottle gauge system is the key to using it with confidence. Here are some straight answers to the most common queries we get from boaters, designed to clear up confusion and help you stay safe on the water.

    Why Does My Pressure Gauge Always Read Full?

    This is probably the most common head-scratcher for anyone new to using a pressure gauge. It’s confusing, but there’s a simple reason for it. A standard pressure gauge isn’t measuring the amount of liquid gas left in the bottle; it’s measuring the pressure of the gas vapour at the top.

    As long as there’s any liquid LPG in the cylinder, it will keep turning into vapour, maintaining a fairly constant pressure. So, the needle on your gauge will sit happily in the green zone right up until the very last of the liquid has vaporised. At that moment, the pressure plummets, often with very little warning. This makes a simple pressure gauge a brilliant tool for checking for leaks, but a pretty poor fuel level indicator. If you want a continuous, reliable way to track your fuel level, an ultrasonic or smart gauge is a much better bet.

    Key Takeaway: Think of a pressure gauge as a system integrity checker, not a fuel gauge. The reading will stay high until the tank is about to run completely dry.

    Can I Use a BBQ or Caravan Gauge on My Boat?

    We strongly advise against this. While they might look the part and seem to do the same job, gauges built for a caravan or your back garden simply aren’t tough enough for life on the water. A boat’s gas system is under constant assault from moisture, corrosive salt spray, and relentless vibration.

    Marine-grade gauges are specifically made from materials like stainless steel and high-quality brass to withstand these harsh conditions. Using a non-marine gauge is a false economy. It’s almost guaranteed to fail sooner rather than later, which could lead to a very dangerous gas leak. For your safety and to comply with boating regulations, always stick with equipment that is certified for marine use.

    How Often Should My Boat’s Gas System Be Inspected?

    Best practice is to get the whole LPG system professionally inspected once a year. This isn’t a job for just anyone; it needs to be done by a Gas Safe registered engineer who is specifically qualified to work on boats. While you should be doing your own regular visual checks and soapy water tests, a professional annual inspection is vital for safety, compliance, and often, your insurance.

    A qualified engineer has the experience to spot issues you might easily miss, like an internal regulator fault or the slow degradation of flexible hoses. To understand more about this critical component, you can learn about the importance of regularly checking and replacing your LPG gas hose.

    Is It Safe to Install a Gas Gauge Myself?

    That really depends on the type of gauge. Simple, non-invasive types like the magnetic or clip-on ones are perfectly safe to install yourself. They just stick to the outside of the bottle and don’t require you to touch the gas line at all.

    However, installing any gauge that means you have to break into the gas line—like an in-line pressure gauge—is a different story. In the UK, the law requires this work to be carried out by a qualified Gas Safe registered engineer. The risk of a fire or explosion from a botched installation is just too great to take a chance.


    At Marine Heating Solutions, our Gas Safe registered engineers provide expert installation, maintenance, and safety certification for all marine LPG systems. Ensure your vessel is safe and compliant by trusting the professionals. Contact us today for peace of mind on the water.

  • Your Essential Guide to LPG Gas Hose Safety

    Your Essential Guide to LPG Gas Hose Safety

    It’s easy to dismiss an LPG gas hose as just a simple tube. In reality, it’s the single most critical safety link in your entire gas system, responsible for carrying volatile fuel from the cylinder to the pipework or appliance. Using the wrong type, or one that’s seen better days, introduces serious risks that are completely avoidable.


    For quotes and bookings, call or email us here.


    Picture the LPG system in your caravan, boat, or even for your home BBQ. The gas cylinder is the heart, the appliance is the organ that needs the fuel, and the LPG hose is the main artery connecting them. Just like a healthy artery is vital, a sound, purpose-built hose is absolutely non-negotiable for safety. A failure here doesn’t just mean your heater or cooker stops working—it can lead to a dangerous and uncontrolled release of highly flammable gas.

    The dangers of a dodgy or old hose aren’t just theoretical warnings; they are real-world hazards. A hose that has perished over time can develop tiny, almost invisible cracks, leading to slow but steady leaks. On the other hand, a hose that isn’t rated for the right pressure can burst without warning when you connect it to a full cylinder, creating an immediate and serious risk of fire or explosion.

    It’s More Than Just a Tube

    It’s easy to overlook this simple-looking component, but its job is highly specialised. An LPG hose has to withstand constant pressure, fight off degradation from the chemical compounds in propane and butane, and put up with environmental abuse like UV light, changing temperatures, and physical scuffs. This is precisely why you can never substitute it with a water hose or any other generic bit of tubing.

    To deliver this level of safety and performance, every hose must be built to specific standards. The key things that make a hose safe and compliant are:

    • The Right Materials: Specialised synthetic rubber compounds like nitrile are used because they don’t break down when exposed to LPG.
    • Correct Pressure Rating: Hoses are specifically made for either high pressure (running from the cylinder to the regulator) or low pressure (from the regulator to the appliance).
    • Certified Construction: In the UK, this usually means it has to comply with standards like BS 3212, which is your guarantee that it’s fit for purpose.

    The Real Consequences of Neglect

    Ignoring the importance of your LPG hose can have severe consequences. A small leak in a confined space, like a boat cabin or a caravan’s gas locker, can quickly create a flammable atmosphere waiting for a spark. Physical damage, like a sharp kink or abrasion from rubbing against an edge, creates a weak spot just waiting to fail under pressure.

    The most common causes of gas-related incidents aren’t dramatic equipment failures, but slow, undetected leaks from perished hoses and poor connections. Regular inspection is your first and best line of defence.

    Ultimately, understanding the crucial role of your hose is the first step toward using gas safely. It helps you see it not as a cheap accessory, but as a vital piece of safety equipment. Choosing the right one, installing it carefully, and checking it regularly aren’t just ‘best practices’—they’re essential responsibilities for any LPG user.

    This guide will walk you through everything you need to know to manage your system safely and with confidence.


    A quick check of your LPG hose can be the difference between a safe setup and a serious hazard. This table breaks down the essentials into a simple checklist you can use every time you inspect your system.

    At-a-Glance LPG Hose Safety Checklist

    Check/AttributeWhy It MattersWhat to Look For
    Date StampHoses degrade over time, even if unused. They have a limited lifespan, typically 5 years.Check for a manufacturing date printed or stamped on the hose. Replace if it’s past its expiry or over 5 years old.
    Visible Cracks/SplitsCracks, even tiny ones, are a clear sign the rubber has perished and can leak gas.Bend the hose gently and look closely for any cracks, splits, or crazing on the outer surface.
    Bulges or BlistersThese indicate a weak spot in the hose’s internal structure, which could rupture under pressure.Run your hand along the hose to feel for any soft spots, bubbles, or bulges.
    Kinks or DamageKinks and physical damage weaken the hose wall, creating a potential point of failure.Ensure the hose has a smooth, natural curve and isn’t sharply bent, flattened, or rubbing on sharp edges.
    Secure ConnectionsLoose or improperly fitted connections are a primary source of leaks.Check that the fittings (crimps or swages) are secure and that the end connections are tightened correctly.
    Correct StandardUsing a hose certified for LPG (e.g., BS 3212) ensures it’s made from the right materials.Look for the British Standard number printed along the length of the hose. If it’s not there, replace it.

    Keeping this checklist in mind during your routine maintenance can help you spot trouble before it starts. A few minutes of inspection provides invaluable peace of mind.

    Understanding Hose Materials and UK Certifications

    LPG Hose Types

    At first glance, an LPG gas hose might look like any other rubber tube. But in reality, it’s a piece of specialised engineering designed to handle a highly flammable, pressurised gas safely. You simply can’t use any old bit of tubing; that would be like trying to hold water in a paper bag. Sooner or later, it’s going to fail, and the consequences could be severe.

    The real magic is in the material. LPG hoses are made from specific synthetic rubber compounds, like nitrile (NBR) or neoprene. Unlike regular rubber, which can turn brittle and crack when exposed to the hydrocarbons in LPG, these materials are built to resist that chemical attack.

    This resistance is everything. The hose is in a constant battle with the fuel it carries, and these specialised compounds ensure it stays flexible and strong for its entire service life. They prevent tiny, dangerous micro-cracks from forming, which are often the starting point for a serious gas leak.

    Built in Layers for Strength and Safety

    A proper LPG hose is not just one layer of rubber. It’s a multi-layered construction, a bit like a high-performance car tyre, where each layer has a critical job to do.

    • Inner Tube: This is the layer that’s in direct contact with the LPG. It’s made from a super-resistant synthetic rubber, usually nitrile, designed to stop the gas from seeping through.
    • Reinforcement Layer: In the middle, you’ll find a tough mesh of textile braids, often polyester or even steel. This is the muscle, giving the hose the strength to handle high gas pressure without swelling up or, worse, bursting.
    • Outer Cover: The outside layer is the hose’s bodyguard. Typically made from a durable material like neoprene, it’s there to fend off abrasion, damage from UV sunlight, and bad weather.

    Think of it as a suit of armour for your gas supply. The inner layer contains the threat, the middle layer provides the strength, and the outer shell protects it from the elements. This is what makes a dedicated LPG gas hose completely different from any other tube you might find.

    Decoding the UK Standard BS 3212

    Here in the UK, the gold standard for checking if a hose is safe and fit for purpose is the BS 3212 certification. This isn’t just a friendly suggestion; it’s your absolute guarantee that the hose has been manufactured and rigorously tested to meet strict safety rules for LPG use.

    A hose stamped with BS 3212 confirms it’s made from the right stuff, has the correct pressure rating, and is suitable for the job. If you see a hose without this marking, it has no place in your LPG system in the UK.

    This standard gives us a clear quality benchmark. When you see “BS 3212” on a hose, you know it’s been put through its paces for pressure resistance, flexibility, and material stability. It’s the key that lets you go from being just a user to an informed owner who can check their own equipment with confidence.

    For vapour offtake from cylinders, UK rules are clear: hoses must be marked as ‘High Pressure LPG’ and be certified to British Standard BS 3212 Type 2. To keep risks to a minimum, it’s always best to keep hose lengths as short as you practically can, while still allowing cylinders to be placed safely. You must also use proper hose clips to secure the connections—never use generic jubilee clips, as they are not designed for this and can cut into the hose, creating a leak. It is strictly forbidden to join or extend flexible hoses, as this just adds extra points of potential failure. You can find more great advice on LPG safety from the Hire Association Europe.

    How to Read the Markings on Your Hose

    The information printed along the length of your hose is its birth certificate and CV all in one. If you know what you’re looking at, you can tell its age and suitability in a second.

    1. The Standard: The first thing to look for is “BS 3212” to know it meets UK safety standards.
    2. The Manufacturer’s Name: This tells you who made the hose.
    3. The Date of Manufacture: Often shown as a quarter and a year (e.g., Q2 21). This is vital for knowing when to replace it—typically every five years for domestic use.
    4. Pressure Rating: This shows the maximum pressure the hose can safely handle.

    By getting to grips with these materials and certifications, you give yourself the knowledge to make sure every part of your LPG system is safe, compliant, and ready to give you reliable service for years to come.

    How to Navigate UK Gas Safety Regulations

    Figuring out the rules for using LPG in the UK can feel like a headache, but every single regulation is there for one critical reason: to prevent accidents and keep you safe. The cornerstone of it all is the Gas Safety (Installation and Use) Regulations 1998 (GSIUR). This isn’t just a rulebook for professionals; it lays out practical responsibilities for anyone using LPG, from a homeowner with a patio heater to boaters and caravan enthusiasts.

    The Role of a Gas Safe Registered Engineer

    One of the most important things the GSIUR does is make it clear when you need to call in a professional. While you can connect a new gas bottle to your BBQ yourself, any work on a fixed gas installation—like the pipework in your home, caravan, or boat—legally has to be done by a Gas Safe registered engineer.

    Trying to DIY this kind of work is not only illegal but incredibly dangerous. A Gas Safe engineer is properly trained to:

    • Install and connect all the pipework and appliances correctly.
    • Test the entire system thoroughly for even the smallest of leaks.
    • Ensure there’s enough ventilation to stop harmful gases from building up.
    • Certify that the whole setup meets all current safety standards.

    The Gas Safety legal framework in Great Britain is pretty extensive. It’s not just the GSIUR; it also includes rules like the Gas Safety (Management) Regulations 1996, which manage the safe flow of gases. Within this system, every lpg gas hose and fitting has to meet key safety rules like Regulation 2016/426. This law dictates how gas appliances and their parts are designed and made to ensure they are safe under normal use.

    Sticking to these regulations is the foundation of using LPG safely. It turns a complex set of rules into a simple, life-saving checklist.

    Practical Responsibilities for Users

    Beyond getting professionals in for the big jobs, every LPG user has ongoing responsibilities. If you have a boat, this means regular checks to keep your Boat Safety Scheme (BSS) certificate valid, which is a legal must-have on most UK inland waterways. You can find out more about how to get a Boat Safety Certificate in our guide.

    For caravan owners, it means keeping your gas locker clean and making sure the hose is protected from getting knocked about during travel. For business owners, it’s about regular staff training and keeping records of safety checks. And beyond the UK-specific rules, it’s always a good idea to understand the bigger picture of safety, such as the principles covered in guides to comprehensive safety training requirements.

    At the end of the day, this isn’t about ticking boxes. It’s about building a culture of safety around your equipment, so that every time you turn on the gas, you can do it with complete confidence. Following these rules isn’t a burden; it’s your best defence against accidents.

    Choosing the Right LPG Hose for Any Application

    LPG Installation

    When it comes to LPG gas hoses, one size definitely does not fit all. The hose that’s perfectly fine for your portable camping stove would be a dangerous mismatch for a residential park home or a bustling mobile catering van. Every application has its own unique demands for pressure, durability, and how it stands up to the elements.

    Getting this choice right is absolutely fundamental. It’s not just about making sure your system works efficiently; it’s about making sure it works safely. This means you need to look past what just looks right and really understand the critical differences that determine a hose’s suitability. By matching the hose to your specific needs, you’re creating a secure and reliable link between your gas bottle and your appliance.

    High Pressure vs Low Pressure Hoses

    The first and most important thing to get your head around is the difference between high-pressure and low-pressure hoses. Mixing these two up is one of the most common—and most dangerous—mistakes people make with LPG.

    • High-Pressure Hose: This is the tough, heavy-duty hose that connects your gas cylinder directly to the regulator. It’s built to handle the full, untamed pressure of the gas as it exits the bottle, which can be surprisingly powerful.

    • Low-Pressure Hose: This hose works on the other side of the system, connecting the regulator to your appliance (like a cooker or heater). It’s designed to carry gas at a much lower, controlled pressure and simply isn’t built to take the direct force from the cylinder.

    Using a low-pressure hose where a high-pressure one is needed is a recipe for disaster. It will almost certainly fail, and could even rupture, releasing a large amount of flammable gas. Always, always check the markings on the hose itself to confirm its pressure rating.

    Specialised Hoses for Demanding Environments

    For many simple setups, a standard rubber LPG hose will do the job perfectly well. However, some situations demand something a bit more robust. This is where the armoured LPG gas hose comes in.

    Think of an armoured hose as a standard hose wearing a suit of chainmail. It features a protective outer layer, usually a stainless steel braid, that offers superior defence against physical damage.

    This steel braiding is brilliant at protecting against two major threats:

    1. Rodent Damage: In places like static caravans, park homes, or boats, it’s not unheard of for rodents to chew through standard rubber hoses, causing incredibly dangerous leaks. The metal armour puts a stop to that.
    2. Abrasion and Impact: For hoses that are in high-traffic areas or subject to a lot of movement and vibration, the braiding prevents scuffs, cuts, and general wear and tear from damaging the crucial inner tube.

    Here in the UK, gas safety regulations like BS 6891 are in place to ensure all equipment is fit for purpose. These rules often state that installations must be protected from any foreseeable damage, which includes pests. That’s why armoured hoses are highly recommended—and often a practical necessity—for park homes and caravans where rodent activity is a real risk. For a closer look at the official guidance, you can check out resources from industry bodies like Liquid Gas UK.

    Matching the Hose to Your Application

    So, how do you make the right choice? It all comes down to taking a good look at your specific setup. In marine environments, for instance, even the type of fuel you’re using can influence your system. Our article on propane vs butane for marine installations provides more detailed insights on that front.

    To keep things simple, here’s a quick guide to help you decide:

    ApplicationRecommended Hose TypeKey Considerations
    Portable BBQ/Camping StoveStandard High/Low Pressure Rubber HosePortability and easy connections are key. Just double-check it’s the correct pressure rating for your gear.
    Caravan/MotorhomeHigh-Pressure to regulator, Low-Pressure to appliances. Consider armoured for any external runs.Constant vibration from travel and potential for scrapes make durability a top priority.
    Boat/Marine VesselArmoured High/Low Pressure HoseThe marine environment is harsh. Armoured hoses are a must to resist moisture, salt, and rodent damage in tight spaces.
    Residential Park HomeArmoured High/Low Pressure HoseThese are long-term installations, so you need maximum protection against rodents and general environmental wear.

    By thinking carefully about your environment and how you’ll be using your gas system, you can choose an LPG gas hose that delivers the safety and reliable performance you need.

    Your Guide to Maintenance and Replacement

    LPG Hose Safety First

    It’s tempting to think of an LPG gas hose as a ‘fit and forget’ part of your setup, but that’s a dangerous mistake. The materials that make it flexible and gas-tight will break down over time, even if the hose looks perfectly fine from the outside. Getting into a solid routine of maintenance and timely replacement is one of the most important jobs for any LPG user.

    This isn’t about creating extra work; it’s about staying ahead of problems. Regular checks give you the power to spot the early warning signs of trouble, letting you sort out small issues before they become serious safety hazards. It’s a simple habit that buys you invaluable peace of mind.

    Performing Regular Visual Inspections

    Your first line of defence is a simple look and feel. At least once every few months—and definitely before you hook up a new gas bottle—take a moment to check the entire length of your LPG gas hose.

    Gently bend the hose to see how flexible it is. You’re on the lookout for these tell-tale signs of wear and tear:

    • Cracks and Crazing: Look closely at the outer cover for any fine cracks, splits, or a spiderweb-like pattern. These are clear signs the rubber has perished and is no longer up to the job.
    • Brittleness: If the hose feels stiff, hard, or doesn’t want to bend, its materials have lost their pliability. It needs to be replaced immediately.
    • Bulges and Soft Spots: Run your fingers along the hose. Can you feel any blisters, bulges, or unusually soft areas? These point to a weak spot in the hose’s reinforcement layer, which could burst under pressure.
    • Abrasion: Check for any scuffs, cuts, or places where the hose has been rubbing against something sharp. This can weaken the hose wall and lead to failure.

    Sticking to a Replacement Schedule

    This is the most critical part of your maintenance routine: your LPG gas hose must be replaced on a schedule, no matter how good it looks. The constant exposure to LPG, sunlight, and changing temperatures causes invisible damage to the materials. Because of this, safety authorities and manufacturers all agree on a maximum service life.

    For most domestic, caravan, and marine setups, the rule is to replace your hose every five years. The manufacturing date is always printed right there on the hose, often as a quarter and year (like Q2 24). Knowing when your LPG regulator and hose was last changed is a key part of your safety responsibility. Never, ever take a chance on an old hose.


    For quotes and bookings, call or email us here.


  • Go Eco Adventurer Boat Stove Guide

    When you’re fitting out a narrowboat, a cabin, or any other small space, every single inch counts. That’s where the Go Eco Adventurer boat stove really comes into its own. It’s not just another heater; it’s a tough, reliable centrepiece engineered from the ground up to bring warmth and comfort to the unique world of a floating home or an off-grid hideaway.


    For quotes and bookings, call or email us here.


    Go Eco Adventurer Boat Stove

    Think of it as the Swiss army knife of boat heating—versatile, tough, and perfectly sized for the job.

    This little stove stands out because it was built specifically to tackle the challenges of life on the move. Standard household stoves are often too big and clunky, and they just aren’t built for the damp conditions of a marine environment. The Adventurer, on the other hand, packs a powerful punch into a compact body, making it a firm favourite among UK narrowboat owners and glamping site operators who need a dependable heat source without giving up precious living area.

    Built for Durability and Performance

    The real heart of the Go Eco Adventurer lies in its build quality and impressive efficiency. The entire stove is put together with 100% stainless steel fixings, which is absolutely critical for fighting off the damp and corrosive atmosphere you often find on a boat. This attention to durable materials means it’s ready to handle the constant movement and humidity changes that come with life on the water.

    Its performance is just as solid. This multi-fuel stove is tailor-made for off-grid living, delivering a nominal heat output of 4.5kW within a total range of 3.4kW to 5.3kW. That’s the sweet spot for heating the small-to-medium-sized cabins you find on boats or in glamping pods. With an A+ energy rating and 86% heat efficiency, it’s easily one of the most advanced compact stoves you can get in the UK today.

    Go Eco Adventurer 5 At-a-Glance Specifications

    To give you a quick, clear picture of what this stove can do, here’s a handy breakdown of its key features. This table sums up the technical details that make it such a practical and efficient choice for your vessel or cabin.

    Feature

    Specification

    Heat Output

    3.4kW – 5.3kW (Nominal 4.5kW)

    Energy Efficiency

    86% (A+ Rated)

    Construction

    Steel body with 100% stainless steel fixings

    DEFRA Exemption

    Yes, permitted for burning wood in smoke control areas

    Fuel Type

    Multi-fuel (wood and approved solid fuels)

    Flue Outlet

    100mm (4”) Top Outlet

    Weight

    47kg

    Warranty

    3 Years (Stove Body)

    This combination of a compact footprint, robust materials, and seriously high efficiency is what sets the Go Eco Adventurer apart from the crowd. It’s more than just a heating appliance; it’s a smart investment in reliable, safe, and comfortable off-grid living.

    Why Your Boat Needs a Specialised Stove

    Picking a stove for your boat isn’t like choosing one for your house. Far from it. The unique world of a boat – with its constant motion, the salty air that gets into everything, and tight safety rules for small spaces – calls for a piece of kit that’s built for the job. A standard household stove just isn’t cut out for life on the water. In addition, most household stoves require a flue which is a minimum of 4.5 metres high. This cannot be achieved on a boat. Boat stoves are designed to function efficiently with a short flue.

    Just picture trying to use a normal cooker while you’re gently rocking at anchor, never mind bashing through choppy seas. It’s a disaster waiting to happen. This is why investing in a proper marine unit like the Go Eco Adventurer boat stove is about more than just convenience; it’s about safety, practicality, and knowing you’ve got something that won’t let you down.

    The Unforgiving Marine Environment

    A boat is a living, moving thing, and it throws a few key challenges at any appliance you bring aboard: constant movement, not much space, and a damp, corrosive atmosphere. A domestic stove will give up the ghost pretty quickly under these conditions. The non-stop vibration can shake components loose, and its sheer size makes it a clumsy, dangerous obstacle in a cramped cabin.

    Then there’s the damp, salty air. It’s incredibly corrosive. Without the right materials, a stove will rust and fall apart at an alarming rate, which is not only a waste of money but a serious safety risk. Proper marine stoves are constructed with this in mind, using tough materials like stainless steel to ensure they last and work reliably.

    A purpose-built marine stove isn’t a luxury; it’s an essential piece of equipment. Its design accounts for the physical forces and environmental factors that would render a standard appliance unsafe and unusable in a very short time.

    This isn’t just a niche concern, either. The global market for marine stoves and ovens was valued at around $0.9 billion USD in 2024 and is expected to hit $1.4 billion USD by 2032. Here in the UK, with our buzzing community of narrowboaters and coastal sailors, we’re a big part of the push for safer, better-designed gear. You can read more about these market trends over at businessresearchinsights.com.

    Safety and Compliance Onboard

    On any boat, safety is everything. In the confined space of a cabin, the dangers from cooking and heating are amplified. A fire or a carbon monoxide leak can become a life-or-death situation in moments.

    That’s why marine stoves have to meet strict safety standards, like the BS 8511:2010 code of practice in the UK. These rules cover everything from how much space you need around the stove to how much ventilation is required. A specialist stove is designed from the ground up to tick all these boxes.

    You’ll find several key safety features on a proper boat stove:

    • Secure Latches: The doors need strong catches to stop them flying open when the boat moves, which could spill hot coals everywhere.


    • Fiddle Rails: Many marine stoves have optional rails around the top to stop your kettle sliding off when you’re on the move.


    • Compact Footprint: They are designed to be installed safely with minimal clearance to walls, especially when used with the right heat shielding and flue kits.


    • Controlled Combustion: A clean, controllable burn is crucial for managing the heat in a small cabin and stopping dangerous gases from building up.


    While your stove is an important component, don’t overlook the importance of overall vessel safety. It’s advisable to review a boat safety equipment checklist to ensure you have everything necessary. The Go Eco Adventurer is a reliable option for life on the water, but remember to equip your vessel with the essential safety features as well.

    Installing Your Stove in a Confined Space

    Fitting a solid fuel stove into the tight confines of a boat cabin can look like a daunting puzzle. Every centimetre matters, and safety is always the absolute priority. This guide will give you a clear roadmap for a safe, compliant installation of your Go Eco Adventurer boat stove, helping you navigate the crucial decisions from where to put it to how you ventilate it.

    The first and most important step is picking the right spot. You need a location that not only fits the stove physically but also leaves enough clearance from combustible materials like wood panelling or soft furnishings. Think of it as creating a safe “bubble” of space around your heat source.

    This is where the BS 8511 compliant installation kits, designed specifically for the Adventurer, become invaluable. These kits are engineered to drastically shrink the required safety distances—a massive advantage in the compact world of a narrowboat cabin. They manage this through the clever use of insulated flue pipes and custom-built heat shields.

    The Hearth and Heat Shielding

    Before the stove even gets near its spot, you must lay a solid foundation. This is the hearth, a non-combustible base that protects your floor from the intense heat and any stray embers that might pop out when you open the door.

    The hearth needs to be made of a suitable material, like stone, slate. Regulations state it must extend a specific distance in front of and to the sides of the stove. This isn’t just a friendly suggestion; it’s a critical fire prevention measure.

    On top of that, the walls around the stove need protecting, too. You can’t just shove the stove up against a wooden bulkhead. You have to install a heat shield, which is usually an air-gapped sheet of metal or fireproof board. This shield acts like a thermal barrier, reflecting heat away from the wall and letting air circulate behind it, keeping the surface temperature at a safe level.

    A correctly installed hearth and heat shield aren’t just about ticking regulatory boxes; they are the fundamental safety system that contains the stove’s powerful heat. Getting this part wrong is one of the most common—and most dangerous—installation mistakes we see.

    For anyone planning a DIY project, nailing these details is crucial. For a much more in-depth look at the process, our friends at Marine Heating Solutions have put together an excellent guide on how to install a boat stove that covers these steps thoroughly.

    The Go Eco Adventurer comes with a bolt-on hearth and heat shield option, which looks good and eliminates the need to build a hearth and heat shield on the boat. We even offer free installation when you purchase the entire Go Eco Adventurer Narrowboat Kit from us.

    Optional Extras

    When considering enhancements for your stove, several optional extras can be included to improve functionality and convenience. These extras are designed to complement your stove and make cooking a more enjoyable experience.

    • Removable Oven: Easily detachable without the need for tools, this oven can be lifted off the stove like a pot.


    • Side Warming Shelves: These shelves are perfect for keeping pots warm, ensuring your meals are ready when you are.


    • Fiddle Rail: This feature helps prevent pots from sliding and falling, adding an extra layer of safety.


    The removable oven and side warming shelves have made my cooking time so much easier, and the fiddle rail gives me peace of mind knowing my pots are secure.

    Flue System Installation

    With the foundation sorted, the next job is the flue system—the stove’s chimney. This is probably the most complex part of the whole installation. The flue’s job isn’t just to get smoke and combustion gases safely outside, but also to create the “draw” that makes the stove burn efficiently.

    Though this stove is designed to work well on the short flue lengths found on boats, poor draft means a smoky, sluggish fire that churns out more carbon monoxide. A good draft, on the other hand, pulls air cleanly through the stove, fuelling a hot, efficient burn.

    Here’s a quick rundown of the key bits:

    • Connecting Flue Pipe: This is the single-wall pipe that connects directly to the stove’s 4-inch outlet. Any flue sections above must be twin-wall insulated.


    • Twin Wall Insulated Flue: This pipe has a thick layer of insulation packed between an inner and outer wall, which keeps flue gases hot to help them rise and safely remove them from the cabin environment. It also keeps the outside surface cool enough not to set fire to the surrounding materials where the flue passes through the boat’s roof.


    • Deck Gland and Flashing: This is a specialised, waterproof fitting. It seals the hole where the flue pipe exits the roof, stopping rain and canal water from dripping in.


    • Rain Cap: Finally, a cap sits on top of the flue to stop rain from running down into your stove while still letting all the smoke out.


    Stainless Flue Kit

    Every joint in the flue must be securely clamped together, and flue systems over 1.2 metres should be securely braced to handle the boat’s movement. Get the installation right, and you can enjoy the cosy glow of your Go Eco Adventurer with total peace of mind, knowing it’s both safe and efficient.

    More information can be found on our handy guide about The Benefits Of Stainless Steel Twin Wall Insulated Flues For Boat Stoves

    Choosing the Right Fuel for Your Voyage

    IMAGE IMAGE IMAGE Stove Setup

    One of the biggest plus points of the Go Eco Adventurer boat stove is its multi-fuel capability. It gives you options. Think of it like a seasoned chef with a fully stocked pantry; you can whip up the perfect recipe for warmth, no matter what’s available locally or what the conditions demand. This flexibility is what makes it a truly practical and reliable heart for your floating home.

    Of course, making smart fuel choices is about more than just grabbing the nearest bag of logs. You’ve got to weigh up heat output, burn time, cost, and even the environmental side of things. The two main players for a solid fuel stove like this are traditional seasoned hardwoods and modern smokeless coals.

    Seasoned Wood: The Classic Choice

    Let’s be honest, there’s something deeply satisfying about the crackle and intense radiant heat from a real wood fire. For many boaters, it’s a non-negotiable part of the charm of life on the cut.

    • Heat Output: Wood burns hot and fast. This makes it brilliant for getting a chilly cabin warm in a hurry after a long day’s cruising. Dense hardwoods like oak, ash, and beech are your best bet, as they provide a much longer, more sustained burn than softwoods.


    • Availability: In many rural canalside spots, getting your hands on well-seasoned wood is pretty straightforward. Sometimes it’s even free if you have permission to gather it yourself.


    • Eco-Impact: As long as it comes from sustainable woodlands, seasoned wood is considered a carbon-neutral fuel. The CO2 it releases when burning is simply what the tree absorbed during its life.


    Wood isn’t without its downsides, though. It’s bulky, and storage space on a narrowboat is always at a premium. It also has to be kept bone dry, which can feel like a constant battle against the damp marine environment.

    Smokeless Coal: The Practical Powerhouse

    If you need steady, long-lasting heat that will keep the cabin toasty through a frosty night, smokeless coal is hard to beat. These manufactured briquettes are a go-to choice for liveaboards who rely on their stove as the main source of heat.

    Smokeless fuels are engineered to burn much more slowly and consistently than wood. They kick out a high, stable heat for hours on end, which means you won’t be stumbling out of bed in the middle of the night to top up the stove. They’re also far more compact to store than logs—a massive advantage when every inch of space counts.

    Key Takeaway: The best approach is often a hybrid one. Use seasoned wood for a quick, cheerful blaze to take the immediate chill off, then switch to smokeless coal for reliable, overnight warmth. This gives you the best of both worlds.

    The Shift Towards Safer Heating Solutions

    Over the years, the boating community has increasingly adopted safer heating solutions. Within the UK marine sector, the transition towards solid fuels has been influenced by both safety concerns and environmental regulations. Solid fuel stoves have become a preferred choice for many boaters as they eliminate specific risks associated with other fuels, such as the danger of gas accumulation in low areas like the bilge.

    For those considering heating options, solid fuel stoves present a reassuringly safe alternative by removing the potential hazards linked with gas fuels. The use of multi-fuel stoves, such as the Go Eco Adventurer, offers a low-risk option that aligns with these safety priorities. Understanding the benefits and safety features of solid fuels is essential for making informed decisions about marine heating solutions.

    Operating Your Stove for Peak Performance

    Go Eco Adventurer with Accessories

    Getting the most from your Go Eco Adventurer boat stove is a satisfying mix of art and science. Once you get the hang of it, you’ll be able to coax out a perfect, steady burn that keeps your cabin toasty while being incredibly frugal with fuel. It’s not just about lighting a fire; it’s about learning to work with your stove to really achieve that impressive 86% efficiency rating.

    Think of it a bit like sailing your boat. You don’t just point it in the right direction and hope for the best. You’re constantly making tiny adjustments to the sails and rudder to catch the wind just right. Your stove’s air controls are your sails, letting you fine-tune the fire for whatever you need.

    This section will walk you through mastering the Adventurer, from the initial light-up to managing the airwash for a crystal-clear view of the flames. With these tips, you can enjoy its comforting glow with complete confidence.

    Lighting and Establishing the Fire

    A good fire always starts with a good foundation. The main goal here is to create a hot, fast-burning base that will properly ignite your logs or coal without belching out loads of smoke. Rushing this bit is a classic mistake that often leads to a sluggish, smoky fire.

    Here’s a simple, reliable method to get your Go Eco Adventurer roaring to life:

    1. Prepare the Firebox: Clean the firebox and empty the ash pan. You’ll want to start with a completely clean, empty grate.


    2. Open the Air Controls: Slide both the primary and secondary air controls wide open. This gives the fire the maximum oxygen it needs to start up quickly.


    3. Build Your Fire: Create a small “Jenga” tower or log-cabin-style stack with some dry kindling in the centre of the stove. Pop a natural firelighter right in the middle.


    4. Light and Watch: Light the firelighter and close the stove door, but don’t latch it shut just yet. Leaving it slightly ajar for the first 5 minutes helps draw in even more air, getting that kindling burning fiercely.


    5. Add Fuel: As soon as the kindling is well and truly ablaze, add a couple of small, dry logs or a scoop of smokeless fuel. Now you can latch the door securely. Let this new fuel catch properly before you think about adding any more.


    A strong, hot burn right at the start is vital. This heats up the stove body and the flue pipe fast, which establishes a powerful “draw.” The draw is the engine of your stove, pulling air through the firebox and pushing smoke safely up the chimney.

    Fine-Tuning with Air Controls

    Once your fire is happily established, it’s time to take the helm. The Go Eco Adventurer has two main air controls that let you manage the burn rate and heat output with real precision.

    • Primary Air: This control feeds air from underneath the fuel. You’ll use this mostly for getting the fire started and for burning smokeless coal, which needs a good supply of air from below the grate.


    • Secondary Air (Airwash): This is a clever bit of kit. It feeds pre-heated air down over the inside of the glass door. Its main job is to create a super-hot curtain of air that incinerates any soot before it has a chance to stick to the glass, keeping your view clear. For wood burning, this is your main control.


    Once a wood fire is burning nicely, you should close the primary air control completely. From then on, use only the secondary airwash to control the flames. This is the secret to a cleaner, more efficient burn, and it’s how you hit that 86% efficiency figure while staying compliant with DEFRA smoke control rules.

    Finding the sweet spot takes a bit of practice, but you’ll soon get a feel for it. Before you know it, you’ll be setting it for a long, slow overnight burn or a roaring blaze to heat the cabin up in a flash.

    Keeping Your Stove in Top Condition

    A well-maintained Go Eco Adventurer isn’t just an efficient heater; it’s a safe one. You’ve got to build simple maintenance habits into your onboard routine. Think of it like checking your engine oil or your mooring lines – small, regular actions that stop bigger problems from developing down the line.

    These little routines are what keep your stove as the reliable heart of your boat, ready for whatever the weather throws at you. By following a straightforward plan, you’ll keep it running at its best and ensure it lasts for years to come.

    Simple Daily and Weekly Checks

    Your maintenance schedule doesn’t need to be some complex, drawn-out affair. In fact, simple and frequent checks make all the difference, and they only take a few moments.

    Daily habits are the easiest ones to get into. Before you even think about lighting it, give the glass a quick wipe with a damp cloth dabbed in ash or a proper stove glass cleaner. This stops soot from baking on and becoming a real pain to remove later. At the same time, have a quick peek inside the firebox for anything that looks out of place.

    Your weekly checks can be a bit more thorough:

    • Check the Door Seal: A leaky door seal is bad news. It lets in extra air, causing the fire to burn way too fast and out of control. An easy test is to close the door on a piece of paper; if you can pull it out without any resistance, the rope seal probably needs replacing.


    • Inspect Firebricks: Have a look for any major cracks or crumbling in the firebricks that line the stove. Their job is to protect the stove’s steel body from the intense heat, and they’re designed to be replaced when they get worn out.


    • Empty the Ash Pan: An overflowing ash pan can block airflow and eventually damage the grate.


    A proactive maintenance mindset is absolutely crucial for life on the water. Catching a worn door seal or a cracked firebrick early costs very little to fix but can save you from inefficient burning and potential damage to the stove itself.

    Monthly Checks

    In addition to daily and weekly maintenance tasks, it is important to conduct monthly checks to ensure everything is functioning safely and efficiently. This includes verifying that the stove is properly secured to prevent any potential hazards. Inspect the stove and flue thoroughly for any signs of damage or wear. Additionally, it is important to sweep the flue to remove any buildup, which helps maintain optimal performance and safety.

    The Annual Service Checklist

    Once a year, usually before the colder months roll in, your stove needs a more detailed service. This is your chance to give it a full health check and get it ready for heavy use. While plenty of boaters are happy to do this themselves, there’s no shame in calling in a professional if you’re not confident. For those who need a hand, exploring options for our professional boat stove servicing is a very wise move.

    Your annual list should always include sweeping the flue to get rid of soot and creosote buildup – a major fire hazard. You’ll also want to give every component a thorough inspection, from the door handle and hinges to the integrity of all the flue connections. This annual going-over is what ensures your Go Eco Adventurer boat stove will operate safely and efficiently, season after season.

    Got Questions? We’ve Got Answers

    Putting a new stove in your boat is a big decision, so it’s only natural to have a few questions floating around. Let’s tackle some of the most common things people ask us about the Go Eco Adventurer. We’ve put together some straightforward answers to help you figure out if it’s the right fit for your vessel.

    Can I Fit the Go Eco Adventurer Myself?

    Our free installation offer makes this somewhat unnecessary, but yes, if you’re a confident DIYer with a good set of skills, you can definitely install this stove yourself. The key thing to remember is that you absolutely must follow the manufacturer’s instructions down to the last detail. It’s also critical to stick to the BS 8511:2010 code of practice and adhere to best industry practices, Boat Safety Scheme guidelines, and the requirements of your insurance.

    For example, the BS8511:2010 is currently being updated and doesn’t make twin wall flues mandatory yet. However, it is considered extremely poor practice to install mild steel single skin flues, and your insurance will likely not cover you if the stove hasn’t been installed competently. All other stove installation standards, for houses, huts, and caravans, already make twin-wall flues mandatory.

    If you feel even a tiny bit unsure, our qualified professionals are here to help. It’s the simplest way to get total peace of mind, knowing your stove is installed securely, correctly, and in a way that’s fully compliant with safety standards.

    Remember, a stove installation isn’t just about warmth; it’s about safety. An incorrect installation can pose serious risks, including fire and carbon monoxide poisoning. When in doubt, always bring in an expert.

    What Makes the Adventurer 5 Different From Other Stoves?

    The Go Eco Adventurer isn’t just another small stove; it was designed from the ground up for life on the water. Here’s what sets it apart:

    • Marine-Grade Build: Its full stainless steel construction is specifically chosen to stand up to the damp, corrosive environment of a boat.


    • DEFRA Exempt: This is a huge bonus. It means you can legally burn wood even when you’re moored up in smoke control areas across the UK – essential for boaters in towns and cities.


    • Future Proof: It is SIA Ecodesign 2022 compliant for future-proof peace of mind, and has ClearSkies Level 5 certification.


    • Built for Boating: Features like its outstanding 86% efficiency rating and a really robust door latching system are there for a reason. They’re designed to meet the real-world demands of off-grid living, something you don’t always find in more generic compact stoves.


    For expert advice, certified installation, and servicing of your Go Eco Adventurer boat stove, trust the specialists. Marine Heating Solutions ensures your vessel is warm, safe, and ready for any voyage.


    For quotes and bookings, call or email us here.


  • Best Heaters for Boats UK Warmth and Safety Guide

    Picking the right heater for your boat isn’t just a small upgrade; it’s what turns a seasonal hobby into a year-round passion, especially with the UK’s notoriously fickle weather. The main contenders are diesel, LPG, solid fuel, and electric systems. The best one for you really boils down to your boat’s specific setup, your power situation, and how you actually use your vessel. This guide will walk you through finding the perfect setup for warm, safe, and comfortable boating, no matter what the weather throws at you.


    For quotes and bookings, call 07846 274 926 or email marineheatingsolutions@gmail.com


    Why Choosing The Right Boat Heater Matters

    Let’s be honest, navigating chilly UK waters often calls for more than an extra jumper. A decent heating system is a cornerstone of safety and comfort, and it’s your best defence against the damp and mould that can plague any boat. Think of it less like a luxury item and more like a core part of your vessel’s kit. It’s what transforms your boat into a warm, dry sanctuary you can escape to, whatever the season.

    This isn’t just a nice-to-have anymore; it’s becoming a key consideration for many UK boaters. The market for specialised boat heating equipment is growing steadily, driven by more and more people wanting to get the most out of their boats all year. If you’re interested in the numbers, you can read more about the UK heating equipment market’s projected growth on Mordor Intelligence.

    Understanding Your Primary Options

    Making a smart choice starts with knowing the main players. Each type of heater has its own personality—its own quirks, ideal uses, and installation needs.

    • Diesel Heaters: Easily the most popular choice. They’re efficient, can often tap right into your main fuel tank, and they produce a very dry heat, which is brilliant for fighting off condensation.
    • LPG (Gas) Heaters: These are prized for being quiet and convenient, particularly if you’re already set up with gas for cooking. As you’d expect, safety is absolutely paramount with these systems.
    • Solid Fuel Stoves: The traditional heart of a narrowboat. Nothing beats the unique, radiant warmth and cosy glow of a real fire.
    • Hybrid Gas/Electric Heaters: A straightforward solution with plug-and-play functionality when connected to shore power in a marina. When out on the water, the gas option ensures battery conservation.

    At-a-Glance Comparison of Boat Heater Types

    This table is a quick reference to see how the main heating options stack up against each other on the most important factors.

    Heater TypePrimary FuelTypical Running CostBest For
    Diesel Air/Water HeaterDieselLow to MediumLiveaboards and frequent cruisers needing reliable, dry heat.
    LPG (Gas) HeaterPropane/ButaneMediumWeekend boaters or those needing quiet, on-demand heating.
    Solid Fuel StoveWood, Coal, BriquettesLow (can be very cheap)Narrowboats and traditional vessels looking for a cosy, off-grid heat source.
    Electric HeaterMains ElectricityHigh (on batteries) / Low (on shore power)Marina-based boats with constant access to shore power.

    Ultimately, the ‘best’ heater is the one that fits your boat and your lifestyle like a glove. Whether you prioritise low running costs, ease of use, or that unbeatable feeling of a real fire, we have a solution that’s right for you.

    Autoterm 9D Diesel Air Heater 8KW

    When considering modern heating options for boats, one popular and effective choice is the forced air diesel heater. This system functions similarly to a car’s heating system and is widely used by liveaboards and cruisers.

    These heaters operate on a simple principle: they draw in cool cabin air, pass it over a heated element powered by a small amount of diesel, and then distribute the warm, dry air through ducting around the boat. This process is efficient and reliable.

    However, it’s crucial to be aware of the risks associated with unbranded Chinese heaters. These units may not meet European safety standards, potentially posing hazards such as fire risks or carbon monoxide leaks. Investing in a well-branded heater that complies with strict safety regulations ensures not only effective heating but also peace of mind while aboard.

    The Power of Dry Heat

    One of the biggest wins with a forced air diesel heater is the type of heat it creates. Unlike some methods that can actually add moisture to the air, these systems actively dry it out. On a boat, where you’re in a constant battle against damp, condensation, and that musty smell that follows, this is an absolute game-changer.

    Waking up on a cold, misty morning to find the windows streaming with condensation is a familiar sight for any boater. A forced air heater tackles this head-on, circulating warm, dry air that lifts moisture from surfaces and the atmosphere itself. This makes for a far healthier and more comfortable living space, protecting both your boat’s interior and your own well-being.

    By installing a reliable diesel heater, boaters can transform their vessel into a year-round retreat. It opens up the colder months for peaceful cruising, letting you enjoy quiet anchorages without the drone of a generator. This single upgrade makes autumn trips and even winter stays not just possible, but genuinely pleasant.

    Fuel Efficiency and Convenience

    Another huge reason they’re so common is their incredible fuel efficiency. These heaters are remarkably frugal, sipping fuel directly from your boat’s main diesel tank. A typical unit might only use 0.1 to 0.2 litres of fuel per hour on a low setting, making them unbelievably cheap to run for long periods.

    You really can’t overstate the convenience of this setup. There’s no need to lug separate fuel canisters about or worry about managing another fuel source. For any diesel-powered boat, the integration is seamless and just makes sense. It’s a self-contained system providing powerful, reliable heat without complicating your fuel logistics. If you’re exploring this efficient solution, checking out the range of Autoterm diesel heaters is a great starting point to see what different models can do.

    A Balanced View: Noise and Power

    Of course, no system is perfect, and it’s important to look at the whole picture. Forced air heaters aren’t completely silent. You’ll hear the gentle hum of the circulation fan and the quiet, rhythmic ticking of the fuel pump. While modern units from top brands like Wallas or Eberspächer are designed to be extremely quiet, you still need to think carefully about where you install them to minimize noise in sleeping areas. Air duct silencers can help reduce fan noise.

    They also need a bit of electrical power to run the fan, fuel pump, and control unit. While the draw is modest—typically 1 to 3 amps once up and running—it is a constant drain on your 12V or 24V battery bank. For anyone planning to spend long periods off-grid, this power consumption has to be factored into your overall energy budget. You need to be sure your charging systems, like solar panels or the engine alternator, can keep up.

    Still, for most boaters, the benefits massively outweigh these minor points. The ability to quickly and efficiently warm the entire boat with dry, comfortable air makes forced air diesel heaters the go-to choice for creating a proper home on the water, whatever the weather is doing outside. They give you the confidence to cast off the lines on a crisp autumn day, knowing a warm and inviting cabin is waiting for you when you get back.

    Diesel Liquid Heaters for Central Heating and Hot Water

    Diesel liquid heaters also present an effective solution by providing central heating and hot water through a calorifier. These systems function by heating water, which is then circulated through radiators, ensuring an even warmth distribution throughout the vessel. Additionally, they connect to a calorifier, utilising the heated water to provide hot water for showers and the galley.

    This setup not only ensures comfort but also adds convenience for life aboard, making it an efficient heating solution for those living on vessels. Diesel liquid heaters are favoured for their ability to maintain a consistent and reliable heat source.

    The diesel liquid heater has been a game-changer for our onboard comfort, offering dependable warmth and hot water even in the coldest conditions.

    LPG Gas Heaters For Convenience and Safety

    For boaters who put a premium on quiet operation and heat on demand, LPG (Liquefied Petroleum Gas) heaters are a seriously compelling option. Many boats, from weekend cruisers to liveaboard narrowboats, already have an LPG system running for the galley stove. This makes adding an LPG heater a natural and convenient extension of a fuel supply you already manage, saving you the hassle of a separate fuel tank.

    The real draw, though, is how clean-burning and quiet they are. Unlike diesel heaters with their distinctive pump and fan noise, many LPG models run in complete silence. It’s an unobtrusive, peaceful warmth that’s hard to beat, and they deliver it almost instantly, taking the chill off a cabin on a cold morning in minutes.

    Forced Air LPG Heaters and Hybrid AC Electric/LPG Heaters

    When exploring LPG heaters, you’ll notice various options that cater to different heating needs.

    • Forced Air Heaters: These operate similarly to diesel heaters, utilizing a fan to distribute warm air throughout the boat using ducting systems. They are ideal for achieving consistent heating in larger or multi-cabin boats, effectively circulating air, though the fan does produce some noise.
    • Hybrid AC Electric/LPG Forced Air Heaters: These systems combine the benefits of LPG and electric power, offering flexibility and efficiency. They can switch between LPG and electric modes depending on availability and preference, ensuring warmth is maintained efficiently.

    The choice between these systems depends on the size of your boat and your preference for air circulation. While boat heaters are a niche market in the UK, they are an essential part of the commercial and domestic heating industry, valued at over USD 110 billion. The UK’s cooler climate and growing interest in boating drive the demand for dependable cabin heating solutions. For more information on trends in the heating sector, visit gminsights.com.

    The Non-Negotiable Priority: Safety

    While the convenience of LPG is fantastic, it comes with a critical responsibility. LPG is heavier than air. This means any leak, no matter how small, will cause the gas to sink and collect in the lowest part of your boat—the bilges—creating a serious risk of explosion. Because of this, safety can’t just be on the checklist; it has to be the absolute foundation of your entire LPG installation.

    Any installation involving gas on a boat must be treated with the utmost seriousness. There is no room for error. A properly installed and maintained system is perfectly safe, but a poorly fitted one is an accident waiting to happen. Always prioritise professional, certified installation over cost-cutting.

    This brings us to the safety components that aren’t optional extras. They are absolute, must-have requirements for any vessel with an LPG system onboard.

    Core Safety Components for LPG Systems

    To use gas safely on your boat, your setup has to meet strict standards. These three elements are fundamental:

    1. Gas-Safe Locker: Your LPG bottles must be stored in a dedicated, self-contained locker that is completely sealed off from the boat’s interior.
    2. Drop Vents: This locker must have a “drop vent” or drain right at its lowest point that leads directly overboard. This ensures that if a leak happens inside the locker, the heavy gas drains safely out of the boat instead of pooling dangerously in the bilge.
    3. Carbon Monoxide (CO) Alarms: LPG combustion can produce deadly, odourless carbon monoxide. A working alarm isn’t just a good idea; it’s essential. Installing a reliable marine carbon monoxide detector is one of the most critical safety steps you can take on a boat with any gas appliance.

    When you combine these measures with a professional installation by a Gas Safe registered engineer who is qualified for marine work, LPG becomes a wonderfully convenient and safe heating choice. Without them, the risks are simply too great to take.

    Solid Fuel Stoves: The Traditional Heart of the Boat

    Bubble 4B Solid Fuel Boat Stove

    There’s a certain magic to a solid fuel stove that other boat heaters just can’t match. It’s far more than just a heating appliance; it’s the living, breathing heart of a vessel, especially on traditional narrowboats and classic yachts. Imagine coming back to your cabin after a long day cruising a misty canal, the air crisp and cold, only to be met by the deep, radiant warmth and comforting flicker of real flames.

    This isn’t push-button, instant heat. It’s a deliberate, hands-on process that really connects you to your surroundings. The gentle crackle of wood or the steady hum of burning coal becomes the soothing soundtrack to your evening. This unique, all-encompassing warmth radiates through the cabin, drying damp clothes and warming chilled hands in a way forced air never could.

    The Lifestyle and Practicalities of Solid Fuel

    Choosing a solid fuel stove means you’re embracing a particular lifestyle. It takes a bit of planning and some physical effort, but the rewards are considerable. Your main fuel choices are seasoned hardwood and smokeless coal, and each has its own character.

    Wood gives you a livelier flame and is brilliant for a quick, roaring fire to take the chill off. Coal, on the other hand, delivers a long, slow, and incredibly hot burn—perfect for keeping the cabin toasty through a cold winter’s night. Many boaters actually use a combination, enjoying the flames of wood before banking the fire with coal to keep it going for hours.

    Living this lifestyle involves a few key things to think about:

    • Fuel Sourcing: You’ll need to find and store your fuel. This usually means buying seasoned logs or bags of coal from canalside suppliers, marinas, or local merchants.
    • Storage Space: Fuel takes up room. You must have a dedicated, dry spot on your boat—often on the roof or in a bow locker—to keep your supply safe from the weather.
    • Fire Management: Learning to build, maintain, and control your fire is a real skill. It involves managing airflow to get the most efficient burn and knowing how to keep it going safely overnight.

    A solid fuel stove gives you true off-grid independence. With a good stock of fuel, you have powerful, reliable heat that needs no electricity and is completely separate from your engine or battery bank. It is the ultimate self-sufficient heating solution.

    Installation: The Foundation of Safety

    The charm of having a real fire on board comes with an absolute duty of care. An improper installation isn’t just a risk; it’s a profound danger. Unlike other heaters, the high temperatures involved demand a completely uncompromising approach to safety.

    There are three pillars to a safe solid fuel stove installation, and none of them are negotiable.

    1. A Heat-Resistant Hearth: The stove has to sit on a non-combustible base, like stone tile or a thick steel plate. This hearth must stick out far enough around the stove to catch any stray embers that might pop out when you open the door.
    2. Safe Clearances: Intense heat radiates from the stove in all directions. It must be fitted with a safe air gap between the unit and any nearby combustible materials, like wooden bulkheads or furniture. Heat shields are often used to protect these surfaces.
    3. A Properly Fitted Flue: The flue (or chimney) is critical. It must be a twin-wall insulated flue where it passes through the deck or roof to stop heat from transferring to the boat’s structure. It also needs a collar to make sure it’s completely watertight and a cap to keep the rain out.

    Ongoing Maintenance for Reliable Warmth

    Living with a solid fuel stove means committing to regular maintenance, but it’s a simple and rewarding routine. The main jobs are sweeping the flue and emptying the ash pan. Soot and creosote can build up in the flue, which reduces efficiency and creates a fire risk, so it needs cleaning with a flue brush at least once a year.

    The ash pan will need emptying daily when the stove is in heavy use. This simple ritual is just part of the rhythm of life with a real fire. This hands-on approach is what makes these boat heaters so special. For those looking at compact yet powerful stoves, perfect for a marine environment, exploring the different models of Salamander Stoves can provide great inspiration for what’s possible in a smaller space.

    Diesel Stoves: Efficient Heating for Boats

    When considering heating options for your boat, diesel stoves like Refleks or Bubble are excellent choices. These stoves are specifically designed for marine environments and offer several advantages:

    • No Power Supply Required: These stoves can function without a power source, making them suitable for remote areas where electricity is unavailable.
    • Consistent Heat Source: Diesel stoves deliver a steady and reliable heat source, providing comfort even in cold climates.
    • Ease of Use: Featuring straightforward controls, these stoves are user-friendly, allowing for simple temperature adjustment.
    • Cleaner Operation: These stoves don’t require handling ash, resulting in less dust settling in the cabin.
    • Convenience: There is no need to carry or store wood and coal, simplifying fuel management.

    Having a diesel stove on board is like having a dependable friend to keep you warm on the coldest nights.

    Choosing a diesel stove for your boat ensures you have a reliable heating solution that doesn’t rely on an external power source. Consider this option for efficient and hassle-free warmth during your maritime adventures.

    Electric Heaters: Marina Convenience vs. Off-Grid Challenges

    Electric heaters are convenient when moored in a marina, where access to shore power makes them easy to use. They are clean, portable, and effective for warming a boat without the need for complex installations. Common choices include oil-filled radiators, fan heaters, and tube heaters, each offering specific benefits for maintaining comfort on board.

    However, using electric heaters off-grid is not advisable due to the high power demands that can quickly deplete a boat’s battery bank. Boats typically have less insulation than houses, making electric heaters particularly inefficient and costly compared to alternatives like diesel heaters, even if you are plugged into shore power. For off-grid heating, fuel-burning systems are more practical and efficient, ensuring warmth without draining your resources.

    Essential Installation and Maintenance Practices

    Boat Heater Installation and Maintenance - Safety First

    Choosing the right heater for your boat is only half the battle. A flawless installation and diligent maintenance are what truly guarantee years of safe, reliable warmth. While we always recommend a professional fitting, understanding the core principles empowers you to oversee the work and properly care for your system down the line.

    Think of installation not as a one-off task, but as laying the very foundation for your boat’s safety and comfort. Getting it right from day one prevents countless future headaches and, more importantly, hazards. The universal principles of a safe install apply whether you have a diesel, LPG, or solid fuel system.

    The Cornerstones of a Safe Installation

    Every fuel-burning heater, regardless of type, produces exhaust gases that absolutely must be removed from your living space. This is the most critical aspect of any installation, and there is simply no room for compromise.

    Two elements are paramount here: the fuel supply and the exhaust system. Fuel lines for diesel or LPG heaters must be correctly routed, secured against vibration, and free from any potential chafe points. The connections must be leak-proof and installed by a competent person—for gas, this means a Gas Safe registered engineer qualified for marine work.

    Equally important is the exhaust flue. It has to be sealed tightly, routed correctly to prevent water from getting in, and fitted with the proper deck fittings to protect your boat’s structure from high temperatures. For a deep dive into the process for solid fuel systems, which have some of the most stringent requirements, our guide on how to install a boat stove provides detailed insights.

    A professional installation is an investment, not an expense. The peace of mind that comes from knowing your fuel and exhaust systems are fitted to the highest safety standards is invaluable. It protects your vessel, your family, and your ability to relax on board.

    Your Regular Maintenance Checklist

    Once your system is up and running, a simple routine of checks will keep it performing safely and efficiently. Regular maintenance isn’t just good practice; it’s a vital part of responsible boat ownership.

    This quick-reference checklist covers the essential tasks you should perform regularly. Think of it as a seasonal health check for your boat’s heating system.

    • Inspect All Fuel Lines: At least twice a year, visually check all fuel lines for any signs of cracking, chafing, or corrosion. Make sure all fittings are tight and secure.
    • Test CO and Smoke Alarms: Test your carbon monoxide and smoke alarms monthly. This is your most important early warning system, so ensure the batteries are fresh and the units are working correctly.
    • Clean the Flue and Exhaust Outlet: Regularly check that the exhaust outlet on the hull or roof is clear of soot, debris, and any other blockages. A blocked exhaust can force dangerous gases back into the cabin. Solid fuel stove flues should be swept on a monthly basis.
    • Service the Heater Annually: Just like a boiler at home, your boat heater will thank you for an annual service by a qualified technician. They’ll clean key components, check the burner, and ensure combustion is clean and efficient.

    By staying on top of these simple but crucial tasks, you ensure your heater remains a reliable source of comfort, not a potential hazard. This proactive approach allows you to enjoy warm, cosy days and nights on the water with complete confidence.

    Common Questions About Boat Heaters

    Even after getting your head around the main types of heaters, you’ll likely still have a few practical questions knocking about. It’s completely normal. This section tackles the most common queries we get from boat owners, giving you clear, straightforward answers to help you lock in your decision with confidence.

    What Size Heater Do I Need For My Boat?

    Choosing the right size, or power output (measured in kilowatts or kW), is absolutely critical. Get it wrong, and you’re in for a world of frustration. An undersized unit will run flat-out and never quite manage to get the boat properly warm, while an oversized one will constantly switch on and off, wasting fuel and causing unnecessary wear and tear.

    A decent rule of thumb to start with is to allow 1kW of heating power for every 3 to 4 metres of boat length. But honestly, that’s just a rough starting point.

    The perfect size for your heater really comes down to your boat’s total internal volume, how good (or bad) your insulation is, and the number of cabins you need to heat. To avoid making a costly mistake, it’s always best to have a chat with a professional who can calculate your specific heating needs properly.

    Can I Install a Boat Heater Myself?

    While some very experienced and technically gifted boat owners do take on the installation themselves, we strongly recommend getting a professional to fit it, especially for diesel and LPG systems. These heaters aren’t just plug-and-play; they involve complex fuel lines, exhaust systems, and electrical wiring where a small mistake can have very serious safety consequences.

    A certified technician will make sure that:

    • Fuel lines are completely secure and meet all safety standards.
    • The exhaust is routed correctly and perfectly sealed, preventing deadly fumes from leaking into your living space.
    • All the electrical connections are safe, sound, and reliable.

    Is It Safe To Leave a Boat Heater On Overnight?

    Yes, absolutely—as long as the system was installed correctly by a competent person and is properly looked after. Modern diesel, LPG, and solid fuel heaters are designed from the ground up for continuous, unattended use, making them perfect for keeping the chill at bay all through a cold night.

    But, this safety hinges entirely on one little box: a carbon monoxide (CO) alarm. No matter what kind of fuel-burning heater you have on board, a working, regularly tested CO alarm is non-negotiable. It’s an essential piece of kit for your safety and your peace of mind.


    For quotes and bookings, call or email us here.


  • Your Morso Squirrel Stove Guide for Boat Living

    If you spend any time around boats, you’ll hear the name Morso Squirrel mentioned sooner or later. For decades, it’s been the go-to stove for reliability and warmth, especially within the UK’s narrowboat community. It’s that perfect mix of classic looks and modern, efficient heating.


    For quotes and bookings, call or email us here.


    Why the Morso Squirrel Is a Boater’s Best Friend

    Morso Squirrel 1412 DEFRA Approved Solid Fuel Boat Stove

    The Morso Squirrel isn’t just another heater. For many boaters, it’s the warm, beating heart of their vessel. Its reputation is built on solid, dependable construction and a timeless style that just seems to fit the unique interior of a boat.

    The stove’s heritage comes from over 150 years of Danish cast-iron craftsmanship by Morso. When they started exporting to the UK, the Squirrel quickly found a home on the water.

    An Enduring Legacy on the Water

    The Morso Squirrel’s popularity in marine settings is no accident. It’s the direct result of a design that perfectly balances size, performance, and durability for life afloat.

    Since it arrived in the UK back in the 1980s, the Morso 1412 Squirrel has become one of the nation’s best-selling stoves. Its appeal comes from blending that classic look with modern combustion technology, which delivers an efficient 5 kW heat output – ideal for smaller spaces like narrowboats. You can dig deeper into the history of this iconic stove’s success in the UK market.

    Its chunky cast-iron body is a major advantage. Think of it as a thermal battery; it soaks up heat from the fire and then radiates it slowly and evenly into the cabin. This creates a deep, penetrating warmth that really cuts through the damp and chill you so often find on the water.

    What really sets the stove apart is its ability to provide consistent, manageable heat. It doesn’t create a stuffy, overpowering sauna. Instead, it maintains a stable and comfortable living space, which is absolutely crucial when your home is only a few metres long.

    This blend of qualities has secured its status on the cut:

    • Compact Footprint: It’s designed to tuck neatly into tight spaces without skimping on performance.
    • Reliable Heat: The cast-iron construction means you can count on it for dependable warmth.
    • Timeless Design: Its classic look fits right in, whether your boat’s interior is traditional or modern.

    For all these reasons, when boaters are looking for a heating solution that will stand the test of time, they consistently turn to the Morso Squirrel stove.

    The Perfect Fit for Marine Environments

    Anyone who lives on a boat knows that every centimetre of space is precious. When it comes to fitting out your floating home, you’re not just choosing appliances for their function; you’re looking for pieces that fit neatly into a compact, self-contained world. This is exactly where the Morso Squirrel stove really comes into its own, proving time and again why it’s such a popular choice for narrowboats, yachts, and other vessels.

    Morso Squirrel 1442

    It all starts with its small footprint. Unlike those bulky stoves designed for houses, the Squirrel is built to be tucked away neatly into tight corners, saving that all-important living space without compromising on heat. For life afloat, this clever, compact design isn’t just a bonus—it’s essential.

    The Heartbeat of the Cabin

    But it’s not just about size. The stove’s very construction is perfectly matched to the unique challenges of a marine climate. Its heavy-duty cast-iron body acts like a thermal sponge, soaking up a tremendous amount of heat from the fire and then radiating it out slowly and consistently.

    This radiant heat is the key. It creates a deep, bone-dry warmth that pushes back against the persistent damp and chill that every boater is familiar with. Think of it less like the quick, superficial blast from a fan heater and more like the steady, comforting warmth of the sun. When you look at various marine stoves on the market, the Morso Squirrel’s ability to deliver this kind of consistent, penetrating heat from such a small unit is truly exceptional.

    The multi-fuel burner has truly transformed our time on the water! Its efficient design allows for quick heating. We’ve spent countless cozy evenings in our cabin, enjoying the warmth it radiates even in the coldest winter months. It’s an absolute game-changer, making our adventures not only more comfortable but also more enjoyable. I can’t imagine having any other stove for our boating trips!

    The Goldilocks Heat Output

    The Morso Squirrel stove typically has a nominal heat output of around 5kW. For most boat cabins, this is what you’d call the ‘Goldilocks’ level—not too hot, not too cold, but just right. It’s powerful enough to warm the entire space efficiently without turning your cosy cabin into an unbearable sauna.

    This balanced output is precisely what makes it so practical for day-to-day life on a boat. It provides that reliable, gentle warmth needed to transform a cold, damp space into a cosy and inviting home. This combination of clever design, robust construction, and ideal heat output explains why the Squirrel is so much more than just a heater; for countless boaters, it’s the warm heartbeat of their life afloat.

    Understanding Its Technical Specs and Performance

    Beyond its classic good looks and compact size, the real magic of a Morso Squirrel stove is in its engineering. Getting to grips with the technical specs isn’t about memorising dry numbers. It’s about understanding how those details give you reliable warmth, save you fuel, and create a safer home on your boat. These are the figures that really matter when you’re living with it day in, day out.

    Let’s break down what makes it tick. The stove’s dimensions and weight are carefully designed for stability in a marine environment, while its flue diameter is a critical measurement for a safe and effective exhaust system.

    Performance And Environmental Credentials

    One of the best things about the modern Morso Squirrel stove is how efficient and clean-burning it is. It is DEFRA-approved, which is essential if you’re navigating through UK smoke control areas—a common reality for many of us on the inland waterways.

    The image below gives you a clear picture of how the Defra approved Morso Squirrel 1412 stacks up against a standard wood stove, showing its superior burn time and fuel efficiency.

    Morso Squirrel vs Standard Boat Stove Performance

    As you can see, the Morso Squirrel gives you longer burn times with less fuel, making it a more practical and economical choice for keeping your boat warm.

    To put some numbers on it, the Morso 1412 DEFRA model is a great example. We’ve put together a quick table to summarise its key details.

    Morso 1412 Squirrel Stove At A Glance

    FeatureSpecification
    Energy RatingA+
    Nominal Heat Output4.6 kW
    Efficiency83%
    CO Emissions0.10%
    Flue Outlet125mm (Top/Rear)
    DEFRA ApprovedYes
    Fuel TypeWood & Smokeless Fuel

    This efficiency is officially recognised. With an outstanding A+ energy rating and an efficiency of around 83%, a massive chunk of the energy from your fuel is turned directly into useful heat for your cabin, with very little wasted up the flue.

    The Airwash System And Its Benefits

    Ever wondered how the glass on a Morso Squirrel stays so clear, giving you that beautiful view of the flames? That’s the clever built-in airwash system at work. It’s not just there for the looks; it’s vital for the stove’s performance.

    The system channels a super-heated curtain of air down the inside of the glass door. This air stream does two important jobs:

    • Keeps the Glass Clean: It forms a barrier that stops soot and tar from building up on the glass.
    • Improves Combustion: This pre-heated air is drawn into the firebox, providing the secondary air needed for a much cleaner and more complete burn.

    A cleaner burn means you get more heat from your fuel and produce fewer emissions. It’s a perfect example of Morso’s talent for blending traditional design with smart, modern combustion technology.

    The flue system is just as important for performance. A properly installed flue gives you a good draw, which stops smoke from spilling into the cabin and helps the stove run at its best. On a boat, dealing with short flue heights is a key factor. If you want to learn more, you can check out our guide on The Benefits Of Stainless Steel Twin Wall Insulated Flues For Boat Stoves to ensure your stove works perfectly, no matter the weather.

    Ensuring a Safe Stove Installation on Your Boat

    When you live on the water, safety isn’t just a priority; it’s the foundation of everything you do. Fitting a beautiful Morso Squirrel stove is an exciting upgrade, but doing it safely is absolutely non-negotiable. It’s about protecting your boat, your investment, and most importantly, yourself.

    A proper installation starts from the ground up—with the hearth. This isn’t just a decorative base; it’s your first line of defence. The hearth must be made from a non-combustible material like slate, tile, or concrete. It also needs to be large enough to extend well beyond the stove’s footprint, ready to catch any stray embers that might try to escape.

    Likewise, the areas around the stove, especially the bulkheads (your boat’s walls), need serious protection. Just leaving a bit of a gap isn’t going to cut it. You have to install proper heat shielding, usually a combination of an air gap and a fire-retardant board. This is crucial to stop the intense radiant heat from creating a fire risk in the nearby woodwork. For a good overview of the general principles, this wood burning stove installation guide is a helpful resource.

    The Crucial Role of a Marine-Specific Flue Kit

    One of the most dangerous mistakes any boater can make is to try and use substandard flue parts or flue parts made from outdated materials for a marine installation. A boat moves, it flexes, and it lives in a harsh, damp environment. A proper marine flue kit, one that complies with safety standards and best industry practices and is engineered specifically for these challenges, is absolutely essential for your safety.

    Using the wrong type flue pipes is a serious hazard. The correct flue parts are designed to withstand the constant vibration and potential corrosion found on a boat, which can lead to cracks and dangerous leaks of smoke and carbon monoxide.

    A compliant system has several key components:

    • Twin-Wall Insulated Sections: Where the flue passes through your deck and roof (the cabin top), it absolutely must be a twin-wall insulated pipe. This design keeps the outer surface temperature low, and flue gases hot and rising efficiently. It is even better practice to install a flue that is entirely made of twin-wall insulated stainless steel.
    • Deck Collar: This is a purpose-built fitting that creates a totally waterproof and heat-proof seal where the flue exits the boat. It’s essential for keeping rain out and heat safely contained.
    • Secure Brackets: The entire flue system has to be securely attached, and sections longer than 1.2 meters should be supported by brackets. This stops it from moving or shaking apart as the boat shifts and vibrates on the water.

    For anyone planning to tackle this job, our detailed guide on how to install a boat stove gives you a step-by-step walkthrough of these critical stages.

    Your Most Important Safety Device

    While the physical installation is vital, your single most important piece of safety kit is a carbon monoxide (CO) alarm. Carbon monoxide is a colourless, odourless gas produced whenever fuel doesn’t burn completely. In an enclosed space like a boat cabin, it can be lethal.

    You should install at least one, though preferably two, marine-grade CO alarms. Always place them according to the manufacturer’s instructions—this usually means away from the stove itself, in sleeping areas and main living spaces. Test them regularly, just as you would a smoke alarm.

    Think of your CO alarm as the silent guardian for your Morso Squirrel stove. It’s the one device that will alert you to an invisible danger, and it is an absolute necessity for every single boat with a fuel-burning appliance on board.

    Operating and Maintaining Your Morso Squirrel

    Getting the best out of your Morso Squirrel stove is about more than just lighting it up. It’s about getting to know its personality – understanding its rhythms and what it needs to perform at its best. A bit of know-how and some regular upkeep are all it takes to guarantee years of reliable, cosy warmth.

    Your relationship with the stove starts with the very first fire, a vital step called ‘curing’. The heat-resistant paint on your new stove needs to be baked on properly. For the first few times you use it, stick to small, gentle fires, and build up the heat gradually over several sessions. This simple process is what stops the paint from blistering, giving you that tough, long-lasting finish.

    Mastering Fuel and Air Controls

    What you burn has a massive effect on your stove’s performance. Many boaters love the long, slow burn and beautiful, dancing flames you get from seasoned hardwood. But if you need steady, all-night warmth to keep the cabin from getting chilly, smokeless coal is your best bet, as it can smoulder away for hours. We recommend Oxbow coal for best performance and low ash.

    The real skill in running a Morso Squirrel, though, is in getting the hang of its air controls. Think of them as the stove’s lungs; they regulate the fire’s intensity and how efficiently it burns fuel.

    • Primary Air: This is your starter. A wheel opening at the bottom of the stove feeds air from underneath the grate. It’s absolutely essential for getting the fire going and is the main control for burning smokeless fuels.
    • Secondary Air (Airwash): This clever control brings pre-heated air down over the inside of the glass door. It’s the secret to a clean burn with wood, creating those hypnotic secondary flames and, just as importantly, keeping the glass from sooting up.

    When you’re burning wood, you’ll start with the primary air wide open. Once the fire is roaring away, you close it down and rely almost entirely on the secondary air. For smokeless coal, you’ll want to keep that primary air partially open to keep the fuel bed glowing nice and hot.

    The aim is to find that perfect sweet spot – maximum heat for minimal smoke. A lazy, orange flame just creates soot, while a roaring, bright inferno will burn through your fuel in no time. A lively, dancing yellow flame is what you’re looking for.

    A Simple Maintenance Checklist

    Looking after your stove isn’t a chore; it’s just protecting your investment and making sure it runs safely. Weaving these simple tasks into your routine will keep your Morso Squirrel in fantastic shape. To see how these stoves fit into a wider heating setup, you can check out the full range of Morso boat stoves and available accessories.

    Regular Checks:

    • Empty the Ash Pan: Don’t let it get completely full. An overflowing ash pan can cause the grate to overheat and warp.
    • Clean the Flue: This is non-negotiable. Regular sweeping prevents the build-up of flammable creosote, which is a major fire risk.
    • Check Firebricks: Have a quick look for any cracks or crumbling bits. These bricks are there to protect the stove’s steel body, so replace them if they look damaged.
    • Inspect Rope Seals: Check the rope seals around the door and the glass. If they look frayed or squashed flat, they won’t be creating an airtight seal. That means your fire will be harder to control and much less efficient.
    • Annual Check Up and Service: Our engineers can service your stove and carry out safety checks. This is best done on an annual basis, before the heating season begins. We can issue a solid fuel stove safety certificate with your annual stove service.

    Got Questions About The Morso Squirrel Stove?

    When you’re thinking about adding something as significant as a solid fuel stove to your boat, it’s only natural to have a few questions. In fact, asking questions is essential. You need to know what it’s really like to live with it day-to-day before you make the leap.

    We’ve pulled together some of the most common queries we hear from boaters on the towpath and in online forums. Here are some straight-talking answers to help you decide if the Morso Squirrel stove is right for you.

    Can I Really Leave the Stove Burning Overnight?

    This is probably the number one question we get asked, and the short answer is yes, you can – but you need to do it correctly. The Morso Squirrel is a champ at long, slow burns, especially with the right fuel. Its solid cast-iron body is brilliant at holding onto heat and radiating it out long after the flames have died down.

    To get a safe overnight burn, you’ve got to get your routine down:

    • Use the Right Fuel: Seasoned hardwood is great for a roaring fire, but it burns far too quickly for an all-nighter. Smokeless fuels like Oxbow Newheat are what you want; they’re made to smoulder away for hours.
    • Master the Air Controls: Get the fire nice and hot first, then shut the primary air supply right down. This starves the fire of oxygen, slowing the burn rate to a crawl.
    • Keep That Flue Clear: A clean, clear flue is non-negotiable. It’s vital for preventing any build-up of carbon monoxide.

    And speaking of which, always, always have a working carbon monoxide alarm in your cabin. It’s the most important bit of safety kit you own when you’re heating with a stove.

    Which Model Is Best for a Boat?

    Morso has rolled out a few different versions of the Squirrel over the years. But for boaters here in the UK, the Morso 1412 DEFRA-approved model is almost always the one to go for.

    Being DEFRA-approved means you can legally use it in “smoke control areas,” which cover a surprising number of canals and rivers running through towns and cities. This model is designed to burn fuel more completely, so it produces very little smoke. If you opt for a non-DEFRA stove, you could find yourself restricted on where you can moor up and light your fire in the winter.

    A key advantage of the Morso Squirrel stove is its versatility. While the DEFRA-approved 1412 is a standout for UK waterways, the core design’s reliability and compact size make any well-maintained Squirrel a fantastic choice for marine life.

    How Much Space Do I Need Around the Stove?

    Clearances are a massive safety issue. You absolutely cannot just shove the stove up against a wooden bulkhead and hope for the best. The manufacturer gives very specific minimum distances to any combustible materials, and you have to follow them to the letter.

    As a general rule of thumb, you’ll need:

    • Proper Heat Shielding: This means installing a fire-retardant board with an air gap behind and to the sides of the stove.
    • A Non-Combustible Hearth: The stove needs to sit on a solid base of stone, tile, or steel that sticks out in front and to the sides.

    These aren’t just suggestions; they’re essential for stopping your boat from catching fire. Any professional marine installer will make sure your setup meets the relevant standards, which are the official guidelines for installing stoves on boats.

    For anyone living on the water, getting the heating right is what transforms a boat into a proper, cosy home. The Morso Squirrel has been proving its worth for decades, providing a reliable, comforting heart for countless cabins.

    For expert advice and certified installation of your Morso Squirrel stove, trust the specialists at Marine Heating Solutions. We ensure your boat is warm, safe, and fully compliant with all marine standards.


    For quotes and bookings, call or email us here.


  • Propane vs Butane: Choosing the Right Fuel for Marine LPG Installations

    When it comes to powering marine appliances and systems, choosing the right fuel is essential. Propane and butane are two common liquefied petroleum gases (LPG) often used for marine applications. While both fuels have their advantages, propane is often the preferred choice for marine LPG installations. In this article, we will explore the difference between propane and butane and discuss why propane is better suited for marine use.


    For quotes and bookings, call or email us here.


    Propane and Butane: The Basics

    Propane and butane are both hydrocarbon gases derived from natural gas processing and crude oil refining. They can be compressed into a liquid state for easy storage and transportation. These relatively clean-burning gases provide an efficient and convenient energy source for various marine appliances, such as cookers, ovens, boilers, water heaters, and refrigerators.

    Propane:

    Propane has several characteristics that make it well-suited for marine use:

    1. Lower boiling point: Propane has a lower boiling point compared to butane, which means it vaporizes more easily even in colder temperatures. This is crucial for marine applications where the fuel needs to vaporize efficiently to enable proper combustion.
    2. Better cold-weather performance: Propane performs exceptionally well in colder climates, making it a reliable fuel choice for boats that are in use in cold weather conditions. It remains in a gaseous state at temperatures as low as -44°F (-42°C), ensuring that your appliances will continue to function optimally.
    3. Higher energy content: Propane has a higher energy content per gallon compared to butane. This means that it provides more heat and power for your marine appliances, allowing you to cook, heat water, and run other on board systems more efficiently.

    Butane:

    Butane is generally no longer considered a suitable choice for marine LPG installations due to certain limitations:

    1. Higher boiling point: Butane has a higher boiling point than propane, which means it requires higher temperatures to vaporize. In colder temperatures, butane may struggle to convert from its liquid to gaseous state, making it less reliable for marine use. Appliances supplied with Butane will most likely be dangerously under gassed in cold weather conditions and could fail to function during winter months.
    2. Lower energy content: Butane has a lower energy content per gallon compared to propane. This means that it provides less heat and power to your boat’s appliances
    3. Equipment Compatibility with Current Safety Standards: Since 2010, the gas safety standard for boats requires LPG cylinder regulators to incorporate an Over Pressure Shut Off (OPSO) device. There are currently no Butane compatible cylinder regulators with OPSO on the market. Since cylinder regulators should be replaced every 10 years, any Butane installations found on boats today are either using out of date regulators or are not compliant with the safety standard.

    Conclusion

    In conclusion, while both propane and butane are viable options for certain LPG applications, propane is generally considered more suitable for marine LPG installations. Its lower boiling point, better cold-weather performance, and higher energy content make it a reliable and efficient fuel choice for powering appliances and systems on board. When equipping your boat with an LPG system, opting for propane will likely provide you with optimal performance and reliability in various marine environments.

    Remember, safety always comes first when working with any type of fuel. Ensure that your marine LPG equipment and pipework are installed by a GasSafe registered professional and always follow proper safety guidelines to enjoy a worry free boating experience.


    For quotes and bookings, call or email us here.