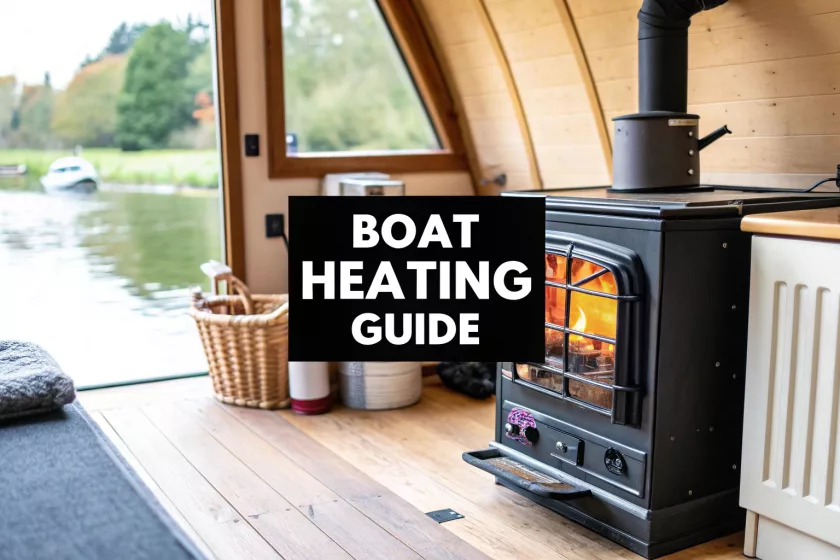
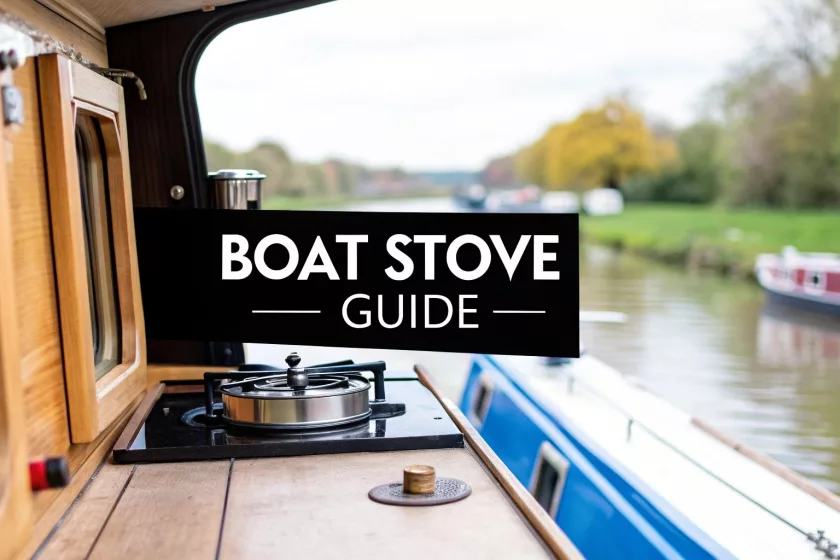
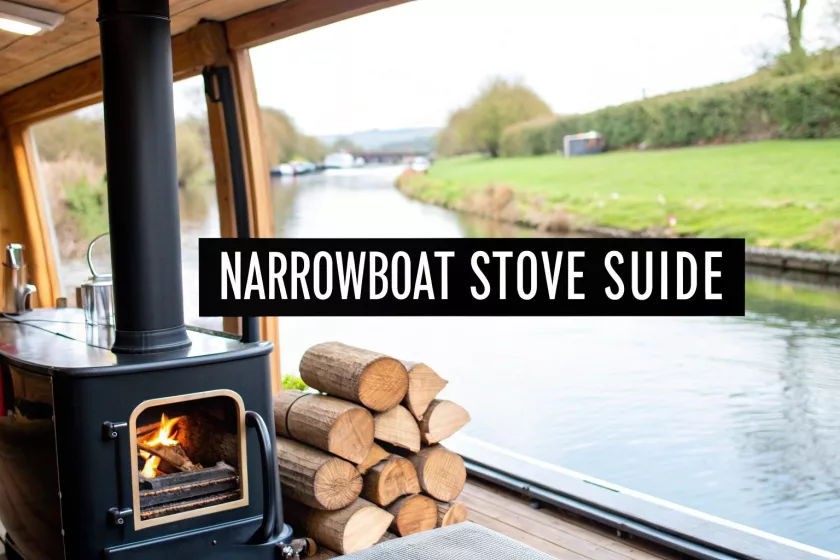
A proper canal boat central heating system isn’t just a nice-to-have; it’s the beating heart of a comfortable, year-round life on the cut. It’s what turns a simple narrowboat into a warm, inviting home, no matter how grim the weather gets outside.
This guide will walk you through the big decisions, putting the most popular systems—diesel, solid fuel, and LPG—head to head. We’ll get into how each one actually works, what you can expect to pay to run them, and which is going to be the best fit for you and your boat.
Once you get a handle on the core differences, you’ll be able to confidently pick a boat heating system that makes sense for your boat’s size, how you plan to use it, and your budget.
A well-chosen heater is the difference between simply owning a boat and truly living aboard. It’s what turns those chilly winter evenings into properly cosy nights in your floating home.
Let’s make sure your boat stays a warm sanctuary, all year long.
Comparing the Top Three Canal Boat Central Heating System Types
Let’s be honest, not all heating systems are created equal, and the right choice for your canal boat depends entirely on how you plan to use it. With over 80,000 leisure boats on the UK’s waterways, modern comforts are no longer a luxury—they’re expected. If you’re curious about how we got from basic working vessels to today’s floating homes, this history of UK canals is a fascinating read.
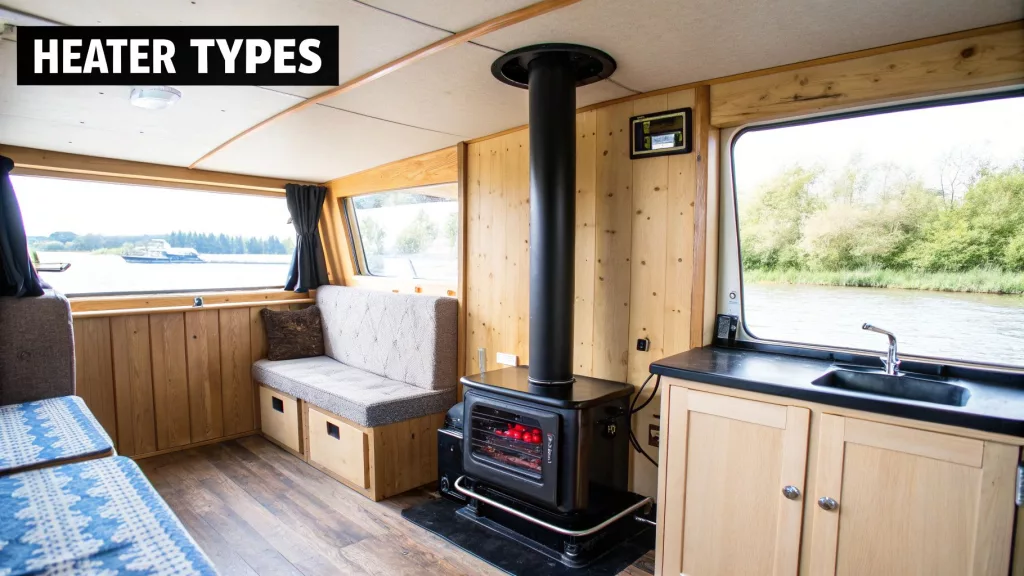
When it comes to central heating, your main options really boil down to three distinct types.
You can think of a diesel system as a compact, dedicated boiler for heating and providing hot water via a calorifier. An LPG system can be much like your boiler at home, just cleverly adapted for life afloat. Then you have the classic solid fuel stove with a back boiler—the traditional heart of the boat, a rustic fireplace that also happens to heat your radiators.
Heating System Comparison At a Glance
To make things a bit clearer, here’s a quick rundown of the main systems side-by-side. Think of this as your cheat sheet for understanding the core differences at a glance.
Liveaboards seeking a traditional feel and off-grid heat source.
Cosy, dry heat and independence from electrical systems.
Each of these has its place on the cut. Your job is to figure out which one aligns best with your life on the water.
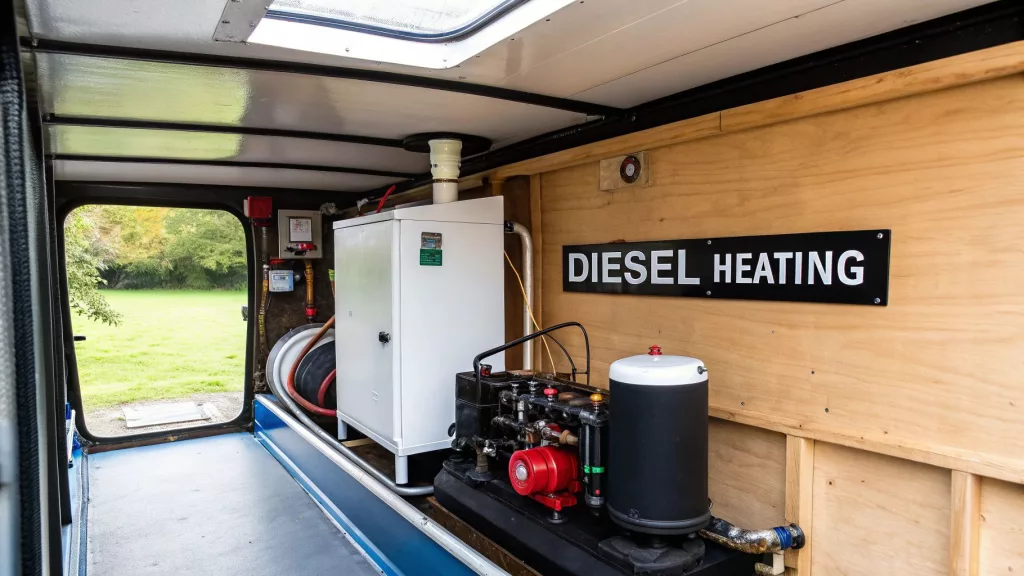
Diesel-Fired Heating: The Modern Choice
For a lot of modern narrowboat owners, diesel central heating has become the undisputed champion. It’s prized for being incredibly efficient and just so convenient. Think of it as your boat’s own miniature, fully automated boiler.
These clever bits of kit simply tap into your main engine’s fuel tank, burning a tiny amount of diesel to heat up a water circuit. This hot water then gets pumped through radiators to warm your cabin, and also through a calorifier to give you hot water at the taps. The whole show is run by a simple control panel, often with a programmable thermostat for that brilliant ‘set-it-and-forget-it’ warmth.
The biggest win here is reliability. You’ve already got a massive fuel tank on board, so a diesel system gives you powerful, consistent heat at the push of a button, no matter what the weather is doing outside.
The process itself is surprisingly straightforward, and these compact units can really kick out some serious heat. If dependable performance is what you’re after, taking a look at the various diesel boat heating options is a sensible next step to keep your boat cosy all year round.
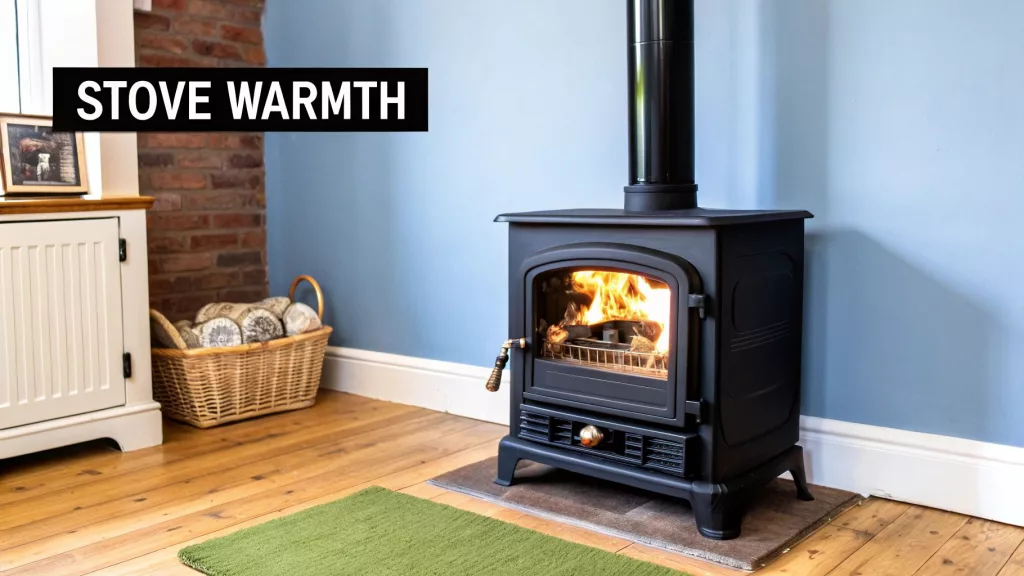
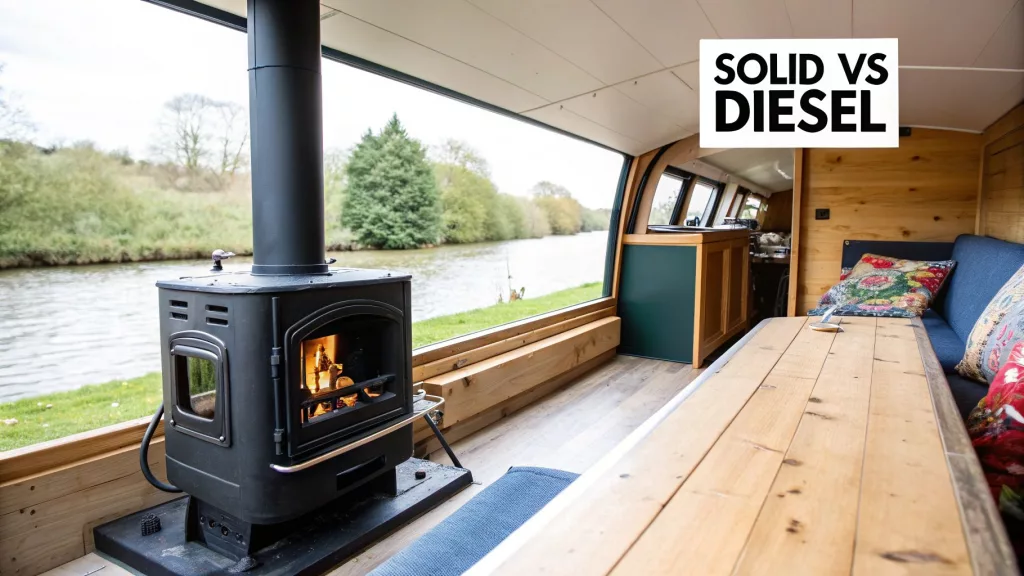
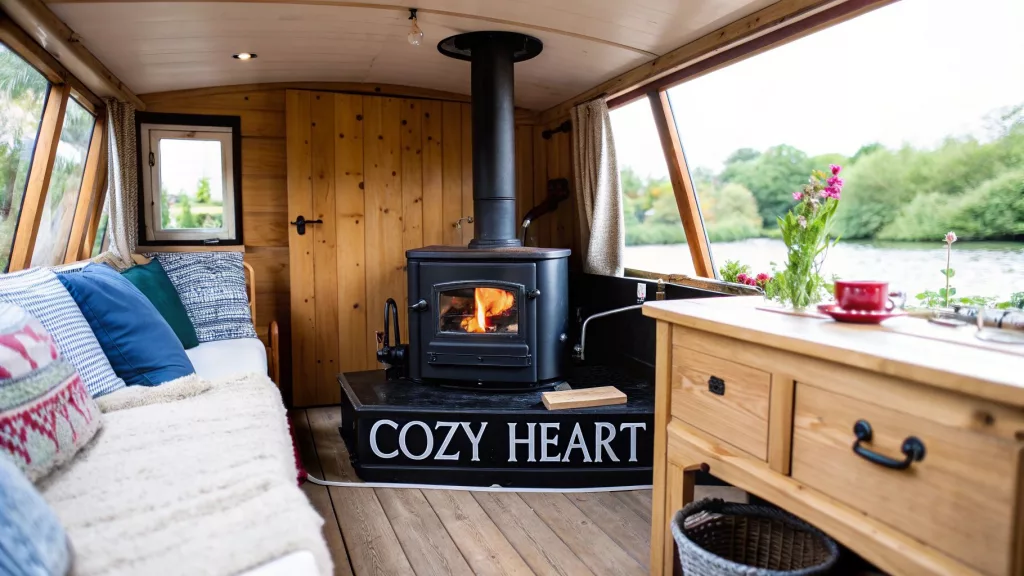
Solid Fuel Stoves: The Heart of Your Boat
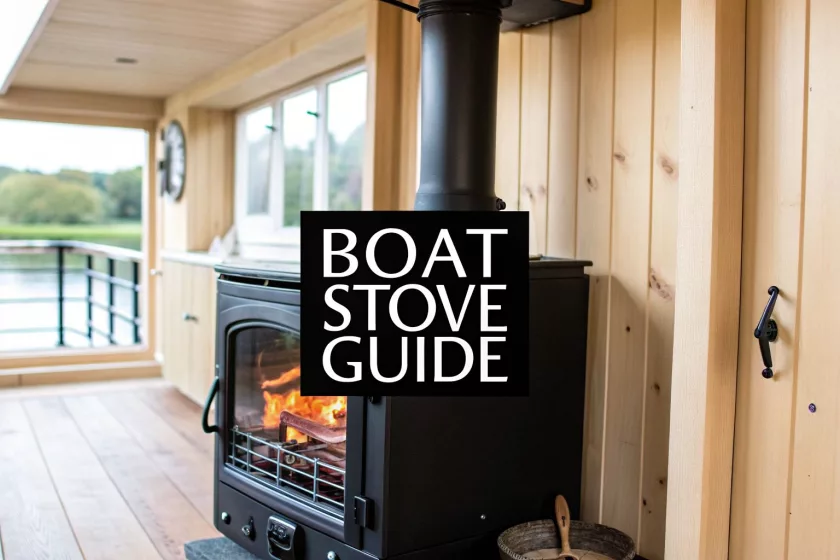
For a lot of boaters, there’s nothing quite like the gentle glow of a solid fuel stove. It’s the very definition of cosy narrowboat life. But it’s more than just a beautiful focal point; fit one with a back boiler, and it can power your entire canal boat central heating system.
This clever setup uses the heat from your fire to warm up water, which then gets pumped around your radiators and through your calorifier for hot taps. It’s a system that creates a deep, dry heat that really gets into the bones of the boat, making it perfect for continuous cruisers and anyone wanting a proper, traditional off-grid life.
This way of life is definitely hands-on. You’ll be sourcing and storing fuel, and the daily ritual of lighting the fire becomes part of your routine. It’s a rewarding process that connects you to your boat in a really fundamental way.
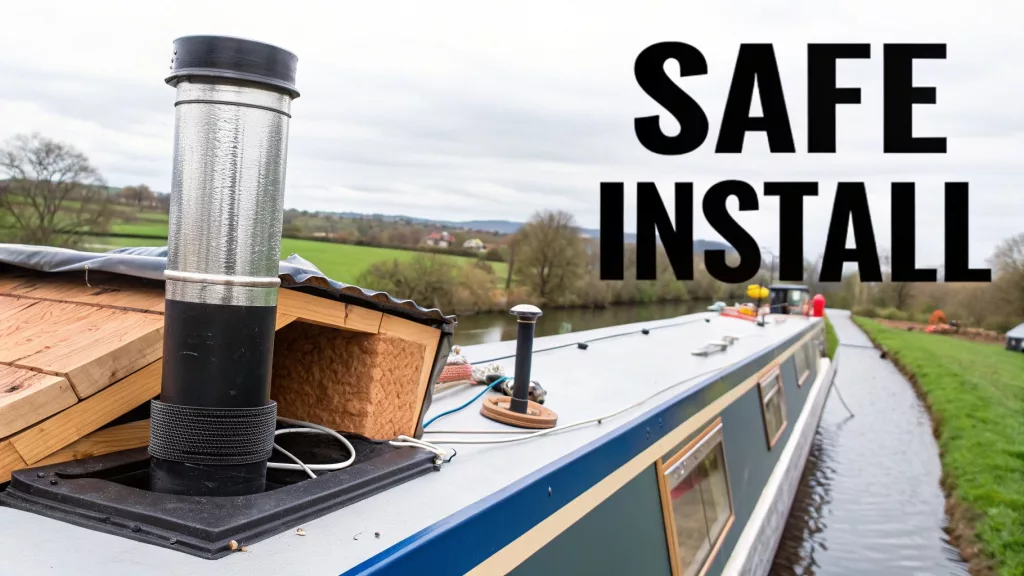
Of course, with any fire, safety has to be the top priority. A properly installed flue and a working carbon monoxide alarm are completely non-negotiable. If you’re curious about the different models out there, you can take a closer look at our post about narrowboat wood burning stoves or browse our Boat Appliances section.
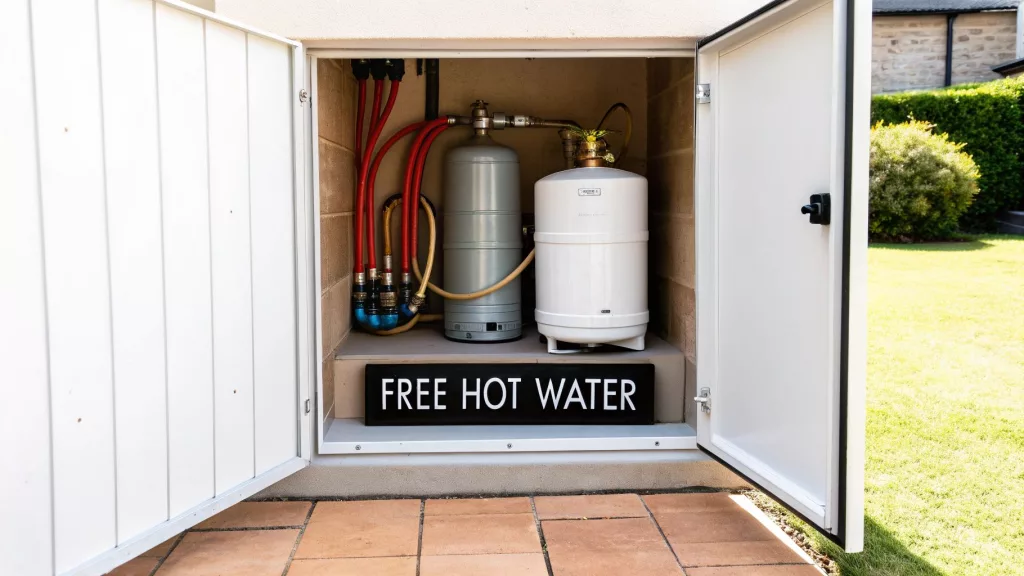
Integrating Your Engine for Free Hot Water
One of the cleverest bits of design on a narrowboat is the ability to generate ‘free’ heat just by running your engine. As you’re cruising along the cut, your engine is producing a massive amount of waste heat. Instead of just letting it dissipate, a well-designed system can capture that energy and give you a tank full of piping hot water without burning any extra fuel.
The magic happens thanks to a piece of kit called a calorifier. You can think of it as a highly insulated hot water tank that also works as a heat exchanger. Hot coolant is diverted from the engine and pumped through a coiled pipe inside the calorifier, transferring its heat to your domestic water supply as you chug along.
With an estimated 8,580 narrowboats being used as permanent homes in the UK, making the most of every bit of energy is crucial for comfortable living, especially through the winter months.
Many modern calorifiers now come with a ‘twin coil’ system. This is a game-changer, as it lets you heat your water from two different sources. You can use your engine’s heat when you’re on the move, and then switch over to your diesel heater or a solid fuel stove’s back boiler unit when you’re moored up. It’s this kind of integration that makes for a truly efficient off-grid home.
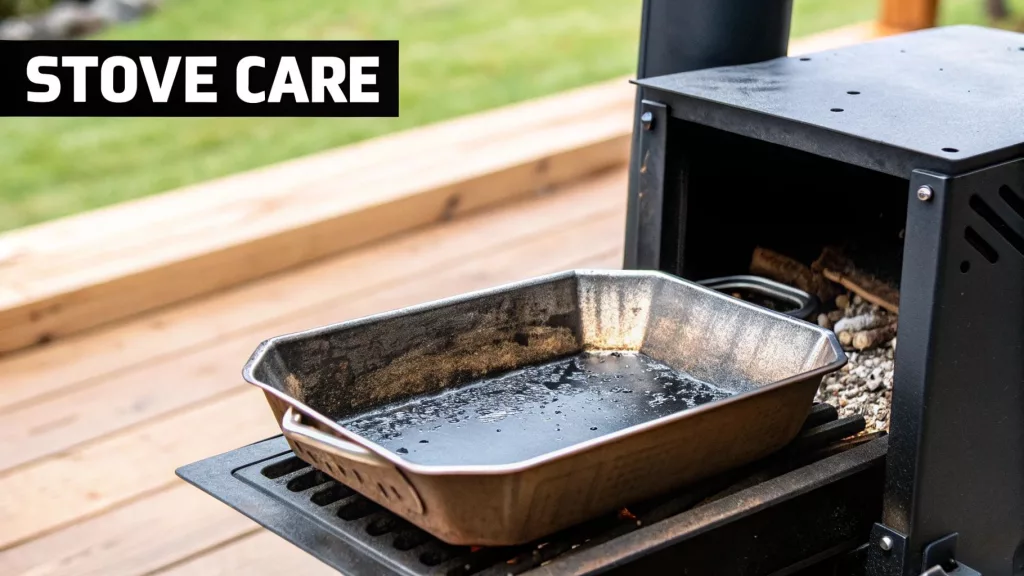
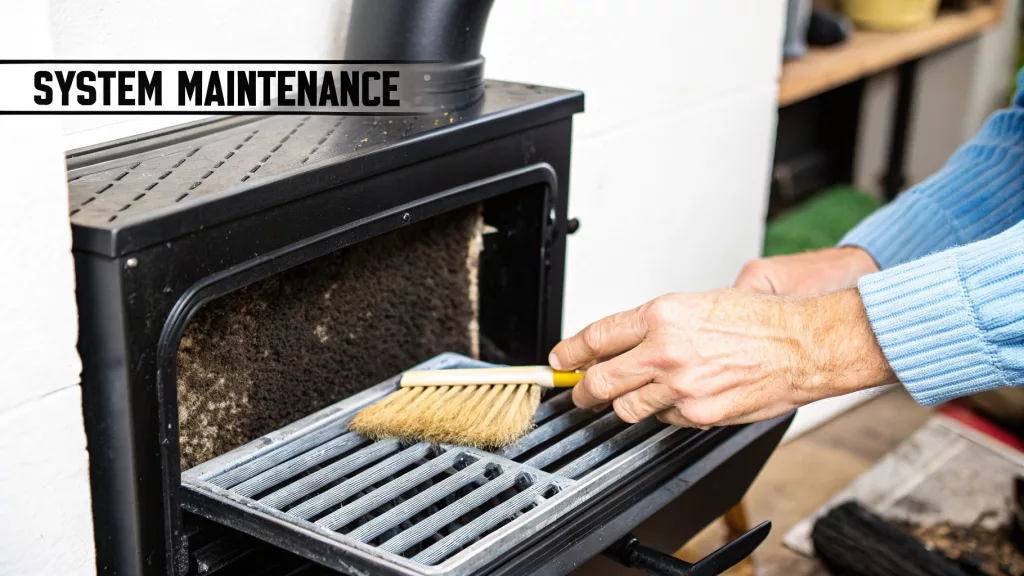
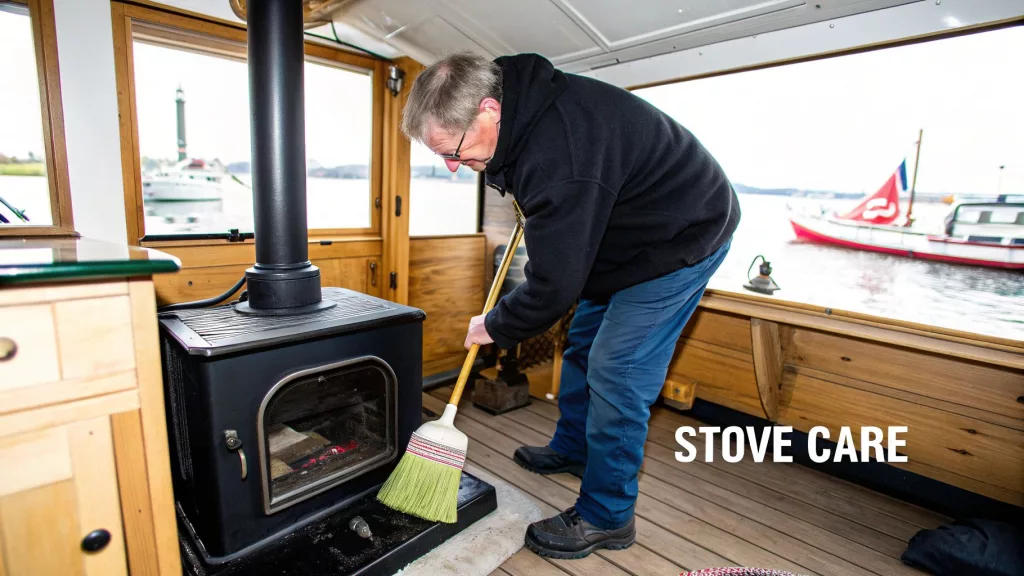
Looking After Your System: Safety and Maintenance
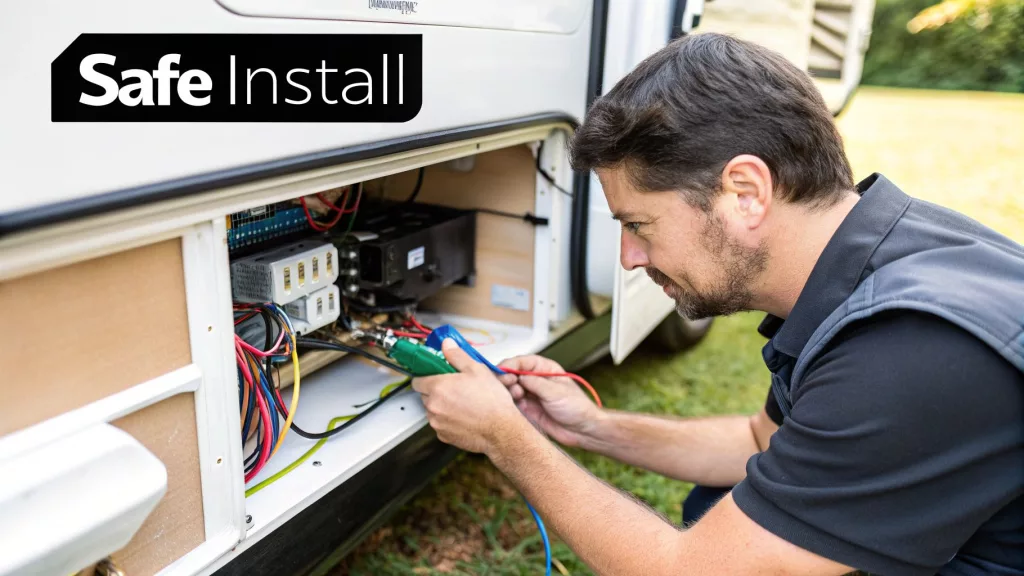
Getting your canal boat central heating system fitted and then keeping it in good nick is about more than just staying warm. It’s about safety, efficiency, and making sure the whole setup lasts as long as it should. When it comes to diesel and gas systems, we can’t stress this enough: get a professional to install it. It’s the smartest money you’ll spend, avoiding terrifying risks like fuel leaks or, worse, carbon monoxide poisoning.
Everything on your boat, especially fuel lines, exhausts, and ventilation, needs to meet the Boat Safety Scheme (BSS) standards. This isn’t just red tape; it’s a non-negotiable part of keeping you safe.
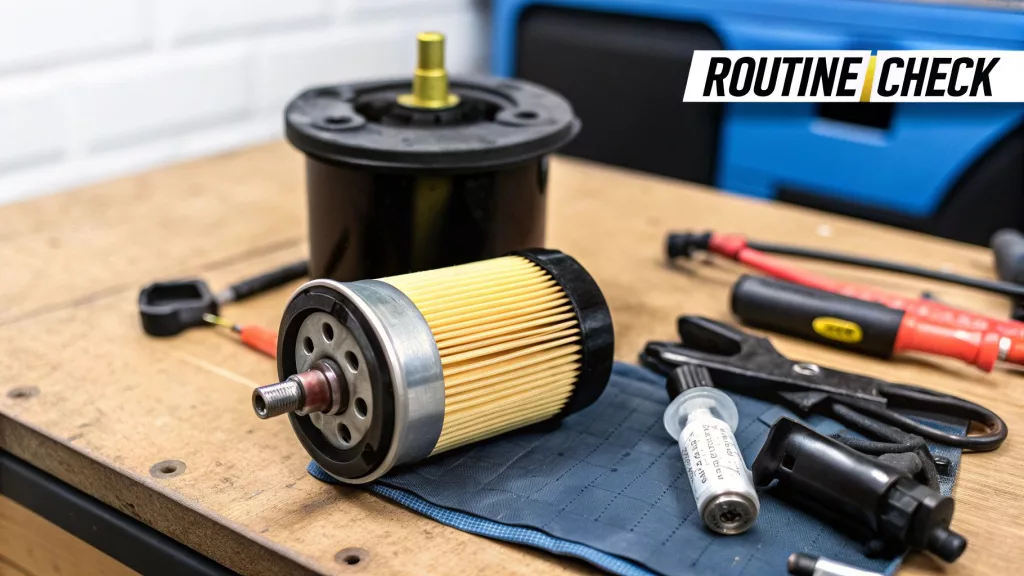
Your annual to-do list should always include a few key checks. Clean out the fuel filters, top up the antifreeze if needed, and give the flue pipes a good inspection for any soot build-up or blockages. A little bit of regular attention keeps the system running sweet, saves you a bit on fuel, and gives you that all-important peace of mind.
And while we’re on the topic of safety, it’s not just about the heating system itself. Every boater should know how to operate a fire extinguisher – it could make all the difference in an emergency.
Finally, a CO alarm is an absolute must-have on any boat with appliances that burn fuel. It’s a simple, cheap bit of kit that protects you, your family, and your boat from dangers you can’t even see.
Common Canal Boat Heating Questions Answered
So, what are the big questions people ask when it comes to heating their boat? Let’s dive into a few of the most common ones we hear.
How Much Does It Cost to Run?
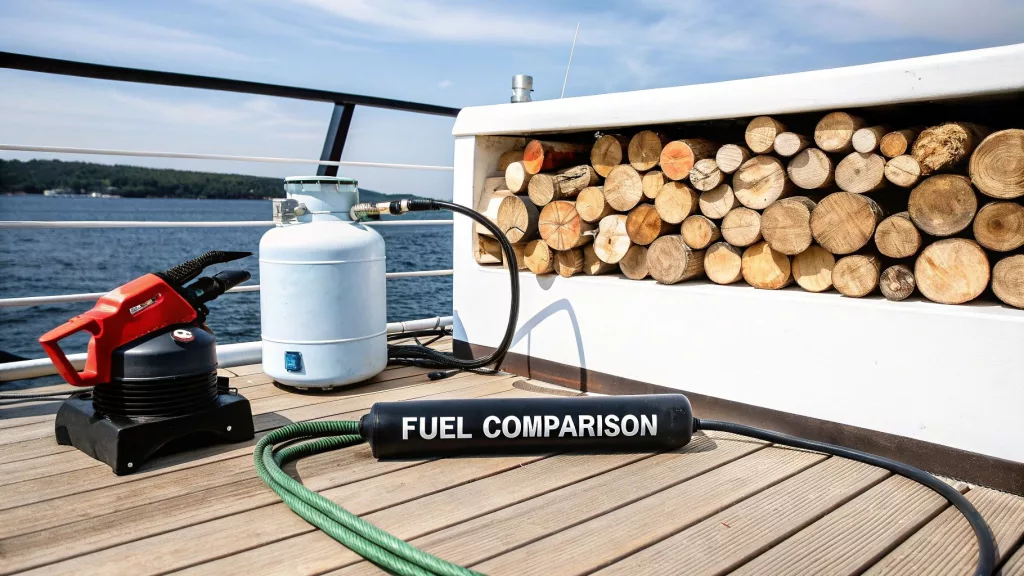
This is the classic “how long is a piece of string?” question. The running costs really do hinge on the system you choose and how you use it.
Diesel systems are generally pretty efficient and their fuel costs are predictable, making budgeting a bit easier. Solid fuel can be incredibly economical, especially if you can source your wood or coal cheaply, but LPG often works out as the most expensive option for keeping your boat warm all the time.
Can I Fit It Myself?
While plenty of experienced boaters with good practical skills will happily tackle fitting a solid fuel stove, we’d always recommend getting a professional in for diesel and gas systems. It’s not just about getting it working; it’s about making sure it’s safe.
Proper installation is critical to meet the Boat Safety Scheme (BSS) standards. Getting it wrong can lead to some really serious risks, like carbon monoxide leaks, which you absolutely don’t want to mess with.
What’s Best for a Continuous Cruiser?
For those living on the cut full-time, flexibility is king. That’s why many continuous cruisers swear by having two different heating systems. A popular and effective setup is a solid fuel stove paired with a diesel heater.
The stove gives you that constant, dry, off-grid heat that’s so lovely on a cold winter’s day. Then, the diesel heater offers quick, automated warmth on demand—perfect for chilly mornings or when you get back to the boat late. This combination gives you brilliant flexibility, covering all bases no matter the weather.
What Canal Boat Central Heating Systems Do You Install?
For professional advice on the best canal boat central heating system for your vessel, contact the experts at Marine Heating Solutions. Find out more about the heaters we sell by browsing our Boat Appliances section, and get in touch for a quote today!
Living on a boat is an incredible experience, blending the comforts of home with the joys of a hobby. But it’s a two-sided coin. The dream of freedom on the water is very real, but so is the constant need for attention and upkeep. It demands far more hands-on maintenance than your average house on land, so before you take the plunge, let’s get a real feel for what you’re signing up for when looking for a boat for living.
There’s a certain magic to waking up to the sound of ripples against the hull and seeing wildlife just outside your window. It’s a liberating lifestyle. However, that romantic charm has to share space with the practical realities of daily chores. You’ll find yourself balancing the serenity of it all with regular hull checks and engine maintenance.
One of the best parts of living on the cut is the community. Your neighbours often become a sort of extended family, always ready to share tools, advice, or just a cup of tea. That said, life on the move, especially near busy locks and bridges, requires a good deal of flexibility in your schedule.
Costs can be a bit of a moving target. You’ve got your regular outgoings like fuel, licence, and mooring fees, but it’s the unexpected repairs that can really test your savings. A smart budget isn’t just about the planned upgrades; it’s about having a healthy buffer for those emergency fixes that always seem to pop up.
And then there’s the paperwork. Safety regulations, enforced by authorities like the Canal & River Trust, are there to protect everyone, but they do mean staying on top of your admin. From the Boat Safety Scheme (BSS) certificate to gas checks, compliance is absolutely non-negotiable. A huge part of this is ensuring you have reliable, safe heating and plumbing systems installed.
The Liveaboard Lifestyle at a Glance
Choosing to live on a boat is a significant lifestyle shift. To help you see the bigger picture, here’s a quick rundown of the highs and lows you can expect.
Aspect
Potential Advantages
Potential Challenges
Freedom & Mobility
Unrivalled ability to change your scenery and explore the UK’s beautiful waterways at your own pace.
Constant need for logistical planning, from navigating routes to finding services like water points and pump-outs.
Community
A unique, tight-knit community where mutual support and camaraderie are part of daily life.
The close quarters can sometimes feel a bit intense, and privacy might be less than you’re used to.
Financials
Potentially lower living costs compared to traditional housing, with no council tax.
Costs can be unpredictable, with licence fees, fuel, and sudden, expensive repairs always a possibility.
Maintenance
A fantastic opportunity to become self-sufficient, learn new DIY skills, and truly make your home your own.
The maintenance is relentless. From engine care to blacking the hull, there is always something that needs doing.
Ultimately, life afloat is a constant trade-off. It’s about weighing the incredible freedom against the very real responsibilities that come with it.
Matching Your Boat to Your Lifestyle
The first big decision is the boat itself, and this really comes down to weighing size against manoeuvrability. A classic narrowboat, for instance, is perfectly designed to slip through the UK’s narrow locks and canals. On the other hand, a widebeam barge feels much more like a floating flat, offering heaps of space but limiting where you can travel. Think of it as choosing between a nimble city car and a spacious SUV – each has its place, but they aren’t interchangeable.
The trend towards living afloat is growing. According to the Canal & River Trust, the number of boats without a permanent home mooring has been steadily increasing, highlighting that this is no longer just a niche lifestyle.
For a deeper dive into the specifics of traditional narrowboats, including different hull types, engine options, and popular layouts, have a look at our detailed guide on narrowboat living. It’s packed with information to help you figure out if this classic style of boat is the right fit for you.
Before you go any further, ask yourself a few honest questions:
Do I prize mobility and freedom more than having lots of living space?
Am I genuinely prepared to get my hands dirty with routine engine and hull care?
Have I realistically budgeted for the ongoing costs of heating, plumbing, and licences?
If you can confidently say yes to these, then a life on the water might just be the best decision you ever make, offering breathtaking views and a wonderfully supportive community. If not, it’s better to realise it now and explore other options that might be a better fit.
Choosing Your Liveaboard Vessel
Picking the right boat to live on is a lot like choosing a house – it’s a massive personal decision that has to match your lifestyle, your wallet, and what you dream of doing. Here in the UK, that choice usually comes down to two main players: the classic, skinny narrowboat or the much roomier widebeam barge. Each one offers a completely different way of life on the water.
You can think of a narrowboat as the waterways’ answer to a classic terraced house. It’s got charm and character, and it’s built perfectly for its surroundings—the historic UK canal network. Its slender build, usually 6 feet 10 inches wide, means it can squeeze through just about any canal, lock, and tunnel in the country. That gives you an incredible amount of freedom to explore.
A widebeam, on the other hand, is more like a modern, open-plan flat. Typically between 10 to 12 feet wide, it gives you a feeling of space that’s remarkably close to a home on dry land. All that extra width means you can have more normal furniture, bigger kitchens, and a general vibe that feels a lot more domestic.
Narrowboat: The Go-Anywhere Home
The biggest draw of a narrowboat is its all-access pass to the canal system. If your dream is to be a continuous cruiser and see every last mile of the UK’s canals, a narrowboat is pretty much a no-brainer. They are so much easier to handle, making tight turns and navigating busy spots a whole lot less stressful.
Of course, that freedom comes at a price: living space. The layout is one long line, so rooms just flow from one to the next. This forces you to be smart with storage and embrace a more minimalist way of living. Life on a narrowboat will make you a master of organisation.
Widebeam: The Floating Apartment
A widebeam gives you a level of comfort and space that a narrowboat just can’t touch. That extra few feet of width totally changes the living area. You can have freestanding sofas, a proper dining table, and even separate rooms that don’t feel like you’re in a hallway. For anyone planning to stay put for longer stretches or work from their boat, this extra room can make all the difference to your daily life.
The massive downside, however, is that your travel is seriously restricted. A lot of the UK’s older canals, especially up in the Midlands and the North, have narrow locks and bridges a widebeam simply won’t fit through. Your cruising grounds will be limited to the wider rivers and certain sections of the canal network. That’s a huge factor to weigh up if exploring is a top priority for you.
At its heart, the decision is a straight trade-off between freedom and space. A narrowboat opens up the entire network but makes you live in a corridor. A widebeam gives you home-like comfort but ties you to a much smaller part of the waterways.
Key Technical Considerations
Beyond just narrow versus wide, a few other key things will shape your decision.
Hull Material: The overwhelming majority of canal boats in the UK are built from steel. It’s tough, it lasts, and it’s not too difficult to get repaired. The thickness of the steel—for example, a 10mm base plate and 8mm sides—is a really good sign of the boat’s quality and how long it’s likely to last.
Engine Type: Most modern boats on the inland waterways run on reliable, water-cooled diesel engines from brands like Canaline, Barrus, or Vetus. These are the workhorses of the canals, famous for being durable and pretty good on fuel.
Interior Layout: You’ll generally find two main layouts. The traditional layout puts the bedroom at the bow (front) of the boat, with the kitchen and living area at the stern, right where you steer from. A reverse layout flips that around, putting the social kitchen and living space at the back, which is great if you like to entertain or chat with people as you cruise.
Plumbing is another one of those critical systems you need to get your head around. The type of toilet you have, for instance, makes a big difference to your daily routine. You can dig into the different options in our guide on choosing the right toilet for a boat, which covers everything from simple cassette toilets to the more involved pump-out systems. Getting these on-board essentials right is the key to making sure your floating home is both practical and comfortable.
Budgeting for Your Life Afloat
The dream of living on a boat is incredibly liberating, but turning that dream into a sustainable reality comes down to a solid financial plan. The real cost of life on the water goes far beyond the initial purchase price of the boat itself. To budget realistically, you need to get to grips with a mix of fixed, unavoidable expenses and variable costs that can shift with the seasons and how much you travel.
Getting a handle on these ongoing outgoings is the secret to a stress-free life afloat. Just like a homeowner has to budget for council tax and utilities, a boater needs to plan for licences, insurance, and routine maintenance. If you let these slide, the dream can quickly turn into a massive financial headache.
Being honest about the finances is crucial. We all feel the pinch from time to time, and the boating community is no different. These pressures have sometimes made it difficult for people to keep up with licensing, which has prompted the Canal & River Trust to increase its welfare support for boaters who need a bit of help with costs.
Mandatory Annual Costs
Right, let’s talk about the non-negotiables. These are the expenses that form the bedrock of your annual budget – the costs you absolutely must cover every year to legally keep and use your boat on the UK’s inland waterways.
Canal & River Trust Licence: Think of this as your permit to cruise the canals and rivers managed by the Trust. The fee is based on the length and width of your boat, and you’ll find that widebeams cost a fair bit more than narrowboats.
Boat Safety Scheme (BSS) Certificate: This is the boating equivalent of a car’s MOT. It’s a mandatory safety inspection required every four years to check that your boat’s fuel, gas, and electrical systems are safe. While it’s only every four years, it’s smart to put money aside for it annually.
Insurance: You’ll need at least third-party liability insurance to get your licence in the first place. Most people living aboard opt for more comprehensive cover that protects the boat’s structure and contents, much like you would with home insurance.
Variable and Maintenance Expenses
Beyond the fixed costs, your day-to-day spending will ebb and flow depending on how you live and cruise. These variable expenses are the ones that need careful tracking and a bit of forward-thinking.
Moorings are a classic example. If you decide to be a “continuous cruiser,” you won’t have permanent mooring fees, but you are required to move your boat at least every 14 days. On the other hand, securing a permanent spot in a marina gives you a home base with handy services like electricity and water. This convenience, however, can set you back several thousand pounds a year, especially in popular areas.
Think of your budget as a living document, not a one-time calculation. Regularly reviewing your spending on fuel, gas, and maintenance will help you adapt to changing costs and avoid unwelcome financial surprises.
Here are some of the other essential variable costs to plan for:
Fuel (Diesel): This is what powers your engine for getting about, but on many boats, it also runs the central heating and hot water. Expect your usage to jump up in the winter and during long journeys.
Gas (LPG): Propane or butane gas is the standard for cooking on board. A typical 13kg bottle can last a good few months, but it all depends on how much you’re cooking.
Engine Servicing: Your boat’s engine is just like a car’s – it needs an annual service with oil and filter changes to keep it chugging along reliably.
Hull Blacking: This is a big one. Every 3-4 years, your boat needs to be lifted out of the water so the steel hull can be painted with bitumen (a process known as ‘blacking’). It’s a vital job that protects the hull from rust and corrosion, and it’s one of the biggest single maintenance costs you’ll face.
Here is a table breaking down some of the typical annual costs you might encounter. Remember, these are just estimates, and your actual spending will depend on your boat, location, and lifestyle.
Estimated Annual Costs for a Liveaboard Boat
Expense Category
Estimated Annual Cost Range (£)
Key Considerations
CRT Licence
£600 – £1,500+
Depends on boat length and width. Widebeams are more expensive.
Insurance
£250 – £600
Varies based on boat value, mooring location, and level of cover.
BSS Certificate
£50 – £75 (Pro-rata)
The full cost is £200-£300 every 4 years. Budgeting annually helps.
Mooring Fees
£0 – £10,000+
£0 for continuous cruisers, but marina fees vary hugely by location.
Diesel (Fuel)
£500 – £2,000+
Highly dependent on cruising habits and winter heating needs.
Gas (LPG)
£100 – £300
Based on usage for cooking and potentially water heating.
Engine Service
£150 – £400
Standard annual service. Can be more if repairs are needed.
Hull Blacking
£300 – £600 (Pro-rata)
The full cost is £900-£1,800 every 3 years. Includes lift-out fees.
General Maintenance
£500 – £1,500
A contingency fund for unexpected repairs, paint, and general upkeep.
By planning for these expenses, you can ensure your floating home remains a safe, comfortable, and financially manageable adventure for years to come.
Essential Onboard Systems for Year-Round Comfort
Turning a boat from a weekend getaway into a proper home you can live on all year round comes down to one thing: its core systems. When you live afloat, you’re not just a homeowner; you become your own utility company. Power, water, heat – they’re all finite resources you have to manage yourself. Getting these off-grid essentials right is the secret to staying comfortable, no matter what the British weather decides to do.
Think of these systems as the heart, lungs, and circulatory system of your floating home. Without reliable power, the lights go out and the pumps stop working. Without a decent water system, everyday life grinds to a halt. And trust me, without good heating, a damp British winter will make you question every life choice that led you to the water.
The Non-Negotiable Need for Reliable Heating
Staying warm and, just as importantly, dry is the biggest battle you’ll face as a liveaboard, especially in the colder months. A damp, chilly boat isn’t just unpleasant; it’s a breeding ground for mould and condensation. This is why a top-quality, efficient heating system isn’t a luxury—it’s an absolute necessity.
While a traditional solid fuel stove has that cosy, romantic appeal, a modern diesel heater offers consistent, controllable heat that’s usually far more efficient. These systems conveniently run on the same fuel as your engine, tapping into your main tank to power central heating through radiators and give you instant hot water. They are the quiet workhorse that keeps a boat a warm, functional home.
A reliable diesel heater is more than a luxury; it’s an investment in your health and well-being. The ability to set a thermostat and wake up to a warm cabin completely changes the liveaboard experience, making your boat a true sanctuary from the cold.
We specialise in robust and dependable diesel heaters from top brands like Webasto, Eberspacher, and Autoterm. Designed specifically for the tough marine environment, these units provide unwavering warmth and hot water, getting you comfortably through even the harshest of winters.
Mastering Your 12V Electrical System
Your boat’s electrical system is its central nervous system. Unlike a house with its limitless supply from the grid, a boat runs on a finite amount of power stored in a bank of leisure batteries. Learning to live within your energy budget is one of the first and most important skills for any boater.
It’s a constant balancing act. Every light you switch on, every phone you charge, and every time a pump kicks in, you’re drawing power from those batteries. To put that power back, you have two main options: run your engine, which uses an alternator to charge the batteries, or harness the free power of the sun.
Many modern liveaboards now use solar panels to keep their batteries topped up silently and efficiently, especially during the brighter months. This drastically cuts down on engine running time, which saves you fuel and keeps the peace and quiet. Our guide on choosing the right boat solar panels is a great place to start if you want to design a system for your own needs.
An inverter is another key piece of kit, turning the 12V DC power from your batteries into the 240V AC power you’re used to at home. This lets you run standard household appliances like laptops, TVs, or kitchen gadgets. Just be warned—they are incredibly power-hungry and can drain your batteries in no time if you’re not careful.
Managing Your Onboard Water Supply
Water is another precious resource you’ll learn to manage down to the last drop. Most boats have a large, built-in water tank that you fill up at designated water points along the canals and rivers. How long a full tank lasts is entirely down to you and your habits.
You’ll quickly find yourself becoming much more conscious of your water use. Shorter showers and being mindful when washing up will become second nature. This resource-management mindset is just part of the lifestyle when you’re responsible for sourcing, storing, and using every litre of fresh water you have.
The quality and safety of all these systems are paramount. Proper, robust construction is non-negotiable. It’s about investing in dependable equipment for your own safety and peace of mind.
Navigating Regulations and Staying Safe
Living on the water is an incredible experience, but that freedom comes with a few essential rules designed to keep everyone safe. It’s not about bureaucracy; think of it as the ‘highway code’ for the waterways. Getting your head around these regulations isn’t just about ticking boxes – it’s about protecting your boat, your neighbours, and yourself. When you know your boat is a safe, legally compliant home, you can relax and enjoy the journey with real peace of mind.
The biggest regulatory hurdle you’ll face is the Boat Safety Scheme (BSS) certificate. This is the boating world’s MOT, and you absolutely cannot get a Canal & River Trust licence without one. Every four years, a qualified BSS examiner will come aboard to give your boat a thorough inspection, making sure its core systems are up to scratch.
The Boat Safety Scheme Examination
A BSS examination is a deep dive into your boat’s critical infrastructure. The examiner isn’t interested in your choice of curtains or scatter cushions; their job is to hunt down any potential hazards that could lead to fire, explosions, or pollution. They’ll be looking closely at a few key areas.
Key areas of a BSS inspection include:
Fuel Systems: The examiner will check every inch of your fuel lines for security and leaks, ensuring tanks for petrol or diesel are properly ventilated.
Gas Systems (LPG): This is a huge focus of the inspection. They’ll be checking that your gas bottles are stored securely in a self-draining locker, that all your hoses and pipework are in good nick, and that your cooker, water heater, and any other gas appliances are installed correctly and working as they should.
Electrical Systems: Both the 12V and 240V systems get a once-over. The examiner looks for safe wiring, secure battery installation, and proper circuit protection to prevent fires. It’s not just about the BSS; part of being a responsible boat owner is adhering to UK electrical safety guidelines across the board.
Ventilation: Proper airflow is crucial. The examiner makes sure you have enough ventilation to stop any build-up of carbon monoxide or other nasty gases.
Getting your BSS certificate is one thing, but day-to-day safety is another. Having the right gear on board is a non-negotiable part of responsible boat ownership. This isn’t just about compliance; it’s about being ready to act fast if things go wrong.
Your essential safety kit should always include:
Fire Extinguishers: You need several, and they need to be the right type (usually dry powder or foam). Place them in easy-to-reach spots near the engine bay, galley, and main cabin. Check the dates on them regularly and make sure you know how to use one.
Fire Blanket: An absolute must-have for the galley. It’s the quickest way to deal with a small cooking fire before it gets out of hand.
Smoke and Carbon Monoxide (CO) Alarms: CO is a silent killer, so alarms are vital, especially if you have a solid fuel stove or an older engine. Test them every month, without fail.
“Safety isn’t an accident. It’s a conscious choice you make every time you untie your ropes. Know your boat, respect the rules, and always be prepared for the unexpected.”
Finally, being safe also means being a good neighbour. The unwritten rules of the waterways – knowing how to work the locks properly, sharing mooring spots politely, and navigating tunnels with care – don’t just make your own journey smoother. They contribute to the friendly, tight-knit community that makes this way of life so special.
Getting Your Feet Wet: The Final Steps to Life Afloat
You’ve done the homework on the lifestyle, picked out a type of boat, and worked out your budget. Now for the exciting bit: making it all happen. This is where you move from daydreaming to doing, taking the last few practical steps to become a real-life liveaboard. Nailing this stage is the key to a smooth start on the water.
The path from spotting a potential boat for living to actually casting off the lines for the first time has a few key milestones. Each one is there to protect you and your investment, making sure your new home is safe, sound, and ready for whatever the cut throws at it.
Your Pre-Purchase Checklist
Before a single penny changes hands, there are a few checks that are absolutely essential. Think of it as the due diligence you’d do on a house – skimp on this, and you’ll regret it later.
Arrange a Boat Survey: This is completely non-negotiable. Get a qualified marine surveyor to inspect the boat out of the water. They’ll check the hull for problems, see what state the engine is in, and poke around all the onboard systems. Their report is your single best tool for negotiation and a must-have for getting insured.
Secure Your Financing: Unless you’re a cash buyer, now’s the time to get your marine mortgage or personal loan finalised. Having your finances sorted means you can make a serious offer when you find the one.
Get Insurance Quotes: With the survey in hand, you can get proper quotes for insurance. You’ll need third-party liability cover at the very minimum to get your licence, but I’d strongly recommend going for a fully comprehensive policy.
Making it Official and Casting Off
Survey done, money sorted – now you can actually buy the boat. Once the keys are in your hand, the next job is getting all the legal bits squared away and planning that first trip. It’s an incredibly rewarding feeling when the dream starts to feel real.
Becoming a liveaboard isn’t one giant leap; it’s a series of careful, deliberate steps. By working through the survey, the paperwork, and your first cruise plan methodically, you’re building a solid foundation for a fantastic life on the water.
After the purchase, your first priorities should be:
Licensing and Registration: Get your Canal & River Trust licence application in. You’ll need your BSS certificate and proof of insurance. This is your legal permission slip to be on the canals.
Connecting with the Community: Jump onto online forums and join local boating groups on social media. The advice you can get from seasoned boaters is absolutely priceless when you’re just starting out. They’ll have tips on everything from tricky mooring spots to the best local engineers.
Planning Your First Cruise: Don’t try to be a hero. Plan a short, simple first trip to get a feel for your new home. This is your chance to learn its quirks, practice your mooring, and just get comfortable at the tiller without any pressure.
Your Top Questions About Life Afloat
Taking the plunge into life on the water is a massive step, and it’s only natural to have a few lingering questions. To round things off, I’ve put together some answers to the queries I hear most often from people getting ready to cast off.
Getting your head around these final practical points will give you the confidence you need to turn your dream into a reality. From money matters to getting your post, let’s tackle the details that make a boat a proper home.
How Do I Get a Loan for a Liveaboard Boat?
One of the first things people ask is whether they can get a normal mortgage for a boat. The short answer is no; a mortgage is strictly for bricks and mortar. But don’t worry, there are specialist financial products out there designed for buying a vessel.
Marine Mortgage: This is your go-to option. It’s a secured loan from a finance company that actually understands boats and their value. They get the liveaboard lifestyle.
Personal Loan: If you’re looking at a boat on the lower end of the price scale, an unsecured personal loan from your bank could be a simpler route, though you might face higher interest rates.
Be prepared for a bigger deposit than you’d need for a house. You’ll typically be looking at putting down 20-30% of the boat’s value. The loan terms are usually much shorter too, often between five and ten years.
What’s the Best Way to Handle Mail and Deliveries?
Not having a fixed letterbox is one of the classic liveaboard puzzles, but thankfully, modern tech has made it surprisingly simple to solve.
The most common solution by far is a virtual mailbox service. You get a proper street address to send all your post to. When anything arrives, the company scans the envelope (and the contents, if you ask them to) and emails it to you. You can then log in online to read your mail from anywhere. If something important like a new bank card arrives, you just tell them to forward it to a Post Office or a mate’s house near where you’re moored.
For all your online shopping, Amazon Lockers are an absolute lifesaver. Just find the nearest one to your mooring, have your parcel sent there, and pick it up whenever you’re passing.
“The logistics of mail and internet might seem daunting, but modern solutions have made them simple to solve. A good 4G router and a virtual address are the two pieces of kit that truly enable a modern, connected life on the water.”
Can I Realistically Work From Home on a Boat?
Absolutely. Working from a boat is not just possible, it’s becoming more and more common. The single most important thing for a successful “boat office” is a solid, reliable internet connection. This usually means getting a dedicated mobile router.
To get a signal you can count on, most boaters who work from home use a 4G or 5G router connected to an antenna mounted on the roof. This setup gives you a much stronger and more stable connection than just using your phone’s hotspot, which is a must for things like video calls or shifting big files. Power management is the other piece of the puzzle.
Your work gear will pull a fair bit of juice from your leisure batteries. A decent set of solar panels is essential to keep them topped up, especially in the summer. Come winter, you’ll probably need to run your engine for an hour or two each day to give the batteries a boost and keep everything ticking over.
Our Boat Services
At Marine Heating Solutions, we know that a comfortable boat is a happy home. Whether you need a dependable diesel heater to see you through the winter or a new cooker fitted in the galley, our certified engineers are here to help. Have a look at our range of heating and plumbing solutions and make sure your life on the water is safe, warm, and comfortable all year round.
A narrowboat range cooker isn’t just a bit of kit for cooking; it’s the heart of the galley. It’s where hot meals are made, where the kettle’s always on for a brew, and it often provides that essential background warmth that makes a boat feel like a home. Unlike the cookers you’d find in a house, these are built specifically for the unique demands of life on the UK’s canals, packed with crucial safety features and a tough build to cope with the damp, ever-moving environment.
Picking the right cooker is genuinely one of the most important decisions you’ll make for your narrowboat. It doesn’t just decide what’s for dinner; it shapes your whole experience on the water. A good, reliable range cooker turns a simple boat into a proper floating home, creating a warm, inviting hub on chilly mornings and damp, rainy afternoons.
But let’s be honest, cooking on a narrowboat comes with its own set of challenges that your standard household cooker just isn’t built for. You’re dealing with a tiny galley, a limited power supply, and the absolute necessity for perfect ventilation. It’s because of these constraints that trying to fit a domestic cooker is not just a bad idea—it’s downright dangerous.
Why Specialist Cookers Are Essential
Marine-grade cookers are designed by people who understand the realities of canal life. They tackle the core problems every boater faces, making sure you get both performance and safety in a tight space.
Here’s what really sets them apart:
Compact Design: They’re built to squeeze into narrow galleys where every single centimetre matters.
Safety First: They must have Flame Failure Devices (FFDs). This is a non-negotiable for passing your Boat Safety Scheme (BSS) inspection. If the flame goes out, the FFD cuts the gas supply instantly.
Durability: They’re constructed from materials like stainless steel that won’t rust and fall apart in the damp marine air.
Fuel Efficiency: Designed to sip, not guzzle, bottled LPG or diesel, which is exactly what you need for an off-grid lifestyle.
Getting your head around the specific needs of a boat cooker is the first real step to a safe and comfortable life afloat. These appliances are engineered to work reliably in conditions that would make a domestic cooker give up the ghost in no time.
To get your boat feeling just right, browsing a range of essential canal products can help you find all the other bits and pieces you need. And if you’re still weighing up your options, our guide to choosing the right cooker for your boat offers a deeper dive into the different types available.
Choosing the Right Fuel for Your Floating Kitchen
Picking the right fuel for your narrowboat range cooker is a bit like choosing the engine for your boat. It determines how it performs, what it costs to run, and your day-to-day relationship with it. The decision really boils down to your lifestyle – are you after the instant convenience needed for daily cooking, or are you looking for a single, powerful system to run your heating as well?
This isn’t just about what you fancy, though. It’s about matching your appliance to the practical realities of life afloat. Each fuel source—LPG, diesel, and solid fuel—comes with its own distinct personality, and your choice will have a huge impact on life in the galley and beyond.
LPG: The Undisputed Champion for Convenience
For the overwhelming majority of narrowboaters, Liquefied Petroleum Gas (LPG), specifically propane, is the fuel of choice for cooking. It’s clean, efficient, and gives you instant, controllable heat with the simple turn of a knob, making it ideal for everything from a quick cuppa in the morning to a full-on roast dinner.
LPG is stored in bottles, usually the familiar 13kg propane cylinders, which live in a purpose-built, self-draining gas locker at the bow or stern. This setup is straightforward, relatively cheap to install, and the gas itself is easy to get hold of from marinas and chandleries up and down the canal network.
The numbers speak for themselves. Across the UK’s estimated 30,000+ canal boats, manufacturers and suppliers report that over 90% of cookers sold are gas-powered. This massive preference shows just how perfectly LPG fits the unique demands of off-grid life on the water.
Diesel: A Powerful Off-Grid Workhorse
A diesel-fired narrowboat range cooker is a serious bit of kit, often the first choice for continuous cruisers and full-time liveaboards, especially those who brave the winter months on the cut. These units are incredibly efficient and tap directly into the boat’s main engine tank, which means no more lugging heavy gas bottles about.
Their real trump card is their dual-purpose nature. A diesel range isn’t just for cooking; it’s a beast of a central heating system. Many models can be fitted with a boiler to run radiators throughout the boat and supply what feels like an endless stream of hot water.
But, as with any big decision, there are trade-offs to consider.
Slower Heat-Up Time: Unlike the instant flame of gas, diesel cookers need a bit of a pre-heating period before you can start cooking.
Higher Initial Cost: The cookers themselves, along with the installation, are a much bigger investment than their LPG cousins.
Maintenance Needs: They need looking after with regular servicing to keep the burner clean and running smoothly.
For anyone who puts self-sufficiency first and loves the idea of a single-fuel solution for all their heating and cooking, a diesel range is a fantastic, if hefty, investment.
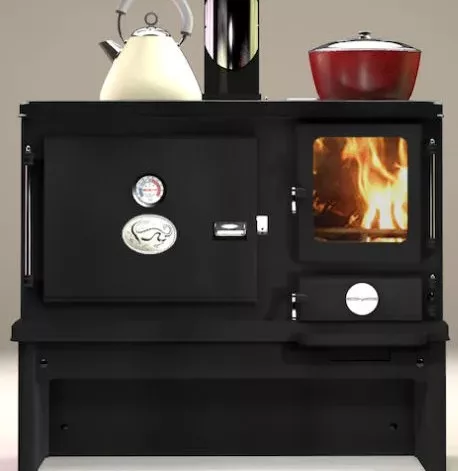
Solid Fuel: The Heartwarming Traditional Choice For a Narrowboat Range Cooker
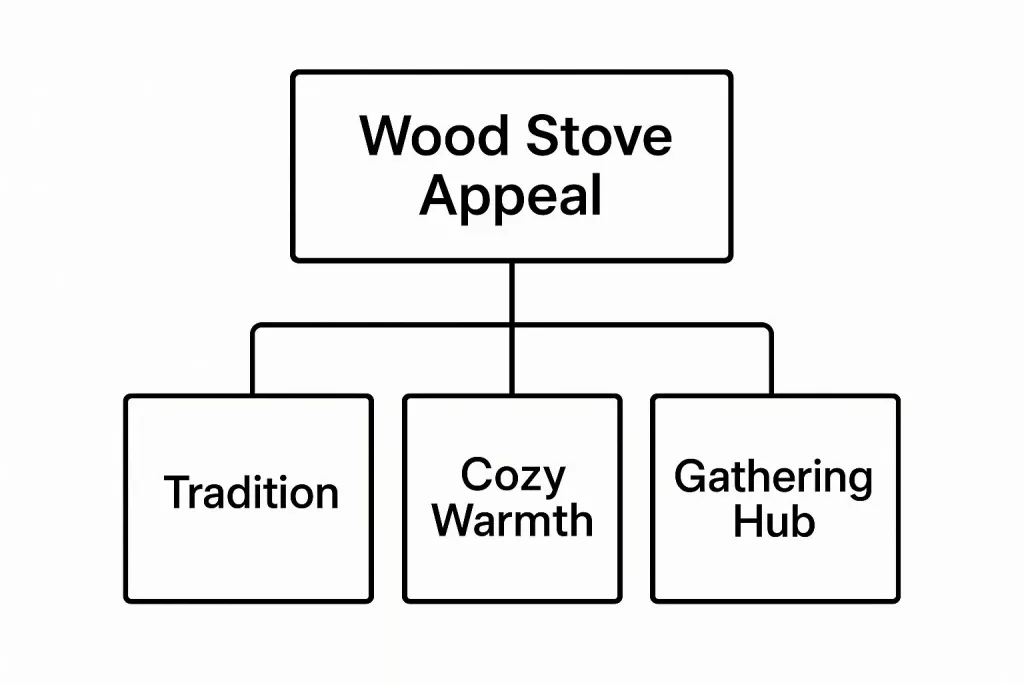
Finally, we have the classic solid fuel range cooker. Burning coal or wood, these cast-iron beauties provide a deep, gentle warmth and create a wonderfully cosy heart for your galley. Just like diesel ranges, they are brilliant heaters and often become the cornerstone of the boat’s entire heating system.
The appeal of a solid fuel cooker is as much about the atmosphere as it is about function. That gentle background heat and comforting glow create an unbeatable ambience that, for many boaters, is the true essence of life on the cut.
This old-school charm does, however, require a more hands-on approach. You’ll be managing the fire, clearing out the ash, and you’ll need a dedicated dry spot to store your fuel. Getting the cooking temperature just right is more of an art than an exact science, and it takes a bit of practice. They are best suited to boaters who enjoy the ritual and are ready for the daily commitment. If cooking efficiency is your main priority, a dedicated LPG gas cooker is often a more practical choice, even if it can’t quite match the rustic appeal.
Fuel Type Comparison for Narrowboat Cookers
To help you weigh it all up, here’s a quick-glance comparison of the most common fuel types, focusing on the practical side of things for life on the water.
Need to store and swap heavy bottles, gas lockers take up space, less effective for primary heating.
Boaters who prioritise cooking convenience and speed. Great for weekenders and summer cruisers.
Diesel
Single fuel source (taps into engine tank), extremely efficient, doubles as a powerful heating and hot water system.
High initial cost, slower to heat up for cooking, requires electricity to run, needs regular maintenance.
Full-time liveaboards and continuous cruisers, especially those wanting a single, robust system for all-year comfort.
Solid Fuel
Creates a cosy, traditional atmosphere, excellent source of dry heat, can run without electricity, fuel can be foraged.
Hands-on management (lighting, cleaning), temperature control is an art, requires dry fuel storage.
Boaters who love the traditional lifestyle, enjoy the ritual of fire management, and want an off-grid heating centrepiece.
Ultimately, the right fuel depends entirely on how you live and cruise. Whether you choose the modern convenience of LPG, the all-in-one power of diesel, or the traditional charm of solid fuel, your cooker will become the true heart of your floating home.
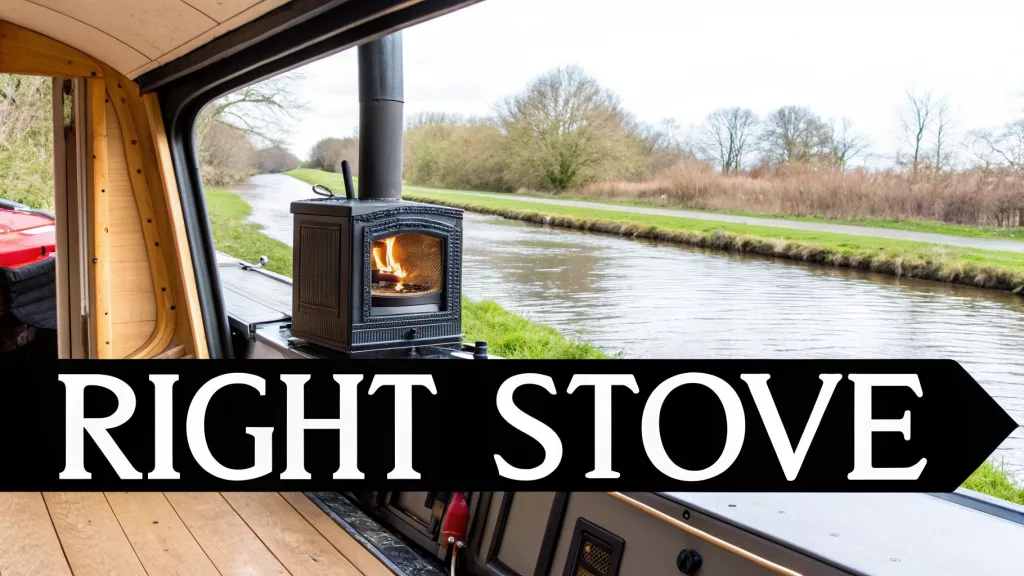
Sizing and Selecting Your Perfect Narrowboat Range Cooker
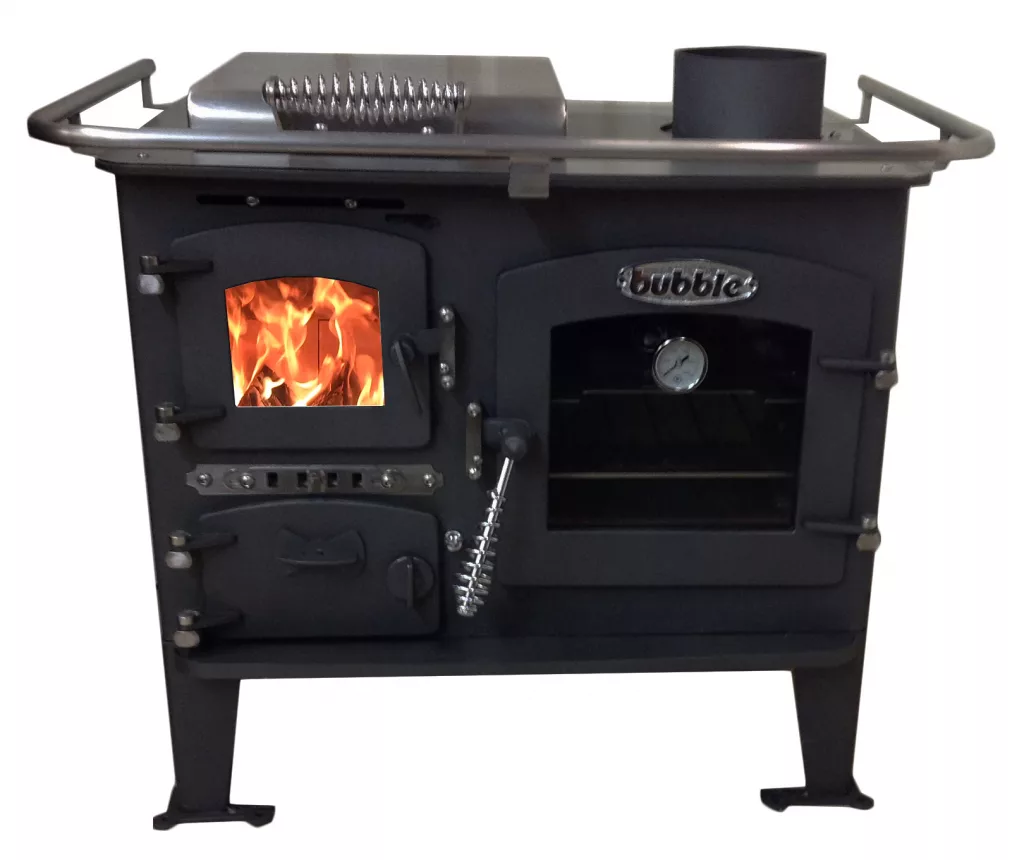
Bubble Narrowboat Range Cooker – Solid Fuel
In the tight quarters of a narrowboat galley, every centimetre counts. Choosing a new cooker isn’t just about how it looks or what it can do; it’s a game of Tetris where the pieces are heavy, expensive, and need to fit perfectly. You absolutely have to adopt a ‘measure twice, buy once’ mindset here. The last thing you want is the heart-sinking moment you realise your shiny new appliance won’t even fit through the door, let alone into its designated home.
Get this right from the beginning, and your cooker will feel like a seamless, purpose-built part of your boat. Get it wrong, and you’re in for daily frustration in a galley that just doesn’t work.
Measuring Your Space and Your Needs
Before you even dream of browsing online catalogues, grab a tape measure. It’s your most important tool. The vast majority of narrowboat range cookers are built to a standard width of between 50cm and 60cm, which suits most galley layouts. But don’t stop there. You need to account for depth and height too, leaving enough breathing room for gas pipes and vital ventilation behind and above the unit.
Once you have the physical dimensions sorted, it’s time for some honest self-reflection on how you actually cook. Are you a one-pot-wonder kind of person, or do you love the challenge of a full-blown Sunday roast for guests? Your answer will determine whether a simple two-burner hob is all you need, or if you should be looking at a full four-burner setup with a separate grill and a decent-sized oven.
Think of it like packing for a long holiday. You need to be brutally realistic about what you’ll actually use, not just what you fancy having. Overestimating your culinary ambitions can lead to a bulky cooker that devours precious countertop space you desperately need for chopping and prep.
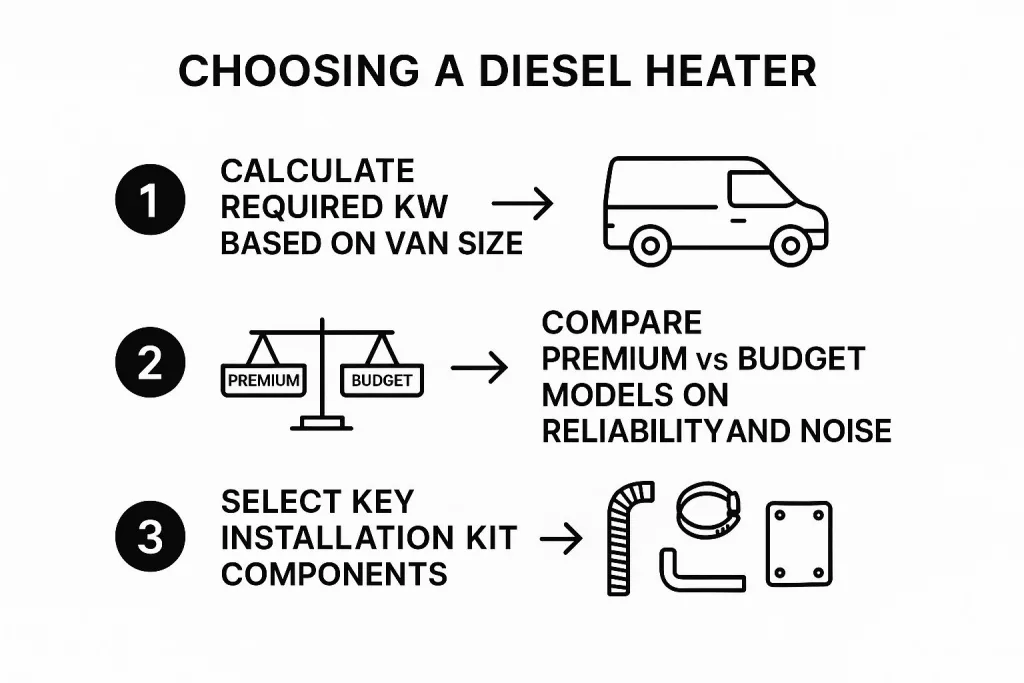
This whole process gets a lot easier when you nail down your main goal. Is it just for cooking, or do you need it to help heat the boat too? The infographic below can help you visualise which path might be the best for your life on the water.
Essential Narrowboat Range Cooker Features for Life Afloat
While showrooms are filled with cookers boasting all sorts of fancy features, only a handful truly matter when you’re on a boat. Focusing on the practical, must-have elements will ensure your investment serves you well for many years to come.
Here are the non-negotiables to keep an eye out for:
Marine-Grade Stainless Steel: The damp, humid air inside a boat is incredibly tough on metal. A cooker built from marine-grade stainless steel is your best defence against rust and corrosion, keeping it looking good and working properly.
Flame Failure Devices (FFDs): We’ve mentioned this before, but it’s worth repeating—this is an absolute safety essential. An FFD on every single burner, including the oven and grill, is a non-negotiable requirement for the Boat Safety Scheme (BSS).
Gimbal Mounting or Pan Clamps: Gimbals, which allow a cooker to swing and stay level, are more common on sea-going yachts. For canal life, where the movement is less dramatic, pan clamps are often a more practical solution. They simply secure your pots and pans to the hob so they don’t go flying.
Oven Capacity: Don’t just glance at it; check the internal volume. A surprisingly small oven might struggle to fit a standard roasting tin, which could be a deal-breaker if you ever plan on cooking for more than one or two people.
The UK’s marine stove market is thriving, which is a good sign—it shows a real demand for home comforts on the water. Digging into the numbers from marine appliance retailers, you’ll find the average price for a new narrowboat gas range cooker sits somewhere between £800 and £2,500. With most boaters replacing their cookers every 10–15 years, it’s a market built on reliability and longevity.
Navigating Installation and Safety Regulations
On a narrowboat, safety isn’t just another item on the checklist—it’s everything. You’re living in a small, enclosed steel box with gas appliances. That simple fact means getting the installation of your narrowboat range cooker right is a non-negotiable part of life afloat.
These rules aren’t here to make your life difficult. Think of them as a safety net, woven from decades of experience on the cut, designed to stop a minor slip-up from becoming a genuine disaster. Trying to cut corners is a risk no boater should ever take.
The Golden Rule: Gas Safe Registered Engineers
When it comes to gas work on a boat, there’s one golden rule: it must be done by a professional. And not just any professional. You need a Gas Safe registered engineer who holds the specific ‘LPG – Boats’ qualification. This isn’t just good advice; it’s a legal requirement here in the UK.
An engineer with this marine-specific ticket understands the unique challenges of a boat’s gas system. They know how to handle the constant movement, tricky ventilation issues, and confined spaces in a way a domestic gas fitter simply wouldn’t. Hiring the right person is the single most important step towards a safe installation and a valid insurance policy.
Understanding the Boat Safety Scheme (BSS)
The Boat Safety Scheme (BSS) is essentially the MOT for your boat. It’s a set of minimum safety standards that nearly every boat on UK inland waterways must meet, and your cooker installation is a huge part of the examination. You can’t get your licence or insurance without a valid BSS certificate.
A BSS examiner will go over your cooker setup with a fine-toothed comb. They aren’t just ticking boxes; they are actively looking for specific safety features that are absolutely vital in a marine environment.
Think of BSS compliance as a health check for your boat’s vital systems. It confirms that your gas, fuel, and electrical installations are all working correctly and safely, giving you real peace of mind when you’re moored up for the night.
Because of these strict standards, certain features are now common practice on marine cookers. They’re built with compact dimensions to fit narrow galleys, and crucial components like Flame Failure Devices (FFDs) are mandatory. While domestic kitchens have seen a huge shift towards electric cookers, now making up nearly 30% of UK sales, the narrowboat world remains firmly committed to gas, thanks to the realities of off-grid power.
Key BSS Requirements for Your Narrowboat Range Cooker
It really helps to know what an examiner is looking for. While your Gas Safe engineer will be across all the technical details, having a basic grasp of the principles helps you maintain a safe galley long-term. To properly prepare, it’s wise to understand what a fire risk assessment entails.
Here are the critical points your narrowboat range cooker installation will be judged on:
Flame Failure Devices (FFDs): This is the big one. Every single burner on your cooker—the hob, the grill, and the oven—must have a working FFD. This brilliant little device automatically cuts off the gas if the flame goes out, stopping a dangerous gas build-up in its tracks.
Secure Installation: The cooker itself has to be securely bolted down. It absolutely cannot move or tip over, even when the boat is rocking about. All gas pipework must be made from the right stuff (usually copper) and be clipped securely to the boat’s structure.
Proper Ventilation: Your galley needs adequate, permanent ventilation. This supplies air for the cooker to burn cleanly and allows any potential gas leaks to escape. An examiner will check that your vents are the right size, in the right place, and aren’t blocked.
Accessible Shut-Off Valve: There must be a clearly marked and easy-to-reach shut-off valve for the cooker. In an emergency, you need to be able to isolate it from the gas supply in a heartbeat.
These rules might seem daunting at first, but they all come from simple, life-saving common sense. By using a qualified professional and keeping these key points in mind, you’ll ensure your cooker is not just a useful appliance, but the safe and reliable heart of your floating home.
Mastering Narrowboat Range Cooker Maintenance and Upkeep
Dickinson Adriatic Diesel Narrowboat Range Cooker
Life on a narrowboat is tough on a cooker. It has to put up with constant engine vibrations, far more moisture in the air, and often gets a much harder workout than its cousins back on dry land. Looking after it isn’t just about keeping it looking nice; it’s a crucial routine for safety, efficiency, and knowing it won’t let you down.
Think of it as a regular health check for the heart of your galley. A little consistent care stops minor niggles from snowballing into major headaches, giving you a dependable workhorse instead of a source of frustration miles from the nearest engineer.
Creating a Practical Maintenance Schedule
The best way to stay on top of cooker care is to build a simple routine. A “little and often” approach is always more effective than waiting for something to break. The good news is that most of these jobs are quick DIY tasks that take just a few minutes.
Here’s a basic schedule to keep your narrowboat range cooker in top nick:
Weekly: Give all the surfaces a good wipe-down – the hob, inside the oven, and the splashback – to stop grease from building up. A quick glance at the burner holes to make sure they’re clear of food debris is a good habit.
Monthly: Lift the burner caps and rings off and give them a proper clean in hot, soapy water. Use a pin or a bit of fine wire to gently clear any blockages in the gas jets. This is key to getting that clean, efficient blue flame.
Quarterly: Take a close look at the oven door seal. You’re looking for any signs of splits, hardening, or general wear and tear. A dodgy seal lets heat pour out, which means wasted fuel and rubbish cooking results.
For the more serious checks, like testing the Flame Failure Devices or inspecting the gas pipework, you really need a professional. If you have any worries at all about how your cooker is behaving, scheduling professional boat stove servicing will give you total peace of mind.
Troubleshooting Common Narrowboat Range Cooker Problems
Even with the best maintenance, things can still go wrong from time to time. Knowing how to spot the common issues can save you a lot of stress and maybe even an unnecessary call-out fee. Here’s a quick guide to tackling a few frequent problems.
Issue 1: The Pilot Light Won’t Stay Lit
A classic problem. This is almost always down to a dirty or knocked thermocouple. The thermocouple is a safety gadget that cuts the gas off if it can’t feel a flame. If its tip gets covered in soot, it can’t do its job. Gently cleaning it with some fine wire wool will often sort it right out.
Issue 2: The Flame is Yellow or Sooty
A healthy gas flame should be crisp and blue. If you see a yellow, lazy, or sooty flame, that’s a red flag for incomplete combustion. It means you’re wasting gas and, more dangerously, creating poisonous carbon monoxide. The usual culprits are blocked burner jets or not enough ventilation in the galley.
A yellow flame is a clear warning sign. Never ignore it. Ensure your vents are clear, clean the burner jets, and if the problem persists, turn the appliance off and call a Gas Safe registered marine engineer immediately.
Issue 3: Uneven Baking in the Oven
Are your cakes coming out burnt on one side and raw on the other? This usually points to a problem with how the heat is circulating. First, check that your oven shelves are in the right place and aren’t blocking the airflow. If that doesn’t fix it, the issue could be a faulty thermostat or a partially blocked oven burner, which will likely need an expert to put right.
Narrowboat Range Cooker Final Pre-Purchase Checklist
Right, you’re almost there. Before you hand over your hard-earned cash, it’s worth running through one final check to make sure you haven’t missed anything crucial. Think of this as the last look-over that turns all the advice we’ve covered into a concrete, tick-box exercise to protect your investment.
Get the Tape Measure Out (Again)
First things first, double-check the space in your galley where the cooker will live. Measure the width, depth, and height one more time, paying close attention to any awkward pipes, bulkheads, or bits of trim. You need to be absolutely certain that a model advertised as 60 cm wide will actually slide in without you having to take a saw to your cupboards.
Check the width against any adjacent cupboard doors and hatches that need to open.
Factor in the required air gaps for clearance behind and above the unit – this isn’t optional!
Make sure your planned ventilation grilles won’t be blocked by anything else.
It’s amazing how often a 58 cm stove will slip into a 62 cm gap with ease, while a 60 cm model turns into an absolute nightmare. A couple of centimetres makes all the difference.
Tick the Safety Boxes
This is non-negotiable. Your new cooker must have Flame Failure Devices (FFDs) on every single burner, including the oven and grill. Without them, you simply won’t get a pass from the UK Boat Safety Scheme. While you’re at it, confirm that any new ventilation you’re fitting meets BSS guidelines for size.
Every FFD has to cut the gas supply in under 2 seconds if the flame goes out. This is a critical safety feature you can’t compromise on.
Confirm FFDs are fitted to the hob, oven, and grill.
Look for properly certified gas components and approved pipework.
Ensure there’s easy access to an emergency gas shut-off valve nearby.
Getting these details right means a safe galley that you can rely on when you’re out on the cut.
Settle on the Right Fuel and Model
The fuel you choose will genuinely shape your day-to-day life afloat. If you’re going with LPG, you need to think about where you’ll store the bottles and how you’ll manage changing them over. If diesel is your choice, be prepared for slower heat-up times and a bigger initial hit on your wallet for installation.
Here’s a quick way to weigh them up:
Fuel Type
The Good Bits
The Downsides
LPG
Instant heat control, easy to find
Lugging heavy bottles, no heating
Diesel
Runs off your main tank, can heat water
Slower to get going, costs more
Don’t Forget the Installation Costs
Finally, be realistic about the cost of getting it fitted and signed off. A Gas Safe engineer who holds the proper LPG Boats qualification is likely to charge anywhere between £150 and £300. It’s a really good idea to get them to do a quick survey before you buy the cooker to avoid any nasty surprises.
Read the Small Print: Warranty and Manuals
Have a proper look at the warranty period and what it actually covers for your chosen model. It’s also wise to download the user manual in advance. This gives you a heads-up on what maintenance involves and how easy it is to get parts.
Check the warranty expiry and, more importantly, the exclusions.
See if there are any service plans or extended protection options worth considering.
Find out how easy it is to get hold of spare parts. There’s nothing worse than a broken cooker because a simple part is impossible to find.
With these final checks done and dusted, you can go ahead and buy with confidence, knowing you’ve covered all the bases.
Got Questions about a Narrowboat Range Cooker ? We’ve Got Answers
Stepping into the world of narrowboat appliances can throw up a lot of questions, especially for something as central to boat life as your cooker. We get asked these all the time, so we’ve put together some straightforward answers to the most common queries we hear from boaters, both new and old.
Do I Really Need a Special Cooker for a Narrowboat?
Yes, one hundred percent. You can’t just pop down to Currys and stick a domestic cooker in your galley. A proper marine-specific range cooker is non-negotiable for life afloat.
These cookers are designed to handle the constant vibration and movement of a boat, and they’re built to fit into tight galley spaces. But the most critical reason is safety. Marine cookers must have Flame Failure Devices (FFDs) fitted to every single burner. This is a clever little device that automatically shuts off the gas if a flame accidentally blows out. A household cooker doesn’t have this, making it incredibly dangerous on a boat and an instant fail on a Boat Safety Scheme (BSS) examination.
Can I Fit My Own Narrowboat Cooker?
While you can certainly manoeuvre the cooker into place and secure it, any work involving the gas connection is strictly a job for a qualified professional.
In the UK, it’s a legal requirement for any gas work on a boat to be done by a Gas Safe registered engineer who holds the specific ‘LPG – Boats’ qualification. Trying to do this yourself isn’t just risky; it’s extremely dangerous in such a small, enclosed space and will void your boat insurance in a heartbeat. For your safety and peace of mind, professional installation is the only way to go.
How Often Should I Get My Cooker Serviced?
We strongly recommend getting your cooker serviced every year by a qualified marine gas engineer. The damp, demanding environment on a narrowboat is tough on appliances.
An annual service makes sure all the safety devices are working as they should, checks that the burners are running efficiently, and hunts for any potential gas leaks. Think of it as preventative medicine for your cooker – it keeps you safe and helps your appliance last much, much longer.
An annual service is like an MOT for your cooker. It’s a professional check-up that confirms the most critical appliance in your galley is safe, reliable, and ready for another year on the cut.
What’s the Best Fuel for a Narrowboat Cooker?
For the vast majority of boaters, LPG (propane) is the undisputed king. It’s the most practical and common choice for cooking on the canals.
LPG gives you instant, highly controllable heat, it burns cleanly, and it’s easy to get hold of from marinas and chandleries up and down the network. It strikes the perfect balance of convenience, performance, and cost when all you want to do is cook.
You will see diesel and solid fuel ranges, of course, but these are typically chosen as mighty heating systems that just so happen to have a cooking function. If you’re looking for a dedicated cooking appliance, LPG is the go-to for almost everyone.
How do I book an Assessment for a Narrowboat Range Cooker Installation ?
For expert advice and professional installation of your next narrowboat range cooker, trust the certified engineers at Marine Heating Solutions. We provide tailored fitting, servicing, and safety certification to keep your galley safe and warm. Get in touch today to discuss your needs.
Before you swap your house keys for a tiller pin, it’s worth taking a proper look at what it really means to live on a boat full-time. It’s an incredible life, but it’s not all picturesque sunsets and gin on the towpath. This is a hands-on world of constant maintenance, clever use of small spaces, and a completely different set of bills—from mooring fees to those out-of-the-blue repairs.
That dream of waking up to the sound of ducks outside your window is a powerful one, but it comes hand-in-hand with some very real challenges. Trading a house for a narrowboat isn’t just changing your postcode; it’s a complete shift in your day-to-day. Simple things you took for granted, like getting post or doing laundry, suddenly need a whole new plan.
This lifestyle really does demand a certain kind of person. You need to be ready to become a plumber, electrician, mechanic, and painter—sometimes all in the same weekend. That idyllic image of peacefully cruising down a canal is absolutely part of it, but it’s the reward you get after putting in the hours of graft.
The Financial Picture Beyond the Purchase Price
Many people are drawn to the water by the idea of cheaper living. While it can be more affordable than bricks and mortar, it’s a long way from being free. Getting a clear-eyed view of the true costs from the start is the key to avoiding a lot of stress later on. The price you pay for the boat is just the first cheque you’ll write.
Your ongoing expenses will look nothing like a typical household budget:
Licensing and Insurance: You’ll need a licence from the Canal & River Trust, which is based on your boat’s length. On top of that, third-party insurance isn’t optional—it’s a must-have.
Mooring Fees: If you want a permanent spot to call home, a residential mooring can set you back anywhere from £2,000 to over £10,000 a year, all depending on where you are and what facilities you get. The alternative is ‘continuous cruising’, which saves you that cost but means you have to move your boat every 14 days.
Maintenance and Upkeep: This is the big one. It’s a significant and non-negotiable cost. You should be budgeting for having the hull blacked every 2-3 years, regular engine services, and—crucially—a healthy contingency fund for the repairs you don’t see coming.
The biggest shock for many newcomers isn’t the price of the boat itself. It’s how quickly all the ongoing running costs add up. A realistic annual budget is the absolute foundation for a happy, stress-free life on the water.
Embracing Compact Living and a Close-Knit Community
Living on a boat is an exercise in minimalism. With such limited space for storage and living, every single item you own needs to earn its keep. This forces you into a more intentional, less cluttered way of life, which many find incredibly liberating. But it does mean getting used to a much smaller personal footprint.
It’s not just about what happens inside your boat, either. You’re joining a unique, close-knit community. Your fellow boaters are your neighbours, your support network, and often the first people you’ll turn to for advice. This shared experience builds incredibly strong bonds, but it also means you need to respect the unwritten rules and be a positive part of the towpath culture. Fitting into this world is just as important as learning how to handle your boat.
Choosing Your Perfect Liveaboard Boat
Picking the right boat isn’t just one of the steps; it’s the decision that will define your new life on the water. It dictates everything from your day-to-day comfort and your budget to where you can actually cruise. Here in the UK, our canals and rivers are home to a few main players when it comes to floating homes.
You’re generally looking at three main contenders: narrowboats, widebeams, and Dutch barges. Each one offers a completely different living experience.
A traditional narrowboat, true to its name, is typically 6ft 10in wide. This slender profile is its superpower, designed specifically to navigate the UK’s historic canal network, giving you incredible freedom to explore almost anywhere. The trade-off, of course, is that the living space is very linear and can feel a bit like living in a corridor.
If you want something that feels more like a floating flat, a widebeam is probably on your radar. Often 10ft to 12ft wide, they offer a huge leap in living space. But that extra width comes with compromises. You’ll pay more upfront, and your cruising grounds will be seriously restricted as many canals are simply too narrow for them. Then you have Dutch barges, which are often even larger, offering cavernous space but generally confining you to the widest rivers or coastal waters.
Liveaboard Boat Type Comparison
Here’s a quick breakdown of the most common boat types you’ll find on the UK waterways. This table should give you a clearer picture of which vessel might be the best fit for your plans.
Boat Type
Typical Size (L x W)
Best For
Key Advantage
Main Disadvantage
Narrowboat
50-70ft x 6ft 10in
Exploring the entire UK canal network
Unrivalled cruising freedom
Limited, linear living space
Widebeam
55-70ft x 10-12ft
Spacious living, often static mooring
Apartment-like interior width
Cannot navigate most canals
Dutch Barge
60-100ft+ x 12-16ft
Coastal cruising and wide rivers
Huge living area and seaworthiness
High purchase & mooring costs; restricted travel
Ultimately, your choice boils down to a single question: do you prioritise cruising freedom or interior space? There’s no right answer, only what’s right for you.
Your Pre-Purchase Inspection Checklist
When you’re viewing a potential new home, it’s far too easy to get swept away by a fresh coat of paint or a charming little wood-burning stove. You have to force yourself to look past the cosmetics. A thorough, methodical inspection is the only thing standing between you and a potential money pit.
Here’s what you absolutely must focus on:
The Hull: This is the boat’s foundation. Don’t be shy—ask when it was last blacked (the protective bitumen paint) and, more importantly, when it was last surveyed. Get on your hands and knees if you have to and look for any obvious pitting, rust, or damage, paying close attention to the waterline.
The Engine Room: A clean engine bay is a fantastic sign of a diligent owner. Check for any tell-tale signs of oil or diesel leaks. Insist on seeing the engine started from cold; it should fire up without a struggle or clouds of smoke.
Onboard Systems: This is where things can get complicated. Take a good look at the wiring. Is it a neat, well-secured loom, or a chaotic mess? Turn on the taps and listen to the water pump. Fire up the heating – this is a critical bit of kit for year-round living in the UK. If you’re unsure what you’re looking at, this guide to narrowboat heating systems is a great resource to get you up to speed.
The Non-Negotiable Marine Survey
I can’t stress this enough: no matter how fantastic a boat seems or how genuine the seller feels, you must get an independent marine survey. It’s not optional.
A surveyor is a trained expert who will examine the boat out of the water. They use ultrasonic kit to measure the steel thickness of the hull, hunting for problems that are completely invisible to the naked eye.
A pre-purchase survey isn’t just another expense; it’s your single best investment in this process. The cost is a tiny fraction of what you could end up paying to fix a serious, hidden issue with the hull or engine.
The survey report you receive is pure gold. It gives you a detailed, unbiased verdict on the boat’s condition and lists any work that needs doing. This gives you powerful leverage to negotiate the price or, if necessary, the confidence to walk away from a deal that could sink you financially. It’s the only way to be sure your new home is safe, sound, and truly ready for the water.
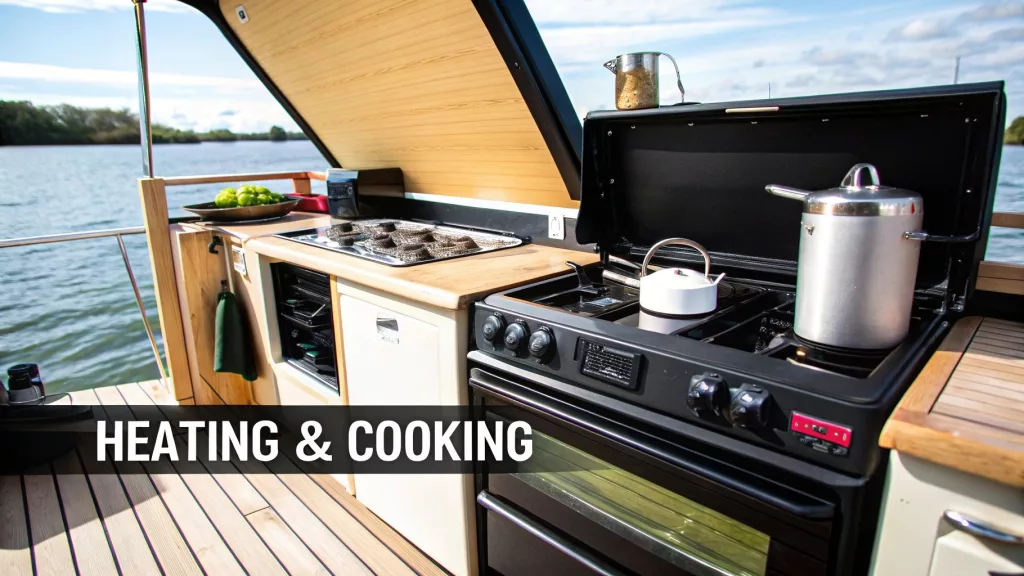
Getting Your Onboard Heating and Cooking Sorted
When you decide to live on a boat, staying warm and well-fed shoots right to the top of the priority list, especially through a damp British winter. Your heating and cooking systems aren’t just luxuries; they’re the absolute heart of your floating home. They’re what transforms a cold steel shell into a proper sanctuary.
Getting these systems right from the start is fundamental to enjoying your boat all year round.
There’s a reason so many boaters love a solid fuel stove. The dry, radiant heat they kick out is brilliant for fighting off the damp and condensation that can plague life afloat. The warmth you get from burning coal or properly seasoned wood just feels different—it creates a truly cosy, homely atmosphere that’s hard to beat.
Of course, they do demand a bit of effort. You’ll need to manage your fuel storage, get into the daily routine of cleaning out the ash pan, and keep a close eye on the flue to make sure it’s clear. It’s a hands-on approach, but an incredibly rewarding way to keep your boat toasty.
Central Heating for a Touch of Modern Comfort
If you’d rather have a more automated, house-like experience, diesel-fired central heating is the way to go. These systems work much like your boiler at home, heating water that then circulates through radiators placed around the boat. Set the thermostat, and you’ve got consistent, reliable background warmth.
Waking up to a pre-warmed boat on a frosty morning without having to faff about lighting a fire is a genuine luxury. For many full-time liveaboards, it’s a convenience they simply wouldn’t do without.
The initial installation is certainly more complex and costly than fitting a simple stove, and you’ll need to factor in regular professional servicing to keep it running smoothly. But for larger boats, or for anyone who prefers a ‘set it and forget it’ solution, a diesel heater is a fantastic choice for maintaining a comfortable living temperature.
Staying Safe in the Galley
The galley is the centre of daily life on board, and for the vast majority of us, cooking means using Liquefied Petroleum Gas (LPG). It’s efficient and gives you great control, but it absolutely demands respect. Unlike the natural gas you get at home, LPG is heavier than air. This means any leaks can silently pool in the lowest part of your boat—the bilge—creating a serious risk of explosion.
Because of this, proper installation and ongoing maintenance are completely non-negotiable.
Here’s what you need to have in place:
A Proper Gas Locker: Your gas bottles must be stored in a dedicated, self-draining locker. Critically, this locker must vent overboard, never into the bilge.
Certified Installation: All pipework and appliance connections must be done by a Gas Safe registered engineer who holds the specific qualifications for boat installations.
Good Ventilation: Decent airflow in the galley is crucial for dispersing any unburnt gas and cooking fumes. Make sure your vents are always clear and never blocked.
Essential Alarms: A working carbon monoxide alarm and a gas bubble tester aren’t optional extras. They are vital bits of safety kit that provide an early warning if something’s wrong.
Choosing the right cooker is just as vital as the gas system itself. If you’re looking to upgrade your galley, taking the time to research the best cooker for a boat ensures you end up with a model that’s both safe and built for the unique demands of a home that moves. Whether you go for a simple hob or a full oven and grill, making sure it’s designed for marine use and properly certified is paramount.
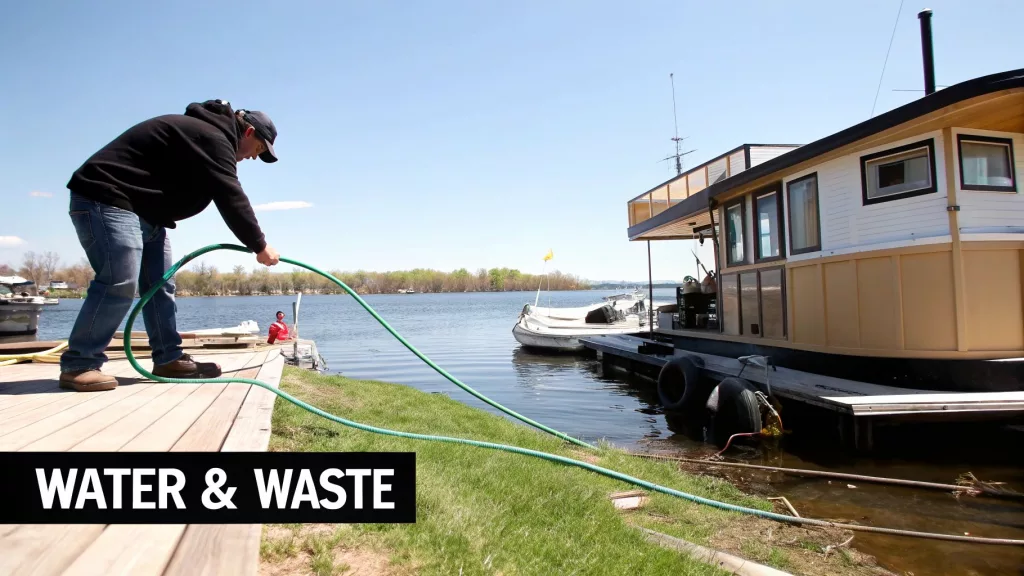
Managing Water and Waste Like a Pro
When you live on a boat, managing your water and waste becomes a central part of the daily routine. Unlike a house where it’s all “out of sight, out of mind,” you’re hands-on with every litre that comes aboard and every litre that leaves. Getting these systems right is the secret to a clean, comfortable, and stress-free life on the water.
Your boat’s fresh water system is its lifeblood. Everything starts with the water tank, which is usually stainless steel or a tough, flexible plastic bladder that can hold anything from 400 to over 1,000 litres. From there, a trusty 12V water pump pushes water to your taps and shower, kicking into action the moment you turn one on.
Keeping Your Water Supply Fresh
While the water from towpath taps is treated, plenty of boaters add their own filtration for better-tasting water and extra peace of mind. Even a simple carbon filter fitted under the galley sink makes a noticeable difference to your drinking water.
For an even better solution, a point-of-entry system simplifies things by cleaning all the water as it enters your tank. You can learn more about taking a comprehensive approach to your whole-system water filtration.
Keeping a close eye on your water level is a constant job. You’ll quickly become a master of water conservation, learning to take shorter showers and turning the tap off while you soap up the dishes. Running out of water mid-shampoo is a rookie mistake you’ll only make once!
The Less Glamorous Side: Waste Management
Now, for the less glamorous but equally critical topic: your toilet. On a boat, you’ve got two main choices, and each one comes with pros and cons that will directly shape your cruising life. Choosing how you handle waste is a big decision, and our detailed guide on selecting the right toilet on a boat offers more specific insights to help you decide.
Your options almost always boil down to a pump-out or a cassette system.
Pump-Out Toilets: These feel much like a normal loo at home. Waste is stored in a large holding tank (usually 200-400 litres), which means you only need to empty it every few weeks. The trade-off is that you’re tied to finding a designated pump-out station and paying a fee each time.
Cassette Toilets: This system uses a smaller, removable container—the cassette—which holds around 20 litres. You empty this yourself at an “Elsan point,” which are much more common than pump-out stations. This gives you amazing flexibility, but the downside is that you’ll be doing the job every few days.
There’s no single “best” system here. The right choice depends entirely on how you plan to use your boat. A continuous cruiser might prefer the freedom of a cassette, while someone on a long-term residential mooring may find the convenience of a pump-out is a better fit.
Ultimately, whether you’re topping up your water tank or emptying the loo, these tasks become part of the normal rhythm of life afloat. They connect you directly to your resources, turning what might seem like chores into a mindful practice of self-sufficiency.
Powering Your Life Off-Grid
Getting your head around a boat’s electrical system is the first step to enjoying all the creature comforts when you live on a boat. It can feel a bit daunting, but really, it all comes down to two separate but connected systems working together to power your life afloat.
At the core of your off-grid world is a 12V DC battery bank. This is the workhorse, running most of the essential onboard gear—everything from the water pump and lights to your navigation equipment and the USB sockets for your phone. It’s the boat’s baseline power, keeping the lights on day and night.
Then you have your household appliances, like a TV, laptop charger, or kitchen gadgets. These need 240V AC power, the same stuff you get from a socket in a house. You get this in two ways: either by plugging into shore power at a marina or by using an inverter. An inverter is a clever bit of kit that transforms the 12V DC power from your batteries into usable 240V AC.
Monitoring and Managing Your Power
Living off-grid makes you incredibly mindful of every single watt you use. A decent battery monitor isn’t a luxury; it’s an absolutely essential tool. Think of it as a fuel gauge for your electricity. It tells you precisely how much power is flowing in, how much is being used, and crucially, what’s left in the tank.
A huge part of managing your power is simply understanding your own needs. You can learn to get an accurate picture of your daily usage with this brilliant guide on how to calculate electrical energy consumption. Knowing your numbers helps you make smart decisions about what to run and when, stopping you from accidentally draining your batteries dry.
Running your batteries completely flat is one of the fastest ways to kill them for good. A quality battery management system (BMS) is a wise investment that will protect your expensive battery bank from being over-charged or deeply discharged, which can dramatically extend its lifespan.
Harnessing the Power of the Sun
Keeping that battery bank topped up is a daily task. This is where solar power becomes a boater’s best mate. Solar panels quietly trickle-charge your batteries all day long, which means you don’t have to rely on running the engine just to make electricity. It saves a fortune in diesel and makes for a much more peaceful life on the water.
Investing in a proper setup is the key to real energy independence. If you want to dive deeper into choosing the right gear for your vessel, our detailed guide on fitting boat solar panels will walk you through everything you need to know. With the right system in place, you’ll have a reliable power supply for your daily needs, so you’re never left in the dark.
Your Top Questions About Boat Life Answered
Making the jump to living on a boat is a huge step, and it’s completely natural for your head to be swimming with questions. As you get closer to casting off, the big, practical queries start to surface. We get asked these all the time by people on the verge of starting their own adventure, so here are some straight-up answers.
Getting your head around these final details is often the last hurdle. Once you’ve got these sorted, you’ll have the confidence to push forward, knowing you’ve got your bases covered.
What Does It Really Cost to Live on a Boat in the UK?
This is the big one, and the honest answer is: it varies massively depending on how you choose to live. Your main fixed costs will be your boat licence from the Canal & River Trust and your insurance, which usually lands somewhere between £200 and £500 a year. The real game-changer is mooring. A proper residential mooring can set you back anywhere from £2,000 to over £10,000 annually.
Then you’ve got your regular maintenance budget. You can’t skip these jobs:
Hull Blacking: Every 2-3 years, your boat’s steel hull needs a fresh coat of protective bitumen. It’s a messy but vital job.
Engine Servicing: Just like a car, your engine needs an annual service to keep it purring along reliably.
Safety Checks: You’ll need regular professional inspections of your gas and fuel systems to stay safe and compliant.
Finally, don’t forget the day-to-day running costs. We’re talking diesel for propulsion and heating, LPG for your cooker, and pump-out fees for your toilet holding tank. If you decide to go down the “continuous cruiser” route, you’ll save a fortune on mooring fees, but your diesel bill will shoot up.
Do I Need a Special Licence to Drive a Narrowboat?
Surprisingly, no. You don’t need a special driving licence to skipper a narrowboat on the UK’s inland waterways. Your only legal must-have is a valid boat licence for the waterway you’re on, issued by the navigation authority like the Canal & River Trust.
While you don’t legally need one, taking a practical course like the RYA Helmsman’s Certificate is probably the single best investment a new boater can make. It builds a massive amount of confidence for tackling locks, mooring up like a pro, and navigating those nail-biting tight spots without incident.
How on Earth Do I Get Mail and Do My Banking?
Ah, the classic liveaboard dilemma! Thankfully, it’s a well-trodden path with some solid solutions. Without a fixed abode, many boaters simply use a trusted friend or family member’s address for their official post. Another popular option is to sign up for a dedicated mail forwarding service or just get a PO Box.
If you have a permanent residential mooring, life is much simpler – you can use that address for everything from bank accounts to getting on the electoral roll. For continuous cruisers, banks are usually happy to accept a correspondence address from a marina or a mail handling service. It feels like a massive puzzle at first, but it’s one that’s easily solved with a bit of forward planning.
Our Services:
For any aspect of your onboard systems, from installing a new diesel heater to ensuring your LPG cooker is certified and safe, the expert team at Marine Heating Solutions has you covered. Get in touch to discuss your project today!
Nothing quite beats the feeling of a small boat wood stove at the heart of your cabint. It provides a dry, penetrating heat that’s essential for life afloat, but it’s much more than just a heater. It transforms a simple cabin into a cosy, welcoming sanctuary on the water – it’s the centrepiece of the entire lifestyle.
Picture it: a crisp morning on the canal, the gentle warmth of a stove radiating through your cabin as the quiet crackle of burning wood creates the perfect haven. This image is the very essence of life on a narrowboat or barge, and a good stove is what makes it a reality. A small boat wood stove is more than just a practical appliance; it’s a direct link to tradition and the true focal point of life afloat.
For many boaters, putting a stove in is a decision that goes far beyond just keeping warm. It’s a real commitment to a certain way of living—one that’s self-sufficient, a little bit rustic, and deeply comforting. This guide is here to walk you through turning that vision into a safe, warm, and reliable part of your boat.
Why a Stove Is More Than Just a Heater
The attraction of having a wood stove on a boat is about so much more than just heat. It’s a blend of practicality with a powerful sense of heritage and comfort that completely changes the experience of being on the water, especially during the colder months.
Dry, Radiant Heat: Unlike other heating methods, a wood stove kicks out a lovely dry heat that properly fights back against the persistent damp that’s so common on boats. This is your best defence against mould and mildew.
Off-Grid Reliability: It gives you a dependable source of warmth that doesn’t rely on electricity or complicated systems. For continuous cruisers, that’s absolutely crucial.
A Social Hub: The stove naturally becomes the spot where everyone gathers in the cabin. It’s the place for a good chat, quiet reflection, or just nursing a hot cuppa.
This infographic really nails down the core elements of a stove’s appeal.
As you can see, the allure comes just as much from its traditional roots as it does from the incredible cosy warmth it provides and its role as the social heart of the boat.
A Rich Heritage on British Waterways
This connection to stoves isn’t some modern trend; it’s steeped in history. Stoves have been used on British boats for centuries, with early examples even found on historic vessels like the Mary Rose. By the 19th century, manufacturers were designing advanced stoves for everything from canal boats to massive trans-Atlantic liners, making them an integral part of life on the water.
How to Choose the Right Small Wood Stove for Your Boat
Picking the perfect stove for your boat can feel like a massive task, but it really just comes down to a few key decisions. It’s a choice you want to get right from the start. Go too big, and your cabin becomes an unbearable sauna; go too small, and you’ll never quite shake off the winter chill.
This section will walk you through the process, step by step. We’ll start with the most important bit: working out the right heat output for your space. Then, we’ll get into the different materials and fuel types. By the end, you’ll know exactly what to look for in a small boat wood stove that fits your boat, your lifestyle, and that dream of a cosy life on the cut.
Calculating Your Heat Output
The first, most critical job is to match the stove’s heat output—measured in kilowatts (kW)—to the size of your cabin. It’s easy to fall into the “bigger is better” trap, but overpowering a small space is a classic mistake. A stove that’s too powerful will have you constantly cracking open windows and burning through fuel just to make the cabin liveable.
To get a good estimate, you first need to calculate the volume of your cabin in cubic metres. It’s a simple bit of maths: just multiply the length by the width, then by the height (L x W x H).
A widely used rule of thumb for boats is to divide the cabin volume (in cubic metres) by 14. The result gives you the approximate kW output needed to heat the space efficiently.
Let’s say you have a cabin that’s 10 metres long, 2 metres wide, and 2 metres high. That gives you a volume of 40 cubic metres (10 x 2 x 2). Divide that by 14, and you get roughly 2.85kW. For a space like this, a stove with an output of around 3kW to 4kW would be spot on.
Cast Iron vs Steel: The Great Material Debate
Once you’ve got your target heat output, the next big decision is the material. Most boat stoves are made from either cast iron or steel, and each one behaves quite differently. Think of it as the difference between a slow cooker and a frying pan; one heats up gradually and holds its warmth for ages, while the other is quick to heat up and just as quick to cool down.
Stove Material Comparison: Cast Iron vs Steel
Deciding between cast iron and steel really comes down to how you live on your boat. To help you weigh it up, here’s a side-by-side look at their key characteristics.
Feature
Cast Iron Stoves
Steel Stoves
Heat-Up Time
Slower to get warm.
Very quick to heat up.
Heat Retention
Excellent. Radiates heat long after the fire is out.
Poor. Cools down quickly once the fire dies.
Durability
Extremely durable and resistant to warping.
Can be prone to warping over time with extreme heat.
Aesthetics
Often features ornate, traditional designs.
Typically has a more modern, clean-lined appearance.
So, what’s the verdict? If you’re a liveaboard who keeps the fire ticking over most of the time, the steady, lingering heat from a cast-iron stove is a huge plus. But if you’re more of a weekend boater who needs to get the cabin warm in a hurry, the rapid response of a steel stove might be the better fit.
Wood Burner or Multi-Fuel Stove?
The final piece of the puzzle is deciding what you actually want to burn. This choice dictates the kind of stove you can safely install. While a dedicated small boat wood stove is brilliant at its job, a multi-fuel model gives you a whole lot more flexibility.
Wood Burners: These are designed specifically for burning logs. They have a flat firebox floor, which allows wood to burn efficiently on a bed of its own ash. Simple and perfect for the job they were built for.
Multi-Fuel Stoves: These come with a raised, riddling grate. This grate allows air to get in underneath the fuel, which is essential for properly burning smokeless coals. You can still burn wood in them, though sometimes they aren’t quite as efficient as a dedicated wood burner.
For most boaters, the sheer versatility of a multi-fuel stove makes it the winner. It means you can burn smokeless coal, which is great for a long, slow overnight burn and is often a requirement in Smoke Control Areas you’ll find along city canals. Ultimately, a multi-fuel stove gives you the freedom to use whatever fuel is best, cheapest, or simply available wherever you happen to moor up.
Installing Your Small Boat Wood Stove with Safety as the Top Priority
Let’s be clear: getting the installation of your small boat wood stove right isn’t just important—it’s everything. This is the single most critical step for keeping you and your boat safe. It’s no place for shortcuts or guesswork. Every single decision, from where the stove sits to how the flue pipe punches through the roof, has to be made with safety front and centre.
A proper, careful installation gives you complete peace of mind. It means you can kick back and enjoy that lovely radiating warmth without a nagging worry about fire or fumes. This section is your safety-first map through the whole process, highlighting the absolute non-negotiables you have to meet.
Positioning Your Stove and Building a Hearth
First things first, where is this stove going to live? It needs a dedicated, secure home that gives plenty of breathing room from anything combustible. We’re talking cabin walls, furniture, curtains—if it can burn, it needs to be a safe distance away.
Every stove manufacturer specifies the minimum clearances, and these aren’t just suggestions. For instance, a particular model might demand 16 inches of clearance at the sides and 18 inches at the back. You can usually shrink these distances with well-fitted heat shields, but you must follow the manufacturer’s guidance to the letter.
Your stove can’t just sit on a wooden deck. It needs to be installed on a non-combustible hearth. This serves two vital purposes: it shields the floor from the intense heat radiating downwards and acts as a landing pad for any stray embers that might escape when you open the door.
The Boat Safety Scheme (BSS) is very clear on this. The hearth must be at least 12mm thick and made from something solid and fireproof, like a stone slab, concrete, or ceramic tiles. It also needs to extend 225mm in front of the stove and 150mm to the sides.
This foundation is the very base of your heating system. Getting it right is fundamental.
Understanding the Flue System of a Small Boat Wood Stove
If the stove is the heart of the system, the flue is its lifeline. It’s the chimney that channels all the smoke and nasty gases safely out of your living space. This is often the trickiest part of the installation, and it has to be absolutely perfect. A leaky or poorly installed flue is a massive fire and carbon monoxide risk.
The whole setup has to comply with British Standards (BS 8511), which is the official code of practice for solid fuel appliances on small craft. The key bits you’ll be dealing with are:
Single-Wall Flue Pipe: This is the pipe that connects directly to the stove itself. It gets incredibly hot, which is great for radiating extra warmth into the cabin, but also means it needs careful handling.
Insulated Twin-Wall Flue: This is a non-negotiable. Where your flue goes through the boat’s roof (the deckhead), it must be an insulated, twin-wall section. This pipe has a layer of insulation sandwiched between an inner and outer wall, keeping the outside surface cool enough that it won’t set fire to your boat’s structure.
Deck Gland/Fitting: This is a specialist marine part that creates a waterproof and heat-resistant seal where the flue exits the roof. It’s built to handle the high temperatures while keeping rainwater out of your cabin.
Chimney Cap: Placed on top of the flue, a cap stops rain from pouring down into your stove. Many are also designed to improve the ‘draw’ of the chimney and prevent downdraughts on windy days.
DIY Installation or Professional Help?
Plenty of boaters install their own stoves, and do a great job of it. But it’s a task that requires real competence and a solid grasp of the safety standards. If you are not 100% confident that you can meet every single requirement of the BSS and BS 8511, then calling in a professional marine heating engineer is the smartest, safest move you can make.
A pro will make sure every last detail is spot on, from the hearth to the final flue fitting, and can give you the safety certificates to prove it. Beyond the stove itself, you absolutely must have a working carbon monoxide alarm. A certified alarm is a BSS requirement and your best defence against an invisible killer. Whether you DIY or hire a pro, the end goal is the same: a safe, compliant, and cosy source of heat for your life afloat.
Choosing the Best Fuel for Your Boat Stove
What you feed your stove is a bit like the food you eat; the quality of the input has a massive impact on its performance, health, and how long it’ll last. On a boat, picking the right fuel for your **small boat wood stove** is a critical decision that affects everything from your warmth and safety to your environmental footprint.
Get it right, and you’re set for a winter of clean, efficient heat. Make the wrong choice, though, and you could be looking at a smoky cabin, a dangerously clogged flue, and a lot of wasted money. Let’s walk through the best options for life on the water to make sure you’re making smart, safe choices every time you light up.
The Gold Standard: Well-Seasoned Hardwood
For a dedicated wood burner, or when using the wood cycle on your multi-fuel stove, there is simply no substitute for good quality, properly seasoned hardwood. Dense woods like ash, oak, and beech are fantastic because they burn slowly and kick out a tremendous amount of heat for their size—just what you need for a long, cosy evening.
The most important word here is “seasoned.” Freshly cut “green” wood is absolutely saturated with water, sometimes having up to 50% moisture content. Trying to burn it is a terrible idea. Most of the fire’s energy gets wasted just boiling off this internal moisture, which means you get very little heat but huge amounts of steam and sticky, tar-like creosote.
Properly seasoned wood should have a moisture content below 20%. This is the magic number that ensures a clean, hot burn, maximising your heat output and drastically cutting the risk of creosote building up in your flue—which is the number one cause of chimney fires on boats.
A good way to check is to knock two logs together; they should make a sharp “clack” noise rather than a dull “thud.” The wood will also feel much lighter than you expect, have cracks spreading out from the centre of the cut ends, and you’ll often see the bark peeling away easily.
Considering Smokeless Coal in a Multi-Fuel Stove
If you’re running a multi-fuel stove, then you have the brilliant option of burning approved smokeless coals. These manufactured briquettes are a real game-changer for boaters, especially when it comes to keeping the fire in overnight. They provide a steady, consistent heat for hours on end, meaning you can wake up to a warm cabin instead of a freezing one.
There are a few clear advantages to using smokeless fuel:
Long Burn Time: They can happily smoulder away for 8-10 hours, giving you reliable background heat.
High Heat Output: They pack a serious punch and generate an impressive amount of heat.
Compliance: Using an approved smokeless fuel is often a legal must-have in Smoke Control Areas, which cover large parts of the canal network in cities and towns.
On the downside, they do create more ash than wood and can be a bit pricier. It’s really a trade-off between convenience, cost, and what you need from your heating. To get a better handle on the different types of stoves available, you might find our overview on selecting a solid fuel stove for your boat helpful, as it explores these choices in more detail.
Sourcing and Storing Fuel on Board
Finding good fuel and, just as importantly, storing it is a constant puzzle in the confined space of a boat. You absolutely have to keep your fuel bone dry, which is often easier said than done on the water. Many boaters buy kiln-dried logs or bags of smokeless coal in sealed plastic from marinas and canal-side suppliers.
For storage, a dedicated spot on the roof or bow is the usual solution. Using covered log stores, old coal bunkers, or even just some heavy-duty waterproof bags can do the job of protecting your fuel from the elements. Just remember, damp fuel is inefficient and dangerous, so keeping it dry is every bit as important as buying the right type in the first place.
Mastering Routine Stove Maintenance and Care
Don’t think of looking after your stove as a chore. It’s better to see it as a simple, protective routine. A little bit of regular attention is all it takes to look after your investment, keep your small boat wood stove running efficiently, and most importantly, keep you safe on the water.
By building a few easy habits, you can guarantee years of reliable, cosy warmth. This isn’t about getting your hands dirty with complicated mechanical work; it’s just a practical checklist covering everything from a quick daily tidy-up to seasonal prep, making sure your stove is always ready to go.
Your Essential Maintenance Checklist
Keeping your stove in top condition is a continuous process, but it’s much easier when broken down into daily, weekly, and monthly tasks. Once you get into the swing of things, these little jobs will quickly become second nature.
Here’s a practical schedule to follow:
Daily Habit: Before you even think about lighting it, clear the ash pan. A build-up of old ash can choke the airflow, smothering the fire and stopping it from burning properly.
Weekly Task: Give the stove glass a good clean. It’s not just for looks; a clear view lets you keep a proper eye on the fire. A damp cloth dipped in cold wood ash works wonders as a gentle, non-abrasive cleaner.
Monthly Check: Have a look at the door seals and firebricks. A frayed rope seal around the door lets in too much air, making the fire burn too fast and hot. Likewise, any cracked or crumbling firebricks should be replaced to protect the main body of the stove.
These simple steps make a massive difference to how your stove performs day-to-day and how long it lasts.
The Critical Importance of Chimney Sweeping
While daily checks are good practice, the single most crucial job is sweeping your chimney and flue. This isn’t optional; it’s a non-negotiable safety requirement. Burning wood or coal creates creosote, a black, tar-like gunk that builds up inside the flue.
Creosote is highly flammable and is the number one cause of chimney fires on boats. A clean flue is a safe flue—it’s as simple as that. Regular sweeping gets rid of this dangerous deposit, ensuring smoke and gases can escape freely and drastically reducing your fire risk.
You absolutely must sweep your chimney at least once a month. If you rely on your stove for heating most of the time, it’s much safer to do it twice a season. Watch for warning signs like smoke puffing back into the cabin when you light the stove, or a thick, dark deposit you can see when you look up the flue. These are clear signs that a sweep is well overdue.
Preparing for the Off-Season
When the warmer months finally roll in and the stove is no longer in daily use, a proper end-of-season shutdown will protect it from damp and rust. Give the stove and flue one last, thorough clean to remove every last bit of ash and creosote. Some boaters then lightly coat the internal metal surfaces with a protective oil to stop corrosion from setting in.
Solid fuel stoves are a tradition deeply woven into canal boat culture, with a history stretching back over two centuries. Modern installations have to follow strict safety codes like BS 8511 and meet environmental regulations like the Ecodesign standards, which can cut air pollution by up to 80% compared to older models. For more on the history of these stoves and the rules that govern them today, you can discover more about stove traditions and regulations on hnbc.org.uk.
Answering Your Top Questions About Boat Stoves
Even the most seasoned boaters have questions when it comes to something as vital as a stove. Getting good, straight answers isn’t just helpful—it’s essential for your safety and peace of mind. We get asked a lot of questions, so we’ve put together this final section to tackle some of the most common ones.
Think of this as a quick reference guide. We’ll cover the absolute must-knows, clear up some common points of confusion, and go over the best practices that keep life on the water both warm and safe.
Is a Carbon Monoxide Alarm Required with a Boat Stove?
Yes, absolutely. A working carbon monoxide (CO) alarm isn’t just a good idea; it’s a mandatory safety requirement under the Boat Safety Scheme (BSS). CO is a colourless, odourless gas that comes from burning fuel, and it can be lethal. An alarm is your only real defence against this invisible threat.
You must install an alarm that’s certified to BS EN 50291-2, the specific standard for boats. Make sure it’s placed in the same cabin as your stove, and follow the manufacturer’s instructions to the letter for correct height and positioning.
Can I Install a Small Boat Wood Stove Myself?
From a legal standpoint, a competent person can do a self-install. However, this is one of those jobs where small mistakes can lead to catastrophic results, creating a serious risk of fire or deadly CO poisoning. The standards for flue clearances, hearth construction, and ventilation are incredibly strict, and for very good reason.
If you have even the slightest doubt about your ability to meet every single safety standard set out by the BSS and BS 8511, we strongly recommend hiring a qualified marine heating engineer. Their experience ensures the job is done right, giving you priceless peace of mind.
What Is the Difference Between a Wood Burner and a Multi-Fuel Stove?
The main difference is all about the grate at the bottom of the firebox. Wood actually burns best on a flat bed of its own ash, so a dedicated wood burner just has a simple, flat base. A multi-fuel stove, on the other hand, has a raised, riddling grate.
This grate lets air get underneath the fuel, which is crucial for burning smokeless coal properly. Given the need for flexibility on the canals and the regulations in Smoke Control Areas, multi-fuel stoves are often the more practical choice for many boaters.
How Often Should I Sweep My Boat Stove Chimney?
At the very minimum, you need to sweep your chimney and flue at least once a month, usually just before winter kicks in. But if your stove is your main source of heat and it’s running a lot, it’s much safer to do it more often—maybe a couple of times during the heating season.
Regular sweeping is the single most effective way to prevent a dangerous chimney fire, which is caused by a build-up of flammable gunk called creosote.
What Boat Stove Services Does Marine Heating Solutions Offer?
For expert installation, servicing, and safety certification of your small boat wood stove, trust the certified engineers at Marine Heating Solutions. Ensure your vessel is warm, safe, and fully compliant. Contact us for a quote today!
A reliable small boat stove is far more than just a heater; it’s the warm, beating heart of any narrowboat or canal barge. It provides a dry, cosy sanctuary against the persistent damp and chill of UK waterways and is pretty much essential for comfort, cooking, and creating that unbeatable atmosphere of life afloat.
Living on a narrowboat offers a unique kind of freedom, but it also comes with its own set of challenges—especially when it comes to staying warm. Unlike a house on land, a boat is a steel box sitting in cold water, which makes it a magnet for damp and lets heat escape frighteningly quickly. This is where a well-chosen stove transforms a cold metal shell into a proper home.
A good stove does more than just blast out heat. It creates a dry, ambient warmth that works its way into every nook and cranny of the cabin. This constant, gentle heat is crucial for driving out the moisture that leads to condensation, mildew, and an all-round uncomfortable living space. It naturally becomes the gathering point on chilly evenings, a place for drying wet gear, and often, a handy cooktop for a simmering kettle or a slow-cooked stew.
More Than Just a Heater
Deciding to install a small boat stove is really about embracing a particular lifestyle. It’s a commitment to a more hands-on, rewarding way of living. The daily ritual of lighting the fire, keeping it going, and enjoying that radiant glow connects you directly to your surroundings in a way central heating never could.
It’s a practical solution that delivers some key benefits:
Effective Moisture Control: A solid fuel stove is arguably the best weapon in the fight against the pervasive dampness common on boats, protecting both your health and the boat’s interior.
Off-Grid Reliability: It gives you a dependable source of heat that needs no electricity. That’s vital when you’re cruising in remote areas or during winter when solar power can be scarce.
Versatile Functionality: Many stoves have a flat top that’s perfect for cooking, boiling water, or keeping food warm, adding valuable utility to what is often a very compact galley.
Unmatched Ambience: Let’s be honest, the gentle flicker and radiant warmth of a real fire create a cosy, inviting atmosphere that a radiator system simply can’t replicate.
Choosing a stove isn’t just a technical decision; it’s about defining the character of your floating home. It’s the difference between merely existing on the water and truly living comfortably.
Ultimately, the right stove becomes an indispensable companion on your journey. It provides security against the cold, a functional cooking surface, and a psychological comfort that turns a simple cabin into a cherished sanctuary. This guide will walk you through everything you need to know to select, install, and maintain the perfect stove for your vessel.
Choosing Your Fuel: Solid Fuel vs Diesel Small Boat Stove
Picking the right fuel for your small boat stove is the first big fork in the road. You’re essentially choosing between solid fuel and diesel, and believe me, they offer two completely different ways of life on the water.
Think of it like this: are you after the rustic charm and deep, bone-warming heat of a real fire, or the push-button convenience of a modern heating system? There’s no right answer, only what’s right for you.
Solid fuel stoves, burning good old-fashioned wood or smokeless coal, are the traditional heart of a narrowboat. They kick out a powerful, radiant heat that feels incredibly comforting. It’s the kind of warmth that seems to seep into your bones, drying out damp air and creating that unbeatable cosy atmosphere every boater craves.
Diesel stoves, on the other hand, are much more like an integrated heating system. They sip fuel directly from your boat’s main diesel tank, which gives you a level of convenience that solid fuel simply can’t touch. This makes them a hugely popular choice for anyone who puts ease of use and consistent temperature control at the top of their list.
The Case for Solid Fuel Stoves
A solid fuel stove is all about the experience. For many boat owners, the ritual of lighting the fire, managing the burn, and basking in the glow is a huge part of the appeal. It’s a hands-on relationship.
The heat itself is special, too. It works through radiant heat, much like the sun, warming objects directly—the walls, the furniture, and you—rather than just the air. This is a game-changer for combating the deep-seated damp that a steel hull sitting in cold water is so prone to.
Of course, this traditional route has its practicalities. You need to find space onboard to store fuel, whether that’s bags of coal strapped to the roof or seasoned hardwood tucked away in a bunker. Finding good quality, dry fuel while you’re out cruising can also be a bit of a logistical puzzle.
Wood: Gives you a beautiful, lively flame and a quick, intense heat. It must be well-seasoned (with less than 20% moisture) to burn properly and stop tar building up in your flue.
Smokeless Coal: Burns longer and more consistently, making it perfect for keeping the stove ticking over through the night. It also means less smoke and soot, which is better for your flue and the environment.
The real charm of a solid fuel stove lies in its simplicity and off-grid reliability. It requires no electricity to run, providing a dependable source of heat and a cooking surface even when your batteries are low.
The Appeal of Diesel Stoves
If convenience is your king, a diesel stove is a fantastic choice. Just imagine getting back to a cold boat and having it warm up at the flick of a switch. You can even set a thermostat to keep the cabin at the perfect temperature.
These systems are plumbed straight into your main engine fuel tank, so you can forget about lugging and storing separate bags of fuel. They’re incredibly efficient, using only a tiny amount of diesel per hour to keep things comfortable. While you don’t get the visual appeal of a flickering fire, their sheer practicality is hard to argue with.
Installation is a bit more involved, often needing electrical connections and a dedicated fuel line. They also rely on your boat’s 12V system to power the fuel pump and fan, which is something you’ll need to factor into your overall power management. For a deeper look at the different systems available, you might want to read our guide on choosing the right boat heating system.
Comparing Your Options Directly
To help you weigh it all up, let’s put these two stove types side-by-side. Seeing the key differences laid out clearly can often make the decision much easier.
Comparing Solid Fuel and Diesel Boat Stoves
Feature
Solid Fuel Stove (Wood/Coal)
Diesel Stove
Heat Type
Radiant heat; deep, dry, and ambient.
Convected heat; warms the air quickly.
Convenience
Manual operation; requires lighting and refuelling.
Automated; often has thermostat control.
Fuel Source
Separate storage needed for wood or coal.
Plumbed directly into the main diesel tank.
Atmosphere
Excellent; provides a visible flame and cosy focal point.
Functional; lacks the aesthetic appeal of a real fire.
Power Needs
None; fully off-grid operation.
Requires 12V power for fuel pump and fan.
Maintenance
Requires regular ash removal and annual flue sweeping.
Ultimately, the best choice boils down to your lifestyle. If you love the ritual of a real fire and value being completely self-sufficient, a solid fuel stove will fit right in. But if you prefer modern convenience and want your heating on demand, a diesel stove will be a much better companion for your life on the water.
Calculating the Right Stove Size for Your Cabin
Choosing a small boat stove can feel like a bit of a dark art, but getting the size right is probably the single most important decision you’ll make. It’s a classic Goldilocks problem. Go too small, and you’ll be huddled under blankets on a frosty morning, unable to beat back the damp. Go too big, and you’ll turn your cabin into a sauna, constantly cracking open windows and burning through fuel like there’s no tomorrow.
The goal is to find a stove with a heat output that perfectly matches the space you need to keep warm. This output is measured in kilowatts (kW), and a little bit of simple maths is all you need to find your magic number. Don’t worry, you won’t need an engineering degree for this—just a tape measure and an honest assessment of your boat’s insulation.
Understanding the Key Calculation
The method seasoned boaters swear by is straightforward and surprisingly accurate. It all boils down to two key factors: the volume of your cabin and the quality of your insulation.
Think of it like this: your cabin is a box you need to fill with warmth. A bigger box obviously needs a more powerful heater, but good insulation acts like a sturdy lid, keeping all that precious heat from escaping into the cold.
First, you need to work out the volume of the space you want to heat in cubic metres.
Step 1: Measure the length of your cabin.
Step 2: Measure the width of your cabin.
Step 3: Measure the average height from floor to ceiling.
Step 4: Multiply these three numbers together (Length x Width x Height) to get the volume.
Once you have this figure, you’re halfway there. The next step is to factor in how well your boat actually holds onto heat.
How Insulation Changes Everything
Insulation is the great equaliser in the world of boat heating. A boat with modern spray foam insulation will hold its warmth for hours, meaning it can get by with a much smaller stove. On the other hand, an uninsulated steel shell leaks heat like a sieve and will need a lot more firepower to stay comfortable. This is where a simple “insulation factor” comes into play.
A widely used rule of thumb helps to estimate the stove output you’ll need. To get a good approximation, boat owners calculate the volume of their heated area (in cubic metres) and then divide it by an insulation quality factor. We typically use 15 for excellent insulation or 10 for poor insulation.
It’s often wise to slightly overestimate your needs to ensure you have enough power for the very coldest days. A slightly larger stove running gently is far more efficient and pleasant than a small one working flat out. Models like the compact yet powerful https://marinestaging.wp59.qa.internal.searchatlas.com/salamander-hobbit-stove/ are popular for a reason—their output is perfectly suited to typical narrowboat dimensions.
It’s better to have a little more power than you need and not use it, than to need more power and not have it. A stove that is constantly struggling will never create a truly comfortable, dry environment.
Putting It All Together: A Practical Example
Let’s imagine a typical narrowboat cabin that is 8 metres long, 2 metres wide, and has a ceiling height of 1.9 metres.
Calculate Volume: 8m x 2m x 1.9m = 30.4 cubic metres
Assess Insulation: The boat has good quality spray foam insulation, so we’ll use the factor of 15.
Calculate Required Output: 30.4 ÷ 15 = 2.03 kW
In this scenario, a small stove with an output of around 2-3 kW would be the perfect fit.
But what if that same boat had poor or no insulation? We’d use a factor of 10. The calculation would be 30.4 ÷ 10 = 3.04 kW. See the difference? You’d need a significantly more powerful stove to get the same level of comfort.
If you’re really pushed for space, exploring options like a titanium packable stove can provide an effective heating and cooking solution tailored to a small cabin’s dimensions. By taking these simple measurements, you can confidently choose a small boat stove that will keep your floating home perfectly warm and cosy all winter long.
Navigating Installation and Safety Regulations for a Small Boat Stove
A safe stove installation isn’t just a good idea—it’s completely non-negotiable on a boat. Get this part right, and you’re protecting your vessel, your crew, and ensuring you stay on the right side of UK waterway regulations. The process can seem a bit intimidating at first, but it all boils down to one simple concept: managing heat safely.
Whether you’re a seasoned DIYer or you’re calling in a professional, knowing the core principles is key. This is your essential checklist for a secure setup that meets the strict standards of the Boat Safety Scheme (BSS), giving you total peace of mind when you light that first fire. For a deep dive into the official rules, you can learn more about the Boat Safety Scheme guidelines.
Building a Safe Foundation: The Hearth
Every solid stove installation starts from the ground up, and that means getting the hearth right. Think of the hearth as the stove’s own personal fireproof island. Its job is to shield the boat’s floor from the intense heat underneath and to catch any stray embers that might tumble out when you open the door.
The BSS is very clear that the hearth must be built from a non-combustible material. This is your first critical step.
Material Choice: Slate, granite, or thick ceramic tiles are all brilliant choices. They’re tough, totally fireproof, and do a great job of stopping heat from transferring downwards.
Dimensions: The hearth has to stick out at least 300mm in front of the stove’s door and a minimum of 150mm to each side. This creates a safe ‘landing zone’ for when you’re refuelling or clearing out ash.
Air Gap: This is the clever bit. You absolutely must have a ventilated air gap of at least 25mm between the hearth material and your boat’s deck. This gap is vital for stopping a slow, dangerous build-up of heat in your floor structure over time.
This foundation isn’t just about ticking a box for compliance; it’s the fundamental first layer of defence against fire risk.
Managing Radiant Heat: Walls and Surroundings
Your stove doesn’t just warm the air; it radiates a surprising amount of heat in every direction. Any nearby combustible surfaces, like wooden bulkheads or furniture, need to be properly protected. The golden rules here are maintaining safe distances and using effective shielding.
The BSS has specific minimum air gaps that must be kept around the stove. If your layout means you can’t achieve these distances, then a properly installed heat shield becomes mandatory.
A heat shield acts like a thermal mirror, reflecting radiant heat away from the surface it’s protecting. The air gap behind the shield is just as important, as it allows cooling air to circulate and carry the heat away safely.
For a heat shield to do its job properly, it must be:
Made of non-combustible material: A simple sheet of steel or aluminium works perfectly.
Mounted with an air gap: You need a gap of at least 25mm between the shield and the wall behind it. This is for airflow.
Ventilated: The shield must be open at the top and bottom. This encourages natural convection, drawing cool air in at the bottom and letting the warmed air escape at the top.
This setup is an incredibly effective way to interrupt the path of radiant heat, keeping your boat’s interior safe and sound.
The Flue System: Your Stove’s Chimney
The flue pipe is your stove’s exhaust system, and it has the critical job of getting dangerous gases out of your cabin. Getting this part of the installation right is arguably the most important task of the whole project. A leaky or badly fitted flue is a massive fire and carbon monoxide hazard.
The section of flue that passes through your boat’s roof needs special attention. A simple single-walled pipe would get incredibly hot, transferring a huge amount of that heat straight into your roof structure—a serious fire risk.
To prevent this, you must use a double-insulated flue section where the pipe goes through the deck. This is basically a pipe within a pipe, with a high-temperature insulating material packed in the gap. This design keeps the outside of the flue cool enough to be safely installed through the roof.
Securing the flue’s exit point is just as important. You’ll need a weatherproof deck collar and a good rain cap.
Deck Collar: This fitting creates a waterproof seal around the flue pipe, stopping rain from leaking into your cabin or, even worse, into the roof’s core structure.
Rain Cap: A cap on top of the flue stops rain from running straight down the chimney, which can cause rust and damage to your stove over time.
Final Safety Checks: Alarms and Extinguishers
With the physical installation done, the final layer of safety is all about detection and response. Even with a perfect installation, you can’t eliminate every single risk, which is why having the right safety gear is a firm BSS requirement.
A carbon monoxide (CO) alarm is absolutely essential. CO is an invisible, odourless gas that comes from incomplete combustion, and it can be lethal. Your alarm needs to be in the same cabin as the stove, usually at head height, but always check and follow the manufacturer’s specific instructions for placement.
Finally, make sure you have at least one suitable fire extinguisher nearby. It should be close enough to grab quickly, but not so close that a fire around the stove would make it impossible to reach. A dry powder or foam extinguisher is generally what’s recommended for the kinds of fires you might encounter with a solid fuel stove. Your safety equipment is the final piece of the puzzle, making sure you’re prepared for anything.
Mastering Daily Operation and Maintenance
Once your small boat stove is installed and ready to go, it stops being a project and becomes part of your daily life on the water. Getting the hang of how it works and keeping it in good nick is the secret to making sure it runs efficiently, reliably, and most importantly, safely. Living with your stove should be one of life’s simple pleasures, not a constant chore. This section is all about that practical, hands-on knowledge.
A well-looked-after stove gives you that lovely, consistent heat without bunging up your cabin with smoke. The magic is all in understanding and controlling the airflow. Think of the air vents on your stove as its lungs – they regulate how fiercely the fire burns, much like your own breathing controls your energy.
The Art of Lighting and Controlling Your Stove
Getting a fire going quickly and cleanly is the first skill to master. The aim is to get a strong “draw,” which is when hot air rushes up the flue, pulling all the smoke with it and sucking fresh oxygen into the firebox.
A cracking method for this is the “top-down” fire lay:
Pop your larger logs or some coal at the bottom of the firebox.
On top of that, build a small pile of kindling – stuff about the size of your finger.
Nestle a natural firelighter right in the middle of the kindling.
Light the firelighter, and for the first 5-10 minutes, leave the stove door just a smidge ajar with all the air vents wide open.
This initial blast of air helps the flue heat up quickly, creating that vital draw. Once you’ve got a good blaze going, you can shut the door and start playing with the air controls to manage the burn. Less air gives you a slower, longer-lasting fire, while more air will give you a much hotter, faster burn.
Learning to read your stove is like learning a new language. You’ll soon recognise the sounds and flame patterns that tell you when it’s burning perfectly or when it needs a bit more fuel or air.
Refuelling without getting a puff of smoke in the cabin is another simple but crucial trick. Before you even think about opening the door, open the primary air vent fully for a minute or so. This ramps up the draw, making sure that when you open the door, air is pulled into the stove, not pushed out at you.
Your Simple Stove Maintenance Schedule
Regular maintenance isn’t just about keeping things running smoothly; it’s your best defence against serious dangers like chimney fires and carbon monoxide leaks. A simple, consistent routine will keep your small boat stove in top shape. For a deeper dive, check out our full article on boat stove maintenance.
Daily Habits (When in use):
Clean the Glass: An old boater’s trick that works a treat: a quick wipe with a damp cloth dipped in a bit of cool wood ash. It’ll keep your view of the flames lovely and clear.
Empty the Ash Pan: If ash builds up, it can choke the fire by blocking air from getting in underneath. Best to empty it before you light the fire each day.
Weekly Checks:
Inspect Door Seals: Have a quick look at the rope seal around the stove door. If it’s looking frayed or has gaps, it’s time to replace it. A tight seal is absolutely critical for controlling the burn and stopping smoke from escaping.
Check the Baffle Plate: The baffle is the metal plate inside the top of the stove, and it can get a bit sooty. Make sure it’s clear to keep the draw efficient.
Annual Tasks (Before the heating season kicks in):
Sweep the Flue: This is non-negotiable and the most important job on the list. Soot and creosote build-up is a major fire hazard and has to be cleaned out at least once a year.
Full Inspection: Give the whole unit a once-over. Check for cracks in the firebricks and look over the stove body and flue for any signs of rust or damage.
Sticking to this straightforward routine ensures your stove stays a safe, reliable, and comforting friend through the colder months. It’s no wonder small boat stoves are so popular with narrowboat dwellers and cruisers in the UK; they’re fuel-efficient and don’t demand a lot of upkeep. The newer marine stoves are getting even better, with things like fuel-efficient burners that help meet the UK’s stricter emissions standards for a greener burn. You can read more about these trends and get some market insights into small boat appliances.
A Look at the UK Market for Marine Stoves
Choosing a small boat stove isn’t just about picking a heater for your own vessel; it’s about plugging into the much bigger story of life on the UK’s waterways. The designs you see and the options available are all shaped by the thriving leisure marine industry and, in particular, the ever-growing popularity of narrowboating.
The sheer demand for these vital bits of kit is directly linked to the health of the UK’s entire recreational boating world. It’s a surprisingly robust industry with a massive economic footprint, and that creates a strong, competitive market for things like compact heating.
When you understand this context, you start to see how your purchase is part of a larger ecosystem of British boating. It’s a world shaped by economic trends and a shared passion for staying safe and sustainable on the water.
What Drives the Market? Money and Rules
The UK’s recreational boating sector has shown some really impressive growth over the years. Naturally, this has a knock-on effect for related markets, including the folks selling small boat stoves. According to the latest industry figures, the UK’s leisure marine industry pumps over £3.9 billion into the economy every year. Small boats, which are the primary users of these efficient heaters, are a huge slice of that pie, and this demand fuels constant innovation. You can get a better sense of the numbers from the UK marine industry’s economic impact report.
This hive of economic activity doesn’t happen in a vacuum, though. It goes hand-in-hand with some pretty strict UK safety and environmental regulations. These standards aren’t just red tape; they are the very things that push stove design forward. Manufacturers are always being nudged to create units that burn cleaner and are more efficient, which is a massive win for boat owners.
Innovation in Stove Design
So, what’s the result of all this? A fantastic range of stoves designed specifically for the unique challenges of life afloat. You’ll find clever designs engineered to squeeze into the tightest of spaces, burn fuel more cleanly, and sail through the rigorous standards of the Boat Safety Scheme (BSS).
This intense focus on compliance and efficiency means that today’s small boat stove is a highly specialised piece of equipment. If you’re looking for products available right here in the UK, it’s worth checking out models like the Jetmaster UK 60i Slow Combustion Stove to get a feel for current designs. Ultimately, every stove on the market reflects the real-world needs of the UK’s vibrant boating community.
Your Questions Answered
When you’re thinking about a small boat stove, a few common questions always seem to pop up. We get asked these all the time, so here are some straightforward answers based on our years of experience fitting and maintaining them on the canals.
Should I Get a Multi-Fuel Stove or Just a Wood Burner?
For life on the water, a multi-fuel stove is almost always the more practical choice. It gives you fantastic flexibility. You can burn beautifully seasoned wood when you can get your hands on it, but you’ve also got the option of using reliable smokeless coal for those long, slow overnight burns that keep the chill at bay until morning.
Trying to rely solely on a dedicated wood burner can become a real headache. Finding consistently dry, properly seasoned hardwood while you’re out cruising is a lot harder than you’d think. The versatility of a multi-fuel model means you’ll always have a dependable heating option, no matter where you happen to be moored up.
How Often Does My Boat Stove Flue Need Sweeping?
You should get into the habit of sweeping the flue at least once a year, usually just before the main heating season kicks off in the autumn. Think of this as the absolute bare minimum for safety.
However, if you’re running your stove hard throughout the year or you sometimes burn wood that might not be perfectly seasoned (we’ve all been there), it’s much safer to sweep it two or even three times a year. This isn’t just busywork; regular maintenance is crucial to prevent a dangerous buildup of flammable creosote, which significantly reduces the risk of a chimney fire.
Is It Safe to Install a Small Boat Stove Myself?
While plenty of experienced boaters do a fine job of their own installations, it’s a safety-critical task that leaves absolutely no room for error. You have to follow the stove manufacturer’s instructions and the Boat Safety Scheme (BSS) guidelines to the absolute letter.
If you have even the slightest doubt about building the hearth, fitting heat shielding correctly, or getting the flue system perfect, then hiring a qualified marine heating engineer is the safest and wisest decision you can make. An incorrect installation creates a severe risk of both fire and deadly carbon monoxide poisoning.
For expert advice and a professional installation you can trust, talk to the certified engineers at Marine Heating Solutions. We’ll make sure your boat is safe, warm, and fully compliant.
A good, reliable boat heating system is what turns your vessel from a fair-weather toy into a genuine year-round retreat. It’s the difference between shivering through a damp autumn evening and feeling properly cosy and comfortable. The best systems are not just about raw heat; they’re efficient, safe, and perfectly suited to your boat’s size and, more importantly, how you actually live on it. The right choice will always be a balance between the initial cost, day-to-day running expenses, and how much tinkering you’re willing to do.
Why Choosing The Right Boat Heater Matters
Picking the right heater is genuinely one of the most critical decisions you’ll make for your life on the water. It’s not just about warding off the cold. A good system creates a dry, healthy living space, keeps damp and mould at bay, and protects your boat’s plumbing from freezing solid during a bitter UK winter. In many ways, it’s the heart of your boat’s comfort and well-being.
The right heater just works. It slots seamlessly into your routine, whether you’re a weekend sailor who just needs a quick blast of warmth or a full-time liveaboard on a narrowboat who depends on it for constant, reliable heat. Get it wrong, however, and you’re in for a world of frustration, surprisingly high running costs, and even serious safety risks.
Before you even think about brands or models, you need to think about yourself. A small cabin cruiser used for sunny day trips has completely different needs to a 60-foot steel barge that’s your permanent home.
Ask yourself these simple but crucial questions:
How do you actually use your boat? Are you a coastal cruiser, a canal wanderer, or do you spend most of your time tied up at a marina with shore power?
What’s your power situation? Are you running off a beefy battery bank with solar, or are you relying on your engine’s diesel tank?
How hands-on do you want to be? Are you happy tending to a solid fuel stove, or is a “set it and forget it” thermostat-controlled system more your style?
Getting your head around these trade-offs is the first big step. For a much more detailed breakdown, you can learn more about the complete range of boat heating systems and where each one truly shines. Making a smart, informed choice now means you’ll be enjoying countless comfortable days and nights on the water for years to come.
Exploring the Main Types of Marine Heaters
Figuring out how your boat stays warm isn’t just about the fuel you use. The real difference lies in how that heat gets collected and moved around your living space. Each type of marine heater creates a completely different experience onboard, from a quick blast of targeted warmth to a gentle, background cosiness that feels just like home.
Let’s unpack the three main ways of delivering heat on UK boats. By looking at how each system actually works—from its guts to its real-world performance—you’ll get a much clearer idea of which one fits your life on the water.
Forced Air Systems: The Instant Warm-Up
Picture your car’s heater on a freezing morning. You fire it up, and within minutes, hot air is pouring from the vents, chasing the chill out of the cabin. That’s exactly how a forced air boat heating system works, which is why it’s such a popular choice for weekend sailors and cruisers who need heat right now.
The setup is based around a compact heater unit, usually running on diesel or LPG. Inside, a burner heats up a metal component called a heat exchanger. A powerful fan then sucks in cool cabin air, shoves it across the super-hot exchanger, and blasts the now-warm air through flexible ducting to outlets around the boat.
This approach is incredibly good at heating a space quickly. A typical 2kW system can raise the temperature in a small cabin by several degrees in just 10 to 15 minutes. It’s perfect for taking the edge off after a long, cold day on the water.
This makes forced air a brilliant solution for GRP (fibreglass) boats, which tend to lose heat fast. It gives you an immediate shot of dry, warm air that’s fantastic for fighting damp and condensation.
The range of marine heating systems available in the UK has grown a lot, thanks to new tech and what boaters are now looking for. Propane (LPG) forced-air heaters are a common sight, mostly because many boats already have LPG onboard for cooking. This makes adding a heater pretty straightforward. A big plus is their almost silent operation, a huge improvement on the noisy pumps and fans of some older diesel heaters. Electric systems are also gaining ground for smaller, plug-in setups, while hybrid LPG/electric models offer a flexible solution for boats that sometimes have shore power and sometimes don’t.
Hydronic Systems: Your Onboard Central Heating
If forced air is like your car heater, then a hydronic system is the floating version of your central heating at home. It provides a gentle, silent, and wonderfully even warmth that’s ideal for liveaboards or anyone spending a lot of time on their boat.
The heart of a hydronic system is a boiler, which is usually fired by diesel or gas. This boiler heats up a water and antifreeze mix, which is then pumped through a sealed loop of pipes. This hot liquid flows through radiators or little fan-assisted units in each cabin, which then radiate heat out into the room.
This kind of setup has some serious advantages:
Silent Operation: Once it’s up to temperature, the system is virtually noiseless, other than the faint hum of the circulation pump.
Even Heat Distribution: Radiators give off a gentle, radiant warmth that heats the whole space evenly. You don’t get the hot and cold spots that can sometimes happen with forced air.
Domestic Hot Water: A lot of hydronic boilers can be linked to a calorifier (your boat’s hot water tank), using the same system to give you plenty of hot water for showers and washing up.
This all-in-one capability makes it a top-tier choice, especially for larger vessels and steel narrowboats where keeping a stable, comfortable temperature is the main goal.
Solid Fuel Stoves: The Traditional Heart of the Boat
For countless narrowboat and barge owners, a solid fuel stove isn’t just a heater; it’s the heart and soul of their boat. These classic stoves, burning wood, coal, or smokeless fuels, kick out a powerful, dry heat and create a cosy focal point that no other system can touch.
A solid fuel stove works through simple radiation and convection. The fire roaring inside the cast-iron body heats the metal until it’s glowing hot, and that heat radiates directly into the cabin. This intense, dry warmth is amazing at driving out the damp that can be a constant battle on steel boats.
Sure, they need a bit of manual labour—loading fuel, tweaking the airflow, and cleaning out the ash—but their off-grid reliability is second to none. With no need for electricity or complicated pumps, a solid fuel stove keeps you warm as long as you’ve got a supply of fuel. It’s easy to see why they are such a beloved fixture of the canal community. If you’re drawn to this traditional way of life, it pays to look into the details of choosing and fitting narrowboat wood burning stoves to make sure it’s done safely and efficiently.
Comparing Fuel Sources for Your Boat Heating System
Picking a fuel for your boat’s heating system is about more than just staying warm. It’s a decision that shapes your cruising freedom, your budget, and even your daily onboard routine.
Choosing between diesel, propane, solid fuel, or electricity is a classic boating trade-off. You’re weighing up everything from running costs and fuel availability in remote spots to how much precious space you’re willing to give up for safe storage.
Ultimately, this choice comes down to your lifestyle on the water. A long-distance cruiser will value a fuel source they can find at almost any marina. A full-time liveaboard, on the other hand, might prioritise the bone-dry heat and low running costs of a more hands-on option. Let’s get into the real-world pros and cons of each to help you make the right call.
Diesel: The Convenient All-Rounder
For most boats with an inboard engine, diesel is the obvious and most convenient choice. Why? You already have a large, secure fuel tank right there. This simple fact makes adding a diesel heater—whether it’s a forced air or a wet system—a seamless extension of your boat’s existing setup.
You can find diesel at pretty much any waterside fuel pump, so refuelling is never a headache. Plus, modern diesel heaters are incredibly frugal, sipping as little as 0.1 to 0.5 litres per hour, depending on the model and how high you’ve got it cranked. That kind of efficiency means low running costs and ages of warmth before you even have to think about the fuel gauge.
The catch is in the installation, which needs to be done right. The exhaust has to be properly routed and lagged to stop heat damage and make absolutely certain that fumes are vented safely outside. While the heaters themselves are workhorses, they need regular servicing to keep the fuel filters and glow plugs clean for them to fire up reliably every time.
Propane (LPG): The Clean and Quiet Option
Propane, or LPG, is loved for being clean-burning and incredibly quiet. Forget the distinctive tick-tick-tick of a diesel heater’s fuel pump; LPG systems are often completely silent, which makes for a much more peaceful cabin. Since many boats already carry gas for the cooker, adding a heater can be a fairly simple job.
The heat is instant and easy to manage with a simple thermostat, giving you warmth at the push of a button. Propane also burns without much soot or smell, meaning a clean exhaust and less faffing about with maintenance on the burner itself.
The big thing with LPG is safety and storage. Gas is heavier than air, so any leak can silently pool in the bilges, creating a very real risk of explosion. That’s why regulations demand that gas bottles are kept in a purpose-built, sealed gas locker that vents directly overboard. You also need to think about the logistics of swapping empty bottles, which can be a real pain in more remote cruising grounds.
Nothing beats the cosy, radiant warmth of a solid fuel stove burning wood or smokeless coal. It has an incredible ability to drive damp out of the air. For many liveaboards, especially on steel narrowboats, the dry heat from a stove is the only thing that truly keeps condensation at bay during a damp British winter.
Its biggest selling point? It’s completely off-grid. A solid fuel stove needs zero electricity to run. As long as you have fuel, you have heat. Simple as that. Running costs can also be rock bottom, particularly if you have a good source for cheap or free seasoned wood.
Of course, this rustic charm demands a hands-on approach. You need to find a dedicated, dry space to store your fuel, which is bulky. It also means daily chores: loading the stove, tweaking the airflow for a clean burn, and clearing out the ash. For many, this ritual is part of the appeal of life afloat, but it’s a commitment you need to be ready for.
Getting Installation and Safety Right
Fitting a new boat heating system isn’t just about chasing comfort; it’s a serious exercise in responsibility. A warm boat is only a good boat if it’s a safe one, and that means following the installation rules to the letter. Get this wrong, and you’re not just risking a chilly night—you’re inviting serious dangers like fire or the silent, deadly threat of carbon monoxide poisoning.
Every single component, from the fuel lines right down to the exhaust outlet, has to be installed correctly. Think of the exhaust system as your boat’s chimney. It has to be completely sealed, properly lagged to stop it scorching surrounding structures, and positioned where fumes have absolutely no chance of finding their way back into the cabin. This is non-negotiable.
Core Safety Principles for Any Installation
It doesn’t matter what type of heater you choose; a few universal safety principles are the bedrock of a reliable installation. Whether you’re a seasoned DIYer or briefing a professional engineer, these points are crucial.
Proper ventilation is absolutely paramount. Any appliance that burns fuel needs a steady supply of oxygen to do its job cleanly and safely. If you starve it of air, it will start churning out deadly carbon monoxide (CO). This means you must have permanent, unobstructed vents that provide enough airflow for both the heater and for you to breathe.
A correctly installed and regularly tested carbon monoxide alarm isn’t just a nice-to-have; it’s an essential piece of life-saving equipment. On UK waterways, it’s a legal requirement under the Boat Safety Scheme (BSS) for any boat with fuel-burning appliances.
Gas Systems and Professional Sign-Off
When you’re dealing with gas (LPG) systems, the rules get even tighter. Any work involving gas appliances on a boat must be carried out by a Gas Safe registered engineer who is specifically qualified for marine environments. This is absolutely not a job for the enthusiastic amateur.
The legal and safety standards for gas installations are incredibly strict, covering everything from the design of the gas locker to the type of pipework you can use. While you’re focused on the heater itself, don’t forget the wider electrical system, especially on modern boats. For instance, understanding the potential risks and safety of lithium-ion batteries, which might power other systems or even an electric heater, is another vital safety consideration.
Clarifying the Rules on Open-Flued Appliances
There’s been a lot of chatter and debate over the years about certain types of gas water heaters on boats, particularly the open-flued models. It’s vital to rely on current regulations, not on outdated ‘boatyard wisdom’.
Despite past confusion, current UK law (GSIUR, Regulation 30) does permit the installation of open-flued instantaneous water heaters on boats of any age. This is allowed, provided their heat output is generally below 14 kilowatts and they are fitted with a safety device that shuts the appliance down if combustion products start to build up. This isn’t just our interpretation; it’s backed up by industry standards which explicitly allow for both their replacement and new installations on all types of boats.
Maintaining Your System For Peak Performance
Your boat heating system is a hardworking crew member, running tirelessly to keep your living space warm and dry. Just like your engine, it needs regular, proactive care to stay reliable and efficient. Ignoring it is the fastest way to find yourself with a sudden breakdown, which always seems to happen on the coldest night of the year.
Think of maintenance not as a chore, but as a crucial investment in your comfort and safety. A well-kept system doesn’t just perform better; it runs more efficiently, saving you money on fuel in the long run. A simple schedule of checks can prevent the vast majority of common heating frustrations.
Your Routine Maintenance Schedule
Getting into a simple maintenance rhythm is the key to catching problems before they start. Breaking tasks down into daily, monthly, and annual checks makes the whole process manageable and ensures nothing gets missed.
Daily Checks (Solid Fuel Stoves):
De-ash the firebox: Before lighting up, clear out the old ash. This guarantees good airflow for a much more efficient burn.
Quick flue check: Just a quick glance up to make sure the chimney cap is clear of obvious rubbish like leaves or twigs.
Monthly Checks (All Systems):
Inspect fuel lines and filters: For diesel heaters, have a look at the fuel filter for any signs of water or sludge. On LPG systems, visually check the hoses for cracks or wear and test connections with a bit of soapy water to spot any leaks.
Test safety devices: Push the test button on your carbon monoxide and smoke alarms. This is non-negotiable and one of the most important safety checks you can do.
Annual Service and Deep Cleaning of your Boat Heating System
An annual service is the cornerstone of a healthy boat heating system. This is when you go beyond the simple checks and give the unit a thorough clean and inspection. For most boaters, the best time to tackle this is at the end of the heating season in late spring.
For a diesel heater, an annual deep clean involves removing the glow plug and cleaning away all the carbon deposits that have built up. Soot and carbon are the number one culprits behind ignition failures. You can find excellent guides on the specifics of servicing diesel-burning appliances on boats that walk you through the whole process.
Key Takeaway: Preventative maintenance is always cheaper and less stressful than emergency repairs. A few hours of care each year can prevent days or even weeks of cold and discomfort.
For solid fuel stoves, the big annual job is a full chimney sweep to get rid of creosote buildup, which is a serious fire hazard. If you have a hydronic system, now is the time to check the antifreeze levels in the header tank and bleed any air from the radiators to ensure hot water circulates properly.
Beyond the heating unit itself, proper winterisation of all your onboard systems is vital to prevent damage from freezing. Following a thorough winter preparation guide ensures your entire vessel is protected, making it ready for the next season. This proactive approach protects your whole boat.
Where Is Marine Heating Tech Heading Next?
The world of boat heating is definitely changing. There’s a real push for better efficiency, cleaner emissions, and just plain smarter technology. As boaters (and regulations) become more environmentally aware, manufacturers are having to step up their game. The future isn’t just about blasting out raw heat anymore; it’s about intelligent, sustainable, and integrated warmth that fits with modern boating.
We’re moving away from simple on/off systems and towards much more sophisticated solutions. We’re seeing the first wave of hybrid systems and cleaner fuel options, which are set to redefine what’s possible for comfort on board. Keeping an eye on these trends will help you make a choice today that won’t feel dated in a couple of years.
Smarter Systems and Greener Fuels
One of the most exciting developments is the arrival of smart hybrid boat heating systems. Imagine a system that automatically flips from diesel to shore power the moment you plug in at a marina, saving fuel and cutting out the noise. These intelligent controllers can juggle energy sources—drawing from batteries, the engine, or shore power—to get the best efficiency without you having to lift a finger.
This drive for efficiency is part of a bigger picture. The UK’s entire heating equipment market is expected to grow to USD 6.28 billion by 2030, spurred on by government decarbonisation policies and new tech. This is trickling down to the marine world, pushing for the development of more eco-friendly systems. You can read a bit more about the growth drivers in the UK heating market if you’re interested.
The next generation of boat heating will be defined by how well it can talk to a boat’s entire power management system, making clever decisions on its own to save energy and cut its environmental footprint.
The hunt for greener fuels is also picking up steam. While diesel is still the go-to for most, alternatives like Hydrotreated Vegetable Oil (HVO) are becoming a genuine option. HVO is a renewable diesel that can slash net CO2 emissions by up to 90%. The best part? It can often be used in existing diesel heaters with no modifications needed, offering a pretty straightforward step towards greener boating.
The Rise of Integrated Connectivity
Looking a bit further down the road, connectivity is going to be huge. Soon, you’ll be able to pre-heat your boat from your smartphone before you even get to the marina, check your fuel use from your sofa, and get an alert on your phone if the system detects a fault.
This kind of control isn’t just about convenience; it’s about reliability. It means your heating system will be ready to go the moment you need it. These advances promise a future where staying warm on the water is smarter, cleaner, and a whole lot easier than it is today.
Your Boat Heating Questions Answered
When it comes to boat heating, a few questions pop up time and time again. You might be weighing up your options, thinking about the installation, or just trying to get your head around how it all works day-to-day. We hear these queries from boaters all over the UK, so let’s clear the air.
Getting straight, simple answers is the best way to make sure you’re running your system safely and with confidence. Let’s tackle some of the big ones.
What’s the Cheapest System to Run on a Liveaboard Narrowboat?
For most narrowboaters living aboard, a classic solid fuel stove usually wins on pure running costs. If you’ve got a good source for reasonably priced (or even free) seasoned wood and coal, it’s hard to beat. The initial setup can be a bit of an outlay, but your fuel bills will be a lot lighter than with diesel or LPG.
Of course, there’s a trade-off. A diesel-fired central heating system gives you that incredible “set it and forget it” convenience and heats the whole boat automatically. For many, that ease of use is well worth the extra cost of diesel. It really comes down to what you value more: budget-friendly running costs or push-button comfort.
Can I Fit a Boat Heating System Myself?
If you’re a capable and confident DIYer, installing a solid fuel stove or a straightforward forced-air diesel heater is certainly possible. But—and this is a big but—the safety stakes are incredibly high. Getting fuel lines, exhaust routing, and ventilation absolutely perfect is non-negotiable to prevent the risk of fire and deadly carbon monoxide.
Any system that uses LPG (propane) is a different beast entirely. It must be installed and signed off by a Gas Safe registered engineer who holds the specific qualification for boats. Honestly, for your own peace of mind and to keep your insurance company happy, we strongly recommend having any heating system professionally installed, or at the very least, inspected by a qualified marine engineer.
How Much Battery Power Does a Diesel Heater Actually Use?
This is a massive consideration, especially if you’re spending a lot of time off-grid. The biggest power drain from a diesel heater happens right at the start. When the glow plug fires up to ignite the fuel, it can draw a hefty 8-10 amps for several minutes.
Once it’s up and running, the power consumption plummets. It typically settles down to a much more manageable 1-3 amps, which is just enough to keep the fuel pump ticking over and the fan spinning. You absolutely have to account for this in your boat’s power budget, making sure your battery bank and charging setup can handle that initial surge, especially in winter when you’ll be using it most.
What Boat Heating System Do You Recommend?
For expert advice on choosing, installing, or servicing the perfect boat heating system for your vessel, trust the certified engineers at Marine Heating Solutions. Get in touch with us today to ensure your comfort and safety on the water.
Welcome to our blog post about narrowboat wood burning stoves. Walk onto almost any narrowboat in the UK, and you’ll likely find a wood-burning stove taking pride of place. It’s the warm, beating heart of the boat, the essential weapon against our damp, chilly climate. But it’s so much more than a simple heater; it’s a real symbol of the self-sufficient, traditional spirit of life on the canals.
Getting the right stove isn’t just a detail—it’s absolutely critical for your comfort and safety, and for creating that truly cosy home on the water.
Life on Britain’s canals moves at its own pace, a rhythm dictated by the seasons and the gentle flow of the water. For the thousands of us who call these waterways home, a reliable source of warmth isn’t a luxury—it’s a fundamental necessity. This is where narrowboat wood burning stoves really come into their own.
A narrowboat is, at its core, a steel tube sitting in cold water. That makes it incredibly prone to dampness and losing heat fast. A good quality stove tackles this head-on, kicking out a powerful, dry heat that turns a cold steel shell into a warm, inviting sanctuary.
This dry heat is a game-changer for fighting off the relentless condensation that can plague boat interiors. It protects your precious woodwork and soft furnishings from the threat of damp and mould.
More Than Just a Heater
Beyond its practical job, the stove quickly becomes the central hub of the boat. It’s where you’ll gather on a bitter evening, where you’ll hang your clothes to dry after a rainy day’s cruise, and where you’ll boil the kettle for a much-needed cuppa.
The stove embodies the freedom and resourcefulness of the liveaboard lifestyle. It provides heat and comfort without ever needing to be plugged into the shoreline. For many boaters, the simple ritual of lighting the fire, tending the flames, and managing the fuel is a deeply satisfying part of the experience. It connects you to a more hands-on way of living that is right at the heart of the canal’s appeal.
Of course, a stove is just one piece of the puzzle. Getting to grips with all the boat heating options is the first step towards a comfortable and safe life afloat.
A stove is the best way of keeping your narrowboat warm. It’s an efficient and traditional method to stay cosy, with the added benefit of using readily available fuel like wood or coal.
The Foundation of Off-Grid Comfort
The true worth of a solid fuel stove really hits home in the depths of winter. When the towpaths are frozen solid and the wind is howling outside, that steady, radiant warmth is a reliable lifeline.
This is the self-sufficiency that makes year-round life on the water not just possible, but genuinely enjoyable. In this guide, we’ll walk you through everything you need to know about choosing, installing, and looking after the perfect stove for your floating home, making sure you stay warm and safe on your adventures.
How to Choose the Perfect Wood Burning Stove for Your Narrowboat
Picking the right narrowboat wood burning stoves can feel like a big decision, but it really just comes down to a few key factors. Get this right, and you’re rewarded with a wonderfully cosy cabin. Get it wrong, and you’ll either be shivering through winter or sweltering in a space that’s far too hot.
A stove that’s too small will never quite manage to warm your bones. On the other hand, one that’s too powerful will just tick over inefficiently, creating a mess of soot and smoke. The real goal is to find that ‘just right’ stove that perfectly suits your boat, your lifestyle, and the UK’s waterway regulations.
Calculating Your Required Heat Output
The absolute first thing to get your head around is heat output, which is measured in kilowatts (kW). This isn’t a guessing game; it’s a simple calculation based on the size of your boat and, crucially, how well insulated it is. An older steel boat will haemorrhage heat compared to a modern spray-foamed one, meaning it’ll need a bit more oomph from its stove.
There’s a simple, boater-approved formula that’s been used for years to get a pretty reliable estimate. First, work out the volume of your living space in metres (length x width x height).
Then, if you’ve got good insulation, divide that number by 15. If your insulation is poor or non-existent, divide it by 10. The result is the kW rating you should be looking for. It’s a straightforward calculation that immediately stops you from buying a stove that’s completely wrong for your cabin.
To give you a rough idea, here’s a quick visual guide for typical narrowboat sizes.
As you can see, the power you need scales up directly with the size of your boat. Simple as that.
To make things even easier, here’s a quick reference table to help you pinpoint the right output for your boat.
This table provides a solid starting point, but always remember that things like the number of windows and your personal preference for warmth can play a part.
Wood-Only or Multi-Fuel Stoves
Next up, you need to decide between a wood-only burner and a more versatile multi-fuel stove. They might look the same from the outside, but their internal design is quite different, and that affects what and how they burn.
Wood Burning Stoves: These are designed to burn logs on a flat bed of ash. Wood burns best with air coming down from above the flames.
Multi-Fuel Stoves: These have a raised grate with slots in it. This lets air get up and under the fuel, which is essential for properly burning smokeless coal.
Honestly, for most liveaboards, a multi-fuel stove is the more practical choice. It gives you the freedom to burn cheap and cheerful wood when you can get it, but also lets you switch to long-burning smokeless coal. That’s a real godsend for keeping a steady, reliable heat going overnight during the depths of winter.
Understanding DEFRA Approval
As you travel the canals and rivers, you’re bound to pass through Smoke Control Areas, especially in cities and larger towns. In these areas, it’s illegal for your chimney to puff out lots of smoke. This is where DEFRA approval becomes a must-have.
A DEFRA-exempt (or DEFRA-approved) stove is one that’s been officially tested and certified to burn fuel like wood so cleanly that it doesn’t produce much smoke, even when you’ve turned the air controls right down.
Since your boat is mobile, you could easily moor up in a Smoke Control Area without even knowing it. The simplest way to stay on the right side of the law is just to install a DEFRA-approved model from the start. It saves you the worry of potential fines and means you’re being kinder to the air quality.
Many of the best-loved marine stoves, like the legendary Morsø Squirrel, are available in DEFRA-approved versions. There’s a reason you see so many of them on boats—they’ve been a boater’s favourite for over 30 years. They’re compact, incredibly efficient, and tick all the boxes for UK regulations. For a deep dive into this classic, check out our Morsø Squirrel stove guide for boat living.
By keeping these three things in mind—heat output, fuel type, and DEFRA approval—you’ll be well on your way to choosing the perfect stove to become the warm heart of your boat.
Right, you’ve picked out the perfect stove. Now comes the most critical part of the whole project: the installation. Getting your narrowboat wood burning stove fitted safely and to the proper standards isn’t just a box-ticking exercise—it’s absolutely non-negotiable. This is all about protecting your boat, your possessions, and most importantly, yourself from the very real dangers of fire and carbon monoxide.
Think of the installation as a complete safety system built around your stove. Every single piece, from the slab it sits on to the cap on the chimney, has a vital job to do. When you get this system right, you can finally relax and enjoy that cosy warmth with total peace of mind.
The Foundation: A Fire-Proof Hearth
All narrowboat wood burning stoves need a solid, non-combustible foundation to sit on. We call this the hearth, and its main purpose is to shield the floor from the intense heat radiating downwards and to catch any stray embers that might tumble out when you open the door.
The hearth has to be made from a completely fire-resistant material. On a narrowboat, you’ll typically see a few common choices:
Stone slabs: Materials like slate or granite look fantastic, are incredibly durable, and do the job perfectly.
Tiles: Ceramic or quarry tiles are a hugely popular option, giving you plenty of scope for a custom look.
Metal plates: A simple steel or iron plate is a straightforward and effective solution for a hearth.
Whichever material you go for, it needs to create a safe zone by extending out from the stove on all sides. The Boat Safety Scheme (BSS) has its own specific rules, but a good rule of thumb is to have at least 225mm of hearth in front of the stove door and 150mm at the sides and back.
Managing Heat: The Critical Role of Air Gaps and Heat Shields
Wood burning stoves get seriously hot. In the close confines of a narrowboat, they’re often installed near wooden bulkheads, furniture, or other flammable surfaces. Controlling this radiant heat is arguably the single most important part of a safe installation. The best way to do this is simply by leaving a safe distance—an air gap—between the hot stove and anything that could catch fire.
According to installation experts, the minimum safe distance to combustibles from a stove is typically 400mm from the sides and 450mm from the back. These distances can often be significantly reduced by using heat shields.
A heat shield is just a non-combustible barrier that you fit between the stove and the wall. It works by reflecting the heat away and, crucially, allowing air to circulate behind it, which carries the heat away safely. By fitting a manufacturer-approved heat shield, you can often reduce the required clearance to as little as 100mm—a massive space-saver on a narrowboat.
The Flue System: Your Stove’s Lifeline
The flue, or chimney, is what channels all the dangerous smoke and gases safely out of your cabin. On a boat, this needs a specific type of setup to be both safe and watertight. The modern standard, and a huge leap forward in safety, is the twin-wall insulated flue system.
This system is essentially a pipe within a pipe, with a thick layer of high-temperature insulation packed in between. This design is brilliant because it keeps the outer surface of the flue much cooler, where it passes through your boat’s ceiling and roof, dramatically cutting down the risk of a fire.
A few key parts are involved in a proper flue installation:
Deck Collar: This is the fitting that secures the flue as it goes through the roof. It’s fitted with a tough silicone or EPDM seal to create a watertight barrier and stop rain from dripping into your boat.
Chimney Cap: A cap on top of the flue is essential to keep rain from pouring down the chimney, but it’s designed to let the smoke out freely. Many also help improve the stove’s ‘draw’, making it burn better.
A well-installed twin-wall system isn’t just safer; it actually makes your stove work better by keeping the flue gases hotter, which helps them rise more effectively and reduces the build-up of soot. For a great, detailed look at the whole process, you can find excellent guidance from experienced marine engineers on how to install a boat stove.
Meeting Boat Safety Scheme Requirements
The Boat Safety Scheme (BSS) sets the minimum safety standards for most boats on UK inland waterways. When it comes to solid fuel stoves, their requirements are, quite rightly, very strict, focusing heavily on preventing fires and carbon monoxide poisoning.
A BSS examiner will be looking for a few key things:
Secure Installation: The stove and the entire flue must be securely fixed down so they can’t shift or come loose with the boat’s movement.
Proper Hearth and Clearances: They’ll check that your hearth is the right size and that you’ve maintained all the minimum safe distances to combustible materials.
Correct Flue System: The flue must be properly sealed, well-supported, and pass through the roof in a safe and compliant way.
Carbon Monoxide (CO) Alarms: This is a life-saver. You absolutely must have a working CO alarm, certified to BS EN 50291, in the same cabin as the stove.
While the BSS rules are your primary guide, the principles of fire safety are universal. It never hurts to familiarise yourself with a general home fire prevention checklist for a broader perspective. By following these guidelines carefully, you’ll ensure your stove is not just a source of warmth, but a safe, compliant, and welcome centrepiece for your narrowboat home.
Choosing the Right Fuel for Your Fire
The quality of the warmth radiating from your stove comes down to one simple thing: the fuel you put in it. Your choice here impacts everything. It determines the heat output, how long the fire lasts, what you’ll spend, and even how much ash you’ll be scooping out. It’s a decision that genuinely shapes the rhythm of life on board during the colder months.
Think of fuel as food for your fire. Just like a good meal provides lasting energy, the right fuel gives you a long, clean, and efficient burn. On the other hand, poor quality, damp wood will just smoulder and struggle. You’ll get more smoke than heat, and you’ll clog up your flue with nasty tar.
Hardwood vs Softwood: The Great Debate
The most common fuel for narrowboat wood burning stoves is, of course, wood. But not all logs are created equal. The key difference is between hardwood and softwood, and for a narrowboat stove, hardwood is almost always the better choice.
Hardwood: Sourced from trees like oak, ash, and birch, hardwood is incredibly dense. This density means it burns much slower and hotter, providing that long-lasting, consistent heat that’s perfect for keeping the chill at bay all evening.
Softwood: From conifers like pine or spruce, softwood is much less dense. It catches fire easily and burns fast with a bright, crackling flame. This makes it brilliant for kindling, but it won’t sustain a fire for long and you’ll burn through your supply in no time.
For the best results, use softwood to get your fire roaring and then switch over to dense hardwood logs for a long, slow burn. That’s how you get the maximum heat from every single piece of wood you carry aboard.
Understanding Certified Wood and Smokeless Coal
To get a truly efficient burn, your wood absolutely must be dry. Burning wet wood is a false economy; most of the energy is just wasted boiling off the water inside, which results in a cool, smoky fire. This is precisely why the ‘Ready to Burn’ certification is so important.
This government-backed scheme is your guarantee that the wood you’re buying has a moisture content of 20% or less. It’s the gold standard for efficiency and ensures you produce minimal smoke, which is far kinder to your flue and the environment.
However, for those long, freezing winter nights, many boaters turn to smokeless coal. While wood gives you that beautiful, dancing flame, manufactured smokeless fuels (or briquettes) offer a different kind of performance altogether. They can burn for an incredibly long time at a steady, high temperature, making them ideal for keeping the stove ticking over safely all night.
The real secret to mastering your narrowboat stove often lies in using a mix of fuels. A bed of slow-burning smokeless coal can provide a consistent base heat, with logs added on top for a boost of warmth and the cheerful glow of a real flame.
Narrowboat stoves are proper multi-fuel workhorses, and boaters have become experts at finding the best combinations. It’s this kind of ingenuity that boat life is all about.
Sourcing and Storing Your Fuel
Living on a narrowboat means space is always at a premium, which can turn storing bulky bags of fuel into a real logistical puzzle. You can’t just leave it out on the roof to get rained on; that precious supply must be kept bone dry to be of any use.
A few practical storage solutions you’ll see on the cut include:
Coal Bunkers: A purpose-built metal or wooden box on the bow or stern is the classic, most common solution.
Tonneau Covers: Using the covered space at the bow (the cratch) to keep well-sealed bags of fuel dry and out of the way.
Under-Gunwale Storage: Some creative boaters have even built clever storage racks along the gunwales, protected by a small tarpaulin.
Many boaters buy their fuel in bulk from canalside suppliers who deliver right to the towpath. Beyond just buying seasoned wood, some prefer to source and prepare their own fuel. If you’re considering this route, it’s vital that you first master the art of harvesting firewood safely and efficiently. Getting this right ensures you’ll have a reliable, well-seasoned supply to see you through the winter.
Understanding Emissions and Responsible Boating
As our awareness of environmental impact sharpens, so does the conversation around using wood burners on narrowboats. This isn’t about ditching the traditional warmth that’s a lifeline for so many of us; it’s about understanding the facts and making smarter choices. By opting for modern stove technology and adopting good burning habits, you can look after the waterways while still enjoying the comfort of a real fire.
The main point of discussion when it comes to emissions is something called PM2.5. These are tiny, invisible airborne particles that can hang in the air and affect its quality. Older, inefficient stoves and open fires are definitely major sources of these particles, but it’s vital to draw a line between them and the clean-burning, modern stoves available today.
The Power of Modern Stove Technology
The difference between an old, basic burner and a new, certified model is absolutely night and day. This is where standards like Ecodesign and ClearSkies come in, setting a whole new benchmark for how efficiently and cleanly a stove can operate.
Ecodesign Stoves: This is the current UK standard for all new stoves. An Ecodesign-ready model is engineered to burn fuel far more completely, which drastically cuts down on the amount of unburnt particles—what we see as smoke—going up the chimney.
ClearSkies Certification: This is an independent scheme that pushes the standards even higher. A stove with a high ClearSkies rating is one of the cleanest and most efficient you can possibly buy, easily surpassing the basic Ecodesign requirements.
Honestly, choosing a certified stove is the single biggest thing you can do to minimise your environmental footprint. It’s all about balancing the traditional comforts of boat life with a modern sense of responsibility for the air we all breathe.
A Balanced Look at the Data
The recent noise around wood burning often completely misses the huge strides made in stove technology. While emissions are a real concern, the data shows that modern stoves are a tiny piece of the puzzle. Ecodesign stoves can slash emissions by up to 90% compared to a traditional open fire, and the latest ClearSkies Level 5 models improve on that by another 30%.
Consider this: in London, a massive 70% of wood burning still happens on open fires, not in modern stoves. That really highlights where the real problem is. Despite record stove sales, UK PM2.5 emissions have consistently fallen, with modern stoves contributing just 1–2% of the national total. For us boaters, this just reinforces how important it is to upgrade to newer, cleaner models to protect air quality on the cut. You can find a great breakdown by exploring the data behind wood stove emissions.
Choosing an Ecodesign stove, burning the right fuel, and maintaining your flue system isn’t just about ticking boxes; it’s about being a good neighbour and a responsible member of the boating community, protecting the unique environment we all love.
At the end of the day, responsible boating comes down to making informed choices. Alongside keeping emissions low, it’s absolutely vital to be vigilant about immediate safety risks. An essential part of this is knowing how to prevent carbon monoxide poisoning in the tight confines of a boat. By combining clean burning with solid safety practices, you ensure your stove remains the safe and welcoming heart of your home.
Getting to Grips with Routine Stove Maintenance
Looking after your stove isn’t a chore; it’s a simple set of habits that keeps it safe, efficient, and ready to roar into life when you need it. Think of it like a series of small, regular check-ups that stop bigger problems from ever cropping up. By staying on top of these little tasks, you’ll make sure your stove remains the reliable, warm heart of your boat for years to come.
Honestly, a little bit of attention goes a very long way. Simple daily and weekly jobs form the bedrock of a healthy stove, preventing the build-up of gunk that can kill its performance and even pose a safety risk.
Daily and Weekly Checks
Your most frequent job will be dealing with the ash. Before you even think about lighting a new fire, clear out the excess ash to keep the air flowing properly – it’s absolutely vital for an efficient burn. A thin layer on the bottom is actually helpful for burning wood, but if you’re using smokeless coal, you want that grate to be completely clear.
Once a week, give the stove glass a good clean. It’s not just about enjoying the view of the flames; a clear window helps you keep an eye on how well the fire is behaving. While you’re at it, have a quick look at the rope seals around the door and glass. If they look frayed or have come loose, they won’t be creating a proper airtight seal, which leads to a fire that’s inefficient and hard to control.
“Regularly emptying the inside of your stove from ash and charcoal is important to maintain good airflow. You should also clean your chimney regularly to prevent soot build-up.”
The All-Important Job of Sweeping the Chimney
This is, without a doubt, the most critical maintenance task you’ll do. As fuel burns, it creates a sticky, black, tar-like substance called creosote that coats the inside of your flue. This stuff is incredibly flammable and is the number one cause of chimney fires on boats.
How often you need to get the brushes out really depends on what you’re burning:
Burning Wood: You absolutely must sweep the chimney at least twice a year. Wood produces way more creosote than other fuels, especially if it isn’t perfectly seasoned.
Burning Smokeless Fuel: Sweeping at least once a year is the recommended minimum here.
Heavy Winter Use: If your stove is blazing away 24/7 through the coldest months, you’ll probably need to sweep it more often.
Plenty of boaters learn to sweep their own chimney with a set of flexible flue rods and the right-sized brush. But if you’re not confident, getting a professional sweeping gives you that priceless peace of mind that the job’s been done right.
End-of-Season Care
When the weather finally warms up and your stove’s work is done for the year, don’t just shut the door and forget about it. A proper end-of-season shutdown is key to protecting it from rust during the damp summer months.
Give the stove and flue one last, thorough clean to get rid of every last bit of ash and soot. These residues love to attract moisture, which is the fast track to corrosion. Once it’s clean, leave the air vents cracked open just a little. This allows air to circulate inside and stops condensation from forming. It’s a simple routine, but it means that when that first autumn chill hits the air, your stove will be ready to go without a hitch.
Got a Question About Your Narrowboat Stove?
Even after you’ve got your head around the basics, living with a stove day in, day out throws up its own set of practical questions. Let’s tackle some of the most common queries we hear from boaters on the cut, with clear, straightforward answers to help you run your stove with confidence.
These are the real-world questions that pop up when you’re actually living the life, from keeping the fire in all night to figuring out your maintenance schedule.
How Often Should I Be Sweeping My Chimney?
This is a big one, and it’s all about safety. The simple answer is: it depends entirely on what you’re burning.
Mainly burning wood? You absolutely must sweep the chimney at least twice a year. Wood creates a sticky, tar-like substance called creosote, which is the number one cause of dangerous chimney fires.
Mainly burning smokeless fuel? You can get away with sweeping at least once a year as a bare minimum.
Running it 24/7 in winter? If your stove is your primary heat source and it’s going non-stop, you’d be wise to sweep it more often. A clear flue is a safe flue.
Can I Keep My Stove Lit Overnight?
Yes, you certainly can. Keeping the fire in overnight is standard practice for most liveaboards, but you have to do it the right way. The goal is to create a slow, slumbering burn that ticks over gently until morning.
To do this, you’ll want to load up the stove with dense hardwood logs or a good quality smokeless fuel. Let it get properly established, then shut the air vents down until they’re almost completely closed. This starves the fire of oxygen, forcing it to burn incredibly slowly and release a steady, gentle heat all night. But here’s the crucial bit: always, always make sure your carbon monoxide alarm is tested and working before you turn in for the night.
A multi-fuel stove is a popular choice for this, as its raised grate allows air to get underneath the fuel. This is essential for burning smokeless coal properly and gives boaters that all-important flexibility.
Do I Really Need a DEFRA-Approved Stove?
The strict legal answer is that you only need a DEFRA-exempt (the official term for ‘approved’) stove if you plan on burning wood in a designated Smoke Control Area.
However, a narrowboat is a moving home. You’ll constantly be travelling through towns and cities that have these smoke control zones. For that reason alone, it’s highly advisable to just get a DEFRA-approved stove from the outset. It saves a world of hassle and ensures you’re compliant, no matter where you decide to moor up for the night.
Our Service for Narrowboat Wood Burning Stoves
For expert advice on choosing, installing, or servicing the perfect stove for your vessel, trust the certified marine engineers at Marine Heating Solutions. Ensure your boat is warm, safe, and compliant. Browse our range of narrowboat wood burning stoves, and get in touch for a quote today!
A campervan diesel night heater is an absolute must-have if you want to extend your travel season beyond the summer months. It provides a steady, dry heat by sipping diesel directly from your van’s main fuel tank. This simple integration makes it a game-changing upgrade for anyone serious about year-round van life, especially with our notoriously unpredictable UK weather.
Why a Diesel Heater is a Game Changer for Van Life
This is about so much more than just staying warm. Installing a diesel heater unlocks a new level of freedom and comfort on the road. It transforms your campervan from a seasonal escape pod into a genuine four-season adventure-ready home. It’s not just about heat; it’s about making van life practical, sustainable, and enjoyable no matter what the forecast says.
The Ultimate Convenience: Fuel on Tap
One of the biggest wins is tapping directly into your van’s main fuel tank. Picture this: you’re parked up deep in the Scottish Highlands on a freezing evening when you realise your separate LPG bottle for heating is about to run out. The nearest supplier is miles away and probably closed. Stressful, right?
A diesel heater gets rid of that worry completely. As long as you’ve got fuel in the tank to drive, you’ve got fuel to stay warm. The sheer convenience is a huge reason these heaters have become so popular. Diesel is available at every fuel station, unlike LPG which can be a real pain to track down. A typical 2kW heater only sips around 0.3 litres of diesel per hour, giving you efficient warmth without the constant anxiety of finding a refill.
Combatting the Dreaded UK Damp with a Campervan Diesel Night Heater
Anyone who has spent a winter in a campervan knows the constant battle against condensation. Every breath you take, every brew you make, adds moisture to the air. This then clings to cold surfaces like windows and metalwork, quickly leading to damp, mould, and a generally miserable living space.
A campervan diesel night heater is your secret weapon here. It produces a very dry heat because the whole combustion process is self-contained and vented outside. This means zero extra moisture is pumped into your living area. In fact, it actively dries the air, protecting your van’s interior and your health.
Cost-Effective Warmth for Long Trips
While the initial purchase and fitting is an investment, the running costs of a campervan diesel night heater are surprisingly low. When you compare it to the recurring expense and faff of swapping out gas bottles, using a tiny amount of diesel from your main tank is far more economical for long-term travel.
Of course, comfort from the cold is one thing, but peace of mind is another. To make your van life experience truly worry-free, it’s wise to think about overall security. Protecting your investment is key, so consider looking into the best car security systems as well. Pairing a reliable heater with solid security means you can properly relax and embrace the adventure.
Choosing the Right Diesel Heater for Your Van
Picking the perfect diesel night heater for your campervan can feel like a big decision, but it really just boils down to a few key questions about your specific needs and setup. The first, and arguably most important, thing to get right is the size.
Get this wrong, and you’re either burning through diesel with a unit that’s far too powerful or, worse, shivering through a cold night because your heater just can’t keep up.
How Much Power Do You Need?
Diesel heater power is measured in kilowatts (kW). For most small to medium-sized vans – think Ford Transits or the ever-popular VW Transporter – a 2kW model is usually the perfect fit. They are incredibly efficient on both fuel and electricity, providing more than enough warmth for a well-insulated space without making a racket or draining your batteries.
If you’re working with a much larger van, like a long-wheelbase Sprinter or a high-roof Ducato, you’ll probably want to step up to a 5kW unit. This is especially true if you plan on chasing snow and spending lots of time in properly cold places, like the Scottish Highlands in the dead of winter. A 5kW heater has the extra grunt to get a larger volume of air up to a comfortable temperature much more quickly.
This infographic breaks down the main things you’ll need to think about.
As you can see, it’s all about matching the heater’s power to your van’s size, weighing up the pros and cons of different models, and double-checking that the installation kit has everything you need for a safe, reliable fit.
Premium Brands vs Budget Heaters
Your next big choice is whether to splash out on a premium brand or go for one of the much cheaper, budget-friendly models, often known as “Chinese diesel heaters”. There are some pretty significant differences to weigh up here.
Established brands like Webasto and Eberspächer have built a solid reputation over decades for being incredibly reliable, whisper-quiet, and just really well-made. They’re put through rigorous testing and come with proper warranties and a network of dealers for support. Of course, that peace of mind comes with a hefty price tag, often costing nearly ten times as much as the budget options. You can get a feel for what’s on offer by checking out proven models like the Webasto Air Top 2000.
On the flip side, the budget heaters you see all over the internet have made a warm van accessible to thousands of people who couldn’t justify the premium cost. They are unbelievably cheap and, for the most part, surprisingly effective. The trade-off? You get virtually no official customer support, and the quality of some components in the fitting kit can be a bit hit-or-miss.
Diesel Heater Comparison: Budget vs Premium
Feature
Budget Heaters (e.g., Chinese Models)
Premium Heaters (e.g., Webasto/Eberspacher)
Price
£100 – £200
£1,000 – £2,000+
Reliability
Variable; some run for years, others fail early.
Excellent, proven track record.
Noise Level
Generally louder, especially the fuel pump tick.
Very quiet, engineered for minimal noise.
Build Quality
Basic materials, inconsistent quality control.
High-quality components, robust construction.
Warranty & Support
Limited to non-existent.
Comprehensive manufacturer warranty and dealer support.
Kit Components
Often requires upgrades (fuel line, clamps, etc.).
High-quality, reliable components included.
High Altitude Perf.
May require manual adjustment.
Often includes automatic altitude compensation.
Ultimately, the choice often comes down to your budget and how hands-on you’re willing to be. If you don’t mind a bit of tinkering and are happy to troubleshoot and maybe upgrade a few parts yourself, a budget heater is fantastic value for money. But if you need something that’s guaranteed to work flawlessly straight out of the box and has professional backup, a premium brand is the smarter long-term investment.
What to Look for in an Installation Kit
No matter which heater you end up with, the quality of the fitting kit is absolutely vital for a safe and long-lasting installation. It’s well worth paying close attention to these bits, as spending a few quid on upgrades now can save you a world of pain later.
Fuel Line: The hard plastic fuel line that comes with many budget kits is notoriously stiff and can become brittle over time. Swapping it for a higher-quality, more flexible fuel line is a cheap and easy upgrade that I’d highly recommend.
Exhaust Pipe: Check that the exhaust is made from proper stainless steel and is long enough for you to route it safely out from under your van, well away from any opening windows, doors, or vents.
Fuel Pump Mount: That constant ticking from the fuel pump is the noise that drives most people mad. A decent kit should include a rubber isolation mount that stops the pump from vibrating directly against your van’s chassis, which makes a huge difference.
Installing Your Heater for Safety and Reliability
Right, this is where we get our hands dirty. Honestly, a safe and secure installation is the single most important factor for a reliable campervan diesel heater. I’ve seen too many people rush this bit or cut corners, and it’s just a recipe for problems down the road. Let’s walk through the critical steps I’ve learned from years of fitting these things, so you can get it right the first time.
This isn’t just about making the heater work; it’s about being confident that your setup is safe, quiet, and dependable for years of chilly nights. From picking the perfect spot to sealing that exhaust, every little detail matters.
Choosing the Perfect Mounting Location
The first big decision you’ll make is where to mount the heater unit. You’re balancing a few different factors here, so it’s well worth taking the time to get under your van and properly visualise the possibilities.
Your main goal is to find a flat, secure patch on the underside of your van’s floor. You need to find a spot that’s clear of chassis members—they’re a nightmare to drill through—and well away from any existing brake lines, fuel pipes, or wiring looms.
Keep these key points in mind when you’re scouting for a location:
Airflow: The heater needs to pull in cool air from inside your van and push hot air back out. Make sure the spot you choose inside the van is clear of obstructions so you can get good circulation.
Noise: Remember that ticking fuel pump? If you mount it directly to a main chassis rail, the sound will echo through the whole van. It’s much better to find a spot on a smaller bracket or subframe where you can use a rubber isolating mount to absorb the vibrations.
Safety Clearances: The exhaust pipe gets incredibly hot. Your chosen location must allow you to route the exhaust with plenty of clearance from any plastic bits, underseal, and especially the vehicle’s tyres.
Fuel, Fumes, and Fire Safety
Once you’ve got your location sorted, the next job is to tackle the three most critical connections: the fuel supply, the exhaust outlet, and the combustion air intake. Getting these right is absolutely non-negotiable for safety.
Tapping your fuel line is often the bit that makes people nervous. Most kits come with a standpipe that you install directly into your main diesel tank. This means dropping the tank, drilling a hole, and fitting the pipe with a completely secure, fuel-tight seal. You’ll need to cut the pipe so it sits a couple of inches from the bottom of the tank – this is a clever feature that stops the heater from ever running your van completely dry.
The exhaust is, without a doubt, the most critical safety element. It must be routed well away from any doors, vents, or opening windows. The last thing you want is for fumes to find their way back into your living space.
Your exhaust system must be 100% gas-tight. I can’t stress this enough. Double-check every single connection and use a dab of high-temperature exhaust paste on the joints. A carbon monoxide leak is silent and deadly, so please, install a quality CO detector inside your van as well.
For a really detailed look at routing and sealing, our comprehensive guide on diesel heater installation has some extra tips and diagrams that can be a massive help at this stage.
Getting the Electrics Right
Finally, it’s time to give it some power. A campervan diesel heater should always be wired to your leisure battery, never your starter battery. This is crucial—it ensures you can stay warm all night without waking up to a van that won’t start.
The wiring loom that comes with most kits is pretty straightforward. You’ll have a positive and negative wire for the battery, a plug for the controller, another for the fuel pump, and one for the main heater unit itself.
It is vital to include an inline fuse on the positive wire, placed as close to the battery terminal as possible. This is your main protection against short circuits. Take a moment to make sure all your connections are solid; use properly crimped connectors and finish them with heat shrink to protect against moisture and vibration under the van. A bit of extra care here will save you from chasing frustrating electrical gremlins later on.
Mastering Your Heater’s Controls and Functions
Getting your campervan diesel night heater fitted is a brilliant milestone. But knowing how to actually run it properly is what really makes the difference on a chilly night. It’s about more than just flipping a switch; operating your heater correctly will save you diesel, cut down on wear and tear, and give you consistent, reliable warmth trip after trip.
The first thing to get your head around is that a diesel heater has its own rhythm. It’s not an instant-on, instant-off appliance. It has very specific start-up and shut-down sequences that you need to respect to keep it running smoothly for years to come.
The Correct Start-Up and Shut-Down Cycle
When you first fire your Campervan Diesel Night Heater up, the glow plug has to get seriously hot to ignite the fuel. This initial phase is quite power-hungry, pulling a peak of around 8-10 amps from your leisure battery. Once the fuel catches and a flame is established, things settle right down, and the power draw drops to a mere 1-2 amps to run the fan and fuel pump.
The shut-down cycle, though, is even more important. After you turn the heater off, the fuel pump cuts out, but the fan keeps spinning for a few minutes. This is the cool-down phase, and its job is to purge any unburnt fuel and cool the combustion chamber.
You must never, ever kill the power to the heater at the main switch while it’s running or in its cool-down phase. Doing so bypasses this vital process, leaving fuel residue and soot to build up inside. Honestly, it’s the quickest way to clog your heater, leading to smoky start-ups and eventually, complete failure.
Interpreting Your Controller
Your controller is the command centre for the whole operation, whether it’s a simple rotary dial or a fancy digital display. The basic dials usually just control the fan speed, which gives you an indirect handle on the heat output.
Digital controllers are a different beast altogether, offering far more precise control. You can typically set a specific target temperature, and the heater will cleverly modulate its power up and down to maintain it. This is a game-changer for saving diesel overnight. For those with a premium setup, a controller like the Webasto MultiControl takes it even further with programmable timers and advanced diagnostics.
Priming the Fuel Line
The first time you run your Campervan Diesel Night Heater, or after you’ve done any work on the fuel system, you’ll need to prime the line. This is just the process of getting the fuel pump to push diesel all the way from the tank to the heater unit. Most controllers have a specific priming function for this—you might need to press a combination of buttons. You’ll hear the distinctive ticking of the pump as it works its magic.
A Key Maintenance Habit
Here’s one of the best habits you can get into. Every week or two, run your campervan diesel night heater on its absolute highest setting for a good 20-30 minutes. This high-temperature blast acts like a self-cleaning cycle, burning off any sooty carbon deposits that have built up from running on low power for long periods. It’s a simple, proactive bit of maintenance that can save you a world of trouble down the line.
Simple Maintenance and Troubleshooting on the Road
The secret to a happy and reliable campervan diesel heater? A little proactive upkeep. Honestly, most of the issues I come across are completely preventable with just a few simple checks. Taking ten minutes to look over your system before a big trip can be the difference between a cosy night’s sleep and a cold, frustrating breakdown.
Think of it like the routine checks you do on your van’s engine; a quick glance at the fluids and connections saves a world of trouble later on. Your heater is no different.
Building a Simple Maintenance Routine
You don’t need to be a master mechanic to keep your heater in top nick. A simple, regular schedule of checks will catch most problems before they even start. I try to run through this quick list about once a month, especially during the colder seasons.
Inspect the Exhaust: Get underneath your van and give the exhaust pipe a good look. Check that it’s still securely mounted, has no holes or cracks, and that the outlet is clear of mud, dust, or any other road grime.
Check the Fuel Filter: Most heaters have a small inline fuel filter. Just take a peek to make sure it’s clean and that fuel is flowing freely. If it looks clogged or full of sediment, it’s a very cheap and easy part to replace.
Listen to the Fan: When the heater starts up, have a listen for any unusual scraping or rattling sounds from the fan. A smooth, consistent whir is what you’re after.
This kind of proactive approach doesn’t just extend the life of your unit; it also makes it more fuel-efficient. The big push towards diesel heaters in the UK campervan scene is partly driven by their ability to reduce reliance on gas bottles. Solutions from top providers like Webasto free up valuable space and weight by tapping into the main vehicle fuel tank, which also helps minimise gas consumption. You can learn more about these efficient heating solutions on Webasto’s website.
Spotting Carbon Build-Up Early
Carbon build-up is the number one enemy of a diesel heater. It happens when the heater consistently runs on a low setting, never getting hot enough to properly burn off all the soot. The first sign is usually a puff of white or grey smoke on start-up that takes longer than usual to clear.
If you notice your heater struggling to ignite, producing excessive smoke, or cutting out unexpectedly, carbon could well be the culprit. Don’t ignore these early warnings—they are your heater’s way of asking for a little help.
The best cure is prevention. As we touched on earlier, get into the habit of running your heater on full power for 20-30 minutes at least once a week. This “Italian tune-up” gets the combustion chamber hot enough to burn off the deposits, effectively cleaning itself from the inside out.
On-the-Road Troubleshooting
Even with perfect maintenance, things can sometimes go wrong. When your digital controller flashes an error code, don’t panic. It’s usually pointing you towards a simple fix and is your first clue in diagnosing the issue.
A lot of van owners get worried when they see an error code, but they’re actually really helpful. I’ve created a quick table below to help you decode some of the most common ones you’re likely to see.
Common Diesel Heater Error Codes and Fixes
Error Code
Common Cause
What to Check First
E-01 / E-10
Low voltage
Check your leisure battery charge. Is it above 12.2V? Inspect battery terminal connections for tightness and corrosion.
E-02
Over-voltage
Usually an issue with your charging system (alternator, solar controller). Check the voltage when the engine is running.
E-03
Glow plug fault
Often just carbon build-up on the plug. It might also be a loose wire or, eventually, a failed plug needing replacement.
E-04 / E-05
Fuel pump fault
Is the pump “ticking”? Check for a blocked inline fuel filter, air in the fuel line, or a loose electrical connection to the pump.
E-06
Fan motor fault
Listen for scraping noises. Check that the fan spins freely and that nothing is obstructing the air intake or outlet.
E-07
Overheating
Make sure your hot air ducting isn’t crushed or blocked. Check that both the air inlet and outlet vents are completely clear.
E-08
Failure to ignite
Often caused by carbon build-up, a dirty glow plug, or a fuel supply issue (see E-04).
For example, a “Glow Plug Failure” code (like E-03) might sound serious, but nine times out of ten it just means the plug is coked up with carbon and needs a clean. Similarly, a “Fuel Pump Failure” error (E-04) is frequently caused by a simple blocked filter or a loose wire, not a dead pump. Knowing what these codes mean empowers you to solve minor issues yourself and keep your adventure on track.
Your Diesel Heater Questions Answered
We’ve walked through the why, what, and how of fitting and running a campervan diesel heater. But there are always a few lingering questions that pop up. Let’s tackle some of the most common ones so you can fire up your heater with complete confidence on your next trip out.
Is It Safe to Run a Diesel Heater All Night?
Yes, absolutely. A properly installed diesel heater is designed to run safely all night long. The crucial bit here is ‘properly installed’.
The whole combustion process is completely sealed off from your living space. The heater pulls air in from outside to burn, and then every last bit of exhaust is vented straight back outside again.
To sleep soundly, you just need to be certain of three things:
The exhaust pipe is 100% gas-tight. No leaks, no compromises.
The exhaust outlet is smartly positioned well away from any windows, doors, or vents.
You have a working, reliable carbon monoxide detector inside your van. This is non-negotiable.
With those boxes ticked, you can enjoy a warm and secure night’s sleep, no matter how cold it is outside.
How Much Noise Does a Campervan Diesel Heater Make?
You’ll notice two distinct sounds from a diesel heater: the gentle hum of the fan and the rhythmic tick of the fuel pump. The fan is just a low, consistent whirring, much like your van’s own cabin fan, and it quickly fades into the background.
The fuel pump’s clicking can be more noticeable, but the trick is all in the mounting. Whatever you do, don’t bolt it directly to a main chassis rail, as that will amplify the sound right through your van. Always use the supplied rubber isolation bracket to mount it; this absorbs the vibration and makes it much, much quieter.
While the premium brands are often engineered to be a bit quieter, even the budget models are perfectly fine to sleep with once you’re used to them. For most of us, the guarantee of consistent warmth far outweighs a bit of background noise.
Do Diesel Heaters Cause Condensation?
No, it’s actually the complete opposite. A campervan diesel heater produces a wonderfully dry heat, which is a massive bonus, especially for van life in the damp UK climate.
Unlike some propane heaters, which can release water vapour as part of their combustion, the diesel heater’s entire process is external. This dry warmth actively helps to pull moisture out of the air inside your van, preventing condensation from forming on your windows and stopping that dreaded damp feeling from setting in.
What Services Do You Offer For Campervan Diesel Night Heaters?
For expert advice, installation, or servicing, we provide certified and reliable support for your Campervan Diesel Night Heater. Get in touch with our team to ensure your heating system is safe and ready for your next adventure.
Think of charge controllers MPPT as the brain of your caravan’s off-grid power setup. It’s the smart bit of kit that sits between your solar panels and your leisure batteries, making sure they get charged safely and, most importantly, efficiently. Its job is to squeeze every last drop of power from the sun, which is absolutely vital when you’re relying on solar to keep you powered up on the road.
For any caravan or campervan owner, true freedom means having a solar power system you can depend on. While your solar panels do the heavy lifting of catching the sun’s rays, it’s the charge controller that manages that energy and protects your expensive leisure batteries. Without one, you’re looking at a fast track to damaged batteries and a much shorter lifespan.
The real challenge for every caravanner is simple: how do you get the most power out of the limited roof space you have? This gets even trickier under the UK’s famously unpredictable skies, where bright sunshine is never a guarantee. This is exactly where MPPT charge controller technology proves its worth.
Why MPPT is the Superior Choice for Caravans
An MPPT charge controller is far more than a simple on/off switch. It’s a sophisticated DC-to-DC converter that’s constantly monitoring the voltage and current coming from your solar panels. It hunts for the ‘maximum power point’ – that perfect sweet spot where it can harvest the absolute most energy at any given moment. This ability to constantly adapt is what makes all the difference.
Here in the UK, that extra efficiency is a game-changer. Compared to the older, more basic Pulse Width Modulation (PWM) controllers, MPPT units can be 10-30% more efficient. That boost is especially noticeable in the variable weather conditions we see all the time. It’s a huge gain that translates directly into more usable power for your appliances, even on those frustratingly cloudy days.
Think of it like this: a basic PWM controller is a bit like a simple tap, either on or off. An MPPT controller, on the other hand, is like a clever valve that constantly adjusts the flow to make sure you’re getting the best possible pressure without wasting a single drop.
This clever tech brings some real, tangible benefits to your travels:
Longer Off-Grid Stays: Keep your lights, fridge, and gadgets running for much longer without needing a mains hook-up.
Faster Battery Charging: Your leisure batteries will top up much quicker, getting you ready for the next adventure sooner.
Improved Winter Performance: MPPT really shines in low-light conditions, making it a must-have for year-round caravanning.
While this guide focuses on wheeled adventures, the principles of maximising solar energy are universal. For those interested in how these systems are adapted for life on the water, you can read about boat solar panels in our other guides.
How MPPT Technology Supercharges Your Solar Panels
To really get your head around what MPPT charge controllers bring to your caravan, it helps to understand how they work their magic. At its heart, an MPPT controller is a smart converter. It optimises the relationship between your solar panels and your leisure batteries, making sure not a single watt of precious solar energy goes to waste.
Think of your solar panel as a garden hose. The amount of water coming out is the power it generates, which is a blend of water pressure (voltage) and flow rate (current). On a bright, sunny day, the pressure is high. On a cloudy day, it drops right off. An MPPT controller is like having an intelligent, automatic nozzle on that hose.
It constantly measures the panel’s voltage and current, making tiny, rapid adjustments to find the “Maximum Power Point”. This is the sweet spot—the perfect balance of pressure and flow that shoves the most power into your battery ‘bucket’ at any given moment. This dynamic process is a world away from older PWM technology, which is more like a simple on/off tap that often wastes a load of potential power.
The Voltage Advantage: Unlocking More Power
One of the biggest wins with an MPPT controller is its ability to handle a much higher solar panel voltage than the battery’s voltage. For instance, a typical solar panel you might see on a house roof could operate at 30-40 volts, while your caravan’s leisure battery system is just 12 volts.
A basic PWM controller would simply drag the panel’s voltage down to match the battery. In doing so, it just throws away more than half of the panel’s potential power. It’s incredibly wasteful.
An MPPT controller, on the other hand, cleverly converts this high voltage into increased current at the lower battery voltage. It effectively trades the excess ‘pressure’ for more ‘flow’, ensuring that almost all the power your panel generates actually makes it into your battery.
This conversion process is precisely why MPPT controllers can boost your energy harvest by 10-30% over their PWM counterparts. This gain is most obvious during the exact conditions UK caravanners face all the time:
Early Mornings and Late Afternoons: When the sun is low in the sky, an MPPT controller can still squeeze out a useful charging current.
Overcast or Cloudy Days: This is where it really shines, excelling at harvesting energy from weak or diffused sunlight.
Cold, Sunny Days: Solar panels actually produce higher voltage in colder temperatures, and an MPPT controller capitalises on this to deliver a significant power boost.
Performance When It Matters Most
This chart really drives home the performance difference between MPPT and PWM controllers in different weather.
As you can see, while the difference in clear sun is decent, the MPPT controller’s advantage becomes massive under cloudy skies—the exact situation where every single watt counts.
This superior performance in less-than-perfect conditions is what gives you true energy security on your adventures. It means more power for your fridge, lights, and gadgets, giving you the confidence to stay off-grid for longer, even during a classic British autumn or winter.
Of course, while MPPT tech optimises the power harvest, the physical state of your panels is just as important. For those looking to keep their system in top nick, a good DIY guide for cleaning solar panels can ensure they operate at peak efficiency. Ultimately, this advanced technology is the key to getting the most from your investment and achieving genuine energy independence on the road.
MPPT vs PWM: The Clear Winner for UK Caravans
When you’re choosing a charge controller for your caravan, the choice usually boils down to two bits of tech: Maximum Power Point Tracking (MPPT) and Pulse Width Modulation (PWM). They both manage the flow of juice to your batteries, but how they do it – and the results they deliver – are worlds apart. Especially in a real-world UK caravan setup, where every single watt is precious.
PWM is the older, simpler technology. Think of it as a basic switch that just connects your solar panels straight to your batteries. This forces your high-voltage panel to operate at the battery’s much lower voltage, wasting a huge chunk of potential power in the process. For any caravanner with limited roof space, that inefficiency is a deal-breaker.
In complete contrast, an MPPT charge controller is a smart DC-to-DC converter. It takes the high voltage from the panel, cleverly transforms it into the perfect lower voltage for charging, and boosts the current at the same time. This bit of electronic magic makes sure that almost all the power your panel generates actually makes it into your batteries.
Maximising Your Limited Roof Space
The most compelling reason to go for MPPT in a caravan is its raw efficiency. You’ve only got so much roof, so you need to squeeze every last drop of energy out of the panels you can fit up there. An MPPT controller will consistently give you 10-30% more power from the exact same panels compared to a PWM unit.
That’s not just a number on a spec sheet. That’s the difference between your fridge staying cold all weekend and having to pack up and go home early. On a typically grey British afternoon, that extra 30% might be the only thing keeping your leisure batteries topped up.
For a caravan, investing in an MPPT controller is like getting a bigger solar array for free. You generate significantly more power without having to find space for another panel on your already crowded roof.
This extra energy harvest gives you more freedom. You can stay off-grid for longer, run more of your creature comforts, and travel with the confidence that your system is working as hard as it possibly can, whatever the weather decides to do.
The Freedom to Use Better Panels
Another game-changing advantage of MPPT charge controllers is their ability to handle higher voltage solar arrays. This opens the door to using more efficient, powerful, and often cheaper domestic solar panels—the kind you see on house roofs. These panels run at a much higher voltage (often 30-40V), which a PWM controller just can’t cope with.
If you tried to connect a 36V domestic panel to a 12V battery system through a PWM controller, it would just drag the panel’s voltage down to 12V. In an instant, you’d waste over half of its power. An MPPT controller, however, flawlessly converts that high voltage into increased charging current for your 12V system, capturing all of that lovely power. This gives you fantastic flexibility to design a more powerful and cost-effective solar setup.
MPPT vs PWM: A Head-to-Head Comparison for Caravanners
To really spell it out, let’s put these two technologies side-by-side. For the typical UK caravanner, where sunny days can be a bonus and not a guarantee, the differences become starkly clear.
Feature
MPPT Charge Controller
PWM Charge Controller
Efficiency
Extremely high, typically 95-99%. Gets the most out of every sunbeam.
Moderate, around 75-80%. Leaves a lot of power on the table.
Performance in Low Light
Excellent. Still pulls in usable power even on properly overcast days.
Poor. Struggles badly in low light and might not charge at all.
Panel Compatibility
Highly flexible. Lets you use powerful, high-voltage domestic panels.
Very restrictive. Panel voltage must match your battery voltage.
System Flexibility
Gives you lots of options for powerful and varied panel arrays.
Limited to basic, low-power setups.
Cost
A higher initial investment.
Cheaper to buy upfront.
Best For
Caravanners who want maximum power, off-grid freedom, and efficiency.
Small, simple systems like trickle charging a battery you rarely use.
A Smart Investment, Not an Expense
It’s true that MPPT controllers cost more upfront than their PWM counterparts. But it’s vital to see this as an investment in your freedom, not just an expense. The superior efficiency and panel flexibility mean the controller pays for itself very quickly in usable energy and peace of mind.
For UK caravanning, where sunlight is a valuable commodity and roof space is at a premium, the choice is simple. The MPPT charge controller is the undisputed winner, delivering the performance and reliability you need for true off-grid adventure.
Sizing Your Perfect MPPT Controller
Picking the right MPPT charge controller can seem a bit daunting, but it’s actually pretty straightforward once you know the basics. Getting the size spot-on is absolutely critical. A controller that’s too small will get fried by your solar panels, and one that’s too big is just a waste of good money. Let’s walk through how to choose the right one for your caravan setup with confidence.
The two most important numbers you’ll see on any charge controllers mppt are its voltage (V) and amperage (A) ratings, usually written together like “100/30”. The first number (100V) tells you the absolute maximum solar panel voltage the controller can take. The second number (30A) is its maximum output current to your batteries. Your job is to make sure your solar array doesn’t exceed either of these limits.
Of course, before you can choose a controller, you need a good grasp of your overall power needs. It’s well worth learning how to size your solar system first. This foundational knowledge will ensure your entire setup works together in perfect harmony.
Decoding Your Solar Panel’s Spec Sheet
The secret to sizing your controller is hidden in plain sight, right on the sticker on the back of your solar panel. You’re looking for two key figures:
Open-Circuit Voltage (Voc): This is the highest possible voltage your panel can produce when it’s not connected to anything. Think of a very cold, bright morning – that’s when you’ll see peak voltage. This number is your red line; your controller’s voltage rating must be higher than this.
Short-Circuit Current (Isc): This is the maximum current (amps) your panel can kick out under a short circuit. We use this to figure out the maximum current your controller will have to handle.
An easy way to think about it is that Voc is the panel’s potential ‘pressure’, and Isc is its potential ‘flow’. Your MPPT controller has to be tough enough to handle the highest pressure and flow your panels can throw at it.
Calculating Your Controller Size
Let’s run through a quick, two-step calculation. We’ll use a common caravan setup as an example: two 200W solar panels wired in series. We’ll pretend our panel’s spec sheet says each one has a Voc of 22.5V and an Isc of 11A.
Step 1: Calculate Maximum Voltage
When you connect panels in series (linking the positive of one to the negative of the next), their voltages add up.
2 panels x 22.5 Voc = 45V
This means your controller must have a voltage rating well above 45V. A 75V or 100V model would be a safe bet. Never, ever pick a controller where the maximum voltage is close to your calculated Voc.
A good rule of thumb is to add a 25% safety margin to your calculations. This buffer protects your gear from unexpected power spikes, especially on those cold, sunny days when panels can temporarily exceed their rated Voc.
Step 2: Calculate Maximum Current
Next, we need to find the maximum charging current. To do this, just divide your total solar wattage by your battery system’s voltage (which is almost always 12V in a caravan).
Total Wattage: 2 panels x 200W = 400W
Calculation: 400W ÷ 12V = 33.3A
This result tells you that you need a controller rated higher than 33.3A. A 35A or even a 40A model would give you a healthy margin for error. A 30A controller would be too small and would likely shut down or damage itself under full sun.
Essential Features to Look For
Beyond just the voltage and amp ratings, modern charge controllers mppt come with some brilliant features that make a real difference to performance and ease of use.
Battery Type Compatibility: Make sure the controller has settings for your specific batteries. Whether you have AGM, Gel, or Lithium (LiFePO4), using the right charging profile is vital to avoid damaging them.
Temperature Sensor: A remote temperature sensor is a game-changer. It lets the controller adjust the charging voltage based on your battery’s actual temperature, preventing overcharging in the heat and undercharging in the cold. It can seriously extend the life of your batteries.
Bluetooth Connectivity: This is fantastic for life on the move. It lets you keep an eye on your entire system—live power generation, battery status, and performance history—straight from an app on your phone.
With the UK government pushing towards net zero by 2050, efficient renewable tech has never been more important. MPPT controllers are a key part of this, as they squeeze every last drop of energy from the sun, even in our notoriously variable weather. In more complex setups, especially those with mixed voltage systems, you might need other bits and pieces; for those scenarios, take a look at our guide on choosing a 24 to 12 V converter.
Best Practices for Installing Your MPPT Controller
A proper, safe installation is the bedrock of any reliable solar setup in your caravan or campervan. Get it right from the start, and your MPPT charge controller won’t just perform at its best, it’ll operate safely for years to come. Think of this as a practical, step-by-step guide to fitting your controller with confidence.
First things first: safety. Before you even think about touching a wire, your solar panels must be completely disconnected or, better yet, covered with a thick, opaque blanket. This simple step stops them from producing any power, which is crucial for preventing any risk of electric shock while you’re working.
The Crucial Connection Sequence
There’s a strict, non-negotiable order for connecting your solar system components. Getting this sequence wrong can instantly fry your brand-new controller, so pay close attention. The controller has to see the battery voltage first so it can correctly set itself up for your 12V system.
Connect the Battery First: Always, always wire the MPPT controller to your leisure battery terminals before anything else. This allows the controller to boot up, recognise the system voltage, and prepare itself for the incoming solar power.
Connect the Solar Panels Second: Only after the controller is powered on and happily talking to the battery should you connect the wires from your solar panel array.
Disconnection is the Reverse: If you ever need to disconnect the system for maintenance, just do everything in reverse. Unplug the solar panels first, then disconnect the battery.
Stick to this simple mantra: Battery first, solar second. This one rule is the single most important part of the entire installation. It prevents the controller from being hit with unregulated high voltage from the panels, a mistake that can easily destroy it.
Location and Mounting
Where you physically bolt down your controller makes a huge difference to its performance and lifespan. Heat is the number one enemy of electronics, and believe me, MPPT controllers can generate a surprising amount of it when they’re working hard on a sunny day.
Choose a spot for it that is:
Cool and Ventilated: Mount the controller vertically on a non-flammable surface. Critically, you need to leave at least 10-15cm of clear space all around it so air can circulate freely and carry heat away. A cramped, unventilated cupboard is the worst place for it.
Close to the Batteries: The shorter the wire run between the controller and your batteries, the better. This keeps voltage drop to a minimum, which means more of that precious solar energy actually makes it into your batteries.
Protected and Dry: It goes without saying that the unit has to be installed inside the caravan, well away from any chance of getting wet or being physically knocked about.
Wiring and Fusing for Safety
Using the right thickness of wire (or gauge) is absolutely vital. Wires that are too thin act like a bottleneck, creating resistance that wastes your solar power as heat. At best this is inefficient; at worst, it’s a serious fire hazard. Always check your controller’s manual for the recommended wire sizes based on the system’s amperage and the length of the wire run.
Fuses are your system’s non-negotiable safety net. They are the primary protection against short circuits and potential fires. You must install a correctly rated fuse on the positive wire in two key places:
Between the Controller and the Battery: This protects the wiring from any faults that might come from the battery side.
Between the Solar Panels and the Controller: This fuse is there to protect against any faults in the panel wiring.
A tidy, well-thought-out installation ensures your whole electrical system runs safely and gives you the performance you paid for. If you’re tackling a full electrical fit-out or just want the peace of mind that comes with a professional job, looking into specialist campervan and caravan services can ensure everything is installed to the highest standard.
Troubleshooting Common MPPT Controller Issues
Even with a perfectly installed system, you’re bound to hit a snag sooner or later. Think of this section as your first-aid manual for figuring out the most common issues with charge controllers mppt. Most problems are surprisingly simple to fix and usually boil down to a dodgy connection or a wrong setting.
When your system starts acting up, the key is not to panic. Just work through the issue systematically. Before you start diving into complex diagnostics, always check the most obvious culprits first. A quick visual check of your connections, fuses, and the controller’s display can often reveal the problem in seconds.
My Battery Is Not Charging
This is the number one worry for any caravan owner. You can see the sun blazing down on the panels, but the battery voltage just isn’t budging. The first thing to understand is that high resistance somewhere in the circuit is often the villain here, acting like a blockage that stops the power from getting through.
Start with these checks:
Check the Fuses: A blown fuse is a classic, and thankfully, an easy fix. Check the fuses between the controller and the battery, and any between the panels and the controller.
Tighten All Connections: A loose wire terminal can stop current dead in its tracks. Check every connection at the controller, the battery, and any junction boxes to make sure they’re all rock solid.
Inspect Your Wiring: Have a good look for any signs of damage or corrosion on your cables. For the best longevity, it’s worth understanding the advantages of using multi-strand tinned wire as it resists corrosion far better than standard copper wire.
Panel Shading: It’s amazing how much difference a tiny shadow can make. Even a small shadow from a roof vent or aerial across one part of your panel can slash its output, so make sure nothing is blocking the sunlight.
The Controller Feels Too Hot
Your MPPT controller will naturally get warm when it’s working hard, especially on a bright, sunny day when it’s processing a lot of power. However, if it feels genuinely hot to the touch, that’s a sign it’s struggling.
An overheating controller is a warning sign. The unit will often protect itself by reducing its charging output, a process known as ‘derating’. This means you get less power into your batteries precisely when you should be getting the most.
Poor ventilation is almost always the cause. Your controller needs to breathe. Make sure it has at least 10-15cm of clear space all around it for air to circulate properly. If it’s been crammed into a tight, stuffy cupboard, it simply can’t cool itself down. Moving it to a better-ventilated spot will usually solve the problem for good.
Understanding Error Codes
Modern MPPT charge controllers are pretty clever at self-diagnosis. They’ll often flash an error code or a sequence of lights to tell you exactly what’s wrong. Don’t just ignore these codes – grab your controller’s manual and find out what they mean.
Common error codes often point to:
Battery Over-Voltage: This can happen if the controller’s settings don’t match your specific battery type.
Short Circuit: This is a serious one. It indicates a wiring fault that needs sorting out immediately.
PV Over-Voltage: This means the voltage from your solar panel array (its Voc) is too high for what the controller is rated to handle.
Now, let’s tackle some of the common questions we hear from caravan owners about MPPT controllers. Getting these straight will help you figure out the best setup for your own adventures off-grid.
Can I Use a Domestic Solar Panel on My Caravan?
Yes, you certainly can! In fact, this is one of the biggest advantages of using an MPPT controller. They are brilliant at taking the high voltage from a cheaper, more powerful domestic panel and efficiently converting it down to the 12V your leisure battery needs.
A basic PWM controller just can’t do this. It would be completely overwhelmed and would end up wasting a huge chunk of the panel’s potential power.
Is It Worth Upgrading From PWM to MPPT?
For most UK caravanners, the answer is a definite yes. If you’re often finding yourself a bit short on power, especially on those classic overcast British days or during the spring and autumn months, an MPPT controller can make a world of difference.
It can genuinely boost the energy you get from your existing panels by 10-30%. It’s often the single most cost-effective upgrade you can make to stay off-grid for longer.
Think of upgrading to MPPT less as replacing a part, and more as unlocking the full potential of your entire solar system. It lets your panels perform at their best, especially when the weather isn’t playing ball.
Do I Really Need MPPT for a Small Trickle Charger?
Probably not, to be honest. For those really small panels (under 50 watts) that are just there to keep a battery topped up, a simple PWM controller is usually perfectly adequate and easier on the wallet.
The extra energy an MPPT charge controller could squeeze out of such a small array is minimal, so it’s hard to justify the extra cost. MPPT really comes into its own on solar arrays of 100W or more, where those efficiency gains start to add up to a serious amount of usable power for your trips.