Boat Services
Welcome to our Boat Services category! Here, we provide a comprehensive range of services and products tailored specifically for boat owners. Our focus is on ensuring your comfort, safety, and convenience while you’re on the water.
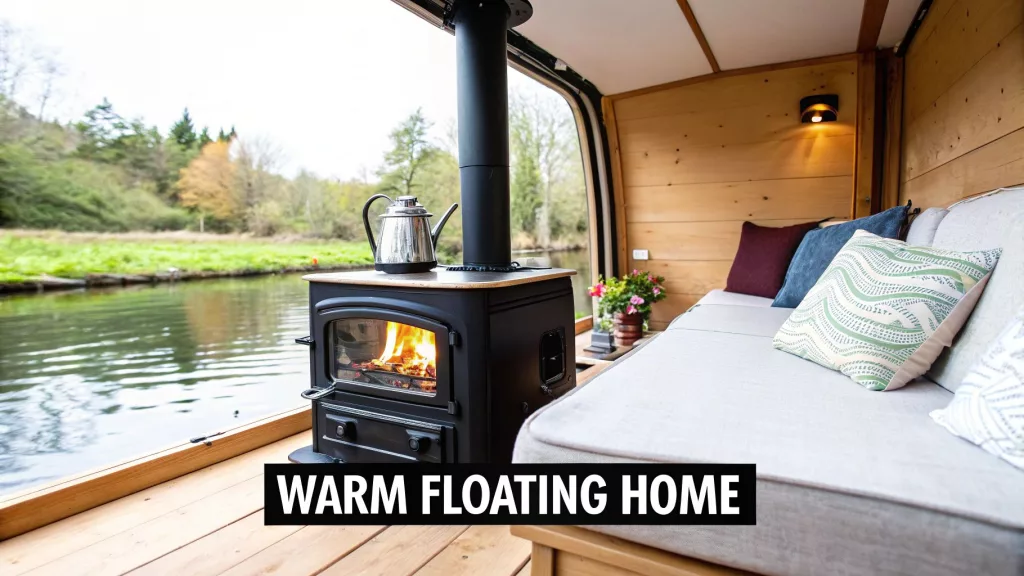
Keep warm and cozy on the water with our diverse heating options. We offer installation, service and repair for all marine heating appliances.
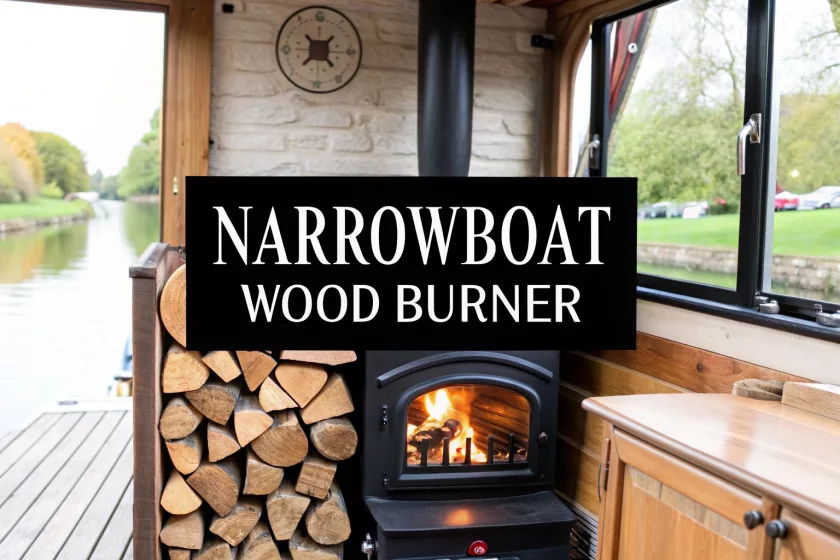
Boat Stoves: Reliable and efficient stoves designed for marine use. From wood burners for narrowboats to solid fuel and diesel stoves for boats of all sizes, we have the appliances best suited for your circumstances.
Heaters: A selection of heaters suitable for various boat sizes and needs. Our collection includes marine diesel air and liquid heaters, as well as LPG powered options
Boilers: We offer installation and maintenance for boilers powered by solid fuel, diesel, and LPG.
Cooking Appliances
Cooking on your boat should be straightforward and enjoyable. Explore our cooking solutions:
Diesel Powered Cookers: High-quality LPG and diesel cookers that provide excellent performance.
Solid Fuel Cooking Ranges: Perfect for those who favour traditional cooking means.
LPG Boat Cookers: Powerful and efficient LPG powered cookers and hob for all boat sizes and types
Boat Boiler Services
Ensure your boiler functions optimally with our expert services:
Diesel and LPG Boilers: Professional installation and maintenance services to keep your boiler in top condition.
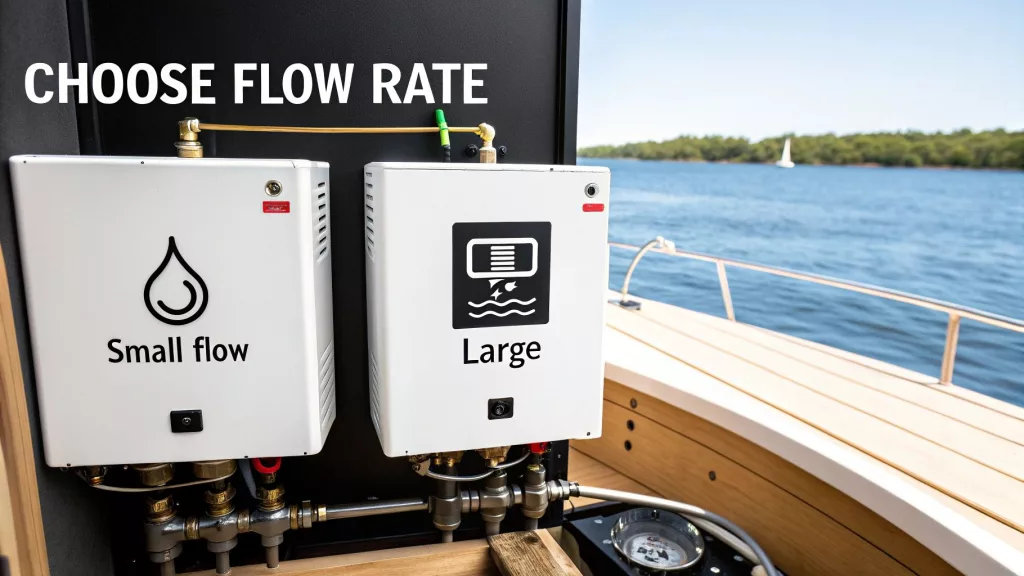
LPG Water Heaters: Instant and continuous hot water supplies for boats with constant high demands
Safety Certifications
Safety is our top priority! We provide safety certificates for all fuel-burning appliances to guarantee they meet rigorous safety standards. Our team is fully qualified by OFTEC and GasSafe, ensuring that you have peace of mind while on the water.
Boat Safety Examinations
Our Boat Safety Examinations are essential for obtaining BSS Certificates. We thoroughly inspect your vessel on behalf of the Boat Safety Scheme to ensure it meets all necessary safety regulations, allowing you to navigate safely.
Additional Services
In addition to our primary offerings, we provide:
Plumbing Services: Comprehensive plumbing solutions to keep your systems running smoothly.
Electrical Boat Services: Expert electrical work to ensure your boat’s systems are safe and efficient.
Mobile Welding Repairs: Professional welding repairs as part of our appliance installation services.
Explore our extensive range of boat services today! We are committed to providing you with the highest quality products and services to enhance your boating experience. Let us help you make the most of your time on the water!
Lorem Ipsum is simply dummy text of the printing and typesetting industry. Lorem Ipsum has been the industry’s standard dummy text ever since the 1500s, when an unknown printer took a galley of type and scrambled it to make a type specimen book. It has survived not only five centuries, but also the leap into electronic typesetting, remaining essentially unchanged. It was popularised in the 1960s with the release of Letraset sheets containing Lorem Ipsum passages, and more recently with desktop publishing software like Aldus PageMaker including versions of Lorem Ipsum.
What is Lorem Ipsum para two
Lorem Ipsum is simply dummy text of the printing and typesetting industry. Lorem Ipsum has been the industry’s standard dummy text ever since the 1500s, when an unknown printer took a galley of type and scrambled it to make a type specimen book. It has survived not only five centuries, but also the leap into electronic typesetting, remaining essentially unchanged. It was popularised in the 1960s with the release of Letraset sheets containing Lorem Ipsum passages, and more recently with desktop publishing software like Aldus PageMaker including versions of Lorem Ipsum.
Knowing how to winterise your boat is far more than just another seasonal chore; it’s about protecting one of your most valuable assets. Here in the UK, it only takes one unexpected cold snap for disaster to strike. A single freeze can lead to a cracked engine block or burst pipes, landing you with a repair bill running into the thousands.
This guide will walk you through everything, from the engine and plumbing to the heating systems and exterior care, making sure your narrowboat or canal barge is ready to go the moment the boating season returns.
Getting your boat ready for winter is easily one of the most critical maintenance jobs you’ll do all year. The main goal is simple: protect your vessel from the punishing effects of freezing temperatures, relentless damp, and just sitting idle for months on end.
When water freezes, it expands by about 9%. That might not sound like much, but it exerts an incredible force—more than enough to fracture heavy-duty engine components, split plumbing pipes, and wreck expensive pumps.
I’ve seen it happen time and again. Forgetting even one small detail, like a sea strainer or a deck wash pump, can lead to a costly and deeply frustrating start to the next season. Think of proper winterisation as a cheap insurance policy that safeguards your investment, keeping your narrowboat or canal barge in top nick.
It’s Not Just About Preventing Freeze Damage
While protecting your boat from turning into a solid block of ice is the top priority, a thorough winterisation process has plenty of other perks. It’s the perfect time to tackle the annual maintenance that often gets pushed aside during the busy boating season.
A good winter routine includes:
Engine Health: Change the oil and filters. This gets rid of corrosive gunk that can sit and eat away at your engine’s internal parts over the winter.
Fuel System Integrity: Always add a fuel stabiliser. It stops varnish and gum from building up, which keeps your fuel lines and carburettors clear and ready for spring.
Mould and Mildew Prevention: A deep clean paired with good ventilation is your best defence against damp. It stops mould from taking hold and turning your cabin into an unpleasant, unhealthy space.
Pest Control: Get rid of every last crumb of food and block up any potential entry points. It’s the only way to stop rodents and other pests from deciding your boat is their new winter home.
This proactive approach is especially important for those of us on the UK’s inland waterways. The government’s own mid-year report on waterway management points to a big seasonal shift, with a huge spike in maintenance jobs during the quieter autumn and winter months. You can read more about this trend in the full 2025 mid-year waterways report.
By putting in the effort to winterize your boat properly, you’re doing more than just dodging repair bills. You’re actively extending the life of your vessel and making sure it’s reliable and safe for many years to come.
Looking After Your Boat’s Engine and Fuel System
Your boat’s engine is its heart, and when it comes to laying up for winter, it absolutely has to be your top priority. Honestly, neglecting the engine and fuel system is the fastest way to guarantee yourself a frustrating and expensive start to the next boating season. This isn’t just about stopping things from freezing; it’s about protecting all those internal components from corrosion and making sure your fuel doesn’t turn into sludge.
The steps below are a solid path for winterising the inboard engines you typically find on UK narrowboats. While your engine’s own manual should always be the final word, these are the bedrock practices of good winter engine care that I’ve seen work time and time again.
Start with an Oil and Filter Change
The very first job on the list should be changing the engine oil and filter. No excuses. Over a season of running, your oil gets loaded with all sorts of nasty stuff – acids, carbon, and water. Leaving that corrosive cocktail stewing in your engine all winter is just asking for internal damage.
Always run the engine for a few minutes before you drain the oil. This simple step warms it up, making it thinner and allowing it to flow out more easily, taking more of the gunk with it. Once it’s drained, spin on a new oil filter and refill with fresh oil that meets your manufacturer’s spec. This leaves your engine’s internals coated in clean, protective oil, ready to fight off moisture and corrosion during the long, cold layup.
A classic mistake is putting off the oil change until spring. By then, the damage from corrosive by-products and moisture sitting in the engine for months has already happened. Always change the oil before winter storage, not after.
Tackling the Fuel System
Modern fuel, especially diesel, can cause major headaches if you just leave it in the tank all winter. It can degrade, suck in water, and form gummy deposits that will happily clog up your fuel lines and filters come springtime.
How you approach this depends a little on what your tank is made of:
Metal Tanks: The best practice is to fill the tank to about 95% full. This leaves just enough room for the fuel to expand if the temperature changes, but massively reduces the amount of air inside. Less air means less chance for condensation to form on the tank walls.
Plastic Tanks: Advice can vary here, but a lot of boaters prefer to leave them almost empty. Plastic is much less prone to condensation than metal. If in doubt, see what your boat’s manufacturer suggests.
No matter the fill level, adding a quality fuel stabiliser is non-negotiable. After pouring in the right amount for your tank size, run the engine for a good 10-15 minutes. This is a critical step – it pulls the treated fuel right through the entire system, from the lines and pumps to the injectors, ensuring every last component is protected.
Flushing and Filling the Cooling System
For any engine that uses raw water for cooling, getting every last drop of that water out is absolutely essential. A frozen and cracked engine block or manifold is a season-ending disaster. Even engines with a ‘sealed’ closed-cooling system have a raw water side that needs the same attention.
The goal is to completely replace the raw water with a non-toxic, propylene glycol-based marine antifreeze. Whatever you do, never use ethylene glycol (the stuff you put in your car) as it’s incredibly toxic to fish and other aquatic life.
The job usually involves closing the raw water seacock and using a bucket or a special flushing kit to suck the antifreeze mixture into the system. You keep going until you see the coloured antifreeze coming out of the exhaust. That’s your signal that the entire circuit is filled and protected from freezing.
Final Checks and Preventive Steps
With the big jobs done, a few final checks will see your engine properly put to bed for the winter.
First up, have a good look at all the belts and hoses. You’re looking for any cracks, shiny spots, or hoses that feel brittle and hard. It’s far better to find a failing hose now in the calm of your mooring than to have it burst on your first trip out next year.
If you have a petrol engine, using fogging oil gives you a brilliant extra layer of protection. This stuff is sprayed directly into the carburettor or air intake while the engine is running. It creates a fine mist that coats the cylinders, pistons, and valves with a protective film, stopping rust from forming on these critical surfaces.
Finally, check all the associated connections. This is the perfect time to give nearby systems a once-over, including things like your gas lines. Making sure you have a properly installed and undamaged LPG gas hose is a simple safety check that brings real peace of mind before you lock up. Once you’re happy, disconnect the battery terminals to stop it from slowly going flat, and if you can, store the battery somewhere cool and dry on a trickle charger.
Securing Your Plumbing from Freezing Temperatures
With the engine sorted, your attention should now turn to the plumbing. A burst pipe on a boat is far more than a simple inconvenience; it’s a potential disaster that leads to widespread water damage, rot, and stubborn mould. The entire goal here is to get every last drop of water out and replace it with non-toxic antifreeze, leaving nothing behind to freeze, expand, and crack your pipework.
This process touches everything connected to your water system: freshwater tanks, pumps, taps, toilets, and showers. It might feel like a long list of jobs, but a methodical approach is your best defence against a very expensive and messy surprise come springtime. You need to walk away confident that every part of the system is fully protected.
Draining the Entire System
First things first, you need to get as much water out as you possibly can. Kick things off by completely emptying your freshwater tank. Next, open every single tap on the boat—both hot and cold—at the kitchen sink, the bathroom basin, and in any showers. Let the water pump run until it’s just sputtering air, which tells you the main lines are clear.
And don’t forget the hot water heater or calorifier. These things hold a surprising amount of water and have their own drain plugs for a reason. Make sure you drain it completely. Leaving water in the calorifier is a classic, costly mistake, as a hard freeze can easily rupture the tank.
Blowing Out the Lines
Even after a thorough drain, pockets of water will inevitably get trapped in low points of your pipework, in U-bends, and inside the pumps. Gravity alone just won’t cut it. This is where a bit of compressed air becomes your most valuable tool.
Using a low-pressure air compressor (around 20-30 PSI is more than enough), you can systematically blow out each water line. You’ll need a special adaptor that screws into your water intake fitting. Work your way through the boat, opening one tap at a time until only a fine mist of air is coming out. This step is absolutely crucial for clearing out every last bit of residual water.
A Quick Tip: It’s not just the main pipes you need to worry about. Pay close attention to often-forgotten spots like deck wash pumps, shower sump pumps, and sea strainers. Each one can hold water and is a prime candidate for freeze damage if you overlook it.
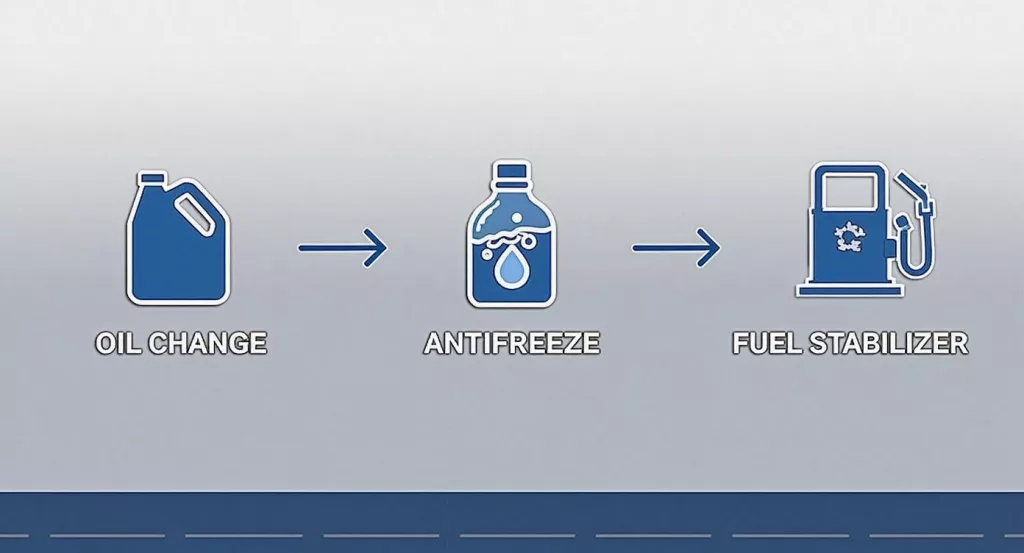
The principles of protecting your plumbing are much the same as for your engine—it’s all about proactive, thorough maintenance to prevent winter damage.
This visual just reinforces the idea that a multi-step, systematic approach is the only way to guarantee comprehensive winter protection.
Circulating Marine Antifreeze
With the system now empty, it’s time to introduce a non-toxic, marine-grade propylene glycol antifreeze. Under no circumstances should you use automotive (ethylene glycol) antifreeze. It is extremely toxic and causes serious harm to aquatic life if it ever gets discharged.
You’ve got a couple of options for getting the antifreeze into the system:
Pour it directly into your empty freshwater tank and use the boat’s own pump to circulate it through the lines.
Disconnect the inlet side of your water pump and use a short bit of hose to draw the antifreeze straight from the bottle. This is often the quicker method.
Once you’re set up, turn on the pump and go back to each tap. Open the hot and cold sides one by one until you see the coloured antifreeze flowing out. Do this for the shower, the toilet flush, and any other water outlet on board. When you see that pink or blue liquid, you know the entire line is filled and protected.
As a final step, pour a little extra antifreeze down each drain to protect the P-traps and any grey water tanks. For a more detailed look at these components, our guide to boat plumbing systems offers some great information.
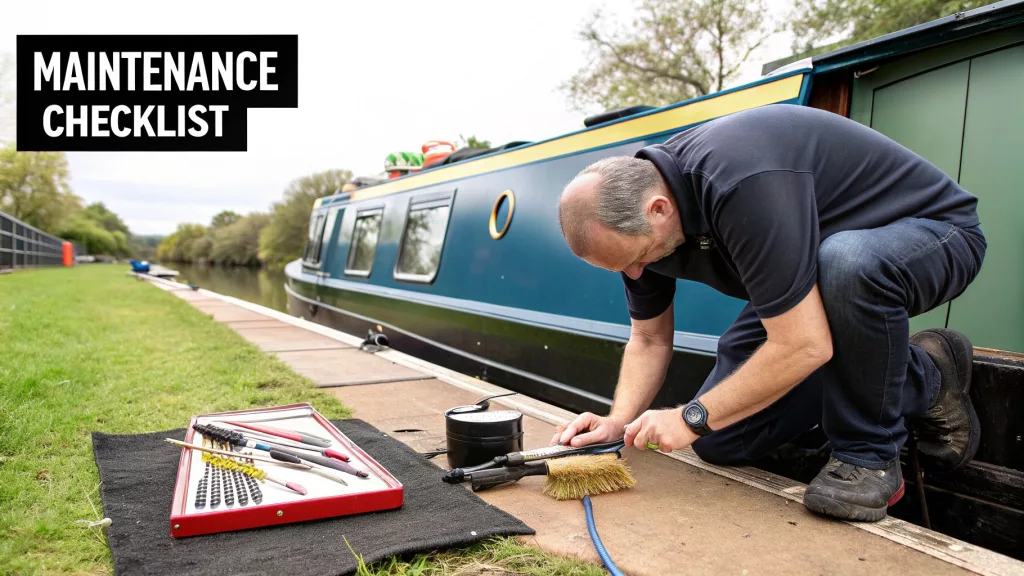
To help you keep track, here’s a straightforward checklist for your plumbing winterization tasks.
Winterization Checklist for Plumbing Systems
Component
Action Required
Antifreeze Needed?
Freshwater Tank
Drain completely until empty.
No (unless using it to circulate antifreeze)
Water Pump
Run until it sputters air, then blow out with compressed air.
Yes – run until antifreeze flows through.
Hot Water Heater
Isolate and drain completely using the dedicated drain plug.
No – bypass this component.
Taps (Galley/Heads)
Open hot & cold sides, blow out, then run antifreeze through.
Yes – until coloured liquid appears.
Shower Head & Hose
Drain hose completely, blow out, then run antifreeze through.
Yes – until coloured liquid appears.
Toilet (Manual/Electric)
Pump system dry, then flush with antifreeze.
Yes – pump through until bowl fills with antifreeze.
Drains & P-Traps
Pour a small amount of antifreeze directly down each drain.
Yes – approx. 250ml per drain.
Ancillary Pumps
Disconnect, drain, and blow out any deck wash or sump pumps.
Yes – run antifreeze through or manually fill pump body.
Following this checklist methodically ensures you won’t miss a single part of your boat’s water system, giving you peace of mind throughout the winter.
Servicing Your Marine Heating System for Winter
There’s nothing quite like having a reliable heater when you pop down to the boat on a cold winter’s day. It’s the difference between a pleasant visit and a miserable one, and it’s absolutely essential for getting the new season off to a comfortable start. If you neglect it now, you can almost guarantee it’ll fail just when you need it most.
Whether your boat has a modern diesel heater or a classic solid fuel stove, giving it a pre-winter service is a non-negotiable part of winterising your boat properly. This is about more than just staying warm; it’s a critical safety issue. A poorly maintained heater isn’t just inefficient—it can be a serious hazard.
Keeping Your Diesel Heater in Top Condition
Modern diesel heaters from brands like Webasto and Eberspacher are brilliant bits of kit, but they won’t look after themselves. They need a bit of regular attention to work reliably. More often than not, the culprit behind a heater that won’t fire up on a frosty morning is something simple, like a clogged fuel line or a sooty burner.
Here’s what should be on your pre-winter checklist:
Check the Fuel Filter: This little component is your first line of defence against debris. Take a close look at the small inline fuel filter. If it looks clogged up, clean it or, better yet, just replace it. A restricted fuel flow will starve the heater and cause it to cut out.
Inspect the Exhaust System: Go over the entire length of the exhaust pipe with a fine-tooth comb. You’re looking for any signs of corrosion, cracks, or loose fittings. A leak here can release deadly carbon monoxide into your cabin, so this check is absolutely vital.
Clean Burner Components: Over time, carbon and soot inevitably build up on the burner gauze and glow pin. This gunk stops the heater from igniting properly and burning efficiently. A careful clean can often bring it back to life, but if the gauze looks damaged, it needs to be replaced.
These jobs can be a bit fiddly and require a decent understanding of how the unit works. For many boat owners, getting a professional service is the best way to get some peace of mind. Our certified engineers are experts at this, making sure every component is clean, safe, and working just as the manufacturer intended.
With the current economic climate, we’re seeing more owners focusing on extending the life of their boats rather than buying new. This makes professional maintenance more important than ever—it’s shifted from a nice-to-have extra to a crucial step in protecting your investment.
Maintaining Your Solid Fuel Stove
For many boaters, especially on the UK’s canals, you just can’t beat the radiant, cosy heat from a solid fuel stove. But with that cosiness comes a responsibility to keep up with maintenance. You have to stay on top of it to prevent serious risks like chimney fires and carbon monoxide poisoning.
Before you even think about lighting that first fire of the season, there are a few key jobs you need to tackle. Getting these done now is fundamental to keeping your stove safe and efficient through the long, damp UK winter.
Essential Stove Winterisation Tasks
The single most important job is to clean the flue. As you burn solid fuel, a sticky, highly flammable substance called creosote builds up inside your chimney. If that deposit gets too thick, it can easily ignite and cause a dangerous chimney fire. A set of flue brushes is a tiny investment that is absolutely essential for every boater with a stove.
Once the flue is clean, turn your attention to the stove itself:
Inspect Fire Bricks and Baffles: Check the internal fire bricks for any big cracks or signs of crumbling. These bricks are there to protect the stove’s metal body from the intense heat, so any damaged ones should be replaced.
Check Rope Seals: The rope seal around the door is what creates an airtight seal, letting you control how fast the fire burns. If it’s frayed or looks compressed, air will leak in, making the fire burn too quickly and just waste fuel.
Protect from Rust: Give the stove body a good wipe-down with an oily rag. This leaves a thin, protective film that will help ward off rust in the damp winter air.
Properly servicing diesel-burning appliances on your boat isn’t just about making sure they work when you flick a switch. It’s a critical safety measure. A full service before winter means you can enjoy your boat safely, whether you’re living aboard full-time or just visiting on weekends. It’s your ticket to a worry-free winter.
Preparing Your Hull, Deck, and Interior
Proper winterising goes way beyond the engine room and the plumbing. If you want your boat to survive a classic UK winter unscathed, you’ve got to protect its structure, both inside and out. The damp, cold conditions are a perfect breeding ground for mould, mildew, and corrosion—all things that can cause serious long-term damage if you let them get a foothold.
This part of the job is all about creating a barrier against the elements while making the interior as unwelcoming as possible for damp and pests. A bit of graft now will save you from that sinking feeling of opening up a musty, damp boat and facing a long list of repairs come spring.
Protecting Your Exterior Surfaces
Your boat’s first line of defence against winter is its exterior. Relentless rain, snow, and ice can really take a toll on paintwork and deck fittings if they aren’t prepped properly.
Start with a really thorough, top-to-bottom clean. This isn’t just about looking smart; you need to get rid of all the salt, grime, and bird droppings that can stain and corrode surfaces over the winter months.
Now is also the perfect time to give all your deck fittings a close inspection. Check the sealant around stanchions, cleats, and windows for any sign of cracking or pulling away. Even a tiny gap is an open invitation for water to seep into your boat’s core, which can lead to rot. Any dodgy-looking sealant should be dug out, cleaned, and replaced with a proper marine-grade sealant.
For those on steel-hulled narrowboats, hunt down any chips or scratches in the paintwork and touch them up to stop rust from taking hold. If you spot anything more serious, it might be worth getting in touch with specialists who offer mobile boat welding services to sort it out before it gets worse.
Choosing the Right Winter Cover
A good cover is one of the best investments you can make, especially if your boat is staying in the water for the winter. It has to be tough enough to handle the weight of snow and battering winds without sagging or tearing.
Custom Canvas Covers: A well-made canvas cover, held up by a solid frame, is a fantastic long-term option. That frame is crucial—it stops water from pooling and makes sure air can circulate underneath.
Heavy-Duty Tarpaulins: This is the budget-friendly choice, but make sure you get a high-quality, durable one and tie it down securely. A tarp flapping in the wind all winter will chafe your boat’s finish to bits.
Whatever you choose, proper ventilation is absolutely key. Your cover must have vents or be set up in a way that allows air to move freely. A completely sealed-up boat is just a recipe for condensation and mould.
Banishing Interior Damp and Mildew
Inside the cabin, your number one enemy is moisture. A damp, sealed-up boat is a playground for mould and mildew, which will leave you with nasty smells and ruined soft furnishings. The goal here is to get the interior as dry and well-aired as possible.
Start by getting everything you can off the boat. All your textiles—cushions, bedding, curtains, clothes—should be taken ashore. These things act like sponges, soaking up any moisture in the air and becoming ground zero for mould. If they absolutely have to stay on board, prop all the cushions up on their sides to get as much air circulating around them as possible.
The most common mistake boaters make is sealing the boat up tight. A completely sealed cabin traps moisture, leading to condensation every time the temperature drops. Your best defence is a combination of removing moisture and encouraging constant airflow.
Final Interior and Electrical Checks
Next, get every last scrap of food out of the galley. Open packets, tins, even sealed jars—they can all attract rodents and other pests looking for a warm winter home. Give all the cupboards a good clean to get rid of any crumbs.
To actively fight moisture, put some dehumidifiers in the cabin. Those passive moisture-absorbing crystal traps are a good, cheap option, but you’ll need to check on them and empty them out from time to time. If you’ve got a reliable shore power connection, a small, low-wattage electric dehumidifier is a more powerful solution.
Finally, get some air moving through the interior. Leave all the locker doors, cupboards, and drawers slightly ajar. After cleaning the fridge, prop its door open to stop it from going mouldy. These simple tricks allow air to circulate, preventing damp, stagnant air from settling in enclosed spaces.
As for your batteries, disconnect them to stop them from slowly draining over the winter. The best practice is to take them off the boat entirely, store them somewhere cool and dry, and hook them up to a smart trickle charger to keep them in good health.
Common Questions About Winterising Your Boat
Even with the best checklist in hand, it’s natural to have a few nagging questions when you’re tackling a job as critical as winterising your boat. After all, getting it wrong can lead to some seriously expensive repairs come spring. We get asked these all the time, so let’s clear up some of the most common queries we hear from boat owners.
Do I Really Need Antifreeze if I Drain the Water Systems?
Yes, you absolutely do. This is probably the biggest—and riskiest—shortcut we see people tempted to take.
Even if you meticulously drain every tap and blow compressed air through the lines, it’s virtually impossible to get every last drop of water out. Little pockets will always get trapped in low spots, within pump housings, or around threaded fittings. That’s all it takes. When that tiny amount of water freezes, it expands with enough force to crack an expensive pump or split a pipe wide open. Think of non-toxic marine antifreeze as cheap insurance. It’s the only way to be completely sure your plumbing is safe from the frost.
Should My Boat Stay in the Water or Be Hauled Out?
This one often comes down to your boat’s design and what your marina allows. For a lot of narrowboats and canal barges here in the UK, staying in the water is standard procedure. If that’s your plan, you need to be 100% confident that your bilge pumps are in perfect working order and that all your through-hull fittings are sound and not weeping.
Hauling out onto the hardstanding is definitely the safer bet for the hull, protecting it from potential ice damage, though this is less common for inland waterway vessels. It also makes it a doddle to get to any underwater gear for maintenance. The downside, of course, is the cost. Always double-check your marina or mooring’s policy before making a decision.
Relying solely on a heater is a high-risk gamble. A shore power failure, tripped breaker, or heater malfunction could leave your boat completely unprotected from a freeze. A full winterization of the engine and plumbing is the only reliable method.
Can I Just Leave a Small Heater On All Winter?
While a small heater can be a useful part of your winter strategy, it should never be your main defence against freezing. The risk is just too high. Imagine a power cut at the marina on the coldest night of the year, a dodgy extension lead failing, or the heater itself giving up the ghost. Suddenly, your boat’s systems are completely exposed.
The only guaranteed way to prevent freeze damage is a full winterisation using antifreeze in the engine and plumbing. Once that’s sorted, by all means, use a low-wattage tube heater. It’s a brilliant way to take the chill out of the air, fight off condensation, and stop the cabin from feeling damp and miserable. Just think of it as a tool for comfort, not a substitute for proper protection. It’s also vital to ensure any fuel-burning appliances are well-maintained; our guide on how to prevent carbon monoxide poisoning has more details on that.
Our Services
At Marine Heating Solutions, we know that keeping your boat safe and sound through the winter is a top priority. Whether you need a professional service for your Webasto or Eberspacher heater, a safety check on your solid fuel stove, or advice on the best heating solution for your vessel, our certified engineers are here to help. Make sure your boat is ready for the cold!
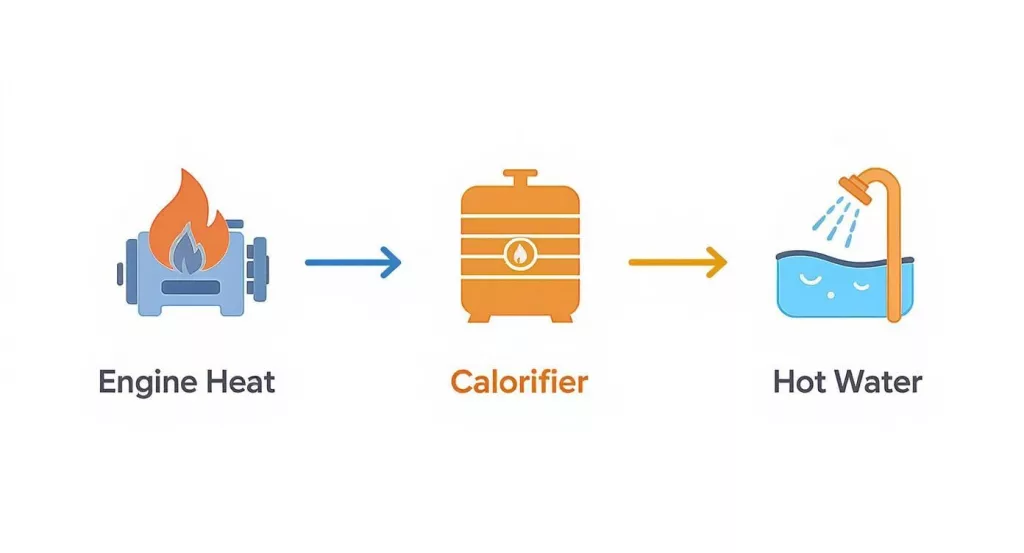
A calorifier is one of those brilliantly simple bits of kit that make life aboard so much better. At its heart, it’s a marine water heater that cleverly uses the waste heat from your running engine to give you plenty of hot water, completely free.
Think of it as a super-insulated hot water tank, a bit like a giant thermos flask. It captures and stores heat that would otherwise just be lost overboard, turning your engine run-time into hot showers and water for the washing-up.
The magic of a calorifier lies in its elegant simplicity and efficiency. It’s essentially an energy recycling system. Instead of letting all that heat from your engine go to waste, a calorifier intercepts a bit of it through two completely separate, sealed water circuits that never actually mix.
The first circuit is your engine’s cooling system. Hot coolant (a mix of water and antifreeze) is piped from the engine through a coiled pipe inside the calorifier tank. This internal coil is known as the heat exchanger coil. As the scorching hot coolant snakes through this coil, it radiates its heat into the fresh water stored in the tank around it.
The Key Components and Their Roles
The domestic fresh water—the stuff that comes out of your taps and shower—sits inside the main tank, safely separated from the engine coolant. As it soaks up the heat from the coil, its temperature climbs, often reaching 80-90°C.
Once you switch the engine off, the high-quality insulation packed around the tank does its job, keeping the water piping hot for hours, sometimes for a full day. This turns a routine task like running the engine to charge batteries into a fantastic secondary benefit: free hot water.
The real beauty of a calorifier is its efficiency. It captures heat that’s already being made, adding a huge amount of comfort and self-sufficiency to your boat without burning extra fuel or needing a separate power source while you’re on the move.
To really get your head around how it all works, let’s look at the main parts of a typical marine calorifier. Understanding these bits and pieces is the first step to appreciating how these systems deliver such reliable hot water. For a detailed look at the types available, you can explore a complete range of calorifier water heaters designed specifically for marine use.
Calorifier Components and Their Roles
Here’s a quick breakdown of the essential parts of a calorifier and what each one does. It’s a pretty straightforward setup, but every component plays a vital role.
Component
Primary Function
Insulated Tank
Stores your domestic fresh water and keeps it hot for hours, working just like a vacuum flask.
Heat Exchanger Coil
An internal pipe that carries hot engine coolant, transferring heat into the surrounding fresh water.
Fresh Water Inlet
Connects to your boat’s cold water supply, allowing the tank to be filled with clean, potable water.
Hot Water Outlet
Delivers the heated fresh water from the top of the tank to your taps, shower, and galley.
Pressure Release Valve
A critical safety device that automatically vents pressure if it builds up to an unsafe level inside the tank.
Each part works together seamlessly to provide that little touch of home comfort, making life on the water that much more enjoyable.
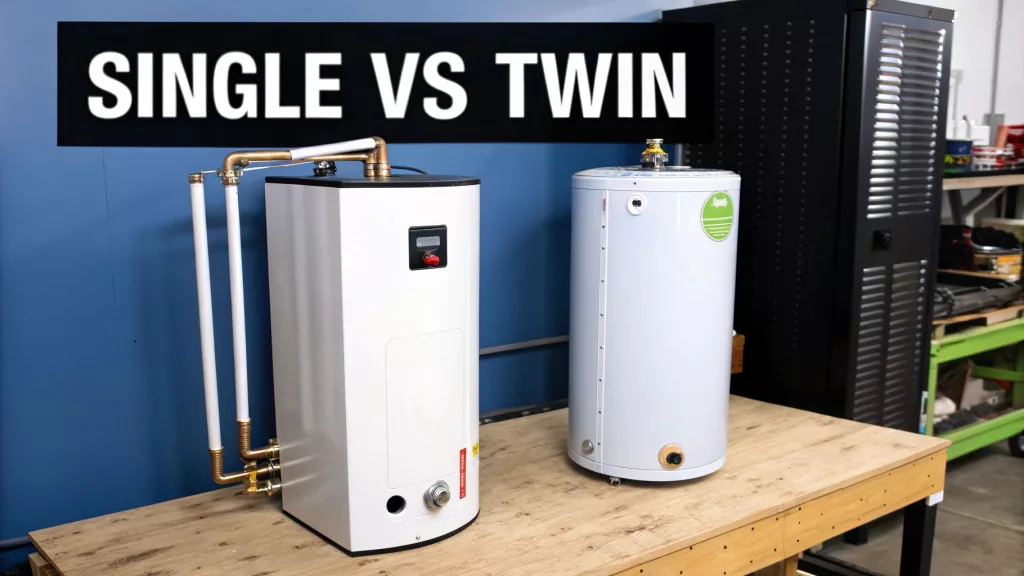
Single-Coil vs. Twin-Coil Calorifiers: What’s the Difference?
When you’re looking at calorifiers, the choice really boils down to two main types: single-coil and twin-coil. Each one is built for a different style of boating, so figuring out which is right for you is the key to having hot water whenever you need it. It all depends on how you actually use your boat – are you constantly cruising, or do you spend a lot of time moored up?
A single-coil calorifier is the most straightforward setup you can get. It has just one internal coil that hooks directly into your boat’s engine cooling system. This design is incredibly efficient when you’re on the move, basically giving you free hot water just by running your engine. For boaters who are underway most of the time, it’s a brilliant, no-fuss solution.
The Simplicity of a Single Coil
This setup is all about direct, uncomplicated operation. The moment your engine is running, hot coolant starts flowing through the coil and heats up the fresh water in the tank. Simple as that. There are fewer pipes and connections to worry about, which can make the installation that little bit easier.
But its greatest strength is also its biggest weakness. With only one heat source, the only way to get hot water is to run the engine. If you’re tied up in a marina for a few days without going anywhere, you’ll have no way to heat your water unless you fire up the engine just for that purpose.
The Flexibility of a Twin-Coil System
This is where the twin-coil calorifier really comes into its own. As the name implies, it has a second, completely separate heat exchanger coil inside the same tank. This extra coil gives you a massive amount of flexibility because you can connect another heat source to it, one that has nothing to do with your engine.
That second connection opens up a whole new world of options for comfort on board.
Immersion Heater: You can easily fit an electric immersion heater. This is perfect for when you’re hooked up to shore power at a marina.
Diesel Heater: For living off-grid, you could connect a diesel-fired water heater. This gives you hot water on demand without having to run your main engine.
Back Boiler: If your boat has a solid fuel stove, you could even plumb the second coil into a back boiler. We’ve got a great guide explaining how a boat backboiler system works if you want to know more.
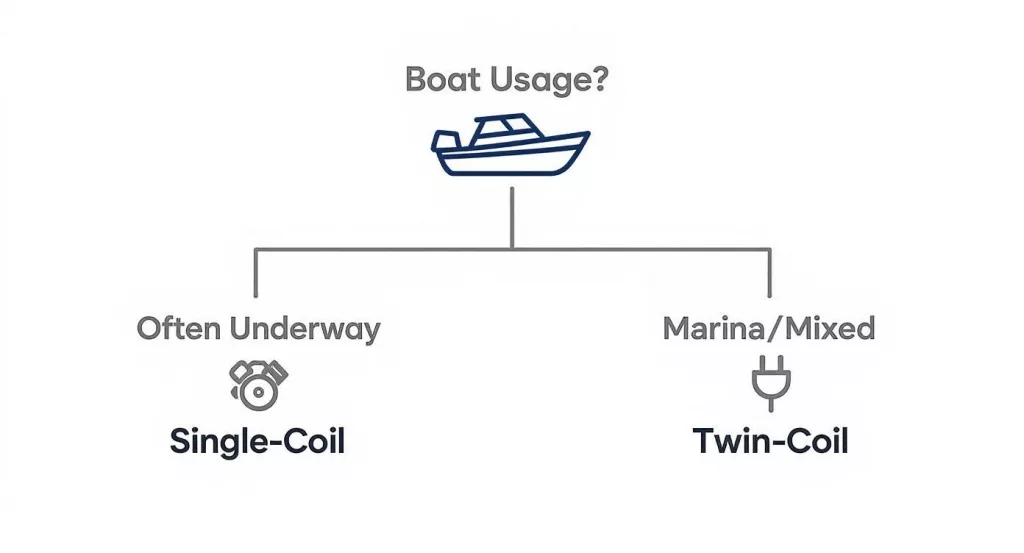
This little flowchart is a simple way to see which type might be the best fit for how you use your boat.
As you can see, your boating habits are the deciding factor. If you’re a continuous cruiser, you’ll love the simple efficiency of a single-coil unit. But if you mix up your cruising with longer stays in marinas, the flexibility of a twin-coil system is almost essential.
Ultimately, it’s a lifestyle choice. If you prize self-sufficiency and having multiple ways to get hot water, then a twin-coil unit is a smart investment. If your priorities are simplicity and efficiency while you’re cruising, a single-coil model will serve you perfectly well.
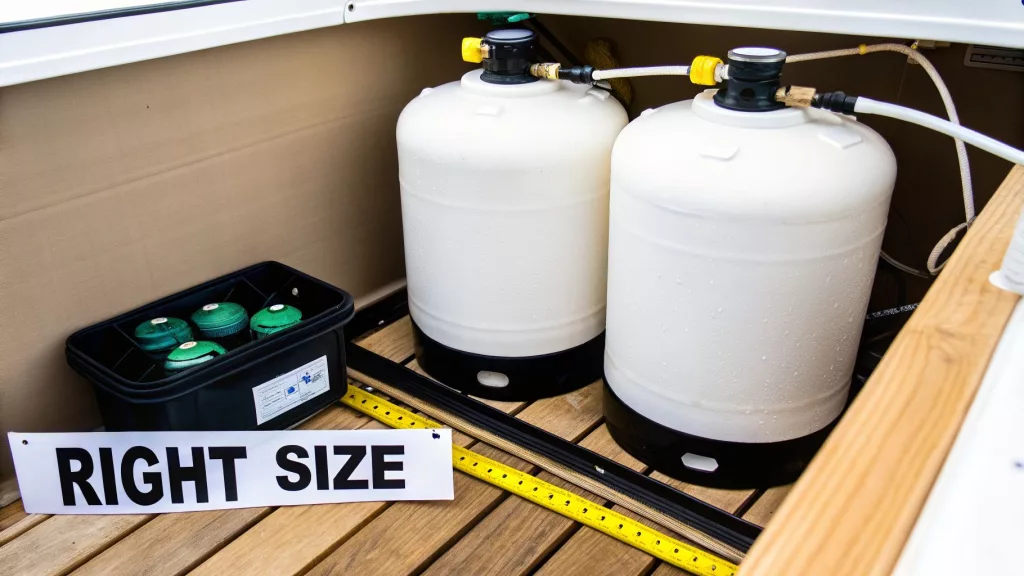
Choosing the Right Size and Type for Your Vessel
Picking the perfect calorifier for your boat comes down to a balancing act. You need to weigh up a few key factors to make sure you get all the hot water you need, without giving up precious space or burning through energy. Get this choice right, and you’ll have a system that’s perfectly matched to your crew, your boat, and how you use it.
The very first thing to nail down is the tank capacity. Go too small, and you’ll be left with cold water halfway through the washing-up. Go too big, and you’re just heating water for no reason while losing valuable locker space. The ideal size is all about how many people you have on board regularly.
Matching Capacity to Your Crew
The easiest way to get a rough idea of your needs is to think about your daily hot water habits – things like showers and cleaning. A quick rinse might only use 10-15 litres of hot water, but a longer, more luxurious shower could easily use double that.
Below is a table to give you a solid starting point for figuring out what size calorifier you’ll need.
Number of People
Typical Usage
Recommended Capacity (Litres)
1-2
Solo boaters or couples; mainly weekend trips.
15-25 Litres
3-4
Small families or groups; regular showers and galley use.
30-50 Litres
4+
Larger crews or full-time liveaboards; frequent use.
50-75+ Litres
This gives you a good ballpark figure, but always consider your personal habits. If everyone on board loves a long shower, it’s wise to err on the side of a larger tank.
Build Quality and Key Features
Beyond just the size, the actual construction and features of the calorifier are hugely important. You need a unit that’s built to take a beating in a marine environment.
High-quality stainless steel tanks are really the gold standard here; they last for ages and resist corrosion. Excellent insulation is another absolute must-have. It’s what keeps your water hot for hours after you’ve shut the engine down, saving you from having to run it just for a hot shower.
Honestly, it pays to invest in a well-built unit from a trusted brand. These are designed specifically for boats, with tough materials and top-notch insulation that make a massive difference to both performance and how long they last.
Finally, never overlook the essential safety features. A built-in pressure release valve (PRV) is a critical bit of kit that stops the tank from dangerously over-pressurising. Many good units also come with a thermostatic mixing valve. This blends the hot and cold water to give you a safe, consistent temperature right at the tap, which is a great way to prevent scalding.
For a much deeper dive into picking the right system, have a look at our detailed guide on selecting a boat water heater for your vessel.
Navigating Calorifier Installation and Safety
Getting the installation of your boat calorifier right is absolutely essential. This isn’t just a matter of making sure it works efficiently; it’s a critical safety issue that protects both your crew and your vessel from some pretty serious harm.
Whether you’re a competent DIYer or you’re planning on bringing in a professional, understanding the core principles of a safe setup is completely non-negotiable.
First things first, you need to decide on the best location. Ideally, you want to mount the calorifier as close to the engine as you possibly can. This minimises heat loss through the pipework and ensures the maximum amount of heat from your engine’s coolant actually makes it to the water tank.
It also needs to be securely fastened to a solid bulkhead or a sturdy mounting surface. Remember, a full calorifier is incredibly heavy, and the last thing you want is for it to break loose in rough conditions.
Key Plumbing and Safety Components
Once you’ve found the perfect spot, the focus shifts to the plumbing. You’re dealing with two completely separate systems here: the engine coolant circuit and your boat’s domestic freshwater system.
Engine Coolant Hoses: The pipes connecting the engine to the calorifier’s heat exchanger coil have to be rated for high temperatures and pressure. Your standard domestic plumbing pipes are absolutely unsuitable and will fail, period.
Freshwater Connections: These are what link your boat’s cold water supply to the calorifier inlet and the hot water outlet to your taps and shower.
Now, let’s talk about the most crucial parts of any installation: the safety devices. These bits of kit are not optional extras; they are vital for preventing a catastrophic failure.
A calorifier without a Pressure Release Valve (PRV) is a ticking time bomb. As water heats, it expands. Without a PRV to safely vent that excess pressure, the tank can rupture with explosive force, causing severe damage and potential injury.
Hiring a Professional for Peace of Mind
An accumulator tank is another vital component. Think of it as a pressure buffer. It creates a smooth, even flow of hot water and significantly reduces the wear and tear on your pump. To get a better grasp of how these systems fit together, it’s worth reading up on general plumbing installation practices.
Given the very real risks involved, many boat owners quite sensibly choose to hire a professional. A qualified marine engineer will make sure every connection is secure, all safety devices are correctly installed and tested, and that the whole system complies with the relevant standards.
If your installation involves gas appliances or any complex systems, consulting a certified boat gas engineer is essential for your safety and for compliance. It’s simply not worth the risk.
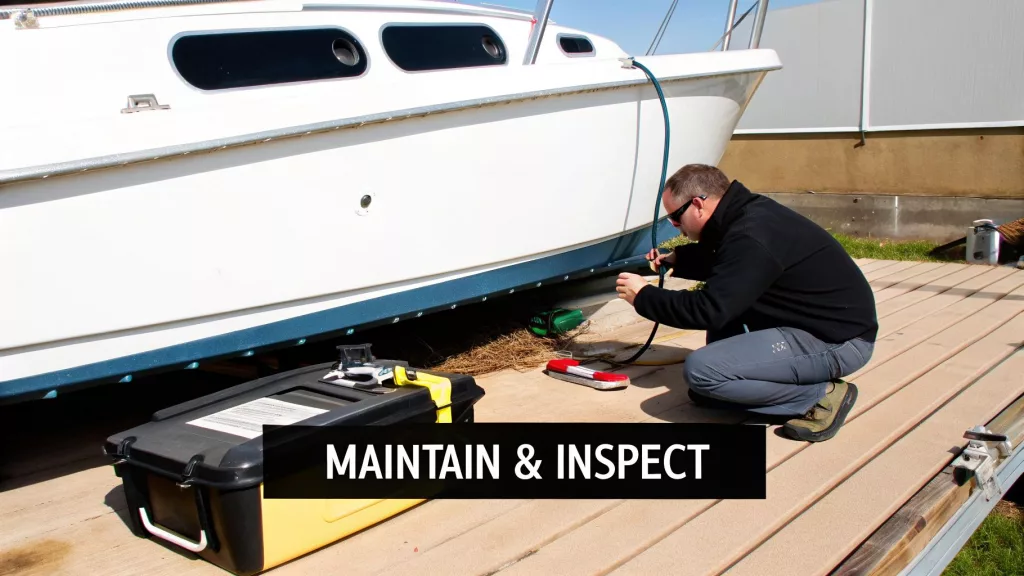
Essential Maintenance for a Reliable System
A calorifier is one of those wonderfully reliable bits of kit you’ll find on a boat. It just sits there and does its job. But like anything, a little bit of routine care goes a very long way in making sure you have hot water season after season. Looking after it is simple, and it’s absolutely vital for keeping it working efficiently and for the long haul.
The easiest thing you can do is just give it a regular once-over. Once a month, have a quick look around the unit, paying special attention to the hose connections and any valves. You’re on the lookout for any signs of weeping, drips, or nasty-looking corrosion. These are often the first tell-tale signs of a loose fitting or a seal that’s on its way out.
Catching a tiny leak early can save you from a world of water damage and helps keep your entire system in good nick. It’s the kind of proactive check that defines good boat ownership and applies to all your water systems. For a bigger picture, you can find out more about complete boat plumbing solutions and the best ways to manage them.
Preparing for the Cold Season
If you own a boat in the UK, winterisation is probably the single most critical maintenance job you’ll do all year. When water freezes, it expands by about 9%, and that expansion creates an incredible amount of force – more than enough to split pipes, tanks, and, yes, your expensive calorifier.
To stop that from happening, you must get every last drop of water out of it before the first proper frost hits.
Isolate the Unit: Start by turning off your freshwater pump. Then, close any isolation valves on the cold water pipe feeding the calorifier.
Open the Taps: Next, open the hot taps at both the highest and lowest points of your system. This lets air in and helps the water drain out properly.
Drain the Tank: Find the drain cock, which is usually right at the bottom of the calorifier, and open it all the way. Let it drain completely, either into the bilge or a container, until it’s empty.
Failing to properly winterise your calorifier is one of the most common and costly mistakes a boat owner can make. A tank that’s been split open by frost is almost always a write-off, meaning a full—and expensive—replacement.
Maintaining Peak Performance
Beyond getting ready for winter, there are a couple of other checks that will keep your calorifier working at its best. The first is a key safety check: testing the Pressure Release Valve (PRV). Just give the test lever a gentle twist or lift. A little bit of water should spurt out, which tells you the valve isn’t seized up and is ready to do its job if needed.
If you’re in a hard water area, limescale can slowly build up on the immersion heater element inside the tank. Over time, this furry coating acts as an insulator, making the element work much harder to heat the water and wasting electricity. Descaling it every few years will bring it back to life, improving performance and helping it last longer. This focus on upkeep is something we see across the wider industry. The UK’s radiator and boiler manufacturing sector, which produces many of the core components for marine heating, is constantly pushing for more modern, efficient equipment. You can read more about the UK heating manufacturing industry’s growth and its commitment to efficiency.
Common Questions About Boat Calorifiers
As brilliant as calorifiers are for life on the water, they can throw up a few questions, especially if you’re new to boating. Getting your head around the finer points of how they work will give you the confidence to get the most from your hot water system. Below, we’ll tackle some of the most common queries we hear from boaters day in and day out.
Each answer is designed to give you clear, practical information to help you manage your onboard systems without any guesswork.
How Long Does Water Stay Hot in a Calorifier?
This is probably the number one question we get asked about calorifiers for boats, and the answer really comes down to the quality of the unit you have installed. A well-built calorifier with thick, high-density polyurethane foam insulation can genuinely keep water hot for up to 24 hours after you’ve cut the engine.
That said, a few real-world factors come into play:
Insulation Quality: This is the big one. Premium units from established brands invest in superior insulation specifically designed to minimise heat loss, and it makes a massive difference.
Ambient Temperature: It’s simple physics. The water will cool down much faster in a chilly engine bay during winter than it will on a warm summer’s day.
Initial Water Temperature: If the engine has had a good run and heated the water to its maximum temperature (often around 80-90°C), it has much further to cool down and will stay hotter for longer.
A good quality unit will easily give you enough hot water for a morning shower, even if you switched the engine off the night before.
Can I Install a Boat Calorifier Myself?
While it’s definitely possible for a competent DIYer to install a calorifier, it’s a job that demands a healthy dose of respect and a solid grasp of marine plumbing. You need to be comfortable working with both your engine’s sealed cooling circuit and the boat’s pressurised domestic water system.
The most critical part of any installation is safety. Incorrectly fitting a calorifier, especially forgetting to install a Pressure Release Valve (PRV), can lead to catastrophic failure. When water heats up, it expands, creating immense pressure that can rupture the tank with explosive force.
Before you start, be honest about your skill set. If you have any doubt at all, getting a qualified marine engineer in is always the safest and smartest move. They’ll make sure every component is correctly installed, tested, and up to current safety standards.
Why Do I Need an Accumulator Tank?
An accumulator tank is a small but mighty component that acts as a pressure buffer for your domestic water system. Although it’s a separate bit of kit, it works hand-in-hand with your calorifier to give you a smooth, consistent flow of water.
Without an accumulator, your water pump would hammer on and off every single time you cracked open a tap. This constant, jerky cycling is not only annoying—causing the water to pulse—but it also puts a huge amount of strain on the pump’s motor and pressure switch, causing them to fail much sooner than they should.
The accumulator holds a small reservoir of pressurised water. This lets you draw off a bit of water—to wash your hands, for example—without the pump needing to kick in straight away. The result is a much smoother flow and a much longer life for your pump.
Our Boat Plumbing Services
For expert advice on choosing, installing, or servicing the right calorifier for your boat, get in touch with the team at Marine Heating Solutions. Our certified engineers can help you find the perfect system to ensure you have reliable hot water on every journey.
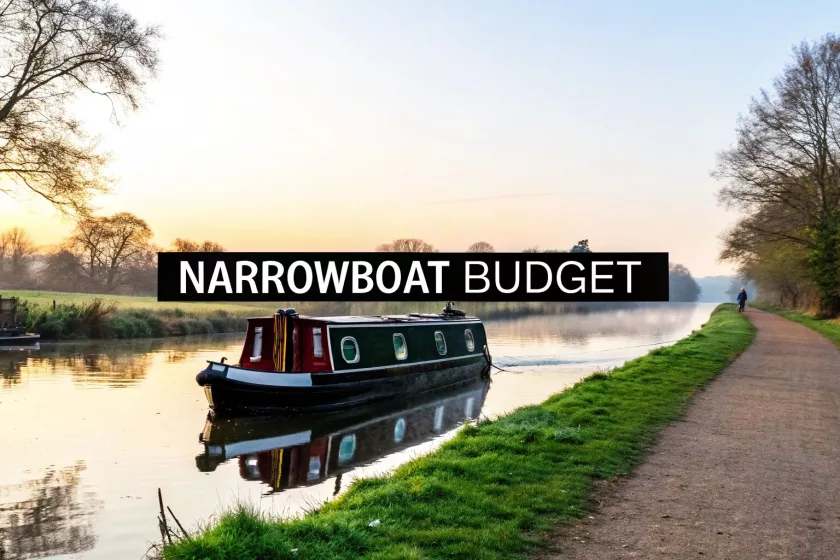
Many people daydream about ditching their mortgage or rent for a life on the water, and it’s true—the costs of living on a narrowboat can be a fraction of what you’d pay for a house or flat. I’ve seen countless boaters save hundreds of pounds every single month. But it’s not just about saving money; it’s about understanding a completely different set of expenses, both one-off and ongoing, that every aspiring boater needs to get their head around.
Choosing to live on a narrowboat is as much a financial decision as it is a lifestyle one. That romantic picture of gliding down a peaceful canal is fantastic, but you need to ground that dream in the solid reality of budgeting. The financial perks are absolutely there, but they don’t just happen. They come from careful planning and a clear-eyed look at every cost involved, from buying the boat to your daily running expenses.
The biggest draw for most is the initial purchase price. In a country where property prices are eye-watering, a narrowboat offers a far more achievable way to own your own home. You can expect to pay around £57,000 for a decent liveaboard narrowboat, which is a tiny fraction of the average UK house price. This massive difference is what tempts so many people to the waterways, especially in pricey cities like London.
To give you a clearer picture, let’s compare the typical running costs of a narrowboat against a standard one-bedroom flat in the UK. This table strips away the initial purchase or deposit, focusing purely on the day-to-day and annual expenses you can expect.
Estimated Annual Costs: Narrowboat vs One-Bed Flat (UK Average)
Expense Category
Average Annual Narrowboat Cost
Average Annual One-Bed Flat Cost
Licence/Council Tax
£1,200 (CRT Licence)
£1,500 (Council Tax, Band A)
Mooring/Rent
£5,500 (Mid-range marina)
£9,000 (Average UK rent)
Utilities (Energy)
£1,800 (Diesel, Gas, Coal)
£2,500 (Gas & Electricity)
Insurance
£350
£200 (Contents Insurance)
Maintenance
£1,500 (Blacking, services)
£500 (Minor repairs)
Water/Sewerage
£60
£450
Total (Excluding Food)
£10,410
£14,150
As you can see, the potential for savings is significant. Even with a mid-range marina mooring, the annual running costs can be thousands of pounds less than renting a small flat. Of course, these are averages, and your own costs will vary depending on your lifestyle and choices.
One-Off vs Ongoing Expenses
The first step to building a solid budget is to split your costs into two clear categories.
One-Off Investments: These are the high, upfront costs you’ll hit right at the start. It includes the price of the boat itself, a vital pre-purchase survey to check the hull, your initial licence fee, and any cash you’ll need for immediate fit-out jobs to make it feel like home.
Ongoing Running Costs: These are the regular bills that will make up your monthly budget. Think of them as your household bills, but with a canal-side twist. This covers your boat licence, insurance, fuel for heating and moving, mooring fees, and all the regular maintenance jobs.
Your single biggest ongoing expense will almost always be your mooring. A permanent spot in a marina with all the trimmings can cost as much as renting a small flat. On the other hand, adopting a “continuous cruising” lifestyle gets rid of mooring fees entirely, but you’ll spend more on fuel and the general wear and tear of being on the move.
This guide will walk you through each of these costs in detail, giving you the clarity you need to plan your finances properly. If you’re looking for a wider perspective on this lifestyle, you might also find our guide on what to consider when you live on a boat helpful, as it covers more than just the money side of things.
Your Biggest Investment: The Narrowboat Itself
Let’s be blunt: your boat isn’t just a future home, it’s the single biggest chunk of cash you’ll hand over when you start this life on the water. The initial purchase price is the cornerstone of your entire budget. It doesn’t just define your entry ticket into the lifestyle; it heavily influences your maintenance headaches for years to come. This is the first, and biggest, number to pin down when working out the true costs of living on a narrowboat.
The narrowboat market is huge and incredibly varied, with something for every budget and level of DIY ambition. It helps to break it down into three general tiers. Getting your head around these categories is the best way to find a boat that fits both your wallet and what you’re willing to take on.
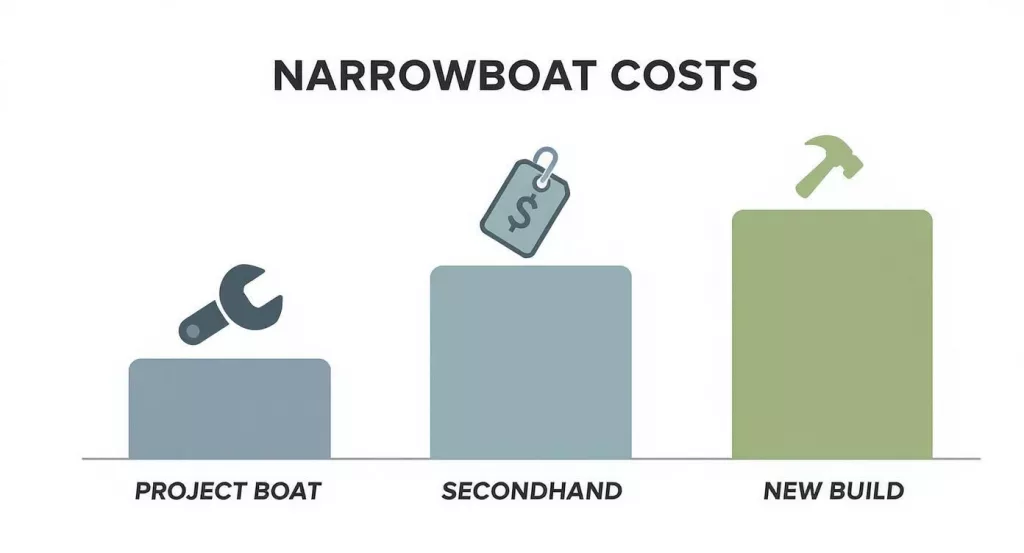
Decoding the Price Tiers
The price you’ll pay is almost always a direct reflection of the boat’s age, its overall condition, and the quality of the fit-out. A brand-new boat is a pristine, blank canvas, while a well-loved older vessel comes with its own history and, let’s be honest, a few quirks.
The ‘Project Boat’ (Under £25,000): This is where many people start looking. It’s the entry-level option, usually an older boat that needs a lot of love. While that low price is tempting, these boats can be a classic false economy. You could be looking at a complete interior refit, a serious engine overhaul, or even costly steelwork on the hull. This path is really only for those with genuine DIY skills, plenty of time, and a separate, healthy pot of cash for the renovations.
The Secondhand Sweet Spot (£30,000 – £70,000): This is where most aspiring boaters find their perfect match. Boats in this bracket are typically well-looked-after, have a solid history, and are pretty much ready to move onto. Sure, you might want to give it a lick of paint or change the curtains, but the really important stuff—the engine, hull, and heating—is usually in good working order.
The Brand-New Custom Build (£80,000+): If you’ve got a bigger budget, a new build lets you design your dream floating home from the steel up. You get to pick the layout, the appliances, and every single finish. The huge advantage here is buying a vessel with a full warranty and no hidden gremlins, which means peace of mind for years
Remember, the price on the advert is just the start. You absolutely have to factor in the immediate, non-negotiable costs that come with buying any secondhand boat. Getting caught out here can sink your finances before you’ve even untied the ropes.
The Crucial One-Time Costs You Cannot Ignore
Beyond the sticker price, there are a few vital one-off fees that every single prospective boat owner must budget for. Skimping on these can lead to disastrous financial surprises and could even put your safety on the line. Think of them as fundamental parts of a responsible boat purchase, not optional extras.
First up, and most importantly, is the pre-purchase survey. This is the boat world’s version of a structural survey on a house, but it’s arguably even more critical. A qualified marine surveyor will inspect the boat out of the water, paying very close attention to the hull’s steel thickness and overall integrity. This survey, costing between £500 and £800, is your best defence against hidden corrosion or damage that could cost thousands to fix. A bad survey gives you the power to renegotiate the price or, even better, the wisdom to walk away from a money pit.
Next, you’ll need a Boat Safety Scheme (BSS) certificate. This is a legal requirement, just like a car’s MOT, and it confirms the gas, electrical, and heating systems on board are safe. If the seller’s certificate is about to run out, you might have to get a new one yourself, which costs around £250-£350. Any problems found during the inspection will need to be fixed at your expense before a certificate can be issued.
Finally, think about the initial fit-out and customisation costs. Even a boat in fantastic condition will need some personal touches to truly feel like home. This could be as simple as a fresh coat of paint and new curtains, or bigger jobs like installing a more efficient heating system or adding solar panels. While these choices are personal, our guide on choosing the right boat for living has some valuable tips on what really makes a vessel a comfortable home. Setting aside at least a few thousand pounds for these initial tweaks will let you settle in comfortably without any financial stress.
Budgeting for Your Monthly Expenses
Once the excitement of buying your boat dies down, your attention will inevitably turn to the regular, running costs. Getting a handle on these monthly outgoings is the key to creating a budget that works and enjoying a stress-free life on the water. These are the predictable bills you’ll face month after month, and they form the real backbone of your financial planning.
Life on a narrowboat means swapping council tax and fixed utility bills for a completely different set of expenses. You’re trading one set of direct debits for another, and knowing what’s coming is half the battle. So, let’s break down the main parts of your monthly floating budget.
The chart below gives you a rough idea of purchase prices, which will have a knock-on effect on your ongoing maintenance bills and insurance premiums.
As you can see, there’s a big financial leap from a project boat to a brand-new one, and that difference will ripple through your monthly spending.
Essential Licences and Insurance
Your first absolute non-negotiable is your boat licence. If you want to cruise most of the inland waterways in England and Wales, you’ll need a licence from the Canal & River Trust (CRT). It’s basically the equivalent of road tax for your car, helping to maintain the canals, locks, and facilities that make this whole lifestyle possible.
The licence fee isn’t a single flat rate; it’s calculated based on the length of your boat. Simply put, the longer the boat, the more you pay. For a fairly standard 57ft narrowboat, you should budget for around £100-£120 per month. Keep in mind, you’ll also need a valid Boat Safety Scheme (BSS) certificate and proper insurance just to apply for the licence.
Boat insurance is the other must-have. At the very least, you need third-party liability cover, which protects you if you accidentally damage another boat or a bit of canal infrastructure. Most boaters, though, go for a more comprehensive policy that also covers their own boat against things like theft, fire, and damage. A decent policy will probably set you back between £25 and £40 per month.
Managing Your Onboard Utilities
Running the utilities on a boat is a world away from a house. You are effectively your own utility company, in charge of generating, storing, and managing your own power and water. This is a big part of the monthly costs of living on a narrowboat.
Your energy will usually come from a mix of these sources:
Electricity: Powering your lights, fridge, water pump, and gadgets typically relies on a bank of leisure batteries. You charge these by running the engine, plugging into a shoreline at a marina, or—the most popular option these days—through solar panels. A good solar setup can make a huge difference, seriously cutting down your engine running time and fuel bill. If you’re curious, we have a great guide on choosing the right boat solar panels for your needs.
Gas: Cooking, and sometimes water heating, is often handled by bottled Liquefied Petroleum Gas (LPG), usually propane. A 13kg bottle can last anywhere from one to three months, depending on how often you’re cooking up a storm. Expect a refill to cost around £40-£50.
Water: Here’s some good news: the water itself is mostly free! Your CRT licence gives you access to water points all along the canal network. The only ‘cost’ is the time and effort it takes to moor up and fill your tank every week or two. Some marinas and lock keepers charge a small fee, usually £1 or £2, if their supply is metered.
Fuel for Heating and Propulsion
Finally, you have to budget for the fuel that keeps you warm and gets you moving. Most narrowboat engines are diesel, just like in a car, but for propulsion, you’re allowed to use ‘red diesel’ (gas oil), which is often a bit cheaper.
How much diesel you get through really depends on your lifestyle. A continuous cruiser who’s always on the go might spend £80-£100 a month on diesel. In contrast, someone with a permanent mooring who rarely travels might only spend £20.
For heating, a multi-fuel stove is the heart of many boats. The cost of fuel for it—smokeless coal and seasoned wood—is very seasonal. You might spend next to nothing in the summer, but that figure can jump to £200-£300 per month in the depths of winter just to stay warm and dry. This seasonal spike is one of the most important things to factor into your yearly budget. Diesel stoves and heaters are also common and can cost less to run.
Mooring Fees: The Great Budget Divide
Nothing will hammer your monthly budget quite like the spot you choose to tie up your boat. Seriously. This one decision creates the biggest split in the costs of living on a narrowboat, capable of turning a modest budget into a significant one, or the other way around. It’s a choice that defines not just your outgoings, but your entire way of life on the water.
You’ve got two main paths to go down, each with its own financial and practical reality. You can either find yourself a permanent, long-term mooring or embrace the nomadic lifestyle of a ‘continuous cruiser’. Getting your head around the real-world costs and what each path demands is vital before you even think about casting off.
The Comfort of a Permanent Mooring
A permanent mooring is your own dedicated spot, either on the towpath or in a marina, where you can legally live aboard your boat. Think of it as renting a parking space for your floating home. The costs for these can vary wildly, from a couple of thousand pounds a year right up to £15,000 or more in hotspots like central London.
The price tag is all about location and what facilities you get for your money:
Marina Moorings: These are usually the priciest option but come loaded with perks. You’ll typically get a secure pontoon, mains electricity hook-up, water taps, rubbish disposal, and sometimes even laundry facilities and parking. A fully-serviced marina in a desirable area can easily set you back £300 to £600 per month, sometimes a lot more.
Towpath Moorings: Managed by the Canal & River Trust or private landowners, these are simpler spots along the canal bank. They’re generally cheaper but often come with fewer facilities—you might just get a water tap and that’s your lot.
Farm Moorings: Some farmers with land backing onto the canal offer basic, no-frills moorings. These can be a real bargain but are often in the middle of nowhere with minimal services.
Securing a good residential mooring, especially in a popular area, can be incredibly tough. Waiting lists are often years long, and some marinas have shut their books to new applicants completely. This scarcity is a huge factor driving up the prices.
The Freedom and Challenge of Continuous Cruising
The alternative to a permanent mooring is to become a ‘continuous cruiser’. This means you don’t have a fixed home base and must be on a genuine, progressive journey around the canal network. The big financial draw is obvious: you pay no mooring fees. It’s a massive saving that makes the lifestyle incredibly tempting.
But don’t be fooled into thinking continuous cruising is ‘free’. This lifestyle has its own rulebook and hidden costs. To stay on the right side of the Canal & River Trust guidelines, you must move your boat to a new “neighbourhood” every 14 days—sometimes even less in restricted areas.
All that moving about translates into other expenses:
Increased Fuel Costs: You’ll burn through a lot more diesel for propulsion than someone sitting on a permanent mooring. This can easily add £50-£100 or more to your monthly fuel bill.
More Wear and Tear: Constantly chugging along the cut puts more use on your engine, gearbox, and all the moving parts, which inevitably leads to higher maintenance bills down the line.
Time and Planning: The biggest cost that isn’t financial is your time. You’ll spend a lot of it planning routes, finding decent spots to tie up for the night, and making sure you’re sticking to the rules.
Choosing between a permanent mooring and continuous cruising is the ultimate balancing act. A mooring gives you stability, convenience, and a fixed address, but it comes at a steep price. Continuous cruising offers incredible freedom and huge savings on fees but demands a much more active, organised, and fuel-heavy lifestyle. Your choice here will be the single biggest factor in shaping your life and your budget on the canals.
Keeping Your Floating Home Warm and Cosy
Let’s not beat around the bush: a damp British winter on the canals can be pretty miserable if you’re not prepared. Keeping your narrowboat warm and dry isn’t just about comfort—it’s absolutely vital for looking after the boat itself, and your own sanity. Heating is a big chunk of the seasonal costs of living on a narrowboat, but if you’re smart about it, you can stay toasty without torching your budget.
The classic image of narrowboat life often includes a multi-fuel stove, and for good reason. It kicks out a wonderful, dry, radiant heat that’s perfect for fighting off that persistent canal dampness. Of course, that lovely warmth comes with the constant job of feeding it, usually with smokeless coal and properly seasoned hardwood.
When a real cold snap hits, you can easily burn through two to three 25kg bags of coal every week. At around £15-£20 per bag, plus the cost of kiln-dried logs on top, you can see how your heating bill can sneak up to well over £200 a month in the dead of winter.
What About More Modern Heating Options?
While the glow of a real fire is hard to beat, a lot of full-time boaters go for the sheer convenience of a diesel-fired central heating system. These work a lot like the central heating in a house, using diesel from your main fuel tank to heat water that then gets pumped through radiators down the length of the boat.
They give you a consistent, programmable warmth that’s a real game-changer for year-round living. The initial installation can feel like a big investment, but you might be surprised at how manageable the running costs are. Modern systems are incredibly efficient, sipping as little as 0.2-0.5 litres of diesel per hour to keep the whole boat comfortable. If you want to really get into the nitty-gritty of what’s out there, our complete guide to selecting a boat heating system breaks down all the pros and cons.
Your heating costs are tied directly to where you moor and what time of year it is. A permanent residential mooring with an electric hook-up opens up different options compared to life as a continuous cruiser, where you’re relying entirely on diesel and solid fuel. Winter will always hit the wallet harder.
It’s Not Just About the Heater: Insulation and Condensation
The most expensive heat is the heat you lose straight away. Before you throw a fortune at fuel, the best money you can spend is on good insulation. Loads of older boats have pretty poor spray foam insulation, which means cold spots and heat just pouring out. Upgrading it where you can, and adding simple things like thermal blinds or thick curtains, will make a massive difference to your fuel bill.
Condensation is the liveaboard boater’s arch-nemesis. Good ventilation is your best weapon—just cracking a window or making sure your vents are clear lets all that moist air escape. A well-heated boat is also a drier boat, simply because warm air can hold more moisture.
When you’re trying to figure out how to heat your floating home affordably, it can be helpful to see the bigger picture. Looking at things like the current winter heating cost projections helps put your own spending in context. At the end of the day, combining an efficient heater with good insulation and solid ventilation habits is the key to creating a cosy, affordable home all year round.
The Hidden Costs of Maintenance and Repairs
This is the financial advice every seasoned boater wishes they’d been given on day one. When you rent a flat and the boiler breaks, you call the landlord. When something fails on your boat, that bill is coming straight to you. Putting off maintenance isn’t a savvy way to save money; it’s a surefire way to create much bigger, eye-watering problems down the line.
Think of routine jobs as the foundation of a healthy boat and a predictable budget. Just like a car, your engine needs servicing every year. This isn’t just about ticking a box; it’s about keeping your engine reliable and avoiding the nightmare of a breakdown in the middle of nowhere.
But the single biggest—and most expensive—routine job you’ll face is blacking the hull. This means getting the boat lifted out of the water so you can slap a thick coat of bitumen paint on the steel below the waterline. It is your boat’s primary defence against the relentless threat of rust and corrosion.
The Blacking Process and Its Costs
Most boaters get their hull blacked every two to three years. And let’s be clear, this is a significant undertaking, not just a quick paint job. The whole process involves lifting the boat, pressure washing years of gunk and old paint off, and then applying at least two fresh coats of bitumen.
You’ve got two main routes to go down, each with a very different price tag:
DIY Blacking: Lots of boatyards offer a ‘dock and scrub’ service. They’ll do the heavy lifting (literally), and then you do the hard graft of painting. It’s the cheaper option, and you’ll probably spend around £400-£600 for the lift. You can then jet wash and paint it yourself.
Professional Boatyard Service: If you’d rather leave it to the pros, the boatyard will handle the entire job. It’s a lot less work for you but a lot more money, typically setting you back between £1000 and £1,500, depending on your boat’s size and the yard’s rates.
Budgeting for the Unexpected
Beyond the jobs you can plan for, you absolutely must have a fund for when things just… break. Life on a boat means dealing with the unexpected. A water pump might fail mid-shower, or the starter motor could give up the ghost on a frosty morning. These aren’t ‘if’ scenarios; they are very much ‘when’.
A well-stocked emergency fund is the difference between a minor headache and a full-blown crisis. Without it, a single serious issue like an engine failure could genuinely force you to sell your home.
A good rule of thumb is to squirrel away about 5% of your boat’s value for maintenance and repairs each year. For a £60,000 boat, that’s £3,000 annually, or £250 a month paid into a dedicated savings account. This pot of money covers planned jobs like blacking and servicing while also building that crucial buffer for emergencies.
From routine checks to emergency fixes, knowing the full scope of maintenance is vital. For those more specialised jobs, knowing where to find reliable canal boat services is invaluable. This kind of financial discipline is what makes a stress-free, sustainable life on the water possible.
Your Questions on Narrowboat Costs Answered
We get a lot of questions about the real-world finances of canal life, so let’s tackle some of the most common ones head-on. Here are some quick, straightforward answers to the queries we hear all the time.
Is It Really Cheaper Than a House?
Yes, in most cases, the day-to-day running costs and the initial purchase are significantly lower than buying or renting a conventional property. It’s not unusual for your monthly narrowboat costs to be hundreds of pounds less than the average UK rent.
But there’s a crucial difference: responsibility. As a boat owner, you are solely accountable for all maintenance and any large, unexpected repairs—jobs a renter would never have to think about. Your true savings will ultimately hinge on your choice of mooring and how meticulously you look after your boat.
There’s a smart rule of thumb in the boating community: budget 10% of your boat’s value for annual maintenance. This isn’t just a casual suggestion; it’s the financial discipline that keeps experienced boaters afloat without the stress.
How Much Should I Save for Emergencies?
Let’s use that 5% rule. For a £50,000 boat, that means setting aside £2,500 a year, which works out to just over £200 a month. In addition, you should set aside 10% of the value of your boat to start with.
This dedicated fund should comfortably cover planned jobs like getting the hull blacked every two to three years and your annual engine service. More importantly, it creates a vital buffer for those unwelcome surprises—a failed inverter, a broken bilge pump, a sudden engine problem, or overplating works. A healthy maintenance fund is the absolute key to stress-free ownership.
Can I Get a Mortgage for a Narrowboat?
You can’t get a standard residential mortgage for a narrowboat simply because it isn’t classed as a property. What you’ll need to look for is a specialist marine loan or, more commonly, a personal loan.
Marine finance typically requires a much larger deposit (think 20-30%) and has shorter repayment terms of around 10-15 years, unlike a typical mortgage. Because of this, many buyers find it simpler to use personal savings or a straightforward personal loan to fund their purchase.
Our Services
Keeping your boat warm, safe, and comfortable is our top priority. At Marine Heating Solutions, we specialise in the installation, servicing, and repair of all marine heating and plumbing systems. From a classic solid fuel stove to a modern diesel heater, our certified engineers ensure your floating home is ready for any weather.
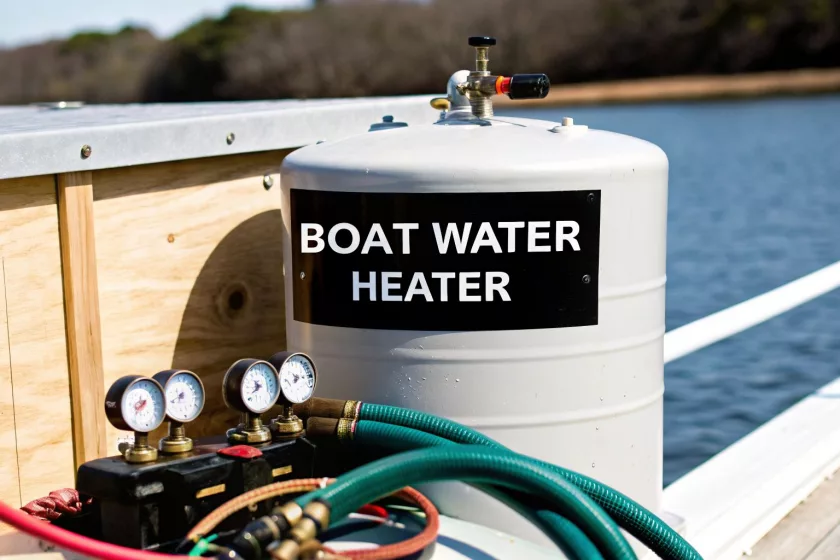
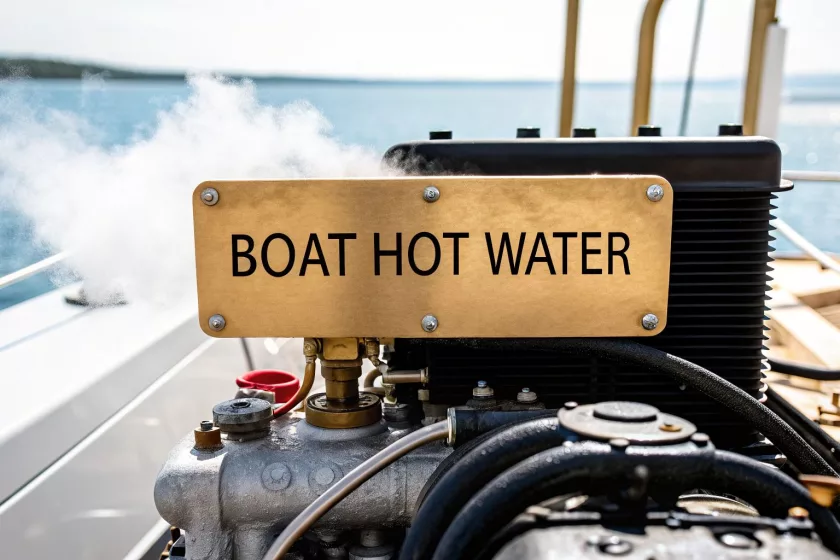
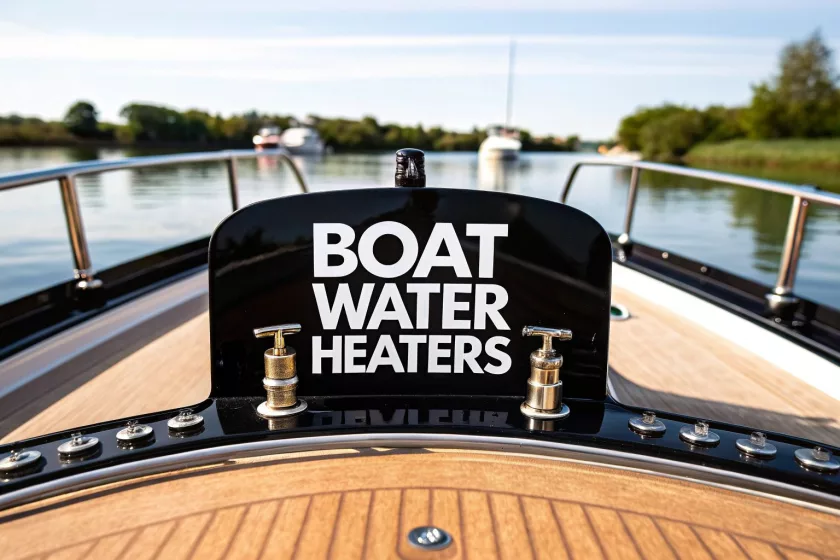
A reliable boat water heater isn’t just a nice-to-have; it’s one of the most fundamental bits of kit for making life on a narrowboat, canal barge, or any other vessel truly comfortable and practical. Having hot water on tap completely changes the experience of living afloat, turning a simple boat into a proper home from home.
Life on the water comes with its own unique set of challenges, but getting a decent supply of hot water shouldn’t be one of them. It doesn’t matter if you’re a weekend cruiser enjoying the canals or a full-time liveaboard – a dependable heating system is absolutely crucial. It’s the difference between a bracing morning shower and a proper hot one, and it makes washing up after dinner a simple task rather than a chore.
Beyond just the creature comforts, a well-chosen boat water heater adds to the overall function and even the value of your vessel. It gives you the freedom to plan longer trips and stay away from marina facilities for extended periods, boosting your self-sufficiency. This is a game-changer, especially for those who’ve embraced the continuous cruising lifestyle on the UK’s amazing network of inland waterways.
More Than Just a Bit of Luxury
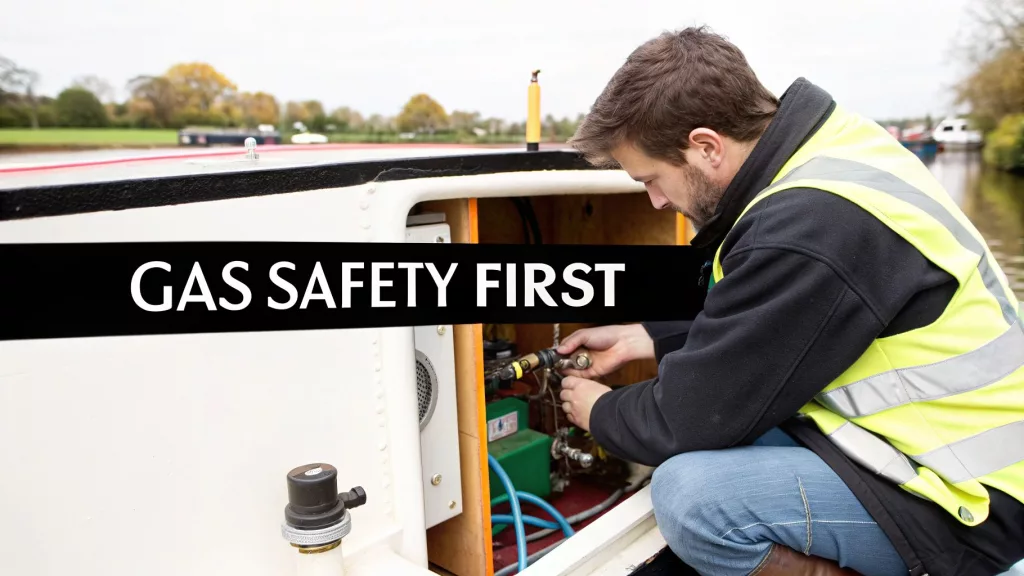
Getting your water heating sorted has some serious safety implications, too. A professionally installed, marine-grade system is built from the ground up to operate safely in the tight confines of a boat, which helps to minimise the risks that come with combustion and ventilation. Gas-powered units, for example, have to be fitted by a competent person to make absolutely sure all fumes are properly vented outside the cabin.
Any appliance that burns fuel on a boat needs to be managed with care. For every boat owner, understanding the risks and knowing how to prevent them isn’t optional – it’s vital.
To keep everything as safe as possible, you have to be clued up on the potential dangers. For a detailed guide on this critical topic, you can learn more about how to prevent carbon monoxide poisoning and keep everyone on board safe.
At the end of the day, the right system gives you peace of mind. It means you have the hot water you need, right when you need it, without cutting corners on safety or efficiency. This guide will walk you through everything you need to know, from how these systems work to picking the perfect one for your boat.
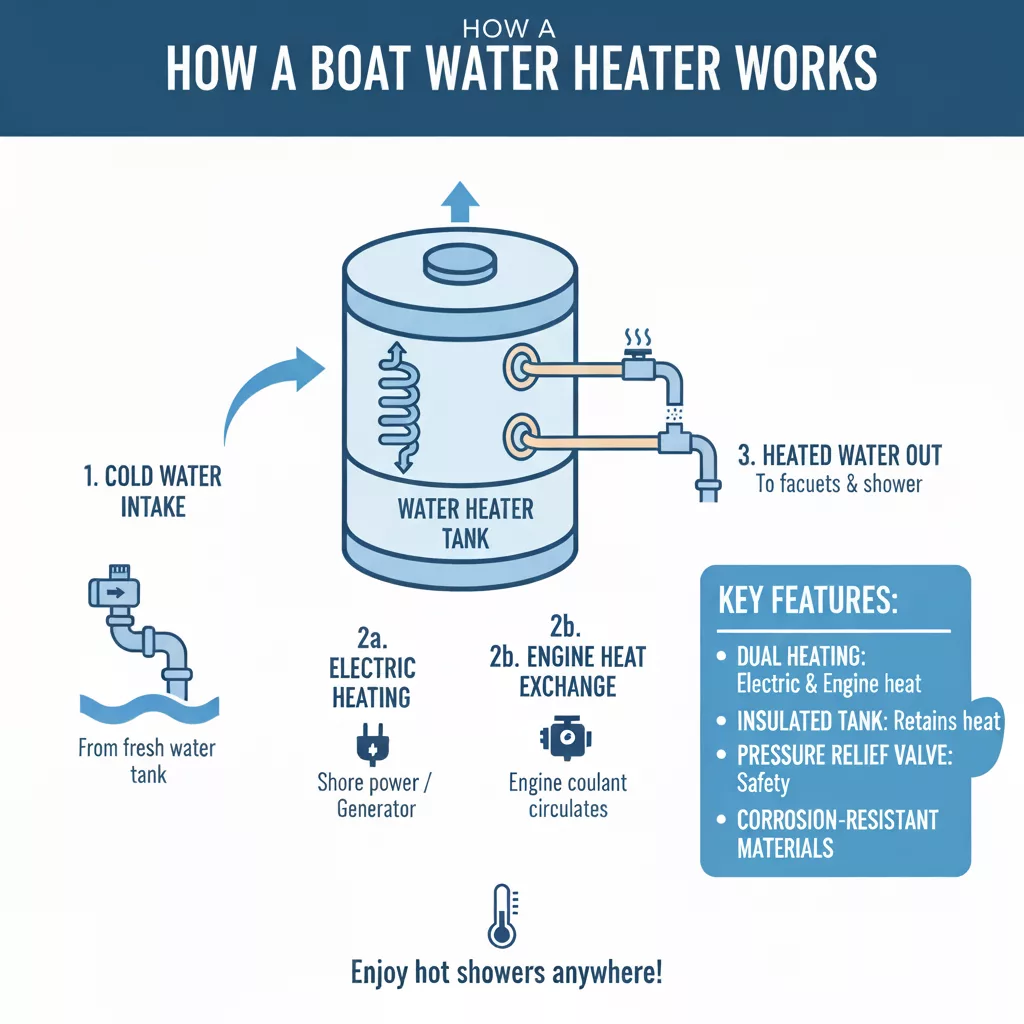
Understanding How Your Boat Gets Hot Water
Getting hot water on your narrowboat or canal barge is usually a lot simpler than you’d think. Most systems are cleverly designed to recycle energy that would otherwise just go to waste, which makes them incredibly efficient and practical for life afloat.
The heart of the most common setup is a piece of kit called a calorifier. Essentially, it’s a very well-insulated hot water tank.
Think of it as the complete opposite of a car radiator. Instead of using air to cool down hot liquid from the engine, a calorifier uses that hot liquid from your engine’s cooling system to heat up your domestic fresh water—all without the two water sources ever actually mixing.
As you can see, a boat water heater is absolutely central to life on the water, having a direct impact on your comfort, safety, and general lifestyle. The key thing to grasp is that hot water isn’t just a bit of a luxury; it’s a fundamental part of a properly functional and enjoyable life on a boat.
How a Calorifier Works
Tucked away inside the insulated tank of a calorifier is a coil of pipe. When your engine is running, hot coolant gets pumped straight from the engine through this coil. The heat simply radiates off the coil and warms up the fresh water stored in the tank around it.
Before you know it, you’ve got a full tank of hot water, pretty much for free, just from cruising along.
Of course, what happens when you’re moored up and plugged into shore power? Well, most calorifiers have a backup. This usually comes in the form of an electric immersion heater—an element inside the tank that works exactly like the one in your kettle at home. It’s a reliable alternative for when the engine isn’t running.
The demand for these clever systems is definitely on the up. This just goes to show how essential a reliable supply of hot water has become for weekend cruisers and full-time liveaboards alike.
What Are the Alternatives?
While calorifiers are hugely popular on UK inland waterways, they’re not your only option. You could also go for an instantaneous gas water heater, which takes a different approach altogether. Instead of storing a tank of hot water, these units heat it on demand as it flows through the appliance.
A well-designed water heating system is one of the most significant upgrades you can make to your vessel. It fundamentally changes your self-sufficiency and comfort, turning a basic boat into a true home on the water.
This on-demand method gives you a potentially endless supply of hot water, as you’re not limited by the size of a tank. The trade-off, however, is that they come with very specific installation and ventilation requirements to ensure they operate safely in the confined space of a cabin.
Getting your head around these core principles is the first step in figuring out which type of boat water heater is the right fit for you and your boat. For a much deeper dive into the most common system, check out our guide on what calorifiers are and how they really work.
Comparing the Main Types of Boat Water Heaters
Choosing the right boat water heater really comes down to understanding the two main technologies out there and figuring out which one best suits your life on the water. For most narrowboats, barges, and other UK vessels, you’re basically looking at a choice between a calorifier and an instantaneous gas heater.
These two systems couldn’t be more different. One is all about storing hot water, cleverly harnessing waste heat for brilliant efficiency. The other creates hot water on demand, giving you a practically endless supply. Let’s get into how each one works, looking at the good and the bad to help you find the perfect fit.
The Calorifier: The Reliable Storage Tank
A calorifier is, at its heart, a well-insulated storage tank that holds a good volume of hot water, ready whenever you need it. It’s the most common system you’ll find on UK inland waterways because it recycles energy that would otherwise just disappear into thin air.
The standard setup is the single coil calorifier. Inside the tank, there’s a coiled pipe. When your engine is running, hot coolant is pumped through this coil, which in turn heats up the fresh water in the tank – all for free while you’re cruising. Most of these also have an electric immersion element as a backup, so you can heat water using 240V shore power when you’re tied up at a marina.
For those who spend more time on their boats, the twin coil calorifier is a fantastic upgrade. This model adds a second, independent heating coil. This extra circuit is a game-changer for liveaboards, as it can be hooked up to a diesel cabin heater. This gives you a third way to make hot water, allowing you to be completely self-sufficient without having to run the engine or find a shore power connection.
A twin coil calorifier offers the ultimate flexibility for continuous cruisers. By integrating with a diesel heater, it provides abundant hot water using the same fuel that keeps your cabin warm, maximising both comfort and efficiency when you’re off-grid.
The Instantaneous Gas Heater: On-Demand Hot Water
An instantaneous gas heater works on a completely different principle – it doesn’t store any hot water at all. Just as the name suggests, it heats water the very moment you turn on the tap. When you open a hot tap, a sensor ignites a gas burner, and the water gets heated as it flows through a heat exchanger inside the unit.
The massive advantage here is a virtually endless supply of hot water. You’re not limited by the size of a tank, which can be a huge plus for larger families or anyone who enjoys a long shower.
But this convenience comes with some very strict safety rules. Any gas appliance on a boat must be a ‘room-sealed’ model. This is a critical safety feature. The unit draws the air it needs for combustion from outside the cabin and vents all exhaust fumes back outside, which prevents any risk of carbon monoxide building up inside. To get a safe and compliant setup, it’s essential to understand the specific requirements. You can learn more by reading our detailed guide on the boat gas water heater.
Boat Water Heater Feature Comparison
To help you see the differences more clearly, let’s put the key features of each boat water heater side-by-side in a simple table. This should help you weigh up the benefits and drawbacks based on how you use your boat.
Feature
Single Coil Calorifier
Twin Coil Calorifier
Instantaneous Gas Heater
Hot Water Supply
Limited to tank capacity
Limited to tank capacity
Endless and on-demand
Primary Heat Source
Engine heat or shore power
Engine, shore power, or diesel heater
LPG (Propane)
Energy Efficiency
High (uses waste engine heat)
Very High (multiple efficient sources)
Moderate (heats only when needed)
Best For
Weekend cruisers, marina users
Liveaboards, continuous cruisers
Those needing high volumes of hot water
Key Consideration
Requires engine run time or mains hook-up
Higher initial cost and complexity
Requires professional gas installation and certification
As you can see, the right choice depends entirely on your lifestyle. A calorifier is perfect if you’re often cruising or have easy access to shore power, while an instantaneous heater might be the better option if an endless supply of hot water is your top priority and you’re prepared for the gas safety requirements.
How to Select the Right Size and Model
Choosing the right water heater for your narrowboat or barge isn’t about grabbing the biggest or most powerful model off the shelf. It’s about making a smart choice based on your specific needs, your boat’s layout, and how you actually live on the water. Get this right, and you’ll have all the hot water you need without wasting precious space or energy.
The whole process really boils down to four key things. If you work through them one by one, you can quickly narrow down the options and find a model that’ll serve you well for years to come. Think of it as building a profile of your perfect hot water setup.
Calculate Your Hot Water Capacity Needs
First things first, you need to work out the right capacity. This is simply how much hot water the tank can store. The goal here is to find that sweet spot: enough hot water for your daily routines, but not so much that you’re constantly heating a huge, unnecessary tank.
A good place to start depends on how many people are on board and your lifestyle:
Weekend Cruisers: For one or two people on shorter trips, a smaller tank of 20-40 litres is usually more than enough for washing up and the odd shower.
Liveaboards or Families: If you live on your boat or have family aboard, your daily demand is going to be a lot higher. A larger tank in the 50-75 litre range is a much more realistic choice to stop you from running out mid-shower.
It’s worth remembering that a well-insulated calorifier can keep water hot for up to 24 hours. This means a tank heated during a short cruise in the afternoon can still give you a hot shower the next morning.
Assess Your Available Heat Sources
Next, have a think about how you’ll actually heat the water. Your boat’s existing systems will naturally point you towards the right type of calorifier. Do you run your engine often? Are you frequently hooked up to shore power? Do you rely on a diesel cabin heater for warmth?
If your main heat sources are your engine and marina shore power, a single coil calorifier is the standard, most straightforward choice. But, if you have a diesel heating system, a twin coil calorifier gives you brilliant flexibility. It lets you generate hot water without having to run the engine at all.
Measure Your Installation Space
This step is simple but absolutely critical. Boats, especially narrowboats, are famous for their limited and often awkward spaces. Before you get your heart set on a particular model, get the tape measure out and check exactly where it’s going to fit.
Don’t forget to allow for more than just the unit itself. You need clearance all around it for the plumbing connections, electrical wiring, and enough access for any future maintenance. A boat water heater has to be securely mounted, so make sure the spot you’ve chosen can handle its weight when it’s full of water.
Finally, don’t skimp on quality materials. The marine environment is tough, so look for tanks made from stainless steel or those with a durable glass-lined interior. These materials are far better at resisting corrosion, which means a longer life for your investment. For those with specific needs, like combi boiler systems, it’s worth learning more about a proven model like the Morco GB24 to see what modern, reliable options look like.
Installation and Maintenance Best Practices
Getting your boat water heater installed correctly and keeping it properly maintained isn’t just about efficiency—it’s absolutely fundamental for safety and a long service life. A proper setup protects your investment, helps you avoid expensive failures down the line, and guarantees you’ll have reliable hot water when you need it.
We always recommend getting a professional to fit any marine appliance, but every boat owner should understand the core principles. Installing anything on a boat is a different ball game; you’re dealing with constant movement, tight spaces, and a damp environment.
This really shows how much boat owners value reliable gear on board.
Key Installation Principles
A safe, effective installation really comes down to three main areas. Get these right from day one, and you’ll sidestep a whole host of future headaches.
Secure Mounting: Your water heater needs to be bolted down securely to a solid part of the boat’s structure. This stops it from shifting or, worse, breaking loose in rough seas or when you’re bumping through the locks.
Correct Plumbing: All your water connections must use high-quality, marine-grade hoses and fittings. Most importantly, a pressure relief valve (PRV) must be installed. This is your safety net, designed to release excess pressure and prevent a catastrophic tank failure.
Safe System Connections: This is where you absolutely need an expert. For gas heaters, it’s not just a recommendation—it’s a legal requirement. Any gas work on your boat has to be done by a qualified professional. We’ve got a detailed guide on hiring a certified boat gas engineer if you need to find one.
Creating a Simple Maintenance Checklist
Looking after your system is pretty straightforward, but you have to be consistent. A simple, regular checklist will help you catch small problems before they become big ones and keep your boat water heater in top shape.
A well-maintained water heater is a safe water heater. Spending just a few minutes on checks each month can prevent the vast majority of common failures and add years to the life of your unit.
As part of your routine, give all the plumbing connections a quick check for any drips or leaks, especially after a long trip. It’s also good practice to test the pressure relief valve at least once a year to make sure it opens freely. If you’re in a hard water area, descaling the immersion element every so often will make a massive difference to its performance.
Finally, the single most important job is winterising your system properly. As the season winds down, you have to protect your water heater from freezing. Following an ultimate winterizing boat checklist gives you the step-by-step process to protect all your water systems from frost damage, ensuring everything is ready to go for the next season.
Common Questions About Boat Water Heaters
When you’re trying to find the perfect water heater for your narrowboat or canal barge, a few questions always seem to pop up. To clear the waters, we’ve put together some straightforward answers to the queries we hear most often from boat owners.
Getting these details right from the start means you can make a confident decision and enjoy a reliable system for years to come.
How Long Does It Take for a Calorifier to Heat Water?
This is probably the number one question we get, and the answer really depends on your heat source and the size of your tank. As a rule of thumb, running your engine for 45 to 60 minutes is usually enough to get a standard 40-50 litre calorifier piping hot. That gives you plenty of hot water for daily tasks like washing up and having a shower.
If you’re moored up and plugged into shore power, the 240V immersion heater element takes over. Heating the full tank from cold this way will generally take about one to two hours.
Are Gas Water Heaters Safe on a Boat?
Yes, they absolutely can be, but with one massive caveat: they must be a marine-specific ‘room-sealed’ model, and it has to be installed correctly. This is a critical safety point you can’t ignore. These units are cleverly designed to draw the air needed for combustion from outside the cabin and vent all the exhaust fumes back outside. This design completely eliminates the risk of deadly carbon monoxide poisoning inside your living space.
It is absolutely essential that any gas appliance on a vessel is installed and serviced by a Gas Safe registered engineer who holds the specific qualifications for boat (LPG) installations. There is no room for compromise on this point.
Can I Connect a Diesel Cabin Heater to My Water Heater?
You certainly can—and it’s an incredibly efficient and popular setup, particularly for liveaboards or those who are out cruising all the time. To make this work, you’ll need what’s called a ‘twin coil’ calorifier. Just as the name suggests, this type of tank has two separate internal heating coils.
One coil connects to your engine’s cooling system, just like a standard setup. The second, independent coil is then plumbed into the hot water circuit from your diesel cabin heater, such as a Webasto or Eberspacher unit. This smart configuration gives you two brilliant ways to get hot water without ever needing to start your engine or plug into shore power, offering fantastic self-sufficiency.
A narrowboat wood burner is so much more than just a heater. It’s the warm, beating heart of your floating home. It provides an essential dry heat that constantly fights back against the dampness that comes with life on the water. For many boaters, it’s the focal point of the cabin and an indispensable part of the journey.
Why a Narrowboat Wood Burner Is Essential for Canal Life
On a narrowboat, staying warm isn’t just about comfort—it’s about protecting your boat and your health. The UK’s canals are beautiful, but they’re often damp environments. A wood-burning stove offers a powerful solution that other heating methods just can’t compete with.
It pumps out a unique, dry heat that works its way into the very fabric of the boat, driving out the kind of moisture that leads to mould, mildew, and damage to your interior woodwork. This is completely different from central heating systems, which often just circulate warm, damp air. A stove radiates an intense, dry warmth, creating a stable and cosy environment even on the bitterest winter nights.
Key Benefits of a Marine Stove
Beyond just pumping out heat, a proper marine stove brings some serious advantages to life afloat. Understanding these benefits makes it clear why so many boaters simply won’t live without one.
Off-Grid Reliability: Your stove doesn’t need electricity or gas to run, giving you complete independence. When you’re moored up somewhere remote, you can stay toasty warm without running the engine or draining your precious battery bank.
Powerful Dry Heat: A good stove is your best weapon against condensation and damp. This doesn’t just make the cabin feel more comfortable; it helps preserve your boat’s woodwork and furnishings for years to come.
Cost-Effective Fuel: Wood and smokeless coal can be sourced quite cheaply, especially if you have the right contacts or foraging permissions. This makes it a very budget-friendly way to heat your boat for long-term cruising.
The Unbeatable Ambience: Let’s be honest, you just can’t beat it. The gentle crackle of a fire and its radiant glow create a feeling of cosiness and peace that is at the very centre of the canal life dream.
A well-chosen and properly installed stove quickly becomes the centre of your floating home. It’s where you’ll gather on cold evenings, dry your clothes after a rainy day of cruising, and soak up the simple, deep comfort of a real fire.
This guide is designed to be your complete resource, walking you through everything you need to know about choosing, installing, and looking after the perfect stove for your boat. We’ll cover everything from UK safety standards to picking the right fuel.
If you’re ready to start exploring your options, have a look at our curated selection of appliances specifically designed for life on the water by checking out our comprehensive narrowboat heating solutions. Our goal is to make sure you can invest in the heart of your home with total confidence.
Embracing Canal Tradition with a Narrowboat Wood Burner
To really get a feel for a modern narrowboat wood burner, you have to look back at its history. For the best part of 200 years, these stoves have been the heart of the boatman’s cabin, pumping out vital warmth and giving them a place to cook while on the move. They are a brilliant mix of practical design and stubborn tradition, a direct line back to the hard-grafting origins of the UK’s canals.
The classic spot for the stove wasn’t just a random choice. It was a masterstroke of practical thinking, born from the tough reality of working life on the cut. Traditionally, you’d find the stove tucked into the small cabin at the back of the boat, right next to the person at the tiller. This layout has barely changed since the early days, and for a very good reason. You can learn more about this heritage by exploring the history of back cabin stoves and their central role in narrowboat life.
The Steerer’s Best Friend
Picture it: you’re steering a seventy-foot working boat for hours on end in the raw cold of a British winter. The steerer was completely exposed to the elements, so having a roaring fire just a step away wasn’t a luxury—it was an absolute necessity.
This smart placement meant they could quickly warm their frozen hands, grab a hot brew, or check on a stew bubbling away on the hob without letting go of the tiller for more than a moment. The stove was the steerer’s constant companion, offering a bit of comfort and a hot meal through the long, hard days of hauling cargo up and down the country.
The traditional stove was the original multitasking hub. It was the boat’s engine room for heat, the galley for hot food, and a welcome refuge from the weather, all within arm’s reach of the person in control.
More Than Just Heat: The Centre of Cabin Life
But the stove’s job didn’t stop at keeping the steerer warm. In the ridiculously tight living quarters of a traditional boatman’s cabin, every single inch of space had to earn its keep. The stove was, without a doubt, the centre of all domestic life.
A Cook’s Galley: The flat top of the stove was the boat’s main cooking surface. A kettle was almost always on the boil for a cuppa, and simple, hearty meals were constantly on the go.
The Laundry Room: Wet clothes from a rainy day’s work would be hung nearby, letting the powerful dry heat get them ready for the next shift.
Social Hub: When the day was done, the small cabin became a cosy haven where the family would huddle around the gentle, radiant warmth of the fire.
Knowing this history really changes how you see your own narrowboat wood burner. It’s not just a bit of modern kit; it’s you playing a part in a time-honoured tradition. It connects you directly to the tough, resourceful spirit of the people who navigated these canals long before we did.
How to Choose the Right Stove for Your Boat
Picking the right stove for your narrowboat is probably the most important decision you’ll make for your boat’s heating. This isn’t just about what looks nice in the corner of your saloon; it’s about choosing the heart of your floating home – something that’s safe, efficient, and perfectly sized for the job. Get it right, and you’ll have a warm, dry cabin all winter. Get it wrong, and you could be facing an uncomfortable or even dangerous living space.
The whole process can feel a bit overwhelming at first, but it’s really just a series of logical steps. We’ll walk you through figuring out the heat output you need, picking the right material, and understanding the different fuel types. By the end, you’ll be able to choose a stove that’s a perfect match for your boat and how you live on it.
Calculating Your Heat Output (kW)
Before you even start looking at shiny new stoves, you need to work out how much heat your boat actually needs. This is measured in kilowatts (kW), and getting this number right is crucial. A stove that’s too powerful will turn your cabin into a sauna, forcing you to constantly open windows and just waste fuel. On the other hand, a stove that’s too weak will really struggle to beat the damp and chill on a proper frosty morning.
A simple way to get a good estimate is to use this formula:
Length x Width x Height (in metres) / 14 = Required kW
Let’s take a typical 50-foot narrowboat. The internal cabin space might be around 12m long, 2m wide, and 2m high. The calculation would look like this:
(12 x 2 x 2) / 14 = 3.4kW
This gives you a really solid starting point. Just remember that things like how good your insulation is, or how many windows you have, will change how much heat you lose. If your boat is well-insulated with spray foam, you might get away with a bit less power. For most older boats, though, this formula is a reliable target.
It’s often better to choose a stove with a slightly lower kW rating and run it hot and efficiently, rather than getting an oversized one that you’re constantly shutting down. A stove that’s always running on low produces more soot and creosote, which is bad news for your flue and the environment.
Cast Iron vs Steel Stoves
The material your narrowboat wood burner is made from has a huge impact on how it heats your space. The two main players are traditional cast iron and modern steel, and each has its own pros and cons for life on a narrowboat.
Cast Iron Stoves: Think of these as the marathon runners of the stove world. They take a bit longer to warm up, but once they’re hot, they hold onto that heat and radiate a steady, gentle warmth for hours – even long after the fire has died down. This makes them perfect for liveaboards who need a constant source of heat overnight. Plus, their classic, chunky look really suits the traditional narrowboat vibe.
Steel Stoves: These are the sprinters. Steel stoves heat up much, much faster than cast iron. This is a massive plus for weekend boaters or anyone who wants to get a cold cabin warm quickly after a day out cruising. They’re also usually lighter, which can be a factor when you’re thinking about weight distribution. The downside? They cool down just as fast once the fire goes out.
The right choice really comes down to your lifestyle. If you live on your boat full-time and the stove is your main heat source, a cast-iron model is a fantastic, reliable choice. If you’re using the boat for holidays and weekends away, the quick heat from a steel stove might be far more practical.
Considering Multi-Fuel Flexibility
While we tend to call them “wood burners,” many of the best stoves for boats are actually multi-fuel models. This simply means they’re designed to burn both wood and approved smokeless coals efficiently. For any boater, this flexibility is a huge advantage.
Smokeless coal burns for much longer and provides a more consistent heat than wood, making it perfect for keeping the fire ticking over through a long, cold night without you having to get up and refuel. You can enjoy the lovely, lively flames of a wood fire in the evening, then bank it up with coal for steady, reliable warmth while you sleep. Having both options gives you more control and makes finding fuel much easier as you travel the cut.
When you browse our complete collection of stoves for boats, you’ll find some brilliant multi-fuel options, including tried-and-tested favourites for boaters all over the UK.
Getting Your Stove Installed Safely and Correctly
When it comes to putting a wood burner on your narrowboat, there’s absolutely no room for cutting corners. Get it right, and you’ve got a reliable source of warmth and a wonderful focal point for your cabin. Get it wrong, and you’ve created a serious threat to your boat and your life. This part of the guide is all about what a safe, compliant installation actually looks like, from the ground up.
Your safety is the only thing that matters here, which is why this is a job for a qualified professional. The risks of a DIY job are massive, from catastrophic fires to the silent, invisible killer that is carbon monoxide. We’ll break down all the crucial bits so you can understand what the engineer is doing and feel confident that your floating home is a true safe haven.
The Foundations of a Safe Setup
Every solid stove installation starts right at the floor. You can’t just plonk a stove down on your boat’s wooden floorboards. It needs a purpose-built, non-combustible foundation, which is known as a hearth.
The hearth has to be made from materials like slate, stone, or a thick steel plate. Crucially, it must stick out a specific distance in front of and to the sides of the stove. This creates a vital safety barrier, catching any hot embers or stray bits of wood that might fall out.
Just as important is proper heat shielding. The walls around the stove get incredibly hot from radiant heat, and they need serious protection. This is usually done by installing a sheet of metal or a special fireproof board behind and beside the stove, with an air gap behind it. This setup reflects heat away from the boat’s wooden structure, stopping a fire from starting inside the walls.
The All-Important Flue System
The flue – your chimney – is arguably the most critical component of the whole setup. Its job is to safely get all the dangerous combustion fumes, including carbon monoxide, out of your living space and into the open air. On a narrowboat, this demands a specialist twin-wall insulated flue system.
A standard single-skin flue pipe gets dangerously hot and would be a massive fire risk where it passes through your cabin’s wooden roof. A twin-wall flue, however, has a thick layer of insulation packed between two stainless steel pipes.
The flue also has to be fitted with a properly sealed deck collar where it pokes through the roof. This fitting is essential for stopping rainwater from dribbling down into your cabin, which can cause horrible water damage and rust around the flue over time.
Meeting UK Safety Standards
Getting a professional to install your stove isn’t just good advice; it’s a legal requirement. The rules for wood burners on UK narrowboats are built around specific safety standards, with BS 8511:2010 being the main code of practice.
Any new stove installation must meet the requirements of both the Boat Safety Scheme (BSS) and BS 8511:2010.
Sticking to these standards isn’t optional. A compliant installation means your boat insurance is valid and, more importantly, that you and your family are safe from the very real dangers of fire and carbon monoxide.
Why You Must Hire a Qualified Professional
I get it. The temptation to save a few quid and have a go yourself is strong, but the risks are simply too high. A qualified marine heating engineer brings specialist knowledge to the table and understands the unique challenges of installing a stove on a boat.
They know:
The exact clearances needed around the stove to prevent fires.
The right way to install and seal a twin-wall flue system to keep it watertight and safe.
How to ensure there’s enough ventilation to stop deadly carbon monoxide from building up.
The specific, detailed requirements of the BSS and BS 8511:2010 standards.
Hiring a professional isn’t an expense; it’s an investment in your safety and your peace of mind. When they’re done, they’ll give you a compliance certificate, which you’ll need for your insurance and your BSS examination. When it comes to fire on a boat, you don’t get second chances.
Operating Your Stove Like a Pro
Getting the most out of your narrowboat wood burner isn’t just about chucking a few logs in and hoping for the best. It’s about learning to operate it safely and efficiently. An expertly managed fire doesn’t just keep you warmer; it uses less fuel and is much kinder to your flue and the environment.
Think of this section as your hands-on user manual. We’ll walk you through lighting a fire that takes hold quickly, controlling the burn for consistent heat, and spotting the signs of a clean, healthy fire. With a bit of practice, you’ll be running your stove like you’ve been doing it for years.
Lighting the Perfect Fire
A good fire starts with a solid foundation. The aim is to create a hot, stable base that encourages bigger logs to catch properly, not a smoky, smouldering pile that struggles to get going and fills your cabin with fumes.
Here’s a tried-and-tested method to get your stove roaring:
Open the Vents: First things first, open all the air vents on your stove wide open. This gives the fire the maximum oxygen it needs to ignite quickly and cleanly.
Lay the Kindling: Pop two small, kiln-dried logs on the fire grate, parallel to each other. On top of these, build a small criss-cross stack of kindling (just small, dry sticks). This is often called the ‘top-down’ method, and it works a treat.
Add a Firelighter: Place a natural firelighter right in the centre of your kindling stack and light it up.
Close the Door (Almost!): Shut the stove door but don’t latch it fully—leave it just a tiny bit ajar. This pulls a strong, direct flow of air right onto the fire, helping it establish itself fast.
Wait and Add Fuel: Once the kindling is burning fiercely, you can carefully add a couple more small, dry logs. Now you can close and latch the door fully.
This top-down technique creates a hot, fast-burning fire that warms the flue quickly and establishes a strong draw. This is brilliant for reducing the amount of smoke that might otherwise spill back into your cabin when you first light up.
Choosing the Right Fuel
The fuel you burn has the single biggest impact on how well your stove performs. It’s no exaggeration. Using the wrong type of wood will lead to thick soot, a blocked-up flue, and a frustratingly low heat output.
The golden rule is simple: only burn kiln-dried hardwood with a moisture content of less than 20%. Wet or unseasoned wood is full of water, which has to boil away before the wood can actually produce any useful heat.
That boiling process creates a huge amount of tarry smoke and creosote—the number one cause of chimney fires. In contrast, dry hardwood burns hot and clean. It gives you maximum heat while keeping your stove glass clear and your flue healthy. Whatever you do, never be tempted to burn treated timber, painted materials, or general household rubbish. They release toxic chemicals and can cause serious damage to your stove.
Controlling the Burn Rate
Once your fire is well and truly established and the stove is up to temperature, it’s time to take control. Your stove’s air vents are your throttle and brake, letting you manage the burn rate with a surprising amount of precision.
Primary Air Control: This vent usually feeds air from underneath the fuel. It’s absolutely essential for getting the fire started and is the main control you’ll use if you’re burning smokeless coal.
Secondary Air Control (Airwash): This clever vent directs a curtain of air down over the inside of the stove glass. Its main job is to keep the glass clean, but it also provides the oxygen needed for the secondary combustion of wood gases, making for a much more efficient fire.
Once the fire is roaring, you should gradually close down the primary vent and use the secondary airwash vent to regulate the flames. A perfect fire for burning wood should have active, dancing yellow flames, not a slow, smouldering glow.
Non-Negotiable Safety Measures
Having a stove is incredibly rewarding, but your safety has to be the absolute top priority. Proper ventilation is critical to prevent the build-up of nasty gases, so make sure your boat’s fixed vents are never, ever blocked.
Most importantly, you must have correctly placed and regularly tested carbon monoxide (CO) and smoke alarms. These aren’t optional extras; they are your essential life-saving devices. A CO alarm must be fitted in the same cabin as the stove, ideally at head height where you breathe.
Test your alarms every single week without fail. It’s a simple habit that takes seconds and could genuinely save your life.
Your Essential Maintenance Checklist
A narrowboat wood burner isn’t a ‘fit and forget’ appliance. It’s a real, working piece of kit that needs regular attention to keep it running safely and efficiently. The best way to guarantee its long life is to stay on top of the maintenance. Think of it less like a chore and more like a simple routine that quickly becomes second nature.
Sticking to a schedule takes all the guesswork out of it and keeps your stove in peak condition. These simple checks will stop small niggles from turning into expensive, or even dangerous, problems down the line. It’s all about peace of mind.
A Simple Maintenance Schedule
Breaking the jobs down makes everything feel much more manageable. Here’s a straightforward schedule covering daily, weekly, and annual checks to keep your stove ticking over perfectly.
Daily Tasks (When in Use)
Remove Ash: Before you even think about lighting it, clear the ash from the grate and into the ashpan. This is vital for good airflow, which means a better burn, and it stops the grate from warping under too much heat.
Check Firebricks: Just give the internal firebricks a quick look-over for any obvious cracks or bits falling off.
Weekly Checks
Clean the Glass: A quick wipe with a proper stove glass cleaner, or even a damp cloth dipped in wood ash, will clear away the soot. Clean glass isn’t just for looks; it lets you see what the fire is doing.
Inspect Door Seals: Feel the rope seal around the door. Is it frayed or looking a bit flat? A leaky seal pulls in too much air, making your fire burn uncontrollably and just wasting fuel.
A great little trick to test your door seal is to shut the door on a slip of paper. If you can pull the paper out without any resistance, the seal is probably shot and needs replacing to keep the firebox airtight.
This kind of upkeep is vital for safety and performance. A poorly maintained stove can be less efficient and produce more pollutants.
The Vital Annual Service For Your Narrowboat Wood Burner
Once a year, usually just before the cold weather kicks in, your stove and flue system need a proper, thorough service. Honestly, this is the single most important bit of maintenance you’ll do.
Your annual service absolutely must include:
Sweeping the Flue: This is non-negotiable. Getting a professional in to sweep the flue removes the build-up of flammable soot and creosote, massively cutting down the risk of a chimney fire.
Full Stove Inspection: Get a good look at the stove body for any cracks, check the firebricks for serious wear and tear, and make sure all the moving parts like air controls and door latches are working as they should.
Replacing Consumables: Now is the perfect time to sort out any worn door rope seals or cracked firebricks you’ve spotted.
Following this checklist won’t just make your wood burner last longer; it’ll ensure it stays the safe, reliable heart of your floating home. For more in-depth advice, feel free to check out our guides on professional stove care and repair.
Right, you’ve got the basics down, but a few questions are probably still nagging at you. That’s completely normal. Let’s tackle some of the most common queries we hear from fellow boaters to make sure you’re feeling confident.
How Often Should I Sweep My Narrowboat Chimney?
You’ve got to get that flue swept at least once a year, no exceptions. The best time is just before you start lighting it up for the winter.
Now, if you’re running your stove hard, especially with coal or wood that isn’t bone dry, you really ought to do it twice. A second, mid-season sweep is a smart move. Think of it as essential maintenance – it’s your number one defence against a build-up of flammable soot and creosote, which is the stuff that causes chimney fires. A clean flue also stops carbon monoxide from finding its way back into your cabin.
Can I Install a Narrowboat Wood Burner Myself?
Look, I get the temptation to save a few quid and do it yourself. But honestly, this isn’t the job for it. We highly recommend you use a qualified marine heating engineer.
Stove installations on a boat are serious business and have to meet the strict BS 8511:2010 and Boat Safety Scheme (BSS) standards. Get it wrong, and you’re not just looking at a bit of a bodge job; you’re risking fire, leaks, and deadly carbon monoxide poisoning. A professional makes sure it’s done right, giving you peace of mind that you and your boat are safe.
What Is the Best Fuel for My Stove?
Easy one, this: kiln-dried hardwood with a moisture content under 20%. It’s the absolute best stuff you can burn. It burns hotter and much, much cleaner than seasoned logs, meaning you get way less smoke and soot.
Using proper fuel is what keeps your stove glass from turning black and dramatically cuts down on the gunk building up in your flue. And it should go without saying, but never burn treated wood, painted scraps, or general household rubbish. The toxic fumes they release are dangerous, and they’ll wreck your stove in no time.
Our Services
At Marine Heating Solutions, we’re all about making sure life on the water is safe and warm. Our certified engineers are experts in installing, servicing, and repairing all kinds of boat heating systems. Contact us today for an estimate.
Think of a calorifier as a clever thermal battery for your boat. It ingeniously captures and stores waste heat, giving you a reliable source of hot water whenever you need it. Essentially, it’s a highly insulated hot water tank that uses your running engine as its main heat source. This means hot showers and washing-up water without burning through your gas supply or needing to be plugged into shore power. It’s an incredibly efficient solution, making it a firm favourite for life afloat on narrowboats, canal barges, and cruisers.
Life on the water doesn’t mean you have to give up home comforts like a proper hot shower. For many boaters, a calorifier is the heart of the vessel’s domestic hot water system, solving the problem of how to heat water efficiently when you’re away from the mains. It simply makes your time onboard far more comfortable.
At its core, a calorifier is a pretty simple bit of kit. It works by transferring heat from an existing source to your fresh water supply. This is usually done in one of two ways, giving you plenty of flexibility whether you’re cruising down the canal or moored up for the night.
How a Calorifier Actually Heats Your Water
The most common method uses your boat’s engine. As the engine runs, it generates a huge amount of heat, which is carried by the coolant. This hot coolant is then circulated through a coiled pipe inside the calorifier tank, warming up the fresh water that surrounds it without the two ever mixing. This clever heat exchange is what makes the whole system so effective.
On top of that, most units come with a backup for when the engine is switched off. This dual approach has some real benefits:
Engine Heating: You get free hot water whenever you’re cruising, putting heat to good use that would otherwise just be wasted.
Shore Power Heating: An electric immersion element, just like the one in your tank at home, can be used when you’re connected to a 240V marina supply.
System Integration: It can often be linked to other sources, like a diesel-fired central heating system, for even more versatility.
While calorifiers are a brilliant primary method for getting hot water, other bits of kit like hot water diverters can also play a part in an efficient system, especially if you’re looking at renewable energy sources. To see a great selection of high-quality boat water heaters, you can find plenty of options perfect for any kind of vessel.
How a Marine Calorifier Really Works
Think of a calorifier as a clever heat-swapping device tucked away on your boat. It doesn’t actually create any heat itself. Instead, it captures warmth from one source and gives it to your fresh water. The whole process is surprisingly simple but incredibly effective for life afloat.
At its heart, a calorifier is a well-insulated water tank with a pipe coiled up inside it. This coil is the heat exchanger, and it’s where the magic really happens. The system uses two main tricks to make sure you’ve got hot water, whether you’re chugging down the canal or tied up for the night.
The Engine-Powered Heat Exchange
The main way a calorifier gets you hot water—and the most efficient one—is by borrowing the waste heat from your boat’s engine. As your engine runs, it circulates a hot fluid (coolant or antifreeze) to keep itself from overheating. A calorifier simply taps into this existing cycle.
A small amount of this hot engine coolant is diverted and sent through that coiled pipe inside the calorifier’s fresh water tank. The heat radiates from the coolant, through the walls of the coil, and into the surrounding water, steadily raising its temperature. It’s crucial to know that the engine coolant and your fresh water never actually mix. It’s just like dipping a hot poker into a bucket of cold water; the heat transfers without the two liquids ever touching.
This diagram shows you that simple, effective flow of heat from your engine right to your tap.
As you can see, it’s all about repurposing energy that would otherwise just be wasted. This method is brilliant because it gives you piping hot water for “free” just by running your engine as you travel.
The Electric Immersion Heater Backup
But what happens when you’re moored up for a few days and the engine is off? That’s where the second heating method comes into play. Most marine calorifiers are also fitted with an electric immersion heater.
This is basically a heating element submerged directly in the water tank, very similar to what you’d find in a hot water cylinder at home. When your boat is plugged into a 240V shore power hook-up at a marina, you can just flick a switch and let the immersion heater warm the water electrically.
Thanks to good insulation, a decent calorifier can keep water hot for 24 hours or more after the engine is switched off. This means you don’t always have to rely on the immersion heater the minute you moor up.
This dual-source setup is what makes the calorifier such a reliable bit of kit for narrowboats and cruisers alike. It’s based on the same indirect heating principles that have been warming UK homes for decades, where a majority of properties use ‘wet’ heating systems that rely on heat exchangers.
For boaters who want even more options, some systems can be hooked up to other sources. You could, for example, connect your calorifier to a diesel heater or explore the benefits of a boat backboiler stove to create a truly integrated heating setup on board.
Choosing Between Single and Twin Coil Calorifiers
When you start digging into calorifiers, you’ll quickly find they aren’t all created equal. The biggest decision you’ll face is whether to go for a single coil or a twin coil model. Getting your head around the difference is absolutely key to picking the right unit for your life on the water.
A single coil calorifier is the workhorse you’ll find on most boats. It has one internal heat exchanger coil, which gets plumbed into your engine’s cooling system. This, along with a standard electric immersion heater for when you’re on shore power, gives you two solid ways to get hot water.
For the majority of boaters, this setup is more than enough. It’s a simple, effective system that delivers plenty of hot water whether you’re cruising or tied up in a marina.
Understanding the Twin Coil Advantage
A twin coil calorifier, as the name implies, adds a second, completely independent heat exchanger coil inside the tank. This extra coil opens up a whole new world of possibilities, letting you hook up another heat source entirely. Think of it as having a dedicated backup generator just for your hot water.
This second input is incredibly useful for building a more versatile and bulletproof hot water system. You can connect it to a different appliance, giving you a third way to heat your water.
The most popular use for that second coil? Connecting it to a diesel-fired central heating system. This setup lets you heat your water without running the main engine or needing shore power – an absolute godsend for long periods moored up off-grid.
This kind of flexibility is a real game-changer for liveaboards or anyone spending serious time on their boat. To get a better feel for how these systems can work together, it’s worth exploring the different yacht diesel heaters available and seeing how they integrate with a twin coil calorifier.
To help you weigh it up, here’s a straightforward comparison between the two types.
Single Coil vs Twin Coil Calorifiers
Feature
Single Coil Calorifier
Twin Coil Calorifier
Heat Sources
Engine coolant + Electric immersion heater (2 sources)
Can produce hot water from diesel heater without running the engine
As you can see, the right choice really comes down to how you use your boat.
Key Factors for Your Decision
Beyond the number of coils, a few other crucial factors should guide your choice. The tank material is a big one; high-quality stainless steel is often the best bet for its durability and corrosion resistance, meaning a much longer life for your unit.
The quality of the insulation is also hugely important. A calorifier wrapped in thick, high-density polyurethane foam will keep your water hot for much longer—sometimes for over 24 hours. This massively reduces how often you need to reheat it, saving you precious energy.
Finally, you need to think about the physical space you have on board. Calorifiers generally come in two shapes:
Horizontal Tanks: These are brilliant for tucking into lower, wider spaces like under a bunk or down in the bilge.
Vertical Tanks: Perfect for taller, narrower spots like a locker or engine room where you have more height than floor space.
Ultimately, the choice between a single and twin coil calorifier hinges on your boating habits. If you’re mainly doing day trips and staying in marinas, a single coil is probably all you’ll ever need. But if you’re a serious cruiser or liveaboard who needs that extra independence and redundancy, the twin coil model offers a level of flexibility that’s hard to beat.
Finding the Perfect Calorifier for Your Boat
Choosing the right calorifier isn’t about finding the ‘best’ one on the market, but about finding the right one for your boat and how you use it. Getting this decision right from the start will save you a world of headaches later on. It all really boils down to three key things: the capacity you need, the heat sources you have available, and the physical space you can actually give up for it.
Think of it like packing for a long trip; you’ve got to carefully balance what you absolutely need against the space you have in your luggage. The first step, then, is to get a realistic picture of your daily hot water demands.
Calculating Your Hot Water Needs
The capacity of a calorifier is measured in litres, and this is probably the most important number to get your head around. If you go too small, you’ll be running out of hot water halfway through a shower or during the washing-up. Go too big, and you’re just wasting energy and precious onboard space heating up water you’ll never use.
A good rule of thumb is to allow for around 20-25 litres per person for typical daily use, which should comfortably cover a short shower and general washing.
For a solo boater or a couple on a small cruiser: A compact 25-30 litre unit is often more than enough.
For a family of four on a narrowboat: You’ll want to look at something in the 40-55 litre range to keep everyone happy without constantly needing to run the engine.
Getting this calculation right means everyone can have a hot shower without immediately having to fire up the engine again. It’s all about matching the tank size to your crew and your cruising style.
Matching the Unit to Your Boat’s Systems
Next up, you need to think about how the calorifier will actually connect with your boat’s existing systems. Are you relying purely on your engine’s waste heat, or do you have a diesel heater that you want to tap into as well? The answer to this question will determine whether you need a single or twin coil model, as we touched on earlier.
The idea of using a central heat source to generate domestic hot water is nothing new, of course. The technology has evolved massively over the decades, mirroring similar shifts in home heating. This same principle of smart integration applies on your boat today.
When you’re weighing up your options, prioritise reliability above all else. Brands like Surecal and Isotemp have built a rock-solid reputation in the marine world for their robust build quality, excellent insulation, and long-term performance.
These trusted brands offer a whole range of sizes and configurations to suit just about any vessel. By investing in a quality unit, you’re not just buying a hot water tank; you’re buying peace of mind for your life afloat. To help you make an informed choice, you can explore a curated selection of boat water heaters in our online store.
Installation and Maintenance Best Practices
A calorifier that’s been properly installed and looked after will be a trusty companion for your life afloat. If you get the installation right from the start and stick to a simple upkeep routine, you’ll have safe, reliable hot water for years to come. It’s not just about protecting your investment; it’s about preventing some of the most common headaches you can have on a boat.
The installation itself is a job that really demands care. The unit has to be securely fastened down, so there’s no chance of it shifting or breaking loose when the water gets rough. All the plumbing connections, especially the ones for the engine coolant, need to be made with top-quality, temperature-resistant hoses. Don’t skimp here—double-clip them to stop any hot antifreeze from leaking into your bilge.
But perhaps the most vital part of the whole setup is the pressure relief valve (PRV). This little safety device is absolutely critical. It’s designed to vent excess pressure if the water inside the tank overheats, which stops the tank from rupturing dangerously. Fitting one correctly isn’t optional; it’s a must-do.
Safe and Secure Installation
While a competent DIYer can often handle the job, you need a good level of skill for the plumbing and any electrical work for the immersion heater. If you have the slightest doubt, particularly when you’re tapping into your engine’s systems, calling in a professional is always the safest bet. A mistake here could lead to serious engine damage or persistent water leaks.
For anything more than a simple fix, or if you’re just not sure what you’re looking at, getting specialised help is essential. While not strictly marine-focused, resources like professional water heater repair services can offer some valuable insights into diagnostics, as the basic principles are often quite similar.
Simple Annual Maintenance Checklist
Keeping your calorifier in prime condition doesn’t take much effort. A quick annual check-up, maybe before the main boating season kicks off, will keep it running smoothly and help you catch any small problems before they become big ones.
Inspect for Leaks: Give all the water and engine coolant connections a thorough check for any signs of weeping or drips. Pay extra attention to the hose clips and the threads on the fittings.
Test the Pressure Relief Valve (PRV): While the system is pressurised, give the cap on the PRV a quick twist. A small jet of water should spurt out, which tells you the valve isn’t seized up.
Check the Immersion Heater: If you use it a lot, just make sure the electrical connections are clean, dry, and tight.
Winterising your calorifier is crucial. Frost damage can easily split the tank or the internal coils. Before any hard frosts are on the forecast, the entire system must be completely drained of all fresh water.
Sticking to this simple routine is the key to making your unit last. When you get down to it, the technology is a cornerstone of heating systems far beyond the marine world. To guarantee safety and compliance on your vessel, getting a certified boat gas engineer to handle the installation and servicing will give you complete peace of mind.
Your Questions Answered: Marine Calorifier FAQs
Even when you’ve got your head around the basics, living with a calorifier day-to-day throws up plenty of practical questions. Here are some quick, straightforward answers to the queries we hear most often from boat owners, both on the cut and in the marina.
How Long Does a Calorifier Take to Heat Up?
This is the big one, isn’t it? Especially when you’re planning a trip or dreaming of a hot shower after a long day’s cruise. The real answer depends on your heat source, the size of your tank, and how chilly the water is to start with.
As a rough guide, you can work on these timeframes:
Heating via the Engine: This is by far the quickest way. A typical 40-55 litre calorifier can get properly hot in just 30-45 minutes of running the engine. The heat exchange from the engine’s coolant is incredibly efficient.
Heating via Immersion Heater: If you’re using the 240V shoreline power, it’s a bit more of a waiting game. For the same size tank, you’ll want to give it at least 1.5 to 2 hours to bring the water up to a decent temperature from cold.
It’s worth remembering that a well-insulated unit can keep water hot for over 24 hours, so you often won’t be heating it from scratch every time.
Can I Install a Calorifier Myself?
For those with solid plumbing and mechanical skills, a DIY installation is definitely possible. But, and this is a big but, it’s a job that demands a lot of respect. You need to be confident cutting into your boat’s plumbing, making connections that are 100% watertight, and, most critically, tapping into your engine’s cooling system without causing any problems.
The two most vital parts of the job are bolting the unit down so it can’t move an inch at sea and fitting the pressure relief valve (PRV) correctly. Getting either of these wrong can create some seriously dangerous situations.
If you have the slightest doubt about connecting to the engine or wiring up the immersion heater, getting a certified marine engineer involved is the smartest, safest call you can make. It’s peace of mind for you, your crew, and your boat.
Why Is My Hot Water Only Lukewarm?
There are few things more disappointing on a boat than a lukewarm shower. If your calorifier is failing to deliver the goods, there are a few common culprits to investigate before you start to worry.
The first port of call is usually an airlock in the system, which can stop the hot water from circulating as it should. Bleeding the system is often a quick fix for this. Another prime suspect is a faulty thermostat, either on the immersion heater or the engine itself, which might not be letting the coolant get hot enough to do its job.
You should also have a look at the coolant flow from the engine. A partially blocked pipe or an issue with the engine’s water pump can choke off the heat reaching the calorifier coil. Working through these points one by one will usually help you get to the bottom of it and back to enjoying hot showers.
Our Calorifier Installation Services
For expert calorifier installation, servicing, and advice on the perfect heating solution for your vessel, trust the certified engineers at Marine Heating Solutions. Explore our full range of marine appliances and services at https://marinestaging.wp59.qa.internal.searchatlas.com/boat-appliances/.
Choosing the right water heater isn’t about finding a single “best” unit, but about finding the system that perfectly aligns with your boat’s unique setup and how you use it. It’s a critical decision that directly impacts your comfort on the water.
Just as a small weekend cruiser has different engine needs than a long-distance residential barge, its hot water requirements will vary significantly. The best boat water heaters are simply those that match your vessel’s power systems and your lifestyle afloat.
What To Consider When Choosing Your Boat Water Heater
The main things you need to think about are your power sources, your boating habits, and your budget.
Are you constantly cruising, generating plenty of engine heat? Or do you spend a lot of time stationary, relying on shore power or a generator? Answering these questions honestly is the first step towards making a smart investment that will keep the hot water flowing for years to come.
The Main Types Of Boat Water Heaters
To make a good decision, you really need to get to grips with the main contenders on the market. Each type offers its own set of pros and cons and is really suited to a specific style of boating.
Calorifiers (Engine-Heated): These are essentially well-insulated tanks that cleverly use the surplus heat from your engine’s cooling system to heat your water. They’re incredibly efficient while you’re on the move, giving you plenty of “free” hot water just as a byproduct of running your engine.
Diesel Boiler: Often the workhorse for liveaboards, these systems burn diesel straight from your main fuel tank. They provide both hot water and central heating, giving you complete independence from engine run times and shore power connections.
LPG Instant Heaters: These work a lot like a domestic boiler you’d find in a house, heating water on demand using Liquefied Petroleum Gas (LPG). They’re a brilliant choice if you want a virtually endless supply of hot water without needing to find space for a large storage tank. A great example is the Morco EUP11RS LPG Water Heater, which is a popular and reliable choice for many UK boaters.
Boat Water Heater Types At a Glance
This table gives a quick overview of the primary water heating methods, highlighting their best uses and key considerations for UK boat owners.
Heater Type
Primary Power Source
Ideal For
Key Advantage
Calorifier
Engine Waste Heat (can have electric backup)
Frequent cruisers, sailboats with engines
“Free” hot water when the engine is running
Diesel Combi Boiler
Diesel Fuel (from main tank)
Liveaboards, larger vessels needing heating
All-in-one heating and hot water solution
LPG Instant Heater
LPG (Propane/Butane)
Weekend boaters, those needing instant hot water
On-demand hot water, no storage tank needed
Ultimately, the best choice connects your power supply with your daily needs, ensuring you have a reliable supply of hot water without putting a strain on your onboard resources.
How Different Marine Water Heaters Work
Getting your head around how different boat water heaters do their job is the first step to choosing the right one for your vessel. Each type has its own way of making water hot, and each comes with its own set of pros and cons depending on how you use your boat. Let’s pull back the curtain on the mechanics behind the most common options out there.
Calorifiers: The Engine-Powered Thermos
Imagine a giant, super-insulated thermos flask that’s cleverly plumbed into your boat’s engine. That’s a calorifier in a nutshell. It’s a smart bit of kit designed to capture and use waste heat that your engine produces anyway.
When your engine is chugging away, it pumps hot coolant through a coiled pipe inside the calorifier tank. This coil works just like a little radiator, transferring all that lovely heat into the fresh water stored in the tank. Because the insulation is so good, it can keep the water piping hot for up to 24 hours after you’ve cut the engine.
Key Takeaway: The beauty of a calorifier is that you get “free” hot water whenever you’re cruising or just running the engine to charge your batteries. It’s an incredibly efficient way to use energy you’re already generating.
Twin-coil calorifiers can also be heated by a diesel-heater central heating system, so you’re not completely reliant on engine run time. If you’re moored up for a few days without firing up the engine, your diesel heater can take care of heating water.
LPG Instant Heaters: On-Demand Hot Water
LPG (Liquefied Petroleum Gas) instant water heaters work a lot like the combi boiler you’d find in a modern house. The moment you turn on a hot tap, a little sensor detects the water flow and immediately sparks a powerful gas burner to life. Cold water zips through a heat exchanger, soaks up the heat from the flame, and comes out of your tap steaming hot, almost instantly.
This on-demand approach means you’ve got a virtually endless supply of hot water, provided you’ve got gas in the bottles. There’s no need for a big, bulky storage tank either, which is a massive plus on smaller boats where every inch of space counts. They do, however, need to be installed with real care, with proper flueing and ventilation to meet the Boat Safety Scheme (BSS) standards. For a deeper dive, check out our guide to boat gas water heaters.
Marine Diesel Combi Boilers: The Ultimate Off-Grid Solution
For boaters seeking independence and reliability, marine diesel combi boilers stand out as an excellent choice. These systems not only heat your water but also provide central heating, making them particularly valuable for liveaboard vessels and long-distance cruising.
Marine diesel combi boilers function by burning diesel fuel drawn directly from the boat’s main fuel tank. This dual functionality means that, whether you’re showering after a long day on the water or keeping your living quarters cosy during chilly nights, a combi boiler provides continuous hot water and warmth.
Benefits of Marine Diesel Combi Boilers
Fuel Efficiency: Combi boilers are designed to use fuel in a highly efficient manner. They reduce wasted energy by heating water only when needed, which can lead to savings on fuel costs—an important consideration when living on the water long-term.
Independence from Shore Power: Since these systems operate using diesel, you’ll enjoy the liberty of not relying on shore power. This is especially useful for off-grid adventures where you want to explore remote areas without sacrificing comfort.
Consistent Heating: Marine diesel combi boilers provide consistent and reliable heating. Whether it’s a warm shower or a toasty cabin, you can rest assured knowing you have an effective heating solution..
This double-duty capability makes boilers from trusted brands incredibly versatile, giving you dependable heat and hot water no matter the weather. They’re the perfect setup for cruising all year round. To get a wider view on the technology, looking into different liquid heating solutions can provide some useful insights into heat transfer and efficiency.
Electric Immersion Elements: The Shore Power Staple
Finally, we have the simplest system of all: the electric immersion element. Think of it as a big heating rod, just like the one in your kettle at home, fitted inside a calorifier tank. When you’re hooked up to a 240V AC power source—either from a marina’s shore power post or an onboard generator—it gets to work heating the water in the tank.
While they are dead simple and super convenient when you’re tied up in a marina, immersion heaters are thirsty for power. Trying to run one from your boat’s batteries through an inverter isn’t really on the cards unless you have a seriously beefy and sophisticated power system. It’s best to think of them as a great backup, or as your go-to option when you have easy access to mains electricity.
Matching a Heater to Your Boat’s Needs
Choosing the right boat water heater isn’t just about picking a brand; it’s about making a smart, practical decision based on your boat and how you actually live on the water. To get this right, you need to think a bit like an engineer, balancing what fuel you have available, how much power you can spare, and your daily appetite for hot water.
Let’s break down how to move from theory to a confident choice that’s perfect for your vessel.
Calculating Your Hot Water Demand
First things first, let’s work out how much hot water you really use. This doesn’t need to be a complex scientific calculation, just an honest look at your habits on board. A solo boater who just needs a splash of hot water for a quick wash has completely different needs from a family of four wanting daily showers.
Think about the main culprits for hot water consumption:
Washing up: A quick rinse of a couple of mugs is nothing, but a full sink after a big meal can easily gobble up 5-10 litres.
Showers: This is the big one. A typical boat shower can use anywhere from 20-40 litres of hot water per person.
General cleaning: Wiping down surfaces or a bit of hand washing will add a few more litres to the daily total.
Add these up for a normal day. A single person might get by comfortably on 25-30 litres, while a couple could easily push past 50-60 litres. This number is your guiding star; it’ll tell you what size tank to look for or if an instant heater has the muscle you need.
Fuel and Power Considerations
Your boat’s existing setup is going to heavily steer your decision. For most of us, convenience is king. Tapping into a fuel source you already have on board just makes life simpler, saving you the headache of storing extra fuel types.
It’s also worth noting a big trend in the UK right now: the push for more efficient systems. Specialist marine heaters are growing in popularity precisely because they’re becoming so much better on energy use. Tankless heaters, in particular, are becoming really popular on boats where every inch of space counts. We’re also seeing a definite shift towards electric and more sustainable options, which lines up with where the country is heading on energy.
This all underlines just how important it is to match your heater to your power reality.
Key Consideration: Always try to match your heater to your primary energy source. If you’ve got a big diesel tank, a diesel heater makes perfect sense. If you spend most of your time plugged into shore power, a simple electric immersion element is a brilliant, fuss-free option.
Matching Heaters to Vessel Types
Different boats and different boating lifestyles call for different solutions. What’s perfect for a narrowboat chugging along the cut might be totally wrong for a speedboat used for weekend blasts.
Calorifiers: These are absolutely ideal for boaters who are regularly on the move. If you’re running your engine for at least a couple of hours a day, a calorifier will give you lashings of “free” hot water. We offer a range of reliable options, including the popular Surejust calorifier water heater.
Diesel Combi Boilers: This is the go-to choice for liveaboards and continuous cruisers on narrowboats and barges. They offer total independence, running both your central heating and your hot water straight from the main fuel tank. We stock and install quality units from leading brands such as Webasto.
LPG Instant Heaters: A brilliant solution for weekend and holiday boaters who just want hot water on demand. They’re nice and compact, making them great for smaller cabin cruisers where space is tight. Just remember you’ll need to plan for safe, compliant storage for the gas bottles. We supply and fit reliable models like the Morco EUP11RS.
Electric Immersion Heaters: A must-have for any boat that spends a lot of time in a marina on shore power. It’s the simplest, most reliable way to get hot water without having to fire up the engine or burn any fuel.
Making Sure Your Installation is Safe and By the Book
On a boat, safety isn’t just another box to tick; it’s the bedrock of everything we do. When you’re dealing with fuel-burning appliances like boat water heaters, cutting corners simply isn’t an option. Getting the installation right isn’t just about having reliable hot water—it’s about keeping everyone on board safe.
In the UK, the Boat Safety Scheme (BSS) is the benchmark for safety on our inland waterways. While it’s a legal must-have on many canals and rivers, sticking to BSS principles is just good sense for any boater. Think of it as your first line of defence against the very real dangers that come with fuel and flames in a small, enclosed space.
Why You Should Never DIY a Fuel Appliance Installation
It’s tempting to tackle boat jobs yourself, I get it. But fitting gas or diesel appliances is one of those tasks that absolutely must be left to the professionals. The potential consequences of a botched job—fire, explosion, or the silent threat of carbon monoxide poisoning—are far too grim to risk.
A properly installed and flued appliance is the single most important thing you can do to prevent a carbon monoxide incident. A qualified engineer has the right training, the specialist tools, and the deep knowledge of marine rules to make sure every connection is leak-proof, every flue is perfectly routed, and every safety cut-out works as it should.
This isn’t just about compliance. It’s about being able to relax on your boat, knowing your system is not only working efficiently but is fundamentally safe for you and your loved ones.
The Nitty-Gritty for LPG Systems
LPG, whether it’s butane or propane, is a fantastic fuel for instant water heaters, but it demands serious respect during installation. Because it’s heavier than air, any leak will sink straight to your bilge, creating a ticking time bomb.
Here are a few key BSS requirements for any LPG setup:
Sealed Gas Lockers: Your gas bottles have to live in their own dedicated locker. It needs to be totally sealed off from the boat’s interior and have a way to drain itself.
Drop-Out Vents: This is critical. The locker needs a vent at its very lowest point so if gas does leak, it can escape safely overboard instead of pooling in the bilge.
Correct Flueing: Any instantaneous water heater must be a ‘room-sealed’ model. This is a non-negotiable. It means the heater pulls the air it needs for combustion from outside the cabin and vents all the exhaust fumes straight back outside through its own flue. No nasty stuff gets into your living space.
You absolutely need a Gas Safe registered engineer who knows their way around boats for this. For a job this specialised, finding a proper boat gas engineer is the only way to guarantee the work is done to the highest, safest standard.
Safety Checks for Diesel Heater Installation
Diesel is a much less volatile fuel than LPG, but the exhaust it kicks out is every bit as dangerous. The main enemy here is carbon monoxide (CO), that invisible, odourless killer produced when fuel burns.
The installation has to create a completely airtight exhaust system, from the heater unit right to the outlet on the outside of your boat.
Exhaust Lagging: That exhaust pipe gets incredibly hot. It has to be properly lagged (insulated) anywhere it passes through a bulkhead or gets close to anything that could catch fire.
Skin Fitting: The exhaust has to exit through a purpose-built ‘skin fitting’ that’s securely fixed to the hull or cabin side. This stops any of those fumes from finding their way back inside.
CO Alarms: A working carbon monoxide alarm is a mandatory safety kit on any boat with an engine or fuel-burning appliance. Test it regularly – it could save your life.
When you hand the job over to an expert, you’re paying for the confidence that every joint is sealed tight, every part is fitted correctly, and your whole system is fully compliant and, above all, safe.
Maintaining Your Boat Water Heater
A well-maintained boat water heater is a reliable companion, providing that blissful hot shower and convenience we all appreciate on the water. But just like your engine, it needs regular attention to perform at its best. Putting a simple maintenance schedule in place is the secret to getting years of dependable service and avoiding those unexpected—and very unwelcome—cold shocks.
Proper upkeep does more than just extend the life of your appliance. It keeps it running efficiently, which saves you fuel and money in the long run. Let’s walk through the essential checks for the different types of boat water heaters you’ll find out there.
Routine Checks for Calorifiers and Diesel Systems
If you’ve got a calorifier or a diesel heating system, a few routine tasks will keep everything ticking over nicely. These checks are pretty straightforward and are your first line of defence against minor issues turning into major headaches.
Annual Calorifier Checklist:
Inspect for Leaks: Get a torch and have a good look at all the plumbing connections going to and from the calorifier tank. You’re searching for any drips or tell-tale signs of corrosion. A tiny weep can worsen over time, leading to water damage and pressure loss.
Test the Pressure Relief Valve (PRV): This is a critical safety component you can’t ignore. Once a year, gently lift the test lever to make sure water flows out, then check that it snaps back into place properly without dripping. This quick test confirms it hasn’t seized up.
Descale the Immersion Element: In hard water areas, limescale is the enemy. It can build up on the electric immersion element, seriously crippling its efficiency. Giving it a good descale every year or two will ensure it heats your water effectively when you’re plugged into shore power.
For diesel systems, the focus shifts to the fuel and combustion side of things. Regular servicing is absolutely vital here. This means cleaning the fuel filter and decoking the burner chamber to prevent breakdowns and maintain clean, efficient combustion.
Winterising Your Water Heater
For any boat owner in the UK, winterising is a non-negotiable part of the annual maintenance cycle. Water left in your pipes and tanks can freeze, expand, and cause catastrophic damage to your plumbing and the water heater itself. A crucial part of this process involves knowing how to prevent pipe freezing before the temperatures drop.
The process is simple, but you have to be thorough:
First, turn off the water pump and open all your hot and cold taps to release any pressure in the system.
Next, find the drain valve on your calorifier tank. Open it up and let the tank empty completely into the bilge.
Finally, use a low-pressure compressor or even a hand pump to blow any remaining water out of the pipework. You want to be sure there’s nothing left inside to freeze.
Crucial Tip: Don’t forget the shower mixer and any external taps. Forgetting even one small section of pipe can lead to a costly, heart-sinking discovery of a burst pipe when the big freeze hits.
Simple Troubleshooting Steps
Even with the most diligent maintenance, things can occasionally go wrong. Before you reach for the phone to call an engineer, here are a few simple checks you can run through yourself if the hot water suddenly vanishes.
If the Water Runs Cold:
Check the Power Source: It sounds obvious, but start here. Is the engine running (for a calorifier)? Is the shore power connected and switched on (for an immersion heater)? Does your diesel or LPG heater have fuel, and can you hear it trying to fire up?
Look at the Fuses/Breakers: A tripped breaker is a very common and easily fixed culprit. Head over to your main electrical panel and have a look.
Inspect for Air Locks: If you’ve recently drained the system, an air lock could be stopping water from circulating properly. Bleeding the system at its highest point often solves this right away.
Running through these basic steps can empower you to solve many common problems yourself. However, for any issues involving fuel lines, gas supply, or the heater’s internal components, it’s always smartest and safest to call in a qualified professional.
Your Partner in Marine Heating
Choosing the right water heater for your boat is a big decision, and a serious investment in your comfort and safety afloat. As we’ve covered in this guide, the core principles of correct sizing, safe installation, and regular upkeep are what make all the difference.
Whether you need a powerful diesel system for a liveaboard narrowboat or a simple calorifier for weekend getaways, getting the details right is what really matters. Now it’s about finding the perfect unit that fits your boat’s unique setup.
We invite you to have a look through our hand-picked selection of high-quality water heaters. We only stock trusted, industry-leading brands like Webasto and Surejust, so you can be confident in their reliability and performance.
Our team of certified marine engineers has the hands-on experience to offer proper, personalised advice. We can help you navigate the options and choose a system that’s just right for your boat and how you use it.
Your Next Step to Onboard Comfort
We don’t just sell boxes. Beyond supplying the parts, we provide a full range of expert support. If you’re looking for a professional installation or need your existing system serviced, our team is ready to help with a wide array of canal boat services.
Let us be your trusted partner in getting your boat comfortable. With the right system installed by professionals, you can relax and enjoy endless hot water, no matter the weather or where your journey takes you.
Frequently Asked Questions
When you’re looking into boat water heaters, a few practical questions always pop up. To help you get your head around it all, we’ve put together some straightforward answers to the queries we hear most often from fellow boaters out on the canals.
How Long Will a Calorifier Keep Water Hot?
That’s a brilliant question, and one we get asked all the time. The best way to think of a quality calorifier is as a high-tech thermos flask designed specifically for your boat. A properly insulated tank can hold onto usable heat for a surprisingly long time.
Typically, you can bank on the water staying hot for up to 24 hours, and sometimes even a bit longer. Of course, the exact time depends on a few things:
Insulation Quality: Better models come with superior insulation, and honestly, it makes a massive difference in how long the heat sticks around.
Tank Size: It’s simple physics, really. A larger volume of water will lose its heat much more slowly than a smaller amount.
Ambient Temperature: Your water will naturally stay hotter for longer during the summer months compared to a frosty winter morning.
Can I Run an Electric Water Heater from Batteries?
While you technically can, running an electric immersion heater from your boat’s batteries is almost never a practical idea. These things are incredibly power-hungry and are designed to run on 240V mains electricity.
To get one going from your 12V or 24V battery bank, you’d need a seriously hefty and powerful inverter to change the DC power to AC. This process would drain even a substantial battery bank in no time at all. For that reason, it’s best to save the electric immersion heater for when you’re plugged into shore power or have the generator running.
The Bottom Line: Trying to heat water with your batteries just isn’t sustainable for most boat electrical systems. It’s really a solution for when you’ve got an external mains power source handy.
What are the Key BSS Rules for a Gas Water Heater?
When you’re dealing with gas appliances on a boat, safety is absolutely paramount. The Boat Safety Scheme (BSS) has very clear, strict rules to minimise any risk, and when you’re fitting an LPG instant water heater, following them is non-negotiable. It’s about keeping you safe and making sure your boat is compliant.
Here are the most critical points you need to know:
Room-Sealed Appliances: The heater absolutely must be a ‘room-sealed’ unit. This is a crucial design feature where the heater draws all the air it needs for burning from outside the cabin and vents all the exhaust fumes directly back outside. This prevents any dangerous gases from ever entering your living space.
Correct Flueing: The flue has to be installed by a professional. It must be completely sealed and routed correctly to guarantee all the products of combustion are chucked safely outside.
Adequate Ventilation: The space around the heater and its flue needs enough ventilation to stop heat from building up and ensure it operates safely.
Professional Installation: Any work involving a gas appliance on a boat must be done by a qualified Gas Safe registered engineer who has specific experience with marine installations. This isn’t a DIY job.
Our Services
At Marine Heating Solutions, we offer expert advice and professional installation for a full range of marine heating systems. Whether you’re after a new diesel heater or need a compliant LPG water heater fitted, our certified engineers are here to help. Have a look at our full range of services and products atmarineheating.co.uk/boat-appliances/, and get in touch for a formal estimate.
Life on a narrowboat is all about freedom, but that doesn’t mean you have to give up life’s little luxuries, like a proper hot shower or doing the washing up with ease. A boat gas water heater is hands-down the most reliable way to get instant, on-demand hot water on board, giving you real efficiency and complete independence from shore power.
Living on the canals in the UK comes with its own unique set of joys and challenges. One of the biggest things to figure out is how to get all your home comforts without being permanently tethered to the mains. When it comes to hot water, this is where a dedicated marine gas water heater really shines.
These systems, often called instantaneous heaters, give you a virtually endless supply of hot water the second you turn on the tap. Unlike other methods that heat up a big tank of water and try to keep it warm, a gas heater only fires up when you actually need it. This makes it an incredibly efficient solution for life afloat.
This on-demand approach offers some serious perks for anyone living on a narrowboat or canal barge:
Unlimited Hot Water: So long as you have gas in the bottle and water in the tank, you’ll never run out mid-shower again.
Energy Efficiency: By only heating water when a tap is open, you avoid the constant energy drain of keeping a large tank hot. That saves precious fuel.
Space Saving: Instantaneous heaters are generally much more compact than their tank-based cousins, freeing up valuable cupboard space where every inch counts.
True Independence: They run entirely off-grid using your boat’s LPG supply, which is perfect for continuous cruising and exploring the far reaches of the network.
While some boats are fitted with a calorifier, which uses heat from the engine to warm up a stored tank of water, a gas heater gives you a dependable, standalone system that works anytime. If you’re weighing up the options, you can learn more about how a calorifier water heater works in our detailed guide.
Ultimately, a professionally installed boat gas water heater delivers the kind of reliability and convenience you need for comfortable, year-round living on the water.
How Instant Gas Water Heaters Work
Think of a boat gas water heater as your own on-demand powerhouse, ready to spring into action the moment you need hot water. It’s a completely different beast to a calorifier, which is more like a flask, storing a limited amount of hot water and trying to keep it warm. An instantaneous gas heater, on the other hand, makes hot water right when you ask for it. This incredible efficiency is what makes it such a brilliant choice for life on the UK’s canals.
The process itself is wonderfully simple. When you turn on a hot tap in your galley or shower, you kick off a chain reaction. A small flow sensor inside the unit detects that water is moving and instantly tells the heater to fire up.
This infographic shows just how a gas water heater slots into the essentials of narrowboat life, giving you an immediate solution for comfort on the water.
As you can see, the heater is the key to turning the freedom of boating into a comfortable lifestyle. It neatly bridges the gap between basic needs and a modern luxury like instant hot water.
The Journey from Cold to Hot
Once the unit ignites, its gas burner roars to life, producing a powerful flame that heats up a component called a heat exchanger. Picture the heat exchanger as a series of winding pipes or coils, a bit like a car radiator but designed for water. As cold water from your boat’s tank travels through this network, it soaks up a massive amount of heat from the burner in just a few seconds.
The water temperature climbs dramatically during this short journey. By the time it leaves the heater and reaches your tap, it’s piping hot and ready to go. The whole sequence, from turning the tap to getting steaming hot water, feels almost instantaneous, providing a continuous and seemingly endless supply.
The real beauty of it is the ‘pay-as-you-go’ nature. The heater only ever uses gas when water is actually flowing. That means no fuel is wasted just to keep a tank of stored water hot when you aren’t even using it.
Boat Gas Water Heater Core Components and Safety
Three main parts work in harmony to make this all happen safely and efficiently, especially within the tight confines of a boat cabin. Getting to know them helps you understand why a professional installation isn’t just a good idea—it’s absolutely vital.
The Gas Burner: This is the real engine of the heater. It provides the intense, controlled flame needed to get that water hot in a flash.
The Heat Exchanger: This is where the magic happens. It’s cleverly designed to transfer heat from the flame to the water with maximum efficiency, wasting as little energy as possible.
The Flue: A critical safety feature. The flue is simply a pipe that vents all the nasty by-products of combustion, like carbon monoxide, safely outside your boat.
Because these systems burn LPG, they have to be installed with real precision. For anyone exploring their options, taking a closer look at a modern LPG water heater specifically designed for marine use is a great next step. Ultimately, these components come together to give you reliable, on-demand hot water—a true game-changer for comfortable year-round living on your narrowboat.
Choosing the Right Heater for Your Boat
Picking the perfect boat gas water heater isn’t like grabbing one off a shelf at a DIY store. It’s about finding a unit that genuinely fits your life on the water. To get it right, you need to understand a couple of key details that will make all the difference to your daily comfort and, most importantly, your safety.
It’s a decision more and more people are making. The UK gas water heater market is on the up, with a projected growth of around 5.9% a year. A big driver for this is the push for better energy efficiency – households can save up to £300 a year on bills by upgrading to modern units. You can discover more insights about these market trends on futuremarketinsights.com.
Understanding Flow Rate
First things first, let’s talk about flow rate. You’ll see this measured in litres per minute (LPM), and it simply tells you how much hot water the heater can pump out at any one time.
Think of it like this: a smaller, less powerful heater might give you 5-6 LPM. That’s fine for washing up in the galley or running a basin tap. But if you’re dreaming of a decent shower, or you want to be able to run the shower while someone else washes their hands, you’ll need a bigger beast capable of 11 LPM or more.
A common mistake is underestimating your hot water needs. Choosing a heater with too low a flow rate can lead to frustratingly weak showers and a struggle to multitask, so it’s wise to aim for a unit that slightly exceeds your expected peak demand.
Open Flue vs Room Sealed Systems
Now for the really critical bit: the flue system. The flue is the pipe that gets all the nasty exhaust fumes safely outside. On a boat, this is hands-down the most important safety feature of the whole installation.
Open-Flue Heaters: These things draw the air needed for the flame directly from the room they’re in. This design is completely unsuitable and incredibly dangerous in the confined, sealed space of a boat cabin. It can strip the oxygen out of the air and spill lethal carbon monoxide back into your living area.
Room-Sealed (Balanced Flue) Heaters: This is the only safe option for a boat. A room-sealed system uses a clever twin-wall flue pipe. It pulls in all the fresh air it needs for combustion from the outside through one part of the pipe, and pushes all the exhaust gases back outside through the other. This creates a completely sealed system, meaning none of the combustion fumes can ever get into your cabin.
Recommended Heaters for Marine Use
When you weigh up these crucial factors, a couple of models really stand out for life on the water. The Cointra CPA range offers robust, room-sealed appliances specifically suited for the marine environment.
Marine Gas Water Heater Feature Comparison
Feature
Cointra CPA 6
Cointra CPA 11
Why It Matters on a Boat
System Type
Room-Sealed (Balanced Flue)
Room-Sealed (Balanced Flue)
Non-negotiable for safety. A sealed system prevents any risk of carbon monoxide entering the cabin.
Flow Rate (LPM)
Up to 6 LPM
Up to 11 LPM
6 LPM is good for a galley tap and a basic shower. 11 LPM provides a powerful shower and can handle multiple outlets.
Ideal Use Case
Smaller boats, weekend cruisers, or those with modest hot water needs.
Liveaboards, larger boats, families, or anyone wanting a strong, consistent shower.
Match the unit’s power to your lifestyle to avoid frustration with weak water flow.
Physical Size
Compact and space-saving.
Larger than the CPA 6.
Space is always at a premium on a boat, so the unit’s footprint is a key consideration for installation.
Installation
Requires a twin-wall flue through the cabin side or roof.
Requires a twin-wall flue through the cabin side or roof.
Correct flue installation is vital for safety and performance, ensuring all exhaust is vented outside.
Fuel Type
Propane or Butane LPG.
Propane or Butane LPG.
Standard fuel for marine use, but you need to ensure your gas locker and supply lines are compliant.
As you can see, the choice between the Cointra CPA 6 and the Cointra CPA 11 really comes down to how much hot water you plan to use. The CPA 6 is a fantastic, compact room-sealed unit for smaller boats where you just need hot water for the galley and an occasional shower. If you need more grunt for a proper power shower, the CPA 11 is the way to go. Both are designed from the ground up as room-sealed appliances, making them a safe and reliable choice for your boat.
Understanding Gas Safety and Installation
When you bring gas appliances onto a boat, safety instantly shifts from a mere consideration to an absolute, non-negotiable priority. The enclosed space of a narrowboat cabin means there is precisely zero room for error. A badly fitted boat gas water heater isn’t just an inconvenience; it’s a life-threatening hazard.
This is why UK law and the Boat Safety Scheme (BSS) are crystal clear on this: all work on any gas system on a boat must be done by a Gas Safe registered engineer. And here’s the crucial bit—they must also hold specific marine qualifications (LPG PD and BSS) to work legally on vessels. Your local domestic gas engineer simply doesn’t have the specialist training for the unique challenges of a marine environment.
The Role of a Qualified Marine Gas Engineer
Trying to DIY a gas installation is not only illegal but also incredibly dangerous. It can invalidate your boat insurance and will guarantee an immediate fail on your BSS examination. A qualified marine engineer is your assurance that every part of the system is safe, compliant, and fit for purpose.
If you’re looking for a professional, our guide on finding a certified boat gas engineer explains exactly what qualifications to look for and why they matter so much.
Their expertise is what stands between you and your crew and the very real dangers of gas leaks and, most frighteningly, carbon monoxide (CO) poisoning.
Carbon monoxide is a colourless, odourless, and tasteless gas produced by the incomplete combustion of fuels like LPG. In a sealed space like a boat cabin, a small leak from a poorly fitted flue can become fatal in minutes.
Essential Components of a Safe Installation
A professional installation goes way beyond just hooking up a heater. A proper engineer will ensure every single one of these safety features is correctly in place, turning your boat into a safe living space.
Correct Flue Fitting: As we’ve covered, only a room-sealed (balanced flue) system is safe for a boat. The engineer will make certain this is perfectly sealed where it passes through the cabin side or roof, preventing any exhaust gases from sneaking back into the boat.
Solid Copper Pipework: Gas lines must be run in solid copper pipe, securely clipped down and protected from vibration. Flexible hoses should only ever be used for the final connection to the appliance and inside the gas locker itself.
Gas Drop-Out Vents: LPG is heavier than air. If there’s a leak, it sinks to the lowest point. Your gas locker must have a drop-out vent at the bottom, which allows any escaped gas to drain harmlessly overboard instead of pooling in your bilge.
A Working Carbon Monoxide Alarm: This is not optional; it is a mandatory, life-saving device. An audible CO alarm has to be installed in the same cabin as the appliance, placed according to the manufacturer’s guidelines, to give you that critical early warning.
Cutting corners on a gas installation is a gamble where the stakes couldn’t be higher. By investing in a professional, you aren’t just buying hot water; you are buying peace of mind and ensuring the safety of everyone on board.
Choosing Your Fuel: Propane vs Butane
Your boat gas water heater is only as good as the fuel you feed it. Here in the UK, that means Liquefied Petroleum Gas (LPG), which you’ll find in two different flavours: propane and butane. They might look similar sitting on the shelf, but one is the undisputed champion for life on the water, especially if you plan on being on your narrowboat all year round.
Getting your head around the difference is absolutely crucial for making sure you always have hot water, even when a sharp winter frost descends on the canal. The choice you make has a direct knock-on effect on the reliability of your entire gas system.
The Deciding Factor: Winter Performance
For boaters, the single biggest difference between propane and butane is their boiling point. In simple terms, this is the temperature where the liquid gas turns back into a usable vapour inside the bottle. If it’s too cold, the liquid stays liquid, and your appliances won’t get any gas.
Butane has a boiling point of -0.4°C. That means as soon as the air temperature drops to freezing, it just stops turning into gas. Your appliances, including that shiny new water heater, will simply cut out. Not ideal on a chilly morning.
Propane, on the other hand, is the real workhorse. It boasts a much, much lower boiling point of -42°C. It will happily keep providing a steady supply of gas vapour even in the deepest, coldest UK winter you can imagine. This incredible resilience makes propane the only sensible and reliable choice for any liveaboard or year-round cruiser.
Choosing propane is a simple decision that guarantees your heating and hot water systems will function flawlessly, no matter how low the temperature plummets. It offers true four-season reliability that butane simply cannot match.
Telling Them Apart: Bottles and Regulators
Thankfully, you don’t need to be a scientist to tell the two types of gas apart. There’s a handy colour-coding system for the bottles which stops you from picking up the wrong fuel.
A critical bit of kit connecting the bottle to your boat’s pipework is the regulator. This clever device takes the high pressure inside the bottle and knocks it down to a low, steady pressure your appliances can safely use. It’s important to know that propane and butane operate at different pressures and use different regulators – they are absolutely not interchangeable.
Here’s a quick look at the key differences between propane and butane, helping you get the right setup for a safe and compliant system.
Propane vs Butane for Boat Use
Characteristic
Propane (Red/Orange Bottles)
Butane (Blue Bottles)
Bottle Colour
Red or sometimes green (patio gas)
Blue
Regulator Type
Screw-on fitting
Clip-on fitting
Winter Use
Excellent. Works down to -42°C
Poor. Stops working near 0°C
Best For
Year-round boating, liveaboards
Summer use, camping, portable BBQs
So, the takeaway is simple. By always picking up the red propane bottles and fitting the correct screw-on regulator, you’re making sure your boat gas water heater has the fuel it needs to give you endless hot water, whatever the British weather decides to throw at you. It’s one less thing to worry about.
Keeping Your Heater Shipshape for Safety and Longevity
Think of your boat’s gas water heater like you do your engine. A bit of regular, proactive maintenance is the best way to keep it running safely and efficiently for years to come. A little preventative care really does go a long way in heading off unexpected problems and keeping everyone on board safe.
While the UK’s water heater market is a big one, valued at around £700 million, a marine environment throws a few extra curveballs that demand more diligence from us boaters. Gas heaters are a big slice of that market, and their safe operation on a vessel is all down to consistent upkeep. You can read the full research about the UK water heater market if you’re interested in the wider picture.
Simple Checks You Can Do Yourself
You don’t need an engineering degree to handle a few basic visual checks. Getting into the habit of doing these once a month can help you spot potential trouble before it turns into a real headache.
Look at the Flue: Check the external flue terminal for any blockages. It’s a favourite spot for spiders and insects to build nests, which can easily obstruct the exhaust path.
Check the Flame Colour: When the heater fires up, take a look at the flame. You want to see a nice, crisp blue colour. If it looks lazy, yellow, or sooty, that’s a red flag for incomplete combustion and means you need to call a professional right away.
Test Your Alarms: This one is simple but crucial. Press the test button on your carbon monoxide (CO) and smoke alarms regularly. It’s the only way to know for sure that the batteries and sensors are still doing their job.
Why an Annual Professional Service is Non-Negotiable
Beyond your own checks, it is absolutely essential to get your boat gas water heater serviced every year by a qualified Gas Safe registered engineer who holds marine qualifications. This is not a job for the DIY list.
An annual service is your single most important investment in safety and reliability. A qualified engineer has the tools and knowledge to test for invisible dangers like gas leaks and carbon monoxide spillage, safeguarding your boat and its crew.
During a proper service, the engineer will get stuck in and:
Clean the burner and all the internal bits and pieces to ensure it’s burning efficiently.
Test every safety device, including the flame failure mechanism.
Carry out a full leak test on the entire gas system, checking every single joint and connection.
Inspect and clean out the flue system to make sure it’s venting clearly.
This professional once-over ensures your heater isn’t just working, but working safely. It’s also a good chance to get an expert eye on components like flexible hoses. If you want to know more about that, have a look at our guide on choosing the right LPG gas hose for your setup.
Common Questions About Boat Gas Heaters
Even after getting your head around how a boat gas water heater works, there are always a few practical questions that pop up. Getting straight answers is key to feeling confident and making sure you run your system safely and efficiently.
Here are some of the most common queries we hear from narrowboat owners.
Can I Legally Install a Gas Water Heater Myself?
In a word, no. In the UK, it’s a legal requirement that any work on gas appliances on a boat must be carried out by a Gas Safe-registered engineer who holds the correct marine qualifications.
Attempting this yourself is incredibly dangerous. Not only that, but it will also void your boat’s insurance and guarantee an immediate fail on your Boat Safety Scheme (BSS) certificate. It’s just not worth the risk.
How Much Gas Will My Water Heater Use?
This really depends on the heater’s power rating and how you use it. Because these heaters only fire up when you turn on a hot tap, they are remarkably efficient.
As a rough guide, a couple using hot water for daily showers and washing up might find a 13kg propane bottle lasts anywhere from four to eight weeks.
A key difference between a gas heater and a calorifier is supply. A gas heater provides an endless, on-demand supply, whereas a calorifier stores a limited amount of hot water that needs time to reheat once used.
Is Carbon Monoxide a Risk?
Yes, absolutely. With any appliance that burns fuel, carbon monoxide is a potential danger if it isn’t installed and looked after properly.
This is precisely why a professionally fitted, room-sealed flue system and a working CO alarm are completely non-negotiable. To get a better grasp of the risks and how to protect yourself, have a read of our guide on how to prevent carbon monoxide poisoning.
Our Boat Gas Water Heater Services
For expert advice and professional installation of your boat’s gas water heating systems, trust the certified engineers at Marine Heating Solutions. Get in touch with us today to ensure your vessel is safe, compliant, and comfortable.