Marine Heating Solutions

Category: Campervan Services

Campervan Services

Welcome to our Campervan Services category, where we provide everything you need for a comfortable and convenient camping experience. Our specialized services ensure that your campervan is equipped with the best in LPG gas, heating, plumbing, and electrical installations.

LPG Gas Services

Our LPG gas services keep your campervan running smoothly. We offer:

Installation: Professional installation of LPG systems to ensure safety and efficiency.

Maintenance: Regular checks and maintenance to keep your gas systems in top condition.

Repairs: Quick and reliable repairs for any issues you may encounter.

Heating Solutions

Stay warm during your travels with our comprehensive heating services:

Heating System Installation: Choice of various heating systems to keep your space cozy.

Inspections: Thorough inspections to ensure your heating system is safe and efficient.

Repairs and Upgrades: Fast repairs and upgrades to enhance your heating systems.

Plumbing Services

Our plumbing services are designed to ensure you have reliable water access while on the road:

Installation: Expert installation of sinks, water tanks, and showers tailored to your needs.

Repairs: Prompt repairs for leaks or any plumbing-related issues.

Maintenance: Regular plumbing maintenance to prevent problems before they start.

Electrical Services

For all your electrical needs, our skilled team has you covered:

Wiring and Installation: Professional wiring and installation of lighting, outlets, and appliances.

Upgrade Services: Upgrading your electrical systems to handle modern appliances and demands.

Diagnostic Services: Troubleshooting and diagnostics to address electrical issues quickly and effectively.

No matter where your adventures take you, our campervan services ensure you have the essentials for a comfortable and enjoyable journey.

Contact us today to learn more about how we can enhance your campervan experience!

  • Choosing Campervan Hot Water Systems: A Quick Guide

    Choosing Campervan Hot Water Systems: A Quick Guide

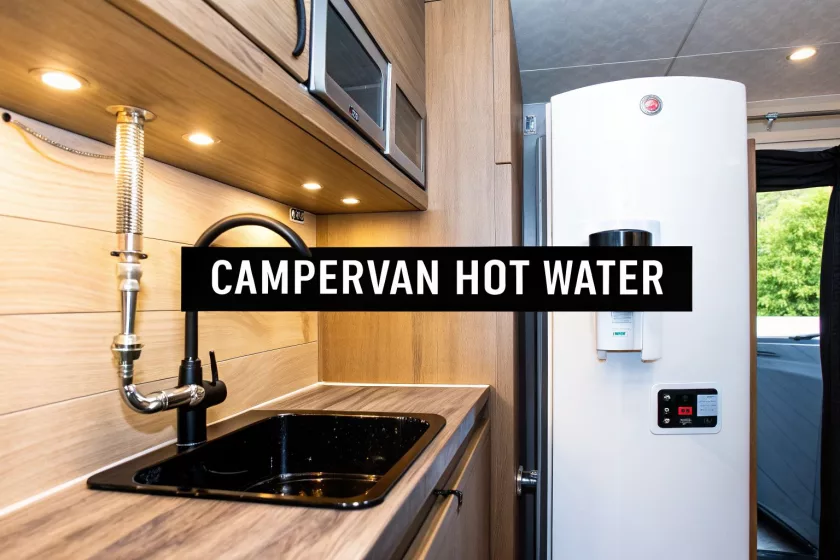
    A decent hot water system is a real game-changer in a campervan. It’s the difference between a rustic weekend away and genuine, long-term comfort on the road. Let’s be honest, having hot water on tap for a proper shower or doing the washing up elevates the whole experience, but getting it right means juggling limited space, power draws, and water capacity.


    For quotes and bookings, call or email us here.


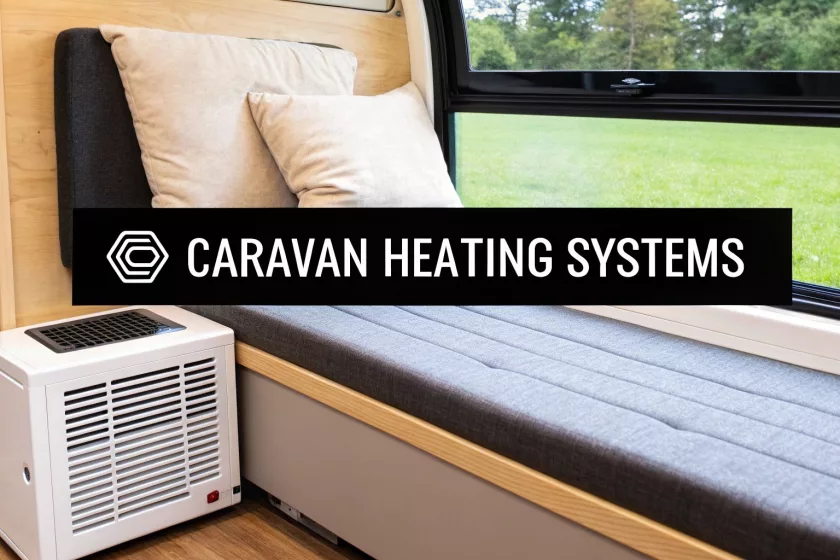
    Your Guide to Hot Water on the Road

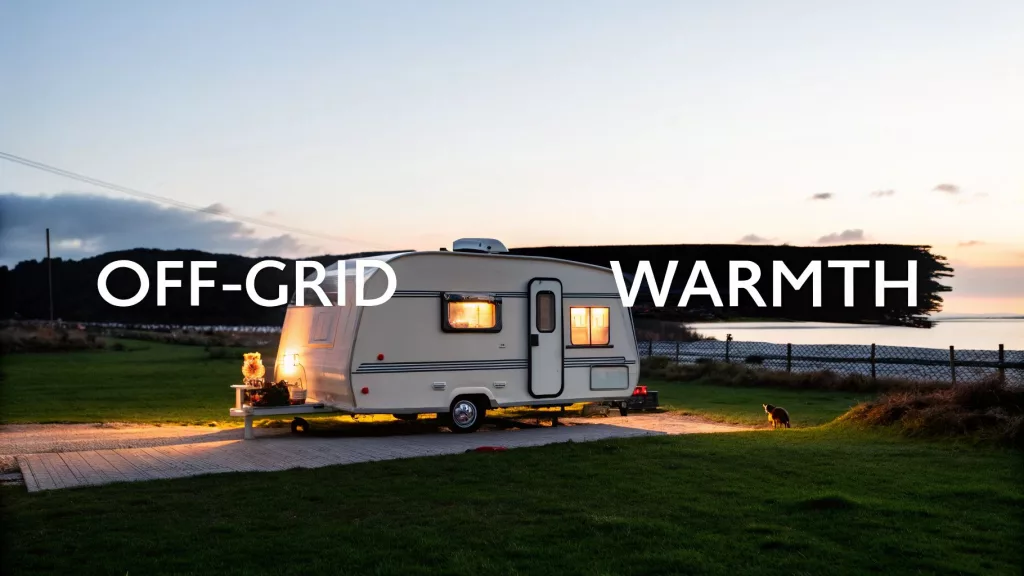
    When you’re planning a campervan conversion, you’ll face a lot of big decisions about the systems that make life on the road possible. Very few are as critical as how you’re going to get hot water. The choice you make here will directly affect your comfort levels, your ability to head off-grid, and how much your van truly feels like a home.

    The main contenders in the world of campervan hot water systems are gas, electric, diesel, and combination (or combi) units. Each type comes with its own set of pros and cons, from the initial purchase price to running costs and sheer convenience. Our job is to cut through the jargon and lay out the options clearly, helping you pick the perfect system for your build and travel style.

    Why Everyone Wants Hot Water Now

    The days of roughing it being the only option are long gone. The desire for home comforts on four wheels has exploded, with the UK’s campervan and van life scene growing at a phenomenal rate. This massive surge has pushed hot water solutions from a “nice-to-have” luxury into an essential bit of kit for modern van life.

    A well-chosen hot water system isn’t just about convenience; it’s about extending your travel season, improving hygiene, and making your campervan feel like a true home, wherever you park it.

    This guide will walk you through everything you need to know. We’ll dig into the good and bad of each heater type, give you some pointers for installation, and share a few maintenance tips to keep things running smoothly for years to come. Of course, while systems like hot water are vital, keeping the whole van in great shape is just as important for its value and your enjoyment. For that, you might want to look into expert camper detailing services to keep your pride and joy looking its best.

    Right then, let’s get into it and find the best hot water solution for your adventures.

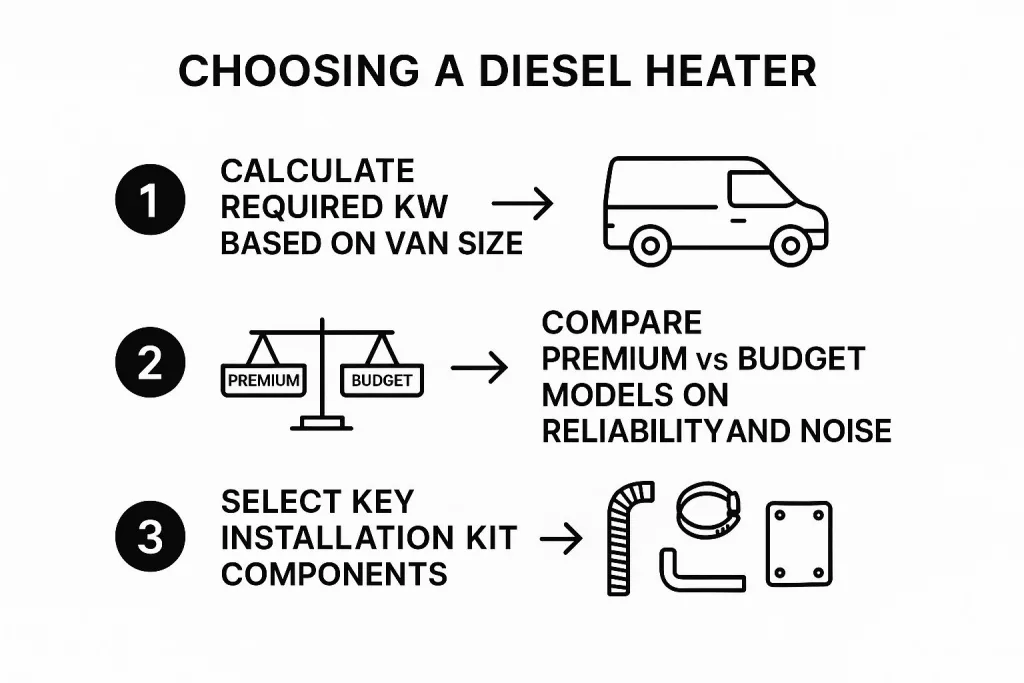
    Breaking Down the Main Types of Water Heaters

    Picking the right hot water system is a massive decision for any van conversion. It can feel a bit overwhelming at first, but honestly, it all comes down to four main players in the campervan world. Getting your head around how each one works is the first big step to figuring out what’s best for your adventures on the road.

    Each system has its own way of getting the job done, and they all come with their own set of pros and cons—things like what fuel they need, how much power they guzzle, and whether they suit your particular style of travel. We’ll get into the nitty-gritty of gas, electric, diesel, and combi heaters to give you a really clear picture.

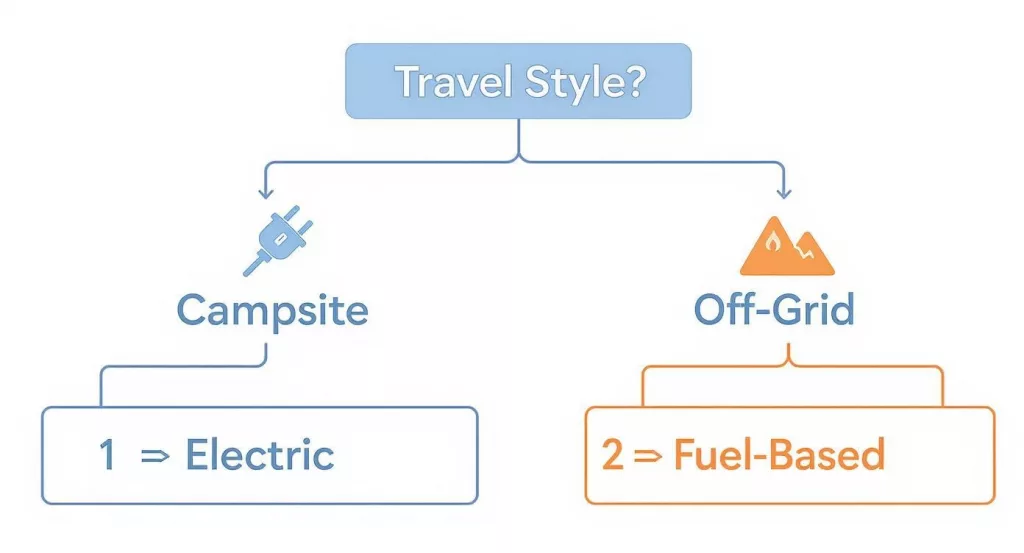
    This decision tree infographic is a great starting point, simplifying the key things you need to think about—space, power, and how much hot water you actually need.

    Challanges for Campervan Hot Water Systems - Infographic

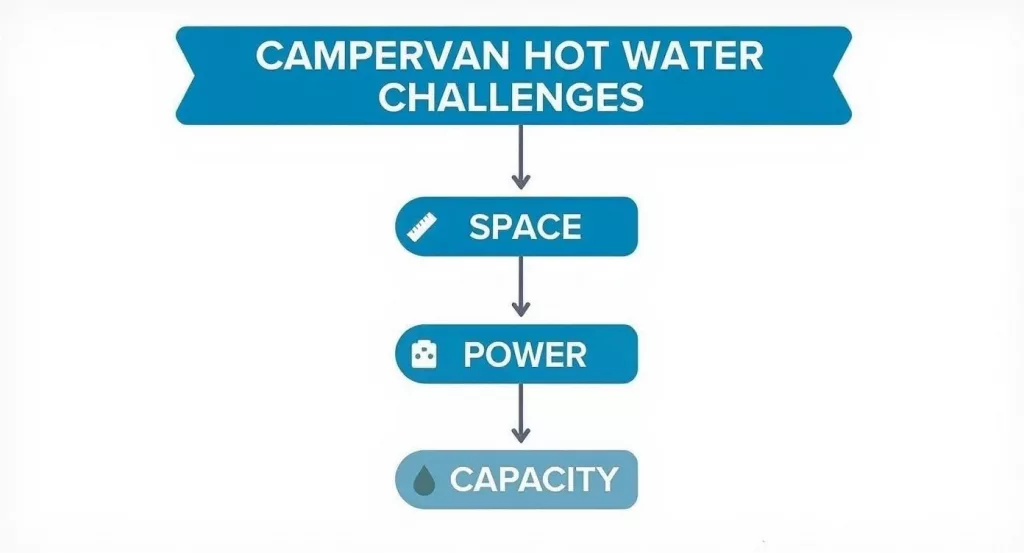
    As you can see, what you prioritise will point you in the right direction. It’s all about whether you’re aiming for total off-grid freedom or just making sure there’s enough hot water for the whole family after a day at the beach.

    To give you a quick overview before we dive deeper, here’s how the main options stack up.

    At a Glance Campervan Hot Water Systems

    System TypePrimary Fuel SourceBest ForInstallation Complexity
    Gas FiredPropane (LPG)Off-grid adventures & instant heatModerate (Requires certified gas work)
    Electric12V Battery / 230V MainsCampsite users & weekend tripsLow to Moderate
    DieselVehicle’s Diesel TankFull-timers & cold weather travelHigh (Integrates with vehicle fuel)
    CombinationGas and/or ElectricAll-season comfort & high-end buildsHigh (Combines two systems into one)

    This table should help you quickly narrow down your options based on your build’s complexity and how you plan to travel. Now, let’s look at each one in more detail.

    Gas-Fired Water Heaters

    Gas water heaters have been a staple in the van life community for ages, and for very good reason. They typically run on propane (LPG) from those familiar refillable bottles, giving you powerful, often instant heat without touching your electrical system. That alone makes them a brilliant choice for going off-grid.

    These systems work by firing up a gas flame that heats water as it flows through a heat exchanger (in on-demand models) or inside a small storage tank. They’re famous for getting up to temperature quickly, meaning you can have a hot shower just minutes after switching it on.

    Who is this for?
    The dedicated off-grid explorer who wants to be free from electrical hook-ups. If you spend most of your time away from campsites and need reliable hot water on tap, a gas heater is a very strong contender.

    Electric Water Heaters

    Electric water heaters are all about simplicity and safety, with no combustion fumes to vent or worry about. Think of them like a big kettle; they use a heating element submerged in a tank to bring the water up to temperature. You can power them with a 230V mains hook-up on a campsite or, if you’re feeling ambitious, a beefy 12V setup.

    Here’s the catch, though: they are thirsty for power. A 12V electric heater will put a serious dent in your battery bank. To make it work off-grid for anything more than a quick wash, you’ll need a pretty hefty solar array and battery capacity. They’re super convenient at campsites but less practical for wild camping unless your electrical system is a beast.

    Who is this for?
    Perfect for the weekend warrior or campsite regular. If you mostly stay at places with mains power and just want a simple, no-fuss system, an electric heater is a great fit.

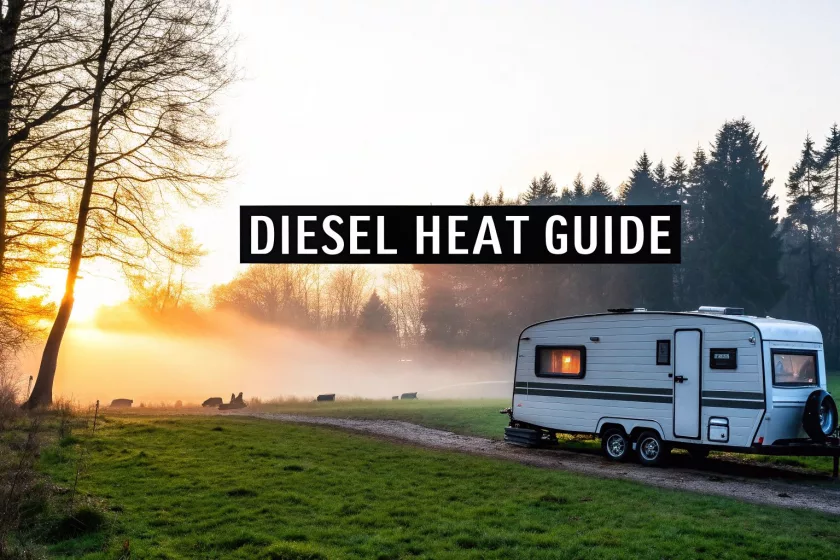
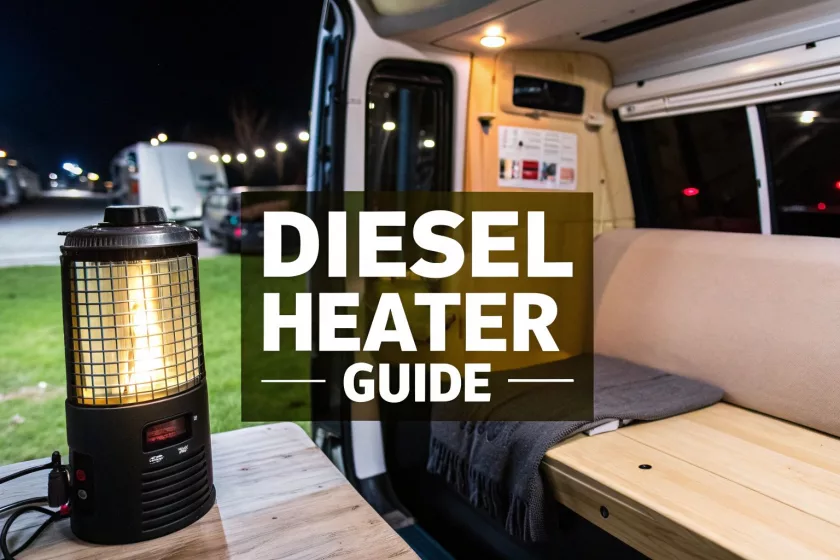
    Diesel Water Heaters

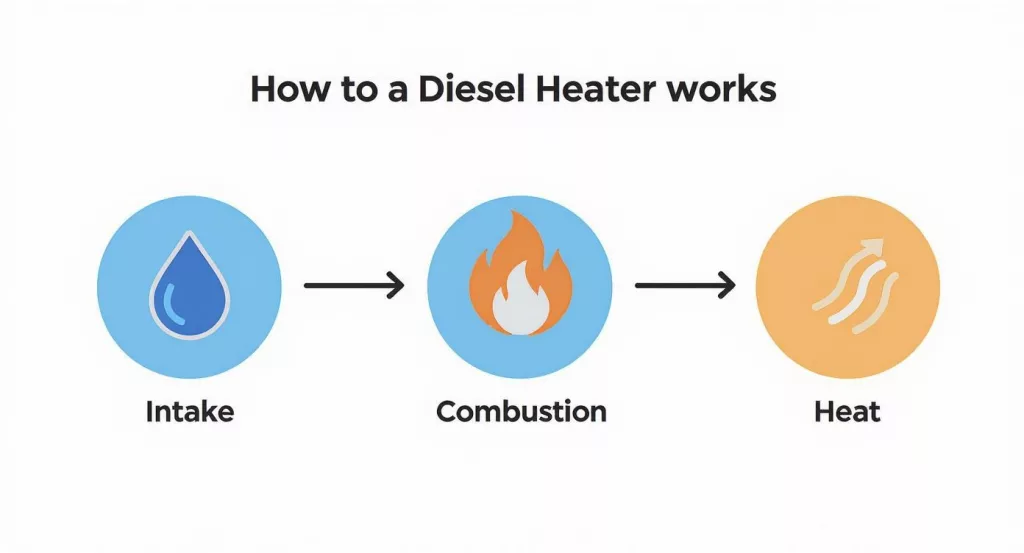
    If you’ve got a diesel van, a diesel heater is an incredibly slick and efficient way to go. These units tap straight into your van’s main fuel tank, so you don’t have to lug around a separate fuel source like propane. They are incredibly efficient, sipping just a tiny amount of diesel to create a surprising amount of heat.

    Many diesel systems are actually liquid heaters. They warm up a coolant mixture that then gets pumped through a heat exchanger, often called a calorifier. This clever box transfers the heat from the diesel heater (or even your running engine!) into your fresh water tank. It’s a dual-purpose setup that means you can literally make hot water while you drive. For a wider look at how these technologies compare to home systems, have a look at this complete guide to water heater types.

    Who is this for?
    This is the top choice for the serious overlander, full-time van-dweller, or anyone venturing into cold climates. If you need a bomb-proof, all-in-one heating and hot water source that runs off your main fuel tank, nothing beats a diesel system. You can learn more about how a calorifier water heater is key to making these systems work so well.

    Combination or Combi Heaters

    Combi heaters are the crème de la crème of campervan integration. These clever bits of kit bundle both your space heating and water heating into one compact unit. They often run on a mix of gas and electricity, giving you the best of both worlds and ultimate flexibility.

    A combi heater is an investment in total comfort, providing a seamless, home-like experience by managing both your cabin temperature and hot water supply from one central control panel.

    These all-in-one systems work by blowing hot air through ducts around your van while also heating water in a built-in stainless steel tank. This approach saves a ton of space and really simplifies the installation compared to fitting two separate appliances.

    Who is this for?
    The van builder looking for a premium, four-season setup. It’s the go-to for high-end conversions where convenience, space-saving, and top-tier functionality are the main priorities.

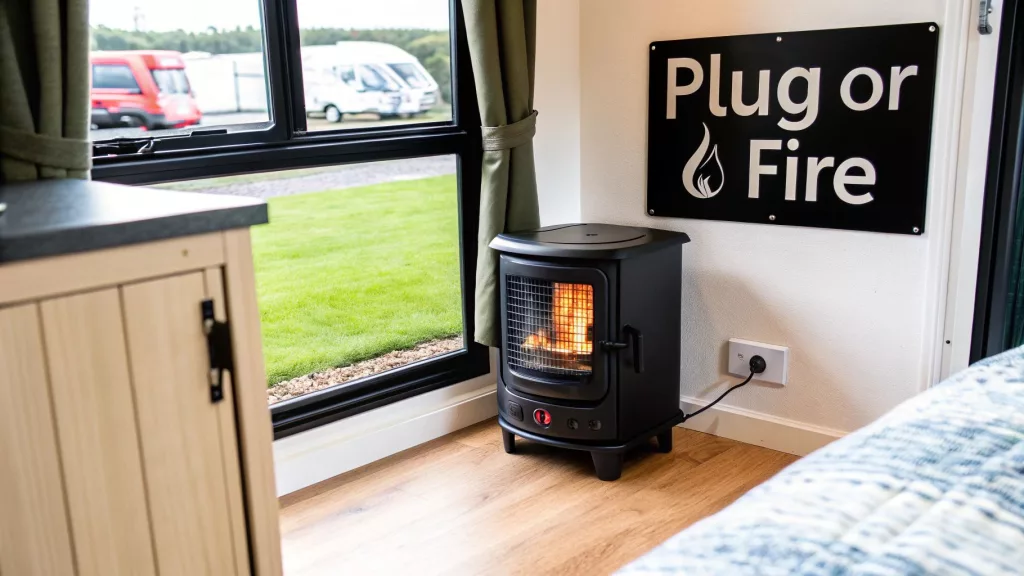
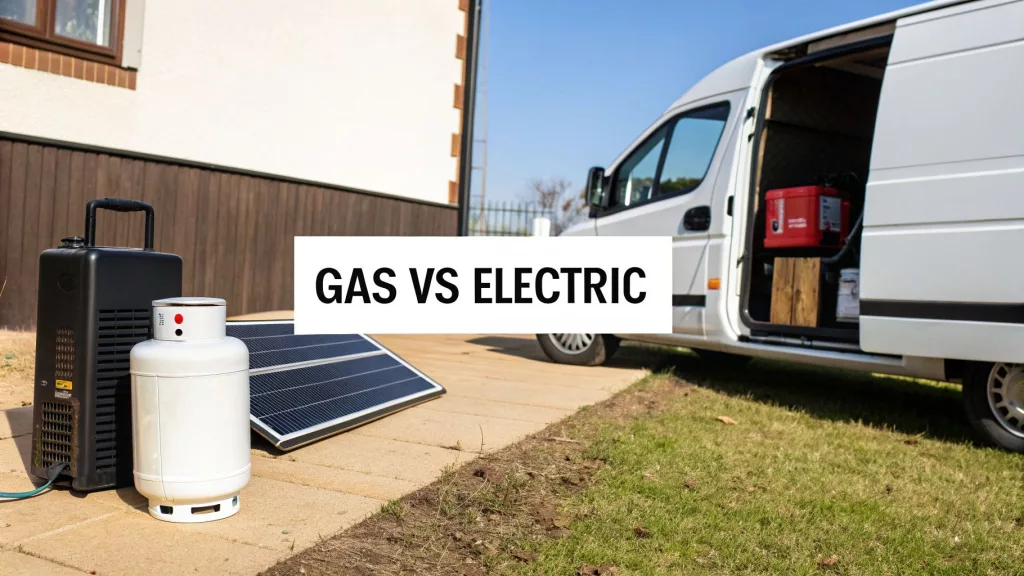
    Gas vs Electric Heaters: The Most Common Choices

    When you’re figuring out a hot water system for your campervan, you’ll quickly find yourself at a crossroads: gas or electric? These are the two heavyweights in the van conversion world, and for good reason. Both do a brilliant job, but they get there in completely different ways.

    Your final decision will really hinge on your travel style. Are you a wild camper who avoids campsites at all costs, or do you prefer the convenience of a proper hook-up? Let’s break down these two popular options to see which one fits your adventure.

    Gas vs Electric Challanges for Campervan Hot Water Systems

    The Case for Gas-Fired Water Heaters

    For van lifers who truly value their freedom, gas heaters are king. Running on LPG (propane), they deliver powerful, near-instant hot water without touching your precious leisure batteries. This is what makes them the go-to for anyone planning to spend serious time off-grid, miles from the nearest mains hook-up.

    They work by using a small flame to heat water, either in a storage tank or on demand as it flows through the unit. It’s an incredibly effective method, often getting water piping hot in just a few minutes. Fancy a hot shower right after a long, muddy hike? A gas system has you covered.

    Pros of Gas Systems:

    • Off-Grid Champion: They run entirely on LPG, meaning no electrical hook-up or colossal solar array is needed for a hot shower.
    • Rapid Heating: Gas heaters are famous for their quick recovery times, so you’re not waiting ages for the tank to reheat.
    • Powerful Performance: You get consistently hot water, strong enough for a proper, satisfying shower.

    However, running a gas system comes with a few non-negotiables. Installation has to be spot on, with proper ventilation and a flue to safely pipe all exhaust fumes outside your living space.

    Cons of Gas Systems:

    • Certified Installation Needed: This isn’t a DIY job. For your safety and to comply with UK regulations, any LPG appliance must be fitted and signed off by a Gas Safe registered engineer.
    • Managing Fuel: You’ll need to find space for gas bottles and keep an eye on your supply, ready to refill or swap them out.
    • Ventilation is Crucial: A properly installed flue is an absolute must to prevent the dangerous build-up of carbon monoxide.

    For those who put off-grid living first, these considerations are a small price to pay for reliable, independent hot water. A unit like the Propex Malaga 5 LPG Water Heater is a perfect example of a tried-and-tested heater that’s proven its worth in countless van builds. To really get into the nuts and bolts, take a look at our detailed guide on the advantages of an LPG water heater.

    The Simplicity of Electric Water Heaters

    If you’re after a more straightforward, plug-and-play solution, electric water heaters are a great shout. Because there’s no combustion, you don’t have to worry about fumes or fitting complex flues. Think of them like a kettle for your van; they use a heating element submerged in an insulated tank to warm the water.

    Their biggest draw is pure simplicity. Pull up to a campsite, plug into the 230V mains supply, and you’re all set for hot water. This makes them a fantastic choice for weekend trips or for anyone who prefers sticking to established sites with full amenities.

    While electric heaters are brilliantly simple, their one major weakness is their appetite for power. An electric system is a massive drain on a 12V battery bank, making it a real challenge for off-grid living without a seriously beefy power system.

    This power demand is the deal-breaker for many. To make a 12V electric heater work off-grid, you’re looking at a huge investment in solar panels and high-capacity batteries.

    Pros of Electric Systems:

    • Simple and Safe: No naked flames or fumes means no need for flues or CO detectors, which makes for a much simpler installation.
    • Quiet Operation: They run completely silently, a huge bonus when you’re trying to sleep in a small space.
    • Great for Campsites: The perfect companion for van lifers who regularly use sites with 230V electrical hook-ups.

    Cons of Electric Systems:

    • High Power Consumption: A 12V model will flatten your batteries in no time, making it pretty useless for extended off-grid stays unless you have a monster electrical setup.
    • Slower Heating Times: They typically take a fair bit longer to heat a tank of water compared to their gas-powered rivals.
    • Reliant on a Power Source: Without a hook-up or a massive solar and battery bank, you simply won’t have hot water.

    When you start looking beyond the more common gas and electric systems, you enter the world of truly integrated solutions designed for serious, all-season van life. This is where diesel and combi heaters come in, offering a level of performance and convenience that taps directly into your van’s own systems.

    These aren’t just heaters; they’re the heart of a high-end conversion, built for reliability when you’re miles from anywhere. Let’s dig into why these setups are considered the gold standard by full-time van dwellers and dedicated adventurers.

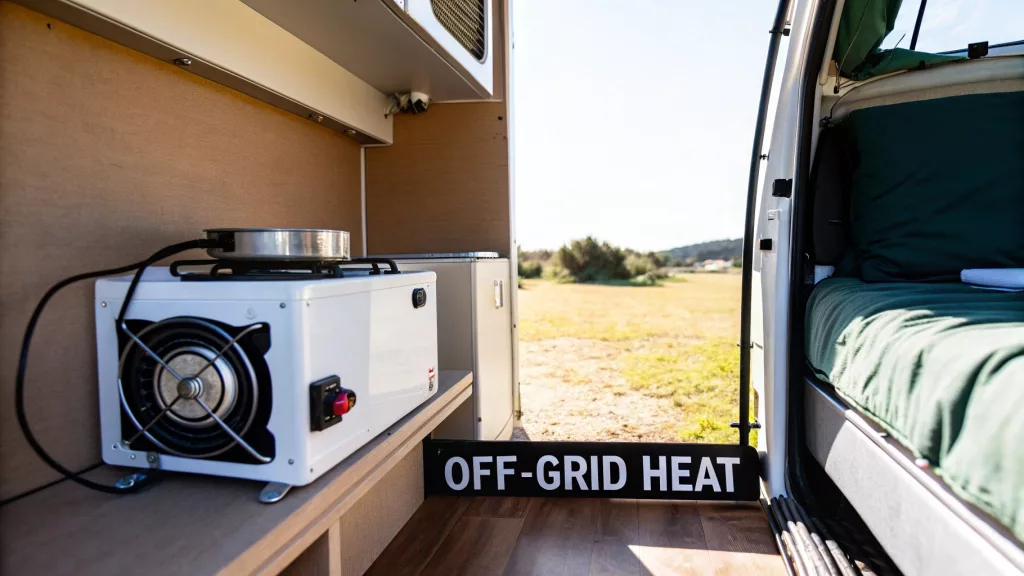
    The Logic of Diesel Heaters

    If you’ve got a diesel van, fitting a diesel water heater just makes sense. Its biggest advantage is simple but profound: it plumbs directly into your vehicle’s main fuel tank. Straight away, you’ve eliminated the need to lug around separate LPG bottles, which frees up a surprising amount of storage and simplifies your whole setup.

    For anyone planning long-term, off-grid trips, this direct fuel line is a game-changer. You no longer have that nagging worry about your propane running out in the middle of nowhere. As long as there’s diesel in the tank, you’ve got hot water.

    On top of that, they’re incredibly frugal with fuel, sipping just a tiny amount to produce a serious amount of heat. This makes them perfect for winter trips where your heating will be working hard. To get a better feel for how these systems can keep you toasty, have a look at our guide on the campervan diesel night heater.

    One of the smartest things about a diesel system is its synergy with the vehicle. Many are set up to heat a coolant loop that then runs through a calorifier. This clever arrangement means you get hot water from either the diesel heater itself or from the engine’s waste heat as you’re driving along.

    Quality Combi Heaters: The All-in-One Powerhouse

    When you absolutely want to maximise comfort and convenience, the combi heater is king. These brilliant bits of kit provide both your space heating and hot water from a single, compact unit. They are the ultimate space-saving solution for any build.

    A popular choice is a Truma Combi unit, which has become the go-to for premium van conversions. It works as a powerful blown-air heater to warm the cabin and as a water boiler, with everything controlled from one neat digital panel. This level of integration makes installation much simpler than trying to fit two separate appliances.

    Most combi heaters run on a mix of gas and electricity, giving you fantastic flexibility. You can run it on gas when you’re wild camping, flick over to the electric element when you’re on a campsite hook-up, or even fire up both at the same time for a ridiculously fast heat-up.

    Why Combi Heaters Are Top of the Food Chain

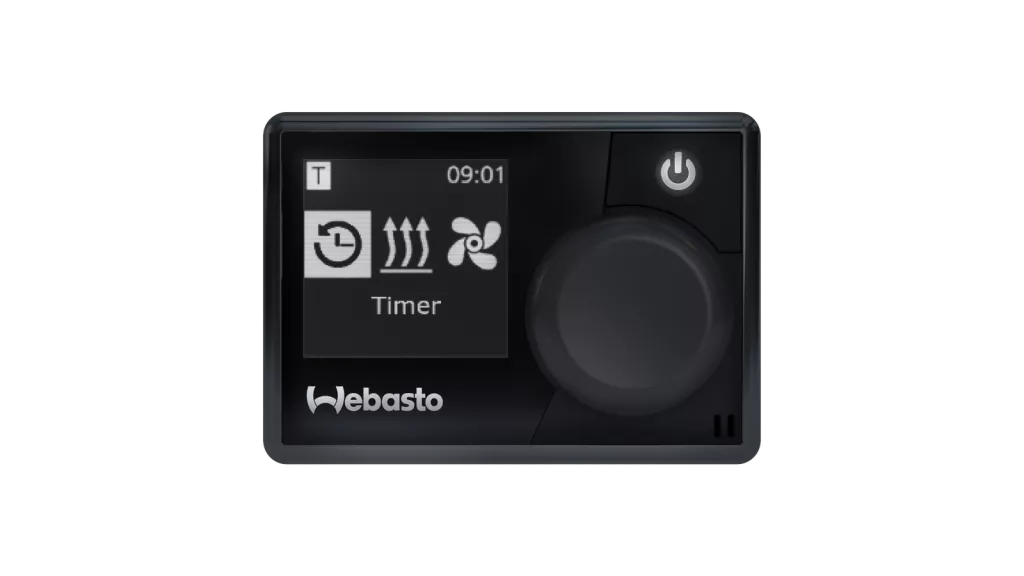
    The appeal of a combi heater isn’t just about saving a bit of cupboard space. It’s about creating a genuinely comfortable, almost home-like feeling in your van. With programmable thermostats and timers, you can set it to have the cabin warm when you wake up, with hot water ready and waiting for that first brew of the day.

    This is the kind of reliable, set-and-forget comfort that makes full-time van life sustainable and turns a campervan into a true four-season adventure vehicle. It gives you the confidence that you’ll be comfortable no matter what the weather throws at you. These high-performance, integrated systems are firmly at the top of the list for any serious van conversion.

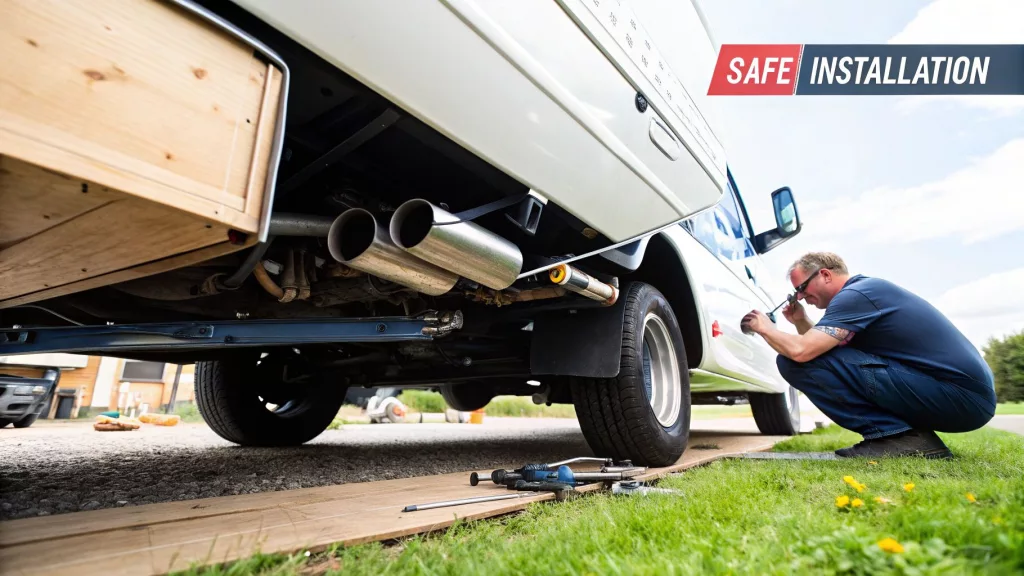
    Getting It Fitted: Installation and Safety Essentials

    You’ve picked out your ideal hot water system—brilliant! But the job’s only half done. Now comes the critical part: installing it correctly. When you’re mixing fuel, electricity, and water in the tight confines of a campervan, “safety first” isn’t just a saying; it’s the absolute golden rule.

    Getting this stage right isn’t simply about making sure you get a hot shower. It’s about protecting your van, your investment, and most importantly, yourself. Whether you’re a seasoned DIY pro or you’re calling in the experts, understanding the fundamentals of a safe install is non-negotiable.

    Safe Installation - An engineers installing a hot water system to a campervan

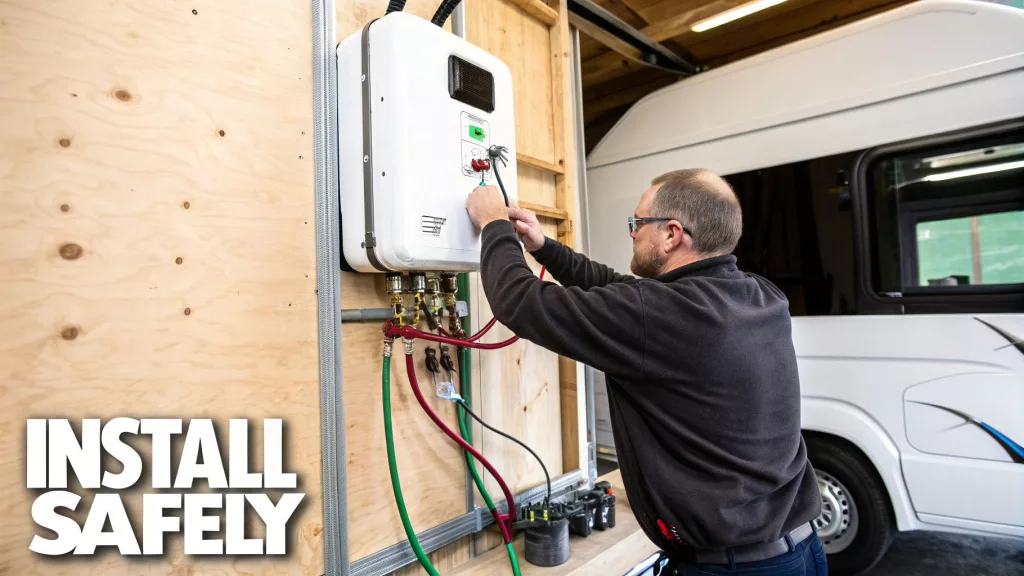
    Gas System Safety: This is a Job for the Pros

    When it comes to LPG systems in the UK, the rules are black and white, and for good reason. Any work on gas appliances in a leisure vehicle must be carried out by a Gas Safe registered engineer. This isn’t a friendly suggestion; it’s a legal requirement, put in place to prevent potentially tragic accidents.

    A properly qualified engineer will nail three critical things:

    • A Perfect Flue Installation: Think of the flue as the system’s exhaust pipe. It has to safely vent nasty combustion gases like carbon monoxide clean outside your van. Your engineer will ensure it’s sealed tight, secure, and positioned well away from any windows or vents.
    • Leak-Proof Connections: They’ll perform a pressure test on the entire gas line, from the bottle right through to the heater. This guarantees every single connection is completely gas-tight, with no exceptions.
    • Full Certification: Once the job’s done and dusted, you’ll get a safety certificate. This gives you total peace of mind and is essential paperwork for your insurance. If you’re looking for the right person, our link about finding a boat gas engineer has some great tips that apply just as well to campervans.

    Your most important bit of kit, alongside a professional installation, is a carbon monoxide (CO) detector. This is a life-saving device, no two ways about it. Fit it near your sleeping area according to the manufacturer’s instructions to get that crucial early warning if anything goes wrong.

    Diesel and Electric Installation Checks

    While diesel heaters don’t fall under the same strict legal certification as gas, they still need to be fitted with real care and attention. The two big focus areas are the fuel and exhaust lines.

    The fuel line must be tapped into your van’s main tank (or a separate one) using high-quality connectors to completely rule out leaks. Crucially, the exhaust pipe gets incredibly hot, so it must be routed well clear of any flammable materials before it exits the vehicle.

    For electric water heaters, the main game is managing their hefty power demand.

    • Correct Wire Sizing: Skimping on wiring is a massive fire risk. You must use the right thickness (gauge) of wire, as specified by the manufacturer, to handle the current without overheating.
    • Appropriate Fusing: An inline fuse is your system’s emergency brake. Placed close to the battery, it will blow and cut the power if a fault occurs, protecting both the heater and your van’s electrical system.

    Plumbing Best Practices for Any System

    No matter which heater you choose, your plumbing has to be up to the task of life on the road. Always use food-grade PEX or push-fit pipes and connectors. They’re reliable and have enough flex to handle the constant vibrations of travel.

    And one final tip: don’t forget insulation! Lagging your hot water pipes does more than just keep the water hotter for longer and improve efficiency. In the colder months, it provides vital protection against your pipes freezing and bursting—a disaster you definitely want to avoid.

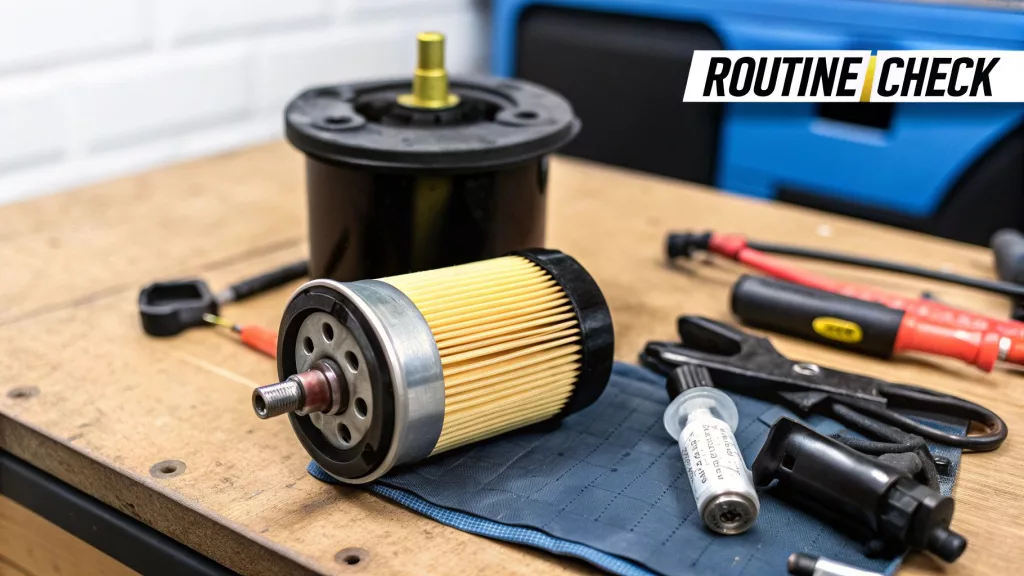
    Looking After Your System for the Long Haul

    A reliable hot water system is one of the best upgrades you can make to your campervan. But like any crucial bit of kit, it needs a little TLC to keep it happy and performing as it should. Think of regular maintenance not just as a chore, but as a way to guarantee hot showers, boost efficiency, and protect your investment from expensive damage down the road.

    The good news is, you don’t need to be a master mechanic. A few simple, seasonal jobs are all it takes to extend its lifespan and ensure it runs safely and efficiently trip after trip.

    Winterising Your Water System

    For anyone using their van in the UK, winterising is without a doubt the single most important job on your maintenance list. When water freezes, it expands with enough force to split pipes, crack water tanks, and completely wreck expensive heater components. The fix is simple, but ignoring it is a recipe for disaster.

    The entire goal is to get every last drop of water out of the pipes, tanks, and heater.

    1. Open Every Tap: Start by opening all your taps, including the shower mixer. Flick them to the halfway point between hot and cold.
    2. Drain the Main Tank: Find the drain valve for your fresh water tank and open it up. Let it empty completely.
    3. Drain the Heater: This is the step people often forget. Your water heater has its own drain plug or valve. Trapped water in the heater is one of the most common causes of frost damage, so make sure it’s fully drained.
    4. Blow Out the Lines: If you can, use a pump or a bit of compressed air (at a very low pressure!) to blow through the taps. This will force out any stubborn water hiding in low points of the pipework.

    Descaling for Better Performance

    Over time, limescale can build up inside your heater, especially if you live in a hard water area. This chalky deposit acts like a fur coat on the heating element, forcing the system to work much harder to heat the water. It’s a sure-fire way to waste fuel and reduce performance.

    Giving your system a good descale once a year is an easy win for efficiency. It gets rid of all that limescale build-up, letting your heater transfer heat properly and helping its components last longer.

    You’ll need a non-toxic descaling solution designed for drinking water systems. Just follow the instructions on the bottle—you’ll typically add it to the system, let it sit for a while to work its magic, and then give everything a thorough flush. This is also the perfect time to give your whole water system a proper clean-out.

    Routine Safety Checks

    Lastly, get into the habit of giving your system a quick visual once-over a few times a year. These simple checks can help you spot a small issue before it escalates into a major headache.

    • Check Fuel Lines: For gas or diesel systems, have a good look at all the fuel lines. You’re looking for any signs of cracking, rubbing, or leaks.
    • Inspect Electrical Connections: Check for any corrosion or loose wires, paying close attention to the connections on the heater unit and the battery.
    • Clean Filters and Flues: Make sure any water pump filters are clear of grit and debris. If your heater has an external flue, check the vent isn’t blocked by mud, leaves, or even insects.

    Common Questions About Van Hot Water Systems

    As you start to nail down the final details of your campervan build, a few last-minute questions about the hot water system are bound to surface. It’s completely normal. To help you move forward with confidence, we’ve put together answers to some of the most common queries we get from fellow van builders.

    How Much Water Does a Van Shower Use?

    This is a big one. A good water-saving shower head, which is pretty much essential for any van, will use somewhere between 5 to 10 litres of water per minute.

    That might not sound like much, but a quick five-minute rinse can easily use up 25 to 50 litres of your precious fresh water. This really puts the spotlight on your tank capacity and how quickly your heater can get back up to temperature. It’s why so many van lifers swear by the “navy shower”—wet down, turn the water off, soap up, then rinse. Every drop counts!

    Can I Use an Instant Water Heater in a Campervan?

    Absolutely. Instant, or tankless, heaters are a brilliant choice for vans, especially the gas-powered models that deliver powerful, on-demand heating. As long as you’ve got fuel and water, you’ve got continuous hot water.

    However—and this is critical—any gas-fired instant heater must be installed with a proper flue. This isn’t optional. It has to vent all the exhaust fumes safely outside the vehicle.

    When it comes to any campervan hot water system, don’t cut corners on installation. While some systems seem DIY-friendly, anything involving gas legally requires certified expertise here in the UK.

    Does My Hot Water System Need Professional Installation?

    It really depends on the type of system you’ve chosen. If you opt for a heater that runs on LPG gas, UK law is crystal clear: it must be installed and certified by a Gas Safe registered engineer who is qualified for leisure accommodation vehicles (LAV).

    For diesel and 12V electric systems, a skilled DIYer can often handle the job. That said, if you have even the slightest hesitation about messing with fuel lines or high-amperage wiring, we strongly recommend calling in a professional. It’s just not worth the risk.

    Our Services

    At Marine Heating Solutions, our Gas Safe registered and OFTEC certified engineers have the know-how to safely install, service, and repair all kinds of campervan hot water systems. We’ll make sure your build is not just comfortable, but fully compliant too. Contact us today for an estimate.


    For quotes and bookings, call or email us here.


  • Choosing Your Ideal Caravan Heating Systems

    Choosing Your Ideal Caravan Heating Systems

    Choosing the right caravan heating systems is what unlocks comfortable, year-round adventures. It’s the difference between a cosy night in and cutting a trip short. The best option for you will really depend on your travel style, boiling down to a balance between off-grid independence and campsite convenience.


    For quotes and bookings, call or email us here.


    Your Guide to Selecting the Perfect Caravan Heater

    Finding the perfect heating system can feel a bit overwhelming, but it all comes down to one simple question: where do you plan to travel? Your answer will immediately point you towards the best kind of heater for your needs, making sure you stay toasty whether you’re parked at a fully-serviced site or exploring the wild.

    This decision is the crucial first step. A system that works brilliantly on a campsite with a mains hook-up might be totally useless in a remote field. On the flip side, a powerful off-grid heater could be complete overkill if you never venture far from civilisation. Getting your head around this fundamental difference is the key to making a smart investment in your comfort.

    Matching Your Heater to Your Travel Style

    The main thing to consider is your power source. Will you always have access to mains electricity, or will you need to be completely self-sufficient?

    • For the Campsite Tourer: If your adventures usually mean staying on sites with electric hook-ups, an electric heating system is the simplest and most convenient choice. You just plug in and enjoy consistent warmth without ever having to think about fuel levels.
    • For the Off-Grid Explorer: If you’re more of a wild camper or prefer sites without mains power, a fuel-based system is an absolute must. Diesel and gas (LPG) heaters provide powerful, independent heating, letting you stay warm no matter where you park up.

    This simple fork in the road helps narrow down your options straight away. This infographic gives a great visual of the core choice between campsite and off-grid heating systems.

    Travel Style Infographic for Choosing Your Ideal Caravan Heating Systems

    As you can see, your primary travel style is the biggest factor, pushing you towards either electric or fuel-based solutions.

    Understanding the UK Caravan Heating Market

    Modern caravans in the UK have come a long, long way, and now feature some seriously efficient systems. The two types you’ll see most often are blown air heating, which circulates warm air through ducts, and wet central heating, which uses radiators just like you’d have at home.

    The market is dominated by a few key brands known for their reliability and innovation, with blown air systems being particularly popular for their quick heat-up times and compact design, while wet systems offer a more silent, domestic-style comfort.

    For caravanners who love to wander far from the beaten track and leave serviced campsites behind, a reliable fuel-based heater is non-negotiable. These systems are the key to true independence, keeping you toasty in the most remote spots without a whisper of an electric hook-up. When you’re properly off-grid, the two main contenders are diesel and gas heating systems.

    Each of these caravan heating systems has its own unique strengths, suiting different travel styles and priorities. Getting to grips with how they operate, what they cost to run, and what’s involved in fitting them is crucial to making the right choice for your caravan or campervan.

    The Power and Efficiency of Diesel Heaters

    Diesel heaters are the undisputed workhorses of the off-grid community. They’ve earned their reputation for being incredibly efficient and for pumping out a powerful, dry heat. Just picture it: a heater that quietly sips fuel directly from your vehicle’s main diesel tank, giving you consistent warmth for days on end. This setup means no more lugging around separate fuel canisters or having that nagging worry about the gas bottle running dry halfway through a chilly night.

    So, how do they do it? They draw a tiny amount of diesel from the tank, turn it into a fine mist, and ignite it inside a sealed combustion chamber. A heat exchanger then transfers that warmth into the air circulating inside your van. And, most importantly, all the exhaust fumes are safely piped outside, so the air you’re breathing stays clean and dry.

    The efficiency is genuinely impressive. A standard 2kW diesel heater, like an Autoterm 2D Diesel Air Heater, will only use between 0.1 to 0.24 litres of fuel per hour. This miserly consumption makes them incredibly cheap to run on long trips, especially when you weigh it up against the cost of bottled LPG.

    One of the biggest wins with diesel heating is the quality of the warmth. It produces a very dry heat that actively fights condensation inside the caravan—a constant battle during the UK’s cold, damp weather. This simple fact keeps the whole space feeling fresher and much more comfortable.

    While the initial purchase price for a quality diesel system is higher than some alternatives, the low running costs and sheer convenience deliver fantastic value over time.

    The Silent Simplicity of Gas (LPG) Heaters

    Gas heaters, running on Liquefied Petroleum Gas (LPG) from bottles, are a classic, time-tested solution in the caravanning world. Their biggest selling point? They’re almost completely silent and provide instant heat with the flick of a switch. Since many caravans already come with a gas system plumbed in, it’s a familiar and comfortable choice for a lot of owners.

    You’ll generally find two types of gas heaters:

    • Blown Air Systems: These function a lot like their diesel counterparts, using a fan to push warm air through ducts placed strategically around the caravan. This ensures the heat is spread evenly. The Propex Heatsource HS2000 is a great example of this tried-and-true technology.
    • Convection and Radiant Heaters: These models heat the air immediately around them, which then circulates through the space naturally. They are completely silent, but you might find they don’t distribute the warmth quite as effectively as a blown air system.

    Gas systems are wonderfully quiet and get the job done, but you do have to think about fuel management. You’ll need to carry at least one gas bottle (and probably a spare), which eats into your precious storage space and adds to your payload. Running costs can also vary with the price of bottled LPG, which is usually more expensive than diesel for the same amount of heat.

    Comparing Diesel and Gas Systems

    Ultimately, the choice between diesel and gas often boils down to your personal travel style and how you plan to use your van. A side-by-side look makes it clear where each one shines.

    FeatureDiesel HeatersGas (LPG) Heaters
    Fuel SourceVehicle’s main diesel tankSeparate LPG bottles
    Running CostGenerally lowerGenerally higher
    OperationAudible fan noiseVery quiet or silent
    Heat TypeVery dry, reduces condensationCan add slight moisture
    InstallationMore involved, requires fuel lineSimpler, often pre-installed
    ConvenienceNo need to carry extra fuelMust manage and replace bottles

    So, what’s the verdict? For the serious off-grid explorer who puts fuel efficiency and low running costs at the top of the list, a diesel heater is a brilliant investment. But for those who crave silent operation or already have a gas setup they’re happy with, an LPG system is still a solid and dependable choice for any adventure.

    Electric and Solid Fuel Heaters Explained

    While gas and diesel heaters give you amazing off-grid freedom, they’re not the only game in town. There are other brilliant heating systems that really come into their own in different scenarios. Think about those times you’re hooked up to campsite power – that’s when electric heaters offer pure, plug-in convenience. Then, at the complete other end of the scale, you’ve got solid fuel stoves, bringing a powerful, rustic charm that’s unbeatable for creating a snug off-grid hideaway.

    An Off-Grid Heating System Installed Inside a Caravan

    Each of these has its own personality, with a unique set of perks and responsibilities. Getting to know them is the key to seeing the full picture of what’s possible for your caravan or campervan.

    The Simplicity of Electric Heating

    When your van is plugged into the mains, electric heating is hands down the simplest, most fuss-free way to get warm. No fuel lines, no combustion, and next to no maintenance. It’s the definition of a plug-and-play solution.

    It’s a straightforward process: electricity flows through a heating element, which gets hot and warms up the air around it. This simplicity makes them incredibly reliable. You’ll generally come across a few common types on your travels:

    • Fan Heaters: These are the small, portable units you can pick up anywhere. A fan blows air across a hot element, giving you a quick blast of heat to take the chill off a room. Perfect for a bit of targeted warmth.
    • Oil-Filled Radiators: These portable heaters gently warm up oil sealed inside, which then radiates a steady, silent heat. They take a bit longer to get going, but once they’re up to temperature, they provide a lovely, consistent warmth and are pretty efficient to run.
    • Integrated Systems: Most modern caravans come with clever built-in systems from leading brands. These are often dual-fuel, meaning they can run on either gas or electricity. When you’re on a campsite with a hook-up, switching to the electric setting is usually the cheapest and easiest option.

    The main draw of electric heating is just how easy it is. The big downside, though, is that you’re completely tied to an external power source. This makes it a non-starter for proper off-grid adventures unless you’ve invested in a seriously beefy battery and inverter setup.

    The Rustic Appeal of Solid Fuel Stoves

    For an experience that’s in a league of its own, you just can’t beat a solid fuel stove. Often called wood burners, these deliver a deep, dry heat and that unmistakable crackle of a real fire. Nothing else creates such a cosy, welcoming atmosphere.

    At its heart, a solid fuel stove is a tough metal box built to burn wood or smokeless coal safely and efficiently. The heat radiates from the body of the stove, filling the whole space with a powerful, penetrating warmth that’s brilliant for driving out damp. It’s no wonder they’re a popular choice for people living in their vans all year round.

    With a solid fuel stove, your heat source is completely self-sufficient. As long as you have fuel, you can be warm anywhere. This makes them a top choice for dedicated off-gridders who prize their independence above everything else.

    But all that traditional charm comes with some serious responsibilities.

    Key Considerations for Solid Fuel Stoves

    Putting a solid fuel stove in your caravan is a much bigger deal than fitting any other type of heater. Safety has to be your number one priority, and there are a few things that are completely non-negotiable.

    • Professional Installation: This is not a DIY job for a weekend. A stove has to be installed properly to be safe. That means building a proper hearth, using heat shields to protect the walls and floor, and fitting a twin-wall flue that goes safely through the roof.
    • Ventilation and Alarms: A fire needs oxygen to burn cleanly, so good ventilation is essential. Just as critical is a carbon monoxide (CO) alarm. It’s a life-saving bit of kit that must be fitted and tested regularly.
    • Fuel Management: You’ll need somewhere dry to store your fuel, whether that’s kiln-dried wood or smokeless coal, and that can take up a surprising amount of precious space. You also have to tend to the fire itself, topping it up with fuel and cleaning out the ash.

    It’s definitely more demanding, but the reward is a quality of dry, off-grid heat that nothing else can touch, plus a charming centrepiece for your living space. A well-installed Salamander Hobbit Stove is a great example of a compact, efficient little stove designed specifically for tight spaces like campervans.

    Safe Installation for Peak Performance

    Even the best caravan heating system on the market is only as good as its installation. Getting the setup right isn’t just a box-ticking exercise for performance; it’s absolutely fundamental to your safety on the road. This is your guide to the non-negotiable principles of a solid, secure installation that will keep your heater running like a dream for years to come.

    A plugin heater in a cabin of a static caravan

    Every single step matters, from picking the perfect spot for the unit to routing the ducting. A thoughtful, well-planned installation means you get even heat distribution, you use less fuel, and most importantly, you and your family are protected from any potential hazards.

    The Foundation of a Safe Setup

    The very first decision you’ll make is where to physically put the heating unit. This choice has a huge knock-on effect on both how well it works and how safe it is. The sweet spot is usually somewhere central, low down, and in a spot with decent airflow. Think inside a locker or under a bench seat, but well away from flammable stuff like curtains or bedding.

    For any system that burns fuel—that’s your diesel, gas, and solid fuel heaters—ventilation is non-negotiable. These heaters need a constant supply of fresh air to burn cleanly, and they must have a completely sealed flue system to vent all the exhaust fumes safely outside. Never, ever block air inlets or vents. Doing so can lead to incomplete combustion, which creates deadly carbon monoxide.

    A correctly installed and regularly tested carbon monoxide (CO) alarm isn’t an optional extra; it is an essential, life-saving bit of kit for any caravan with a fuel-burning appliance. Fit it according to the manufacturer’s instructions, which is typically at head height in a living or sleeping area.

    Ducting and Flue Installation Done Right

    Getting the ductwork routed properly is the key to spreading that lovely warmth all through your caravan. If you get it wrong, you’ll end up with hotspots right next to the heater and chilly corners elsewhere.

    Stick to these core principles for effective ducting:

    • Keep it Short and Straight: The shorter and more direct the ducting runs, the more efficiently the warm air travels. Try to avoid any sharp bends or kinks that will choke the airflow.
    • Insulate the Ducts: Using insulated ducting, especially for longer runs, is a game-changer. It stops the heat from escaping along the way, making sure the air that reaches the furthest vent is still nice and warm.
    • Strategic Vent Placement: Think about where you position the air outlets to create a natural circulation of warm air. Placing them low down helps push the cold air up, creating a much more comfortable and consistent temperature.

    Just as critical is the flue installation for any combustion heater. The exhaust flue must be perfectly sealed, routed directly outside, and positioned well away from windows, vents, or awnings to make sure fumes can’t find their way back inside.

    Why Professional Installation of Caravan Heating Systems is Crucial

    Look, while some experienced DIYers might feel confident enough to tackle a diesel air heater installation, anything involving gas or solid fuel really demands a professional. There’s a reason these installations are governed by strict UK safety regulations. A badly fitted gas line can leak, creating a serious risk of fire or explosion.

    It’s a similar story with a solid fuel stove. That involves building a proper fireproof hearth and fitting a twin-wall flue system through the roof—these are jobs with absolutely no room for error. A certified engineer has the training, the right tools, and the crucial knowledge of the regulations to get the job done safely.

    For total peace of mind, getting a certified caravan gas engineer is the most responsible choice you can make. It’s your guarantee that the system is not only compliant but, above all, safe for everyone on board.

    Keeping Your Heater Running Smoothly

    A well-maintained heating system is your best friend on the road, reliably pumping out warmth trip after trip. The secret? A bit of proactive care. Think of it less as another chore and more as a simple playbook for ensuring your comfort and safety, and for extending its life. You want to avoid the kind of unexpected breakdown that can really put a dampener on a holiday.

    Thankfully, many of the essential checks are dead simple and you can easily do them yourself. By working these habits into your regular routine, you’ll spot small issues before they snowball into big, expensive problems, keeping your heater in top nick for every adventure.

    Your DIY Maintenance Checklist for Caravan Heating Systems

    These regular, simple checks are your first line of defence against heater trouble. Just running through these tasks before a big trip or as part of your general caravan upkeep will make a massive difference to its performance and longevity.

    • Inspect and Clean Air Vents: Dust and debris are the arch-enemies of an efficient heater. Make a point of checking that both the air intake and the warm air outlets are clear of obstructions. We’re talking dust, pet hair, or even things you’ve stored that are blocking the flow. A quick once-over with a vacuum can make a world of difference to the airflow.
    • Check the Ducting: Have a poke around in the lockers and under the seats to find the flexible ducting pipes. Make sure they haven’t been squashed by heavy gear and that there are no rips or loose connections. Any breach here means you’re just losing precious heat.
    • Test Your Safety Alarms: This one is absolutely non-negotiable. At least once a month, hit the test button on your smoke and carbon monoxide (CO) alarms. You need to know they’re working. And don’t forget to pop new batteries in at least once a year.
    • Examine the Flue: For any heater that burns fuel, get into the habit of checking the external flue terminal. You’re looking for leaves, mud, or even insect nests. A blockage here is serious, as it can stop dangerous exhaust gases from escaping safely.

    These steps barely take a few minutes, but they’re fundamental to keeping your system running effectively and, most importantly, safely.

    The Importance of an Annual Professional Service

    While your own checks are vital, they simply can’t replace an annual professional service, particularly for gas and diesel caravan heating systems. Getting a qualified technician to give it a proper check-up once a year is a critical investment in both your safety and the heater’s reliability. It’s the only way to be completely sure that all the complex internal gubbins are working as they should.

    An annual service is far more than just a quick clean; it’s a full health check. A technician will inspect the burner, check gas pressures, test the safety shut-off mechanisms, and ensure the whole combustion process is clean and efficient. This not only wards off breakdowns but is often a must-do to keep the manufacturer’s warranty valid.

    A professional service for a unit like an Autoterm 2D Diesel Air Heater or a Propex Heatsource HS2000 gas heater makes certain it’s burning fuel cleanly. This maximises its efficiency and keeps harmful emissions to a minimum.

    Troubleshooting Common Heater Problems

    Even with the best maintenance schedule, things can sometimes go wrong. Knowing how to diagnose a few common issues can often save you from a cold night and an unnecessary call-out fee.

    Here are a few common hiccups and the first things you should check:

    1. Heater Fails to Ignite: More often than not, the culprit is something simple. First up, check your gas bottle isn’t empty or that your diesel tank isn’t running on fumes. Next, make sure your leisure battery has a decent charge. Low voltage (anything below 11.5V) can be enough to stop the ignition sequence in its tracks.
    2. Uneven Heating: If you find some vents are blasting out hot air while others are just lukewarm, it’s almost certainly a ducting problem. Go hunting for a crushed section or a joint that’s popped apart near the cold spot.
    3. Heater Shuts Down Unexpectedly: Most modern heaters have clever built-in safety sensors. If the unit overheats because a vent is blocked, it will shut itself down automatically. Before you try and restart it, double-check that nothing is obstructing the air intake or outlet.

    By following this mix of simple DIY checks, professional servicing, and a bit of basic troubleshooting, you can make sure your caravan heating system remains a dependable source of warmth for many years to come.

    Where Caravan Heating is Heading Next

    The way we keep our vans warm is always getting better. The future isn’t about one big, shiny invention; it’s more of a clever evolution. We’re moving towards smarter, more adaptable systems that suit how we travel and respond to the world around us. Both technology and new regulations are nudging manufacturers to come up with more efficient and sustainable ways to stay cosy on the road.

    Looking down the road, the biggest change you’ll see is the rise of really sophisticated hybrid systems. Imagine a heater that can flick between gas, diesel, and electric power on its own, picking whichever is cheapest or most efficient at that moment. This kind of setup gives you ultimate freedom—plug into cheaper campsite electricity when you can, but switch to super-efficient diesel for those proper off-grid adventures, all from a single intelligent control panel.

    This push for efficiency is also leading to much smarter energy management inside the caravan. As all these systems start talking to each other, getting the most out of your solar panels and battery banks becomes increasingly important.

    Keeping Up With New Rules and Innovations

    Let’s not forget the environmental standards, which are a huge driver of change. The UK government’s big push towards decarbonisation has had a direct impact on the heating world. Under its Clean Heat Market Mechanism, new rules are being phased in that affect domestic heating.

    However, in a major win for our community, the caravan industry managed to secure a crucial exemption. This means new caravans won’t be forced to have heat pumps fitted, avoiding a hefty levy on every new boiler that would have pushed up prices for everyone.

    This exemption is a big deal. It acknowledges the unique challenges of heating a mobile space and means that practical, fuel-based heating will remain a solid choice for years to come. It allows technology to develop at a pace that actually makes sense for caravanners.

    We can expect to see continuing innovation in efficiency, from more advanced heat exchangers to smart, app-controlled thermostats that learn your routine to maximise comfort while using the least amount of fuel possible.

    Got Questions? We’ve Got Answers

    Choosing the right heating system for your caravan often throws up a few questions. It’s a big decision, so let’s walk through some of the most common queries we hear from fellow caravanners to help you get it right.

    What’s the Cheapest Way to Heat a Caravan?

    The most economical option really comes down to how you like to travel.

    If you’re an avid off-grid tourer, a diesel heater is almost always the most cost-effective to run. They’re incredibly efficient, and with diesel generally being cheaper than bottled gas, it’s the clear winner for long trips away from mains power.

    On the other hand, if you mostly stick to serviced pitches with electric hook-ups, an electric heater can be incredibly cheap. This is especially true if the campsite charges a flat rate for your electricity. Gas systems sit nicely in the middle, but heavy use can get pricey with the ever-changing cost of LPG bottles.

    Can I Have the Heater on While I’m Driving?

    This is a massive safety question, and the answer is: it completely depends on your setup.

    Most modern diesel heaters are designed and approved for use while the vehicle is moving. The same goes for some specific gas heating systems, but there’s a crucial component to look for.

    Gas systems need a special crash-sensor regulator (like the Truma MonoControl CS) to be used on the move. This brilliant device automatically cuts the gas supply if it detects an impact. If your gas system doesn’t have a crash sensor, it must be switched off before you set off. Always, always check your heater’s manual to be certain.

    How Often Does My Caravan Heater Need a Service?

    We can’t stress this enough: any fuel-burning heater—whether it’s gas or diesel—should be professionally serviced at least once a year. Think of it less as a recommendation and more as a vital safety check.

    An annual service makes sure the system is running efficiently and, most importantly, safely. A qualified engineer will clean out the burner, inspect every inch for fuel or gas leaks, test all the safety shut-offs, and make sure the flue is clear of any blockages. It’s often a requirement for keeping your warranty valid and gives you that all-important peace of mind on the road.

    Our Services

    For expert advice on choosing, installing, or servicing your caravan heating system, trust the professionals. Marine Heating Solutions offers a wide range of appliances and certified engineering services to keep you warm and safe on every journey.


    For quotes and bookings, call or email us here.


  • Diesel Heater for Caravans: The Complete Guide

    Diesel Heater for Caravans: The Complete Guide

    If you’re serious about unlocking year-round travel in your caravan, a high-quality diesel heater is probably the single best upgrade you can make. It delivers a consistent, dry warmth without ever needing an electric hook-up, giving you true off-grid freedom that goes way beyond the limits of campsite electricity or the faff of swapping gas bottles.


    For quotes and bookings, call or email us here.


    Why a Diesel Heater Is a Caravan Game Changer

    A Diesel Heater for Caravans Providing Off Grid Warmth

    Picture this: you’ve just pulled up to a remote, scenic spot on a crisp autumn evening. As the temperature outside starts to bite, you flick a switch and your caravan fills with a cosy, dry heat. That’s the freedom a professionally installed diesel heating system gives you. It’s more than a luxury; it’s your ticket to comfortable, four-season adventures.

    Many caravanners know the struggle of staying warm all too well. Relying on campsite electrical hook-ups dictates where you can go, and gas heating means constantly checking levels and wrestling with heavy bottles. A diesel heater for caravans offers a powerful, efficient, and self-sufficient alternative that completely transforms the way you travel.

    Unlocking True Off-Grid Potential

    The real magic of a diesel heater is its ability to work absolutely anywhere, anytime. By tapping into your vehicle’s main fuel tank or a dedicated supply, you carry your heat source with you. This opens up a world of possibilities far beyond the manicured lawns of traditional campsites.

    This self-sufficiency is built on a few key benefits that make these systems a top choice for serious adventurers:

    • Fuel Efficiency: Modern heaters are incredibly frugal, sipping only a tiny amount of diesel to produce a serious amount of warmth. This makes them a really cost-effective way to heat your van for long-term travel.
    • Powerful, Dry Heat: Unlike some heating methods that can add moisture to the air, diesel heaters produce a very dry heat. This is brilliant for combating damp and condensation, which helps protect your caravan’s interior.
    • Off-Grid Freedom: You’re no longer tethered to mains electricity. This means you can be more spontaneous, staying in wilder, more secluded locations, even in the depths of winter.

    By investing in a reliable heating solution, you transform your caravan from a seasonal vehicle into a year-round home on wheels, ready for any adventure, regardless of the weather.

    Ultimately, fitting a high-quality diesel heater is an investment in your comfort, freedom, and the pure enjoyment of your caravan. It empowers you to explore further and for longer, ensuring every trip is a warm and memorable one.

    How a Caravan Diesel Heater Actually Works

    At its core, a diesel heater is a brilliantly simple bit of kit. Let’s pull back the curtain on how it creates all that cosy warmth. Forget thinking of it as a complex furnace; it’s more like a tiny, super-controlled jet engine built for one thing only: making heat safely and efficiently. The whole operation hinges on a single, crucial principle – the air used for burning is kept completely separate from the warm air you breathe.

    It all kicks off when the heater’s tiny fuel pump sips a measured dose of diesel from its tank. This fuel gets atomised—blasted into a fine mist—and mixed with fresh air drawn from outside your caravan. A glow pin then ignites this mix inside a totally sealed metal box, which we call the combustion chamber or heat exchanger.

    The Two-Circuit System

    This is where the really clever, safety-first design comes into play. The combustion process obviously creates exhaust fumes, but because it’s happening inside a sealed chamber, those fumes have only one place to go: out. A dedicated exhaust pipe vents everything directly and safely outside your caravan, far from any windows or vents. The air used for combustion and the resulting exhaust never, ever get inside your living space.

    Meanwhile, a separate, quiet fan is working on a completely different air circuit.

    • First, it draws cool air from inside your caravan.
    • It then blows this air across the hot outer fins of the heat exchanger.
    • As it passes over the hot metal, the air heats up almost instantly.
    • Finally, the fan pushes this lovely warm, dry air back into your living area through the ducting.

    You see, this two-circuit system is the secret to how a diesel heater works. One circuit handles the combustion (fuel + outside air = exhaust), while the other handles the heating (cabin air + hot surface = warm cabin air). The two never meet, guaranteeing you only get clean, safe warmth.

    Smart, Efficient Heat Production

    The whole process is managed by an electronic control unit (ECU) – the heater’s brain. The ECU keeps an eye on the temperature, tweaking the fuel pump and fan speed to hold your caravan at whatever temperature you’ve set. To get going, the glow pin needs a short burst of power from your leisure battery to light the fuel. But once it’s running, the power draw drops right down, often to just 1-2 amps per hour, which is fantastic for off-grid adventures.

    Good quality systems are built to be dependable in any weather. Take the renowned efficiency of a Webasto Air Top 2000 diesel heater, for example. It’s a perfect showcase of these principles in action, delivering consistent heat whether you’re parked up in the Scottish Highlands or on a windy coastal campsite. The technology is designed to be incredibly frugal, giving you hours of warmth from a surprisingly small amount of diesel.

    This simple but ingenious process is what makes a diesel heater for caravans such a solid, reliable choice. It turns diesel fuel into a steady stream of clean, dry heat, letting you enjoy your travels in total comfort, no matter how chilly it gets outside. It’s a self-contained system that brings the comfort of central heating to the freedom of the open road.

    The Real Perks of Upgrading to a Diesel Heater

    Fitting a proper diesel heater for your caravan is more than just a way to keep warm—it’s a genuine game-changer for your entire touring lifestyle. The benefits go far beyond simple comfort, giving you more freedom, lower running costs, and a much healthier living space inside your van. It’s no surprise that so many seasoned caravanners are making the switch; these heaters directly solve the most common headaches of life on the road.

    This diagram shows you exactly how a diesel heater works its magic, turning fuel into safe, dry warmth for your caravan.

    Diesel Heater for Caravans Infographic

    The crucial thing to notice here is that the combustion process and the clean air you breathe are kept completely separate. This design is the key to their safety and efficiency.

    Incredible Fuel Efficiency

    One of the first things you’ll appreciate is just how little fuel these heaters actually use. A quality diesel heater just sips diesel, giving you hours of steady warmth from a tiny amount of fuel. This makes them massively more cost-effective for long trips or full-time touring, especially when you compare it to paying for expensive campsite hook-ups or constantly lugging heavy LPG bottles around.

    These consumption rates have a direct impact on your travel budget, a huge factor for UK tourers. Most diesel heaters for caravans fall between 2.0 kW to 5.0 kW in power. On a low setting, a 2.0 kW unit can use as little as 0.12 to 0.24 litres of diesel per hour. Even the more powerful 5.0 kW models only use between 0.18 and 0.55 litres, depending on how hard it’s working. You can dig deeper into these figures by checking out some of the detailed campervan diesel heater guides available online.

    Superior Dry Heat Quality

    Every caravan owner knows that damp and condensation are the enemy. They lead to musty smells, potential mould, and can even damage your interior. Well, a diesel heater is your best defence in this battle. Unlike other heating methods that can actually add moisture to the air, a diesel heater pumps out an intensely dry heat.

    Because all the exhaust fumes—which contain water vapour from the combustion process—are vented straight outside, the warm air circulating inside your caravan actively dries everything out. This means waking up to clear windows, having drier bedding, and enjoying a healthier, more comfortable living space, particularly during a damp British autumn and winter.

    By actively fighting condensation, a diesel heater does more than just keep you warm; it helps protect your investment and keeps your caravan’s interior in great shape for years.

    True Off-Grid Freedom

    This is where a diesel heater really shines. With one of these installed, you’re no longer tied to campsites with electric hook-ups. Your heating becomes completely self-sufficient, drawing a tiny bit of power from your leisure battery and fuel from your vehicle’s tank or its own dedicated one.

    Suddenly, a whole world of wild camping opens up. You can explore those remote spots you’ve always dreamed of and enjoy the true freedom of the road without ever giving a second thought to where your next source of warmth is coming from. It turns your caravan into a proper all-season, go-anywhere adventure machine.

    Robust and Reliable Safety Features

    Modern, high-quality diesel heaters are built with safety as the number one priority. These aren’t just simple burners; they are sophisticated bits of kit with multiple layers of protection built right in, giving you total peace of mind.

    These safety systems typically include:

    • Sealed Combustion Chamber: As shown in the diagram, the entire burning process is sealed off from your living space. All exhaust fumes are piped safely outside.
    • Automatic Shutdown Sensors: The heater is constantly monitoring itself. If it detects an overheating issue or any other fault, it will automatically and safely shut down.
    • Controlled Fuel Delivery: The fuel pump is incredibly precise, delivering the exact amount of diesel needed for clean, efficient combustion without any risk of over-fuelling.

    When it’s installed by a professional, a diesel heater for caravans is one of the safest and most dependable ways to heat your home on wheels. This blend of efficiency, off-grid capability, and solid safety makes it an upgrade that pays for itself in comfort, savings, and freedom.

    Choosing the Right Diesel Heater for Your Caravan

    Picking out the perfect diesel heater for your caravan can feel a bit overwhelming, but it really doesn’t need to be. The decision boils down to just three things: the size of your caravan, how good its insulation is, and what sort of trips you have planned. Get this right, and you’re set for consistent, efficient warmth without burning through fuel.

    Let’s walk through what you need to know to choose a system that’ll keep you toasty for years to come. One of the biggest mistakes people make is thinking that a bigger, more powerful heater is automatically the best choice. In reality, that can cause more problems than it solves.

    A heater that’s too powerful for the space will constantly be switching on and off. This is called ‘short cycling’, and it’s not just inefficient—gobbling up more fuel and battery power—it also stops the unit from ever reaching its ideal running temperature. When that happens, you get a build-up of carbon inside the combustion chamber, which kills performance and can lead to the heater failing prematurely.

    Matching Heater Power to Your Space

    The real aim is to find a heater with a power output—measured in kilowatts (kW)—that’s a perfect match for your caravan’s volume. A correctly sized heater will run for longer stretches at a lower, steadier output. This is far more efficient and is vital for keeping all the internal parts clean and running smoothly.

    To get this right, you need to think about a few variables:

    • Caravan Size: This is the most obvious starting point. A small campervan needs a much less powerful heater than a huge static caravan.
    • Insulation Quality: How well does your caravan hold onto heat? A modern, well-insulated van will stay warm with a smaller heater. An older van with single-glazed windows and drafty corners will need a bit more oomph.
    • Your Usage: Be honest about when and where you travel. If you’re a hardened winter tourer heading for the Scottish Highlands in January, your heating needs are going to be very different from someone who mostly sticks to summer holidays down south.

    Choosing the right size isn’t about getting the most powerful heater you can find; it’s about finding the most efficient one for your specific needs. This balanced approach guarantees comfort, longevity, and lower running costs.

    To help you get a clearer idea, here’s a simple guide to matching heater power with your caravan size and how you plan to use it.

    Diesel Heater Power Guide for Caravans

    Heater Power (kW)Recommended Caravan Length (up to)Ideal For
    2 kW6 metres (20 ft)Small to medium caravans, campervans, and mainly 3-season touring.
    4 kW / 5 kW8 metres (26 ft)Larger caravans, motorhomes, and anyone planning all-year-round or winter use.

    Remember, this is a starting point. If your caravan is older or has poor insulation, you might need to size up slightly to stay comfortable.

    The Importance of Investing in Quality

    When it comes to something as crucial as your heating, quality and reliability are things you just can’t compromise on. Investing in a high-quality diesel heater for caravans from a trusted name gives you more than just a box of parts. It gives you:

    • Proven Reliability: These units are built to take a beating, using tough materials designed for the vibrations and challenges of life on the road.
    • Technical Support: If you ever hit a snag or just have a question, there are experts you can actually talk to.
    • Readily Available Spares: Should a part ever need replacing down the line, genuine spares are easy to find, meaning your heater can be kept running for years.
    • Peace of Mind: Knowing your heater is a properly engineered, certified product with multiple safety systems lets you kick back and actually enjoy your holiday.

    The UK market has some fantastic models designed for all sorts of vehicles. You can find compact 2 kW units perfect for smaller caravans, all the way up to powerful 5 kW systems for bigger motorhomes or even static caravans. There really is a perfect fit for everyone.

    At Marine Heating Solutions, we’ve hand-picked a selection of heaters from world-class manufacturers like Webasto and Autoterm—brands that are known for quality and performance. By sticking to these proven solutions, we make sure our customers get a heating system that’s safe, efficient, and ready for any adventure. If you’re looking for more specific advice, our guide on choosing a diesel heater for your campervan has tons of detailed info that’s just as useful for caravan owners.

    Safe Installation for Peak Performance

    Getting a diesel heater fitted properly is a job where you absolutely can’t cut corners. While the units themselves are fantastically reliable, their safety and performance come down entirely to the quality of the installation.

    This isn’t a task for a casual weekend DIYer. It’s a meticulous process that a certified technician should handle. Why? To ensure your system is safe, efficient, and keeps your warranty intact.

    Still, it’s incredibly useful for you to understand what a good installation looks like. It means you can ask the right questions, check the work, and have total peace of mind. Think of a professional fit-out as a symphony of carefully placed parts, each one playing a crucial role.

    Key Elements of a Professional Installation

    A safe and effective installation all comes down to the strategic placement and routing of a few key components. Each part needs to be handled with care to head off any potential hazards and make sure the heater runs like a dream.

    Here’s what a pro will focus on:

    • Heater Unit Placement: The heater itself has to be mounted securely in a dry, protected spot, often under a bunk or inside a storage locker. It needs plenty of clearance for airflow and must be fixed to a solid, purpose-made bracket to keep vibration to a minimum.
    • Fuel Line Routing: The fuel line must be run well away from any hot exhaust parts or sharp edges that could cause a chafe. A professional will use protective sheathing and ensure every connection is perfectly sealed to prevent any chance of a leak.
    • Air Intake and Exhaust Pipes: These two are the most critical for safety. The air intake needs to pull fresh air from outside, well away from the exhaust. The exhaust pipe has to be carefully routed to vent fumes safely away from your living space.

    The Critical Importance of the Exhaust System

    If there’s one part of the installation you need to be obsessed with, it’s the exhaust. This is the single most important safety feature of your diesel heater. All the combustion fumes, including carbon monoxide, are channelled out through this pipe. A tiny leak could have serious consequences, which is exactly why getting a professional in is non-negotiable.

    A correctly installed exhaust must be a single, continuous pipe from the heater right to the outside. There should be no joins or breaks anywhere along its length. It must also be wrapped (lagged) with high-temperature insulation where it passes through any part of the caravan’s structure to eliminate any fire risk.

    On top of that, the exhaust outlet on the outside of your caravan has to be positioned intelligently. A good technician will make sure it’s located far from any opening windows, rooflights, or air vents. This prevents any possibility of fumes being drawn back inside. This level of detail is what separates a safe, professional job from a risky amateur one.

    It can be tempting to save a few quid, but the safety of you and your family is priceless. For anyone looking at their options, understanding the parts included in a high-quality campervan diesel night heater kit gives you a great idea of what a safe and reliable system should look like. Investing in a professional installation ensures your diesel heater for caravans will give you years of safe, reliable, and toasty warmth, letting you relax and enjoy your adventures.

    Keeping Your Diesel Heater in Top Condition

    One of the best things about modern diesel heaters is just how little day-to-day maintenance they need. Unlike more fiddly systems, a good quality unit is built to run reliably for thousands of hours with very little fuss from you. That said, a few simple habits will make sure your heater keeps running perfectly for years.

    Taking a proactive approach doesn’t just squeeze more life out of your heater; it ensures you’ve got dependable warmth right when you need it. After all, nobody thinks about their heating until the moment it gets cold, which is a pattern we see every single year.

    You only have to look at Google Trends data to see it. UK searches for ‘diesel air heater’ shot up from an index value of 19 in August 2024 to a massive 94 by November 2024. That’s a nearly fivefold jump, showing just how vital these heaters become the moment winter bites.

    The Essential De-Coking Cycle

    If you only do one thing to look after your heater, make it this. The single most important habit is to run it on its highest heat setting for 30 minutes at least once a month. Yes, even in the middle of summer.

    This is what’s known as a ‘de-coking’ cycle. By running the heater at full blast, you get the combustion chamber incredibly hot. This heat effectively burns off any carbon deposits or soot that has built up from running the heater at lower temperatures.

    Think of it like giving your car a good blast down the motorway after it’s only done short trips around town for weeks. It’s a simple action that keeps all the internal parts clean, guarantees you’re getting maximum heat output, and prevents the most common cause of performance problems.

    Simple Seasonal Checks

    Beyond the monthly de-coking run, it’s a great idea to give the system a quick once-over at the start and end of your main touring season. These checks are dead simple and only take a few minutes, but they can stop a small issue from turning into a real headache down the line.

    Here’s a quick checklist to run through:

    • Inspect Air Intake and Exhaust: Have a look at both pipes and make sure they are completely clear of obstructions. They’re a favourite spot for spiders and insects to build nests, and any blockage can seriously impact performance and, more importantly, safety.
    • Check Fuel Lines: Follow the fuel line with your eyes all the way from the tank to the heater. You’re looking for any signs of cracking, rubbing, or leaks. Make sure all the connections feel snug.
    • Test Electrical Connections: Give the electrical plugs a gentle wiggle to make sure they are securely connected. A loose connection can cause all sorts of intermittent faults that are a pain to track down.

    While these steps will cover your routine care, it’s also worth thinking about a professional service every now and again. Getting an expert to look over the system, much like the process for servicing diesel-burning appliances, can spot potential issues you might miss. This simple maintenance schedule for your diesel heater for caravans will keep it in prime condition, ready for whatever adventure comes next.

    Your Diesel Heater Questions Answered

    Thinking about a big upgrade like a diesel heater naturally brings up a few questions. To help you feel confident in your decision, we’ve pulled together the most common queries we get from fellow caravanners and given them some clear, straight-to-the-point answers.

    Are Diesel Heaters Noisy Inside a Caravan?

    This is a top concern for many, and rightly so. But you can relax – good quality diesel heaters are designed to be surprisingly quiet. The main sounds you’ll hear are the gentle, rhythmic ticking of the fuel pump and the low hum of the circulation fan.

    To make things even quieter, a professional installation is the real secret. A skilled technician will fit a dedicated silencer for the fuel pump and mount everything on vibration-dampening brackets. This makes sure your caravan stays the peaceful retreat it’s meant to be, free from any annoying rattles or drones.

    Can I Run the Heater While Driving?

    Absolutely. One of the best things about a professionally installed diesel heater is that you can safely have it running while you’re on the move.

    This feature is a complete game-changer for winter trips. Just imagine setting off on a frosty morning and arriving at your destination to a caravan that’s already perfectly warm and toasty. It’s a level of comfort that makes chilly adventures far more enjoyable from the moment you pull up.

    How Much Battery Power Does a Diesel Heater Use?

    Power draw is surprisingly low, which is exactly what you want for any off-grid adventures. The system only needs a short burst of power to get going – typically around 8-10 amps for a couple of minutes while the glow pin heats up.

    Once the heater is running steadily, the power consumption drops right down to just 1-2 amps. This tiny amount is only needed to keep the fuel pump and fan ticking over, meaning you can run it for hours without making a serious dent in your leisure battery.

    A key takeaway is that diesel heaters are incredibly efficient, not just with fuel, but with your precious battery power. This makes them a sustainable choice for long-term, off-grid touring.

    Do Diesel Heaters Cause Condensation?

    No, quite the opposite! They are actually one of the very best ways to reduce condensation inside your van. The familiar problem of damp in a caravan is often made worse by heating methods that release moisture into the air as they work.

    A diesel heater, however, produces an intensely dry heat. All the exhaust gases, which contain water vapour as a by-product of combustion, are completely sealed off from your living space and vented straight outside. This process actively dries the air inside your caravan, which helps stop damp from forming and keeps your windows clear.

    Our Diesel Heater Services

    For expert advice on choosing and installing the perfect heating solution for your caravan or campervan, look no further than Marine Heating Solutions. Our certified technicians ensure every installation is safe, efficient, and ready for your next adventure. Explore our range of world-class diesel heaters and services at https://marinestaging.wp59.qa.internal.searchatlas.com/boat-appliances/.


    For quotes and bookings, call or email us here.


  • Your Campervan Diesel Night Heater Installation Guide

    Your Campervan Diesel Night Heater Installation Guide

    A campervan diesel night heater is an absolute must-have if you want to extend your travel season beyond the summer months. It provides a steady, dry heat by sipping diesel directly from your van’s main fuel tank. This simple integration makes it a game-changing upgrade for anyone serious about year-round van life, especially with our notoriously unpredictable UK weather.


    For quotes and bookings, call or email us here.


    Why a Diesel Heater is a Game Changer for Van Life

    This is about so much more than just staying warm. Installing a diesel heater unlocks a new level of freedom and comfort on the road. It transforms your campervan from a seasonal escape pod into a genuine four-season adventure-ready home. It’s not just about heat; it’s about making van life practical, sustainable, and enjoyable no matter what the forecast says.

    The Ultimate Convenience: Fuel on Tap

    One of the biggest wins is tapping directly into your van’s main fuel tank. Picture this: you’re parked up deep in the Scottish Highlands on a freezing evening when you realise your separate LPG bottle for heating is about to run out. The nearest supplier is miles away and probably closed. Stressful, right?

    A diesel heater gets rid of that worry completely. As long as you’ve got fuel in the tank to drive, you’ve got fuel to stay warm. The sheer convenience is a huge reason these heaters have become so popular. Diesel is available at every fuel station, unlike LPG which can be a real pain to track down. A typical 2kW heater only sips around 0.3 litres of diesel per hour, giving you efficient warmth without the constant anxiety of finding a refill.

    Combatting the Dreaded UK Damp with a Campervan Diesel Night Heater

    Anyone who has spent a winter in a campervan knows the constant battle against condensation. Every breath you take, every brew you make, adds moisture to the air. This then clings to cold surfaces like windows and metalwork, quickly leading to damp, mould, and a generally miserable living space.

    A campervan diesel night heater is your secret weapon here. It produces a very dry heat because the whole combustion process is self-contained and vented outside. This means zero extra moisture is pumped into your living area. In fact, it actively dries the air, protecting your van’s interior and your health.

    Cost-Effective Warmth for Long Trips

    While the initial purchase and fitting is an investment, the running costs of a campervan diesel night heater are surprisingly low. When you compare it to the recurring expense and faff of swapping out gas bottles, using a tiny amount of diesel from your main tank is far more economical for long-term travel.

    Of course, comfort from the cold is one thing, but peace of mind is another. To make your van life experience truly worry-free, it’s wise to think about overall security. Protecting your investment is key, so consider looking into the best car security systems as well. Pairing a reliable heater with solid security means you can properly relax and embrace the adventure.

    Choosing the Right Diesel Heater for Your Van

    Picking the perfect diesel night heater for your campervan can feel like a big decision, but it really just boils down to a few key questions about your specific needs and setup. The first, and arguably most important, thing to get right is the size.

    Get this wrong, and you’re either burning through diesel with a unit that’s far too powerful or, worse, shivering through a cold night because your heater just can’t keep up.

    How Much Power Do You Need?

    Diesel heater power is measured in kilowatts (kW). For most small to medium-sized vans – think Ford Transits or the ever-popular VW Transporter – a 2kW model is usually the perfect fit. They are incredibly efficient on both fuel and electricity, providing more than enough warmth for a well-insulated space without making a racket or draining your batteries.

    If you’re working with a much larger van, like a long-wheelbase Sprinter or a high-roof Ducato, you’ll probably want to step up to a 5kW unit. This is especially true if you plan on chasing snow and spending lots of time in properly cold places, like the Scottish Highlands in the dead of winter. A 5kW heater has the extra grunt to get a larger volume of air up to a comfortable temperature much more quickly.

    This infographic breaks down the main things you’ll need to think about.

    Campervan Diesel Night Heater

    As you can see, it’s all about matching the heater’s power to your van’s size, weighing up the pros and cons of different models, and double-checking that the installation kit has everything you need for a safe, reliable fit.

    Premium Brands vs Budget Heaters

    Your next big choice is whether to splash out on a premium brand or go for one of the much cheaper, budget-friendly models, often known as “Chinese diesel heaters”. There are some pretty significant differences to weigh up here.

    Established brands like Webasto and Eberspächer have built a solid reputation over decades for being incredibly reliable, whisper-quiet, and just really well-made. They’re put through rigorous testing and come with proper warranties and a network of dealers for support. Of course, that peace of mind comes with a hefty price tag, often costing nearly ten times as much as the budget options. You can get a feel for what’s on offer by checking out proven models like the Webasto Air Top 2000.

    On the flip side, the budget heaters you see all over the internet have made a warm van accessible to thousands of people who couldn’t justify the premium cost. They are unbelievably cheap and, for the most part, surprisingly effective. The trade-off? You get virtually no official customer support, and the quality of some components in the fitting kit can be a bit hit-or-miss.

    Diesel Heater Comparison: Budget vs Premium

    FeatureBudget Heaters (e.g., Chinese Models)Premium Heaters (e.g., Webasto/Eberspacher)
    Price£100 – £200£1,000 – £2,000+
    ReliabilityVariable; some run for years, others fail early.Excellent, proven track record.
    Noise LevelGenerally louder, especially the fuel pump tick.Very quiet, engineered for minimal noise.
    Build QualityBasic materials, inconsistent quality control.High-quality components, robust construction.
    Warranty & SupportLimited to non-existent.Comprehensive manufacturer warranty and dealer support.
    Kit ComponentsOften requires upgrades (fuel line, clamps, etc.).High-quality, reliable components included.
    High Altitude Perf.May require manual adjustment.Often includes automatic altitude compensation.

    Ultimately, the choice often comes down to your budget and how hands-on you’re willing to be. If you don’t mind a bit of tinkering and are happy to troubleshoot and maybe upgrade a few parts yourself, a budget heater is fantastic value for money. But if you need something that’s guaranteed to work flawlessly straight out of the box and has professional backup, a premium brand is the smarter long-term investment.

    What to Look for in an Installation Kit

    No matter which heater you end up with, the quality of the fitting kit is absolutely vital for a safe and long-lasting installation. It’s well worth paying close attention to these bits, as spending a few quid on upgrades now can save you a world of pain later.

    • Fuel Line: The hard plastic fuel line that comes with many budget kits is notoriously stiff and can become brittle over time. Swapping it for a higher-quality, more flexible fuel line is a cheap and easy upgrade that I’d highly recommend.
    • Exhaust Pipe: Check that the exhaust is made from proper stainless steel and is long enough for you to route it safely out from under your van, well away from any opening windows, doors, or vents.
    • Fuel Pump Mount: That constant ticking from the fuel pump is the noise that drives most people mad. A decent kit should include a rubber isolation mount that stops the pump from vibrating directly against your van’s chassis, which makes a huge difference.

    Installing Your Heater for Safety and Reliability

    Campervan Diesel Night Heater Infographic

    Right, this is where we get our hands dirty. Honestly, a safe and secure installation is the single most important factor for a reliable campervan diesel heater. I’ve seen too many people rush this bit or cut corners, and it’s just a recipe for problems down the road. Let’s walk through the critical steps I’ve learned from years of fitting these things, so you can get it right the first time.

    This isn’t just about making the heater work; it’s about being confident that your setup is safe, quiet, and dependable for years of chilly nights. From picking the perfect spot to sealing that exhaust, every little detail matters.

    Choosing the Perfect Mounting Location

    The first big decision you’ll make is where to mount the heater unit. You’re balancing a few different factors here, so it’s well worth taking the time to get under your van and properly visualise the possibilities.

    Your main goal is to find a flat, secure patch on the underside of your van’s floor. You need to find a spot that’s clear of chassis members—they’re a nightmare to drill through—and well away from any existing brake lines, fuel pipes, or wiring looms.

    Keep these key points in mind when you’re scouting for a location:

    • Airflow: The heater needs to pull in cool air from inside your van and push hot air back out. Make sure the spot you choose inside the van is clear of obstructions so you can get good circulation.
    • Noise: Remember that ticking fuel pump? If you mount it directly to a main chassis rail, the sound will echo through the whole van. It’s much better to find a spot on a smaller bracket or subframe where you can use a rubber isolating mount to absorb the vibrations.
    • Safety Clearances: The exhaust pipe gets incredibly hot. Your chosen location must allow you to route the exhaust with plenty of clearance from any plastic bits, underseal, and especially the vehicle’s tyres.

    Fuel, Fumes, and Fire Safety

    Once you’ve got your location sorted, the next job is to tackle the three most critical connections: the fuel supply, the exhaust outlet, and the combustion air intake. Getting these right is absolutely non-negotiable for safety.

    Tapping your fuel line is often the bit that makes people nervous. Most kits come with a standpipe that you install directly into your main diesel tank. This means dropping the tank, drilling a hole, and fitting the pipe with a completely secure, fuel-tight seal. You’ll need to cut the pipe so it sits a couple of inches from the bottom of the tank – this is a clever feature that stops the heater from ever running your van completely dry.

    The exhaust is, without a doubt, the most critical safety element. It must be routed well away from any doors, vents, or opening windows. The last thing you want is for fumes to find their way back into your living space.

    Your exhaust system must be 100% gas-tight. I can’t stress this enough. Double-check every single connection and use a dab of high-temperature exhaust paste on the joints. A carbon monoxide leak is silent and deadly, so please, install a quality CO detector inside your van as well.

    For a really detailed look at routing and sealing, our comprehensive guide on diesel heater installation has some extra tips and diagrams that can be a massive help at this stage.

    Getting the Electrics Right

    Finally, it’s time to give it some power. A campervan diesel heater should always be wired to your leisure battery, never your starter battery. This is crucial—it ensures you can stay warm all night without waking up to a van that won’t start.

    The wiring loom that comes with most kits is pretty straightforward. You’ll have a positive and negative wire for the battery, a plug for the controller, another for the fuel pump, and one for the main heater unit itself.

    It is vital to include an inline fuse on the positive wire, placed as close to the battery terminal as possible. This is your main protection against short circuits. Take a moment to make sure all your connections are solid; use properly crimped connectors and finish them with heat shrink to protect against moisture and vibration under the van. A bit of extra care here will save you from chasing frustrating electrical gremlins later on.

    Mastering Your Heater’s Controls and Functions

    Getting your campervan diesel night heater fitted is a brilliant milestone. But knowing how to actually run it properly is what really makes the difference on a chilly night. It’s about more than just flipping a switch; operating your heater correctly will save you diesel, cut down on wear and tear, and give you consistent, reliable warmth trip after trip.

    The first thing to get your head around is that a diesel heater has its own rhythm. It’s not an instant-on, instant-off appliance. It has very specific start-up and shut-down sequences that you need to respect to keep it running smoothly for years to come.

    The Correct Start-Up and Shut-Down Cycle

    When you first fire your Campervan Diesel Night Heater up, the glow plug has to get seriously hot to ignite the fuel. This initial phase is quite power-hungry, pulling a peak of around 8-10 amps from your leisure battery. Once the fuel catches and a flame is established, things settle right down, and the power draw drops to a mere 1-2 amps to run the fan and fuel pump.

    The shut-down cycle, though, is even more important. After you turn the heater off, the fuel pump cuts out, but the fan keeps spinning for a few minutes. This is the cool-down phase, and its job is to purge any unburnt fuel and cool the combustion chamber.

    You must never, ever kill the power to the heater at the main switch while it’s running or in its cool-down phase. Doing so bypasses this vital process, leaving fuel residue and soot to build up inside. Honestly, it’s the quickest way to clog your heater, leading to smoky start-ups and eventually, complete failure.

    Interpreting Your Controller

    Your controller is the command centre for the whole operation, whether it’s a simple rotary dial or a fancy digital display. The basic dials usually just control the fan speed, which gives you an indirect handle on the heat output.

    Digital controllers are a different beast altogether, offering far more precise control. You can typically set a specific target temperature, and the heater will cleverly modulate its power up and down to maintain it. This is a game-changer for saving diesel overnight. For those with a premium setup, a controller like the Webasto MultiControl takes it even further with programmable timers and advanced diagnostics.

    Priming the Fuel Line

    The first time you run your Campervan Diesel Night Heater, or after you’ve done any work on the fuel system, you’ll need to prime the line. This is just the process of getting the fuel pump to push diesel all the way from the tank to the heater unit. Most controllers have a specific priming function for this—you might need to press a combination of buttons. You’ll hear the distinctive ticking of the pump as it works its magic.

    A Key Maintenance Habit

    Here’s one of the best habits you can get into. Every week or two, run your campervan diesel night heater on its absolute highest setting for a good 20-30 minutes. This high-temperature blast acts like a self-cleaning cycle, burning off any sooty carbon deposits that have built up from running on low power for long periods. It’s a simple, proactive bit of maintenance that can save you a world of trouble down the line.

    Simple Maintenance and Troubleshooting on the Road

    Campervan Diesel Night Heater Maintenance and Troubleshooting on the Road

    The secret to a happy and reliable campervan diesel heater? A little proactive upkeep. Honestly, most of the issues I come across are completely preventable with just a few simple checks. Taking ten minutes to look over your system before a big trip can be the difference between a cosy night’s sleep and a cold, frustrating breakdown.

    Think of it like the routine checks you do on your van’s engine; a quick glance at the fluids and connections saves a world of trouble later on. Your heater is no different.

    Building a Simple Maintenance Routine

    You don’t need to be a master mechanic to keep your heater in top nick. A simple, regular schedule of checks will catch most problems before they even start. I try to run through this quick list about once a month, especially during the colder seasons.

    • Inspect the Exhaust: Get underneath your van and give the exhaust pipe a good look. Check that it’s still securely mounted, has no holes or cracks, and that the outlet is clear of mud, dust, or any other road grime.
    • Check the Fuel Filter: Most heaters have a small inline fuel filter. Just take a peek to make sure it’s clean and that fuel is flowing freely. If it looks clogged or full of sediment, it’s a very cheap and easy part to replace.
    • Listen to the Fan: When the heater starts up, have a listen for any unusual scraping or rattling sounds from the fan. A smooth, consistent whir is what you’re after.

    This kind of proactive approach doesn’t just extend the life of your unit; it also makes it more fuel-efficient. The big push towards diesel heaters in the UK campervan scene is partly driven by their ability to reduce reliance on gas bottles. Solutions from top providers like Webasto free up valuable space and weight by tapping into the main vehicle fuel tank, which also helps minimise gas consumption. You can learn more about these efficient heating solutions on Webasto’s website.

    Spotting Carbon Build-Up Early

    Carbon build-up is the number one enemy of a diesel heater. It happens when the heater consistently runs on a low setting, never getting hot enough to properly burn off all the soot. The first sign is usually a puff of white or grey smoke on start-up that takes longer than usual to clear.

    If you notice your heater struggling to ignite, producing excessive smoke, or cutting out unexpectedly, carbon could well be the culprit. Don’t ignore these early warnings—they are your heater’s way of asking for a little help.

    The best cure is prevention. As we touched on earlier, get into the habit of running your heater on full power for 20-30 minutes at least once a week. This “Italian tune-up” gets the combustion chamber hot enough to burn off the deposits, effectively cleaning itself from the inside out.

    On-the-Road Troubleshooting

    Even with perfect maintenance, things can sometimes go wrong. When your digital controller flashes an error code, don’t panic. It’s usually pointing you towards a simple fix and is your first clue in diagnosing the issue.

    A lot of van owners get worried when they see an error code, but they’re actually really helpful. I’ve created a quick table below to help you decode some of the most common ones you’re likely to see.

    Common Diesel Heater Error Codes and Fixes

    Error CodeCommon CauseWhat to Check First
    E-01 / E-10Low voltageCheck your leisure battery charge. Is it above 12.2V? Inspect battery terminal connections for tightness and corrosion.
    E-02Over-voltageUsually an issue with your charging system (alternator, solar controller). Check the voltage when the engine is running.
    E-03Glow plug faultOften just carbon build-up on the plug. It might also be a loose wire or, eventually, a failed plug needing replacement.
    E-04 / E-05Fuel pump faultIs the pump “ticking”? Check for a blocked inline fuel filter, air in the fuel line, or a loose electrical connection to the pump.
    E-06Fan motor faultListen for scraping noises. Check that the fan spins freely and that nothing is obstructing the air intake or outlet.
    E-07OverheatingMake sure your hot air ducting isn’t crushed or blocked. Check that both the air inlet and outlet vents are completely clear.
    E-08Failure to igniteOften caused by carbon build-up, a dirty glow plug, or a fuel supply issue (see E-04).

    For example, a “Glow Plug Failure” code (like E-03) might sound serious, but nine times out of ten it just means the plug is coked up with carbon and needs a clean. Similarly, a “Fuel Pump Failure” error (E-04) is frequently caused by a simple blocked filter or a loose wire, not a dead pump. Knowing what these codes mean empowers you to solve minor issues yourself and keep your adventure on track.

    Your Diesel Heater Questions Answered

    We’ve walked through the why, what, and how of fitting and running a campervan diesel heater. But there are always a few lingering questions that pop up. Let’s tackle some of the most common ones so you can fire up your heater with complete confidence on your next trip out.

    Is It Safe to Run a Diesel Heater All Night?

    Yes, absolutely. A properly installed diesel heater is designed to run safely all night long. The crucial bit here is ‘properly installed’.

    The whole combustion process is completely sealed off from your living space. The heater pulls air in from outside to burn, and then every last bit of exhaust is vented straight back outside again.

    To sleep soundly, you just need to be certain of three things:

    • The exhaust pipe is 100% gas-tight. No leaks, no compromises.
    • The exhaust outlet is smartly positioned well away from any windows, doors, or vents.
    • You have a working, reliable carbon monoxide detector inside your van. This is non-negotiable.

    With those boxes ticked, you can enjoy a warm and secure night’s sleep, no matter how cold it is outside.

    How Much Noise Does a Campervan Diesel Heater Make?

    You’ll notice two distinct sounds from a diesel heater: the gentle hum of the fan and the rhythmic tick of the fuel pump. The fan is just a low, consistent whirring, much like your van’s own cabin fan, and it quickly fades into the background.

    The fuel pump’s clicking can be more noticeable, but the trick is all in the mounting. Whatever you do, don’t bolt it directly to a main chassis rail, as that will amplify the sound right through your van. Always use the supplied rubber isolation bracket to mount it; this absorbs the vibration and makes it much, much quieter.

    While the premium brands are often engineered to be a bit quieter, even the budget models are perfectly fine to sleep with once you’re used to them. For most of us, the guarantee of consistent warmth far outweighs a bit of background noise.

    Do Diesel Heaters Cause Condensation?

    No, it’s actually the complete opposite. A campervan diesel heater produces a wonderfully dry heat, which is a massive bonus, especially for van life in the damp UK climate.

    Unlike some propane heaters, which can release water vapour as part of their combustion, the diesel heater’s entire process is external. This dry warmth actively helps to pull moisture out of the air inside your van, preventing condensation from forming on your windows and stopping that dreaded damp feeling from setting in.

    What Services Do You Offer For Campervan Diesel Night Heaters?

    For expert advice, installation, or servicing, we provide certified and reliable support for your Campervan Diesel Night Heater. Get in touch with our team to ensure your heating system is safe and ready for your next adventure.


    For quotes and bookings, call or email us here.


  • Your Webasto Air Top 2000 Campervan Heating Guide

    Your Webasto Air Top 2000 Campervan Heating Guide

    When you’re exploring the UK’s stunning and often chilly landscapes, a reliable campervan heater isn’t a luxury—it’s an absolute necessity. For thousands of van owners, the Webasto Air Top 2000 has become the go-to solution. Think of it as a compact and seriously efficient central heating system for your home on wheels, sipping fuel directly from your van’s diesel tank to deliver consistent, dry warmth. It’s a genuine game-changer for year-round adventures.


    For quotes and bookings, call or email us here.


    Why This Heater Is a UK Campervan Favourite

    Anyone who has tried to predict British weather knows you need a heating source you can count on. The Webasto Air Top 2000 STC consistently rises to the challenge. For campervan folks everywhere, from the Scottish Highlands down to the Cornish coast, this little unit represents freedom—the freedom to travel comfortably, whatever the season. It’s what turns a cold van into a warm, inviting home base after a long day of hiking or exploring.

    This popularity isn’t some happy accident. It’s built on a rock-solid reputation for robust German engineering, remarkably quiet operation, and a design that saves precious space. In any van conversion, every centimetre counts. The heater’s tiny footprint means it can be tucked away neatly under a seat or in a small cupboard, leaving you with more room to live.

    The Power of Compact Design

    Since it first hit the UK market, the Webasto Air Top 2000 STC has cemented its place as the top choice for an auxiliary diesel heater. A huge part of its appeal is its size—it’s one of the smallest air heaters out there—and a modest yet powerful heat output of 2 kW. Despite its small stature, it efficiently heats spaces up to 15–20 square metres, making it a favourite among UK van lifers who need every bit of space they can get.

    The real value of the Air Top 2000 isn’t just the warmth it produces, but the extended travel season it unlocks. It turns the ‘off-season’ into the ‘adventure season’ for countless UK campervan owners.

    Its key benefits are straightforward and compelling:

    • Direct Fuel Integration: It conveniently sips diesel directly from your main vehicle tank, so there’s no messing about with separate fuel canisters.
    • Low Power Consumption: The unit is designed to be incredibly efficient, drawing minimal power from your leisure battery—absolutely crucial for off-grid camping.
    • Dry Heat Production: Unlike some gas heaters that can create condensation issues, this diesel heater provides a dry warmth that helps keep moisture and dampness at bay inside the van.

    This blend of reliability, efficiency, and smart design makes the heater more than just a piece of kit. It’s an essential upgrade for comfortable, four-season van adventures. For those with an interest in the UK, especially when considering moving or extended stays, you might also find this guide on UK customs useful.

    How a Diesel Heater Actually Warms Your Van

    Let’s take a closer look at how a Webasto Air Top 2000 functions. Picture it as a compact jet engine, expertly crafted and secured to generate nothing but pure, dry heat for your van.

    At its core, the process is all about controlled combustion and efficient heat exchange. The real genius, though, is how the unit keeps the fiery part of the process completely sealed off from the air you’re breathing. Getting your head around this separation is the key to understanding why these heaters are so safe and reliable.

    The whole operation is a closed loop. It pulls in air and fuel from outside, does its magic, and then vents all the nasty stuff back outside. The only thing that ever makes it into your living space is pure, cosy warmth.

    The Journey of Combustion, Step by Step

    It all starts when you flick a switch or tap your controller. That simple action kicks off a precise, automated sequence designed for maximum safety and efficiency. Here’s a breakdown of what happens next.

    1. Fuel on Demand: You’ll hear a gentle, rhythmic ticking. That’s the dedicated metering fuel pump doing its job. This isn’t just any pump; it’s designed to sip, not guzzle, drawing a tiny, perfectly measured amount of diesel from your van’s main tank and sending it along to the heater.
    2. A Breath of Fresh Air: At the same time, a combustion fan inside the unit pulls in air. This air is only for burning the fuel – it never mixes with the air inside your camper.
    3. The Spark of Life: Inside a sealed combustion chamber, a glow pin then heats up to an incredibly high temperature, acting like a super-hot spark plug to ignite the fuel. This creates a tiny, stable, and very hot flame.

    The heater’s brain, its electronic control unit (ECU), watches this startup process. If a stable flame isn’t achieved quickly, it shuts the whole thing down and tries again. It’s a critical built-in safety feature.

    Getting the Heat Without the Fumes

    With a stable flame established, the real work begins. The hot gases from the tiny fire are funnelled through a heat exchanger. You can think of it as a radiator, but instead of heating water, it’s heating air.

    Then a separate, much larger fan pulls in cool air from inside your campervan and blows it over the outside fins of the hot heat exchanger.

    The heat exchanger is the most important part of the entire design. It’s the impenetrable wall that allows heat to transfer through its metal casing while physically stopping any toxic exhaust fumes from ever mixing with the clean air destined for your living area.

    The transfer is incredibly efficient. The metal fins soak up the intense heat from the flame and instantly pass it on to the clean cabin air flowing over them. This newly heated air is then pushed through ducting, emerging into your van as that lovely, dry warmth you’re after.

    Finally, the exhaust gases are channelled out of the heat exchanger and safely vented away through an exhaust pipe under the van. At no point do they ever enter your living space. This complete separation of the two air circuits is the fundamental safety principle that makes the Webasto Air Top 2000 such a trusted piece of kit for campervans everywhere.

    Choosing the Right Webasto Air Top 2000 Controller for Your Travel Style

    The Webasto Air Top 2000 STC is a brilliant piece of kit, but the controller is how you interact with it. This is your command centre for comfort, and picking the right one transforms the heater from a simple box into a core part of your campervan experience. Each option is designed for a different kind of traveller and a different budget.

    Understanding the differences is crucial. Do you just need to crank up the heat when you feel a chill, or do you want to wake up to a pre-warmed van on a frosty morning? Maybe you dream of firing up the heater from a ski lift, ensuring your van is toasty the second you get back. Let’s break down the main choices to find your perfect match.

    The Simple Turn-and-Go Rotary Rheostat

    For the no-fuss traveller, the Rotary Rheostat is simplicity itself. It’s a classic dial that you turn to set your desired heat level—that’s it. There are no screens, no menus, and no programming to fiddle with. Think of it as the volume knob for your warmth.

    Room Thermostat For Webasto Air Top 2000

    This controller is perfect for those who value straightforward, reliable operation above all else. When you feel cold, you turn it up. When you’re warm enough, you turn it down. It’s dependable, intuitive, and gets the job done without any faff, making it a popular choice for minimalist builds or for people who just prefer good old-fashioned analogue controls.

    The Programmable MultiControl HD

    The MultiControl HD is a serious step up, bringing modern convenience and precise control into the mix. This digital unit has an easy-to-read screen and a multi-function dial, allowing you to set the exact temperature you want, right down to the degree.

    Webasto MultiControl

    Its real trump card, though, is the programmable timer. You can set up to three different heating schedules per day, for every day of the week. This is a game-changer for the adventurer who thrives on routine. Imagine setting it to kick in at 7 AM so you always wake up to a warm van, and another cycle to start just before you typically get back from a day’s hiking. You can find out more about what a programmable controller like the Webasto MultiControl can do for you.

    The ability to pre-program your heating isn’t just about comfort; it’s about being smart with your resources. The MultiControl HD makes sure the heater only runs when you need it, helping you manage both your fuel and battery consumption intelligently.

    The Premium Smartphone-Controlled ThermoConnect

    For the ultimate in remote convenience, the ThermoConnect brings your Webasto Air Top 2000 into the smart age. This premium option lets you control your heater from anywhere you have a mobile phone signal, all through a dedicated app.

    Smartphone-Controlled ThermoConnect For Webasto Air Top 2000

    Walking back to your campervan after a long, cold day on the trails? Just pull out your phone, open the app, and switch the heater on. By the time you arrive, your van will be a warm and welcoming haven. The ThermoConnect offers all the functionality of the MultiControl—like precise temperature settings and timers—but adds that incredible layer of complete remote access. It’s the peak of convenience for the tech-savvy van owner who wants total control, anytime, anywhere.

    Webasto Air Top 2000 STC Control Unit Comparison

    To help you visualise the differences and decide which controller is right for your adventures, here’s a quick comparison of what each one offers.

    FeatureRotary RheostatMultiControl HDThermoConnect
    Control MethodManual DialDigital Screen & DialSmartphone App
    Temperature SettingPrecise (in degrees)VariableVariable
    Programmable TimerNoYes (7-day timer)Yes (via app)
    Remote AccessNoNoYes (Global)
    Ideal ForSimplicityRoutine & EfficiencyUltimate Convenience

    Ultimately, your choice of controller comes down to how you actually use your campervan. The simple Rotary Rheostat offers rugged reliability, the MultiControl HD provides scheduled comfort, and the ThermoConnect delivers unparalleled remote control. Each one gives you the power to effectively manage the 2kW heat output of your Webasto Air Top 2000, ensuring your travels are comfortable, whatever your style.

    Your Practical Guide to a Safe Installation

    Fitting a Webasto Air Top 2000 is a fantastic upgrade for any campervan. For a competent DIYer, it’s a totally achievable project. I like to think of it not just as fitting a heater, but as integrating the new heart of your van. This guide will walk you through the key stages, helping you turn that box of parts into a safe, reliable source of warmth for all your adventures.

    Of course, a professional installation is always a brilliant option. But even if you go that route, understanding the process is incredibly valuable. It means you can ask the right questions and feel confident the job’s been done to the highest safety standards. We’ll cover the critical steps, from picking the perfect spot to routing the ducting for the cosiest results.

    Safe Webasto Van Heater Installation

    Selecting the Best Location for your Webasto Air Top 2000

    Where you place your heater is the first, and arguably most important, decision you’ll make. It affects everything from how well it heats your van to how noisy it is and how easy it is to service later on. The go-to spot for most people is under one of the front seats, usually the passenger’s.

    This location is popular for good reason: it’s tucked out of the way, it’s close to the vehicle’s battery, and it gives you a straight shot for dropping the exhaust and intake pipes through the van floor. That said, other spots like inside a kitchen unit or a purpose-built cupboard can also work. The key is to make sure there’s enough airflow around the unit and a clear path to the underside of the van.

    • Proximity to Fuel and Power: Try to keep the heater reasonably close to your leisure battery. This minimises voltage drop in the power cables, which is crucial for reliable startups.
    • Clearance is Key: You absolutely must leave enough space around the heater for air to circulate freely. Overheating is a major safety risk, so never box it in tightly.
    • Floor Access: The spot you choose must let you drill holes through the floor for the fuel line, combustion air intake, and exhaust pipe without hitting any chassis members, brake lines, or other vital components. Always check underneath first!

    Managing Fuel and Power Safely

    Connecting the fuel supply is a job that demands care and precision. Most Webasto Air Top 2000 kits come with their own fuel standpipe, which is designed to be installed directly into your campervan’s main diesel tank. This usually means dropping the tank, drilling a hole, and fitting the standpipe securely – it’s a job that requires a bit of confidence.

    Tapping into the vehicle’s own fuel return line is sometimes an alternative, but this has become trickier on modern vans. Whichever route you take, making sure every connection is 100% leak-proof is completely non-negotiable.

    The fuel pump for the Webasto heater is what’s known as a metering pump. You’ll hear it clicking as it delivers tiny, precise pulses of diesel. It’s vital to mount it at a specific angle (usually between 15 and 35 degrees) to stop air bubbles from getting trapped, which can cause the heater to cut out.

    The electrical side of things is a bit more straightforward. The heater connects directly to your leisure battery, not the starter battery. This prevents any chance of it draining the power you need to start your engine. The dedicated fuse included in the kit is a critical safety feature and must be installed on the positive line.

    Ducting and Vents for Efficient Warmth

    How you route the hot air is what turns a working heater into a genuinely effective heating system. The aim is simple: get an even spread of heat throughout your living space.

    • Keep it Short and Sweet: The longer your ducting, the more heat you lose along the way. Make the path from the heater outlet to the air vent as direct and short as you can.
    • Avoid Sharp Bends: Every sharp turn in the ducting restricts airflow and reduces efficiency. Go for smooth, sweeping bends wherever possible.
    • Strategic Vent Placement: Position your main air outlet low down and in a central spot. Because hot air rises, putting the vent near the floor helps create a natural convection current that warms the whole van far more effectively. Our guide on choosing the right diesel heater for your campervan has more great tips for optimising your setup.

    The Critical Under-Van Installation

    What happens underneath your van is just as important as what’s going on inside. This is where you’ll fit the combustion air intake and, crucially, the exhaust pipe. Routing these two pipes correctly is all about safety and reliability.

    1. Combustion Air Intake: This flexible pipe pulls in the fresh air needed for the heater to burn fuel. You’ll want to point it towards the rear of the vehicle to stop road spray and muck from being forced into it while you’re driving.
    2. Exhaust Pipe: This stainless steel pipe gets incredibly hot. It must be securely clipped well away from any plastic parts, fuel lines, or wiring loom under the van. It’s also vital to position its outlet so that fumes can’t possibly find their way back inside the van – especially near doors, windows, or other vents.

    Getting these steps right ensures your Webasto Air Top 2000 is not just effective, but above all, completely safe. A methodical approach and a refusal to cut corners are the real keys to a successful DIY installation that will give you years of reliable warmth on your travels.

    Getting the Most Out of Your Webasto Air Top 2000 Heater

    To really get the best from your Webasto Air Top 2000, it’s about more than just flipping a switch when you feel a chill. A few simple habits will not only keep your campervan toasty but will also go a long way in saving fuel, easing the load on your battery, and seriously extending the life of your heater. It’s all about working with the heater, not just demanding heat from it.

    Think of the heater’s start-up and shutdown cycles like an athlete’s warm-up and cool-down. It just performs better when it’s properly prepared. This means that whenever you fire the heater up or turn it off, the best practice is to let it run on its highest heat setting for a few minutes.

    Why? This initial blast of high heat gets the combustion chamber scorching hot almost immediately, which is exactly what you want for a clean, efficient burn right from the start. Likewise, running it on high before shutting it down helps to burn off any lingering unburnt fuel or sooty deposits that might otherwise build up.

    The Soot-Busting Start-Up and Shutdown Routine

    Carbon build-up, often called ‘coking’ or ‘sooting up’, is the arch-enemy of any diesel heater. It tends to happen when the heater is frequently run on a very low setting, where the combustion chamber just doesn’t get hot enough to burn the diesel fuel completely. This leaves behind a sticky, black residue that can eventually clog up the works.

    A simple routine can pretty much eliminate this problem:

    1. Start-Up: Switch the heater on and crank it straight up to its maximum temperature. Let it run at full tilt for at least 5-10 minutes.
    2. Normal Operation: Once the van feels warm, you can dial the thermostat back down to whatever temperature feels comfortable. The heater will then intelligently adjust its output to hold that temperature.
    3. Shutdown: Before you turn the heater off for the night, turn it back up to maximum heat for another 5-10 minutes. This ‘purge cycle’ gives the chamber a good clean-out before it cools down.

    Adopting this simple “hot start, hot stop” habit is the single most effective bit of preventative maintenance you can do. It keeps the heater’s internals clean, ensuring it starts reliably and runs efficiently for years to come.

    How the Thermostat Saves You Fuel

    Once your campervan reaches the temperature you’ve set on the controller, the Webasto Air Top 2000 doesn’t just abruptly switch off. Instead, it cleverly modulates its heat output, dropping down to a lower power setting to simply maintain the warmth. It starts sipping fuel instead of guzzling it, giving you a steady, consistent level of comfort.

    This efficiency is a massive plus, especially in the UK where fuel costs are always a factor on any trip. The heater’s diesel consumption is impressively low—typically between 0.16 to 0.23 litres per hour at full power. Over a classic British winter weekend, running the heater for a few hours each evening might only use a couple of litres of diesel, a tiny amount from your main tank. You can read more about why this low consumption makes it such an economical choice for campervan owners.

    This smart operation means you can enjoy a cosy van for an entire off-grid weekend without ever worrying about your diesel or battery levels. By mastering these simple tricks, you ensure your Webasto Air Top 2000 remains a reliable, efficient, and cost-effective companion on all your UK adventures.

    Simple Maintenance and Easy Troubleshooting with Webasto Air Top 2000

    A well-maintained Webasto Air Top 2000 is a wonderfully reliable bit of kit, quietly doing its job in the background of your adventures. You don’t need to be a seasoned mechanic to keep it in top shape; a few simple, regular checks will see it running flawlessly for years. Think of it as a small MOT for your heater.

    Getting into these good habits is far better than trying to fix a problem on a cold, wet evening. Simple things like having a quick look at the fuel lines for any wear and tear, or making sure the intake and exhaust ports are clear of mud and debris, can make a massive difference.

    A Straightforward Maintenance Schedule

    Regular attention is the secret to a long and happy life for your heater. We hear it all the time from installers and van life communities across the UK: the Webasto Air Top 2000 STC is a durable, low-maintenance unit. But like any combustion heater, it needs a little TLC to stop things like carbon build-up. Follow a decent maintenance schedule, and you’ll likely get 3–5 years of trouble-free use before it needs a major service. You can learn more about what makes these units so reliable from user experiences right here.

    Here’s a simple checklist to keep you on track:

    • Monthly (when in use): Give the heater a good blast on full power for at least 15-20 minutes. This high-temperature run acts like a self-cleaning cycle, burning off any carbon deposits that have built up inside the combustion chamber.
    • Every Few Months: Pop your head under the van and visually inspect the exhaust pipe. Check it’s securely fixed, has no holes, and is well clear of anything that could catch fire. This is a critical safety check you should never skip.
    • Annually: Give all the electrical connections a once-over to make sure they’re tight and free of corrosion. If you have an external fuel filter fitted, now’s the time to inspect it and either clean it or swap it out.

    Solving Common Heater Problems

    Even the most reliable kit can have an off day. The good news is that many common issues with the Webasto Air Top 2000 have simple fixes you can sort out yourself.

    Heater Won’t Start (No Sound)

    Nine times out of ten, this is a simple power issue. Before you panic, find the fuse for the heater in your van’s electrical system and check it hasn’t blown. It’s also worth grabbing a multimeter to check the voltage at your leisure battery; if it’s dropped below 11.5V, the heater’s built-in safety system might be preventing it from starting to protect the battery from going flat.

    Smoky or Smelly Start-Up

    A bit of white smoke when you first fire it up can be perfectly normal—it’s often just the heater burning off condensation. But if you’re getting persistent white or black smoke, it’s a classic sign of carbon build-up. This usually happens from running the heater on a low setting for long periods. The fix? That “hot burn” maintenance routine we just talked about. Run it on high to clear it out.

    A critical part of maintenance is making sure the exhaust system is perfectly sealed and routed well away from any windows or vents. For total peace of mind, it is crucial to understand how to prevent carbon monoxide poisoning in your campervan.

    This practical advice should give you the confidence to solve minor problems yourself, letting you enjoy your travels and know when it might be time to call in a professional.

    Your Questions Answered

    Got a few questions about the Webasto Air Top 2000? You’re not alone. Let’s run through some of the most common queries we get from new owners. Getting these details sorted will help you feel completely confident with your new heater.

    How Much Fuel Does It Actually Use?

    This is usually the first thing people ask, and the good news is, it’s surprisingly efficient. When you first fire it up and it’s working hard to get your van to temperature, it will use about 0.24 litres of diesel per hour.

    But here’s the clever bit. Once it hits your target temperature, it automatically dials back. From then on, it just sips fuel, often using as little as 0.12 litres per hour just to keep things toasty.

    Can I Run the Heater While I Am Driving?

    Absolutely. The heater is designed to run safely while your campervan is on the move. It’s a brilliant feature, really – you can keep the living space warm during a long drive, so it’s perfectly cosy the moment you pull up and park.

    Is a Diesel Heater Safe to Use in a Campervan?

    Yes, it’s incredibly safe, provided it’s installed correctly. The key thing to understand is that the entire combustion process is completely sealed off from the inside of your van.

    All the exhaust fumes are channelled directly outside and vented underneath your vehicle. This ensures the air inside your living space stays clean, dry, and warm. For answers to other general automotive FAQs, this is a pretty useful resource.

    Our Services

    Ready to bring that reliable, year-round warmth to your campervan adventures? Marine Heating Solutions offers expert advice and professional installation for the Webasto Air Top 2000 and many other heating systems. Ensure your travels are always comfortable by exploring our solutions today!


    For quotes and bookings, call or email us here.